このリファレンスでは、ロジック アプリの基となるワークフロー定義でトリガーとアクションを指定するために使用される一般的な種類について説明します。ワークフロー定義は、ワークフロー定義言語で記述および検証されます。 To find specific connector triggers and actions that you can use in your logic apps, see the list under the Connectors overview.
Triggers overview
すべてのワークフローにはトリガーが含まれており、ワークフローをインスタンス化して開始する呼び出しはトリガーによって定義されます。 一般的なトリガーのカテゴリを次に示します。
A polling trigger, which checks a service's endpoint at regular intervals
A push trigger, which creates a subscription to an endpoint and provides a callback URL so the endpoint can notify the trigger when the specified event happens or data is available. このトリガーは、エンドポイントの応答を待って起動します。
トリガーには次に示す最上位要素がありますが、中には省略可能のものもあります。
"<trigger-name>": {
   "type": "<trigger-type>",
   "inputs": { "<trigger-inputs>" },
   "recurrence": {
      "frequency": "<time-unit>",
      "interval": <number-of-time-units>
   },
   "conditions": [ "<array-with-conditions>" ],
   "runtimeConfiguration": { "<runtime-config-options>" },
   "splitOn": "<splitOn-expression>",
   "operationOptions": "<operation-option>"
},
Required
| Value | タイプ | Description |
|---|---|---|
| < trigger-name> | String | トリガーの名前 |
| < trigger-type> | String | トリガーの種類 ("Http" や "ApiConnection" など) |
| < trigger-inputs> | JSON Object | トリガーの動作を定義する入力 |
| < time-unit> | String | トリガーの起動間隔を表す時間の単位: "Second"、"Minute"、"Hour"、"Day"、"Week"、"Month" |
| < number-of-time-units> | Integer | トリガーの起動間隔を frequency に基づいて指定する値。トリガーが再び起動するまで待機する、時間の単位の数です。 間隔の最小値と最大値は次のとおりです。 - Month: 1-16 か月 - Day: 1-500 日 - Hour: 1-12,000 時間 - Minute: 1-72,000 分 - Second: 1-9,999,999 秒 たとえば、interval が 6 で frequency が "Month" の場合は、繰り返しは 6 か月ごとです。 |
Optional
| Value | タイプ | Description |
|---|---|---|
| < array-with-conditions> | Array | An array that contains one or more conditions that determine whether to run the workflow. トリガーに対してのみ使用できます。 |
| < runtime-config-options> | JSON Object | トリガーの実行時の動作を変更するには runtimeConfiguration のプロパティを設定します。 詳細については、「実行時の構成設定」を参照してください。 |
| < splitOn-expression> | String | 配列を返すトリガーの場合に、配列の項目を複数のワークフロー インスタンスに分割つまり "バッチ解除" して処理するための式を指定できます。 |
| < operation-option> | String | 既定の動作を変更するには operationOptions プロパティを設定します。 For more information, see Operation options. |
トリガーの種類の一覧
トリガーの動作を定義するインターフェイスと入力は、トリガーの種類ごとに異なります。
Built-in triggers
| Trigger type | Description |
|---|---|
| HTTP | Checks or polls any endpoint. このエンドポイントは、特定のトリガー コントラクトに準拠して 202 非同期パターンを使用するか配列を返す必要があります。 |
| HTTPWebhook | ロジック アプリのための呼び出し可能エンドポイントを作成しますが、登録または登録解除は指定された URL を呼び出して行います。 |
| Recurrence | 定義済みのスケジュールに基づいて起動されます。 このトリガーを起動する、未来の日時を設定できます。 頻度に基づいて、ワークフローを実行する時間数および日数を指定することもできます。 |
| Request | ロジック アプリのための呼び出し可能エンドポイントを作成します。"手動" トリガーとも呼ばれます。 例については、HTTP エンドポイントを使用してワークフローを呼び出す、トリガーする、または入れ子にすることに関するページを参照してください。 |
マネージド API トリガー
| Trigger type | Description |
|---|---|
| ApiConnection | Checks or polls an endpoint by using Microsoft-managed APIs or "connectors". |
| ApiConnectionWebhook | ロジック アプリ ワークフローのための呼び出し可能エンドポイントを作成します。これは、サブスクライブとサブスクライブ解除のための Microsoft マネージド API または "コネクタ" を呼び出すことによって行われます。 |
トリガー - 詳細なリファレンス
APIConnection trigger
This trigger checks or polls an endpoint by using Microsoft-managed APIs or "connectors" so the parameters for this trigger can differ based on the endpoint. このトリガー定義の多くのセクションは省略可能です。 このトリガーの動作は、セクションが含まれるかどうかによって異なります。
"<APIConnection_trigger_name>": {
   "type": "ApiConnection",
   "inputs": {
      "host": {
         "connection": {
            "name": "@parameters('$connections')['<connection-name>']['connectionId']"
         }
      },
      "method": "<method-type>",
      "path": "/<api-operation>",
      "retryPolicy": { "<retry-behavior>" },
      "queries": { "<query-parameters>" }
   },
   "recurrence": {
      "frequency": "<time-unit>",
      "interval": <number-of-time-units>
   },
   "runtimeConfiguration": {
      "concurrency": {
         "runs": <max-runs>,
         "maximumWaitingRuns": <max-runs-queue>
      }
   },
   "splitOn": "<splitOn-expression>",
   "operationOptions": "<operation-option>"
}
Required
| Property | Value | タイプ | Description |
|---|---|---|---|
| None | < APIConnection_trigger_name> | String | トリガーの名前 |
| host.connection.name | < connection-name> | String | ワークフローが使用するマネージド API への接続の名前 |
| method | < method-type> | String | The HTTP method for communicating with the managed API: GET, PUT, POST, PATCH, DELETE |
| path | < api-operation> | String | 呼び出す API 操作 |
| recurrence.frequency | < time-unit> | String | The unit of time that describes how often the trigger fires: Second, Minute, Hour, Day, Week, Month |
| recurrence.interval | < number-of-time-units> | Integer | トリガーの起動間隔を frequency に基づいて指定する値。トリガーが再び起動するまで待機する、時間の単位の数です。 間隔の最小値と最大値は次のとおりです。 - Month: 1-16 か月 - Day: 1-500 日 - Hour: 1-12,000 時間 - Minute: 1-72,000 分 - Second: 1-9,999,999 秒 For example, if the interval is 6, and the frequency is Month, the recurrence is every 6 months. |
Optional
| Property | Value | タイプ | Description |
|---|---|---|---|
| retryPolicy | < retry-behavior> | JSON Object | 断続的なエラー (状態コード 408、429、5XX) と接続の例外に対する再試行動作をカスタマイズします。 For more information, see Retry policies. |
| queries | < query-parameters> | JSON Object | API 呼び出しに含めるクエリ パラメーター (ある場合)。 たとえば、"queries": { "api-version": "2018-01-01" } というオブジェクトによって ?api-version=2018-01-01 が呼び出しに追加されます。 |
| runtimeConfiguration.concurrency.runs | < max-runs> | Integer | By default, workflow instances run at the same time (concurrently or in parallel) up to the default limit. To change this limit by setting a new <count> value, see Change trigger concurrency. |
| runtimeConfiguration.maximumWaitingRuns | < max-runs-queue> | Integer | If your workflow is already running the maximum number of instances, any new runs are put in this queue up to the default limit. 既定の制限を変更するには、「実行待機の制限を変更する」を参照してください。 To change the maximum number of instances, specify a value for the runtimeConfiguration.concurrency.runs property. Note: If you set the |
| splitOn | < splitOn-expression> | String | 配列を返すトリガーの場合に、使用する配列をこの式で参照すると、配列の項目ごとにワークフロー インスタンスを作成して実行できるため、"for each" ループを使用する必要がなくなります。 たとえば、 @triggerbody()?['value'] という式は、トリガー本文の内容の中に返される配列の項目を表します。 |
| operationOptions | < operation-option> | String | 既定の動作を変更するには operationOptions プロパティを設定します。 For more information, see Operation options. |
Outputs
| Element | タイプ | Description |
|---|---|---|
| headers | JSON Object | 応答のヘッダー |
| body | JSON Object | 応答の本文 |
| status code | Integer | 応答の状態コード |
Example
このトリガー定義では、職場または学校のアカウントの受信トレイ内の電子メールを毎日チェックします。
"When_a_new_email_arrives": {
   "type": "ApiConnection",
   "inputs": {
      "host": {
         "connection": {
            "name": "@parameters('$connections')['office365']['connectionId']"
         }
      },
      "method": "get",
      "path": "/Mail/OnNewEmail",
      "queries": {
          "fetchOnlyWithAttachment": false,
          "folderPath": "Inbox",
          "importance": "Any",
          "includeAttachments": false
      }
   },
   "recurrence": {
      "frequency": "Day",
      "interval": 1
   }
}
ApiConnectionWebhook trigger
This trigger sends a subscription request to an endpoint by using a Microsoft-managed API, provides a callback URL to where the endpoint can send a response, and waits for the endpoint to respond. For more information, see Endpoint subscriptions.
"<ApiConnectionWebhook_trigger_name>": {
   "type": "ApiConnectionWebhook",
   "inputs": {
      "body": {
          "NotificationUrl": "@{listCallbackUrl()}"
      },
      "host": {
         "connection": {
            "name": "@parameters('$connections')['<connection-name>']['connectionId']"
         }
      },
      "retryPolicy": { "<retry-behavior>" },
      "queries": "<query-parameters>"
   },
   "runTimeConfiguration": {
      "concurrency": {
         "runs": <max-runs>,
         "maximumWaitingRuns": <max-run-queue>
      }
   },
   "splitOn": "<splitOn-expression>",
   "operationOptions": "<operation-option>"
}
Required
| Value | タイプ | Description |
|---|---|---|
| < connection-name> | String | ワークフローが使用するマネージド API への接続の名前 |
| < body-content> | JSON Object | マネージド API にペイロードとして送信するメッセージの内容 |
Optional
| Value | タイプ | Description |
|---|---|---|
| < retry-behavior> | JSON Object | 断続的なエラー (状態コード 408、429、5XX) と接続の例外に対する再試行動作をカスタマイズします。 For more information, see Retry policies. |
| < query-parameters> | JSON Object | API 呼び出しに含めるクエリ パラメーター (ある場合) たとえば、 "queries": { "api-version": "2018-01-01" } というオブジェクトによって ?api-version=2018-01-01 が呼び出しに追加されます。 |
| < max-runs> | Integer | By default, workflow instances run at the same time (concurrently or in parallel) up to the default limit. To change this limit by setting a new <count> value, see Change trigger concurrency. |
| < max-runs-queue> | Integer | When your workflow is already running the maximum number of instances, which you can change based on the runtimeConfiguration.concurrency.runs property, any new runs are put into this queue up to the default limit. 既定の制限を変更するには、「実行待機の制限を変更する」を参照してください。 |
| < splitOn-expression> | String | 配列を返すトリガーの場合に、使用する配列をこの式で参照すると、配列の項目ごとにワークフロー インスタンスを作成して実行できるため、"for each" ループを使用する必要がなくなります。 たとえば、 @triggerbody()?['value'] という式は、トリガー本文の内容の中に返される配列の項目を表します。 |
| < operation-option> | String | 既定の動作を変更するには operationOptions プロパティを設定します。 For more information, see Operation options. |
Example
このトリガー定義は、Office 365 Outlook API にサブスクライブし、API エンドポイントに対してコールバック URL を提供し、新しい電子メールが到着してエンドポイントが応答するまで待ちます。
"When_a_new_email_arrives_(webhook)": {
   "type": "ApiConnectionWebhook",
   "inputs": {
      "body": {
         "NotificationUrl": "@{listCallbackUrl()}"
      },
      "host": {
         "connection": {
            "name": "@parameters('$connections')['office365']['connectionId']"
         }
      },
      "path": "/MailSubscription/$subscriptions",
      "queries": {
          "folderPath": "Inbox",
          "hasAttachment": "Any",
          "importance": "Any"
      }
   },
   "splitOn": "@triggerBody()?['value']"
}
HTTP trigger
このトリガーは、指定された繰り返しスケジュールに基づいて、指定された HTTP または HTTPS エンドポイントに要求を送信します。 その後は、応答をチェックしてワークフローを実行するかどうかを判断します。 詳細については、「Azure Logic Apps から HTTP または HTTPS でサービス エンドポイントを呼び出す」を参照してください。
"HTTP": {
   "type": "Http",
   "inputs": {
      "method": "<method-type>",
      "uri": "<HTTP-or-HTTPS-endpoint-URL>",
      "headers": { "<header-content>" },
      "queries": "<query-parameters>",
      "body": "<body-content>",
      "authentication": { "<authentication-type-and-property-values>" },
      "retryPolicy": {
         "type": "<retry-behavior>"
      }
   },
   "recurrence": {
      "frequency": "<time-unit>",
      "interval": <number-of-time-units>
   },
   "runtimeConfiguration": {
      "concurrency": {
         "runs": <max-runs>,
         "maximumWaitingRuns": <max-runs-queue>
      }
   },
   "operationOptions": "<operation-option>"
}
Required
| Property | Value | タイプ | Description |
|---|---|---|---|
method |
< method-type> | String | 発信要求の送信に使用するメソッド: "GET"、"PUT"、"POST"、"PATCH"、または "DELETE" |
uri |
< HTTP-or-HTTPS-endpoint-URL> | String | 発信要求の送信先となる HTTP または HTTPS エンドポイント URL。 文字列の最大サイズ: 2 KB Azure のサービスまたはリソースの場合は、アクセスしたいリソースのリソース ID とパスがこの URI 構文に含まれます。 |
frequency |
< time-unit> | String | トリガーの起動間隔を表す時間の単位: "Second"、"Minute"、"Hour"、"Day"、"Week"、"Month" |
interval |
< number-of-time-units> | Integer | トリガーの起動間隔を frequency に基づいて指定する値。トリガーが再び起動するまで待機する、時間の単位の数です。 間隔の最小値と最大値は次のとおりです。 - Month: 1-16 か月 - Day: 1-500 日 - Hour: 1-12,000 時間 - Minute: 1-72,000 分 - Second: 1-9,999,999 秒 たとえば、interval が 6 で frequency が "Month" の場合は、繰り返しは 6 か月ごとです。 |
Optional
| Property | Value | タイプ | Description |
|---|---|---|---|
headers |
< header-content> | JSON Object | 要求に含める必要があるヘッダー (ある場合) 言語と種類を設定する場合の例を次に示します。 "headers": { "Accept-Language": "en-us", "Content-Type": "application/json" } |
queries |
< query-parameters> | JSON Object | 要求の中で使用する必要があるクエリ パラメーター (ある場合) たとえば、 "queries": { "api-version": "2018-01-01" } というオブジェクトによって ?api-version=2018-01-01 が要求に追加されます。 |
body |
< body-content> | JSON Object | ペイロードとして要求とともに送信するメッセージの内容 |
authentication |
< authentication-type-and-property-values> | JSON Object | この要求で外部への要求の認証に使用される認証モデル。 詳細については、「送信呼び出しに認証を追加する」を参照してください。 Scheduler 以外に、authority プロパティがサポートされています。 指定されていないときの既定値は https://management.azure.com/ ですが、別の値を使用できます。 |
retryPolicy > type |
< retry-behavior> | JSON Object | 断続的なエラー (状態コード 408、429、5XX) と接続の例外に対する再試行動作をカスタマイズします。 For more information, see Retry policies. |
runs |
< max-runs> | Integer | By default, workflow instances run at the same time (concurrently or in parallel) up to the default limit. To change this limit by setting a new <count> value, see Change trigger concurrency. |
maximumWaitingRuns |
< max-runs-queue> | Integer | When your workflow is already running the maximum number of instances, which you can change based on the runtimeConfiguration.concurrency.runs property, any new runs are put into this queue up to the default limit. 既定の制限を変更するには、「実行待機の制限を変更する」を参照してください。 |
operationOptions |
< operation-option> | String | 既定の動作を変更するには operationOptions プロパティを設定します。 For more information, see Operation options. |
Outputs
| Element | タイプ | Description |
|---|---|---|
headers |
JSON Object | 応答のヘッダー |
body |
JSON Object | 応答の本文 |
status code |
Integer | 応答の状態コード |
着信要求についての要件
エンドポイントがロジック アプリと適切に連携するためには、特定のトリガー パターンまたはコントラクトに準拠し、以下の応答プロパティを認識する必要があります。
| Property | Required | Description |
|---|---|---|
| Status code | Yes | 状態コード "200 OK" のときに実行が開始されます。 状態コードがその他のときは、実行は開始されません。 |
| Retry-after header | No | ロジック アプリがエンドポイントを再度ポーリングするまでの秒数 |
| Location header | No | 次のポーリング間隔で呼び出す URL です。 指定されていない場合は、元の URL が使用されます。 |
さまざまな要求の動作の例
| Status code | Retry after | Behavior |
|---|---|---|
| 200 | {none} | ワークフローを実行し、定義済みの繰り返し間隔の後に、まだデータがあるかどうかを再度チェックします。 |
| 200 | 10 seconds | ワークフローを実行し、10 秒後に、まだデータがあるかどうかを再度チェックします。 |
| 202 | 60 seconds | ワークフローをトリガーしません。 次の試行は、定義済みの繰り返しに従って 1 分後に行われます。 定義済みの繰り返しが 1 分未満の場合は、retry-after ヘッダーが優先されます。 それ以外の場合は、定義済みの繰り返しが使用されます。 |
| 400 | {none} | 要求が正しくないため、ワークフローを実行しません。
retryPolicy が定義されていない場合は、既定のポリシーが使用されます。 再試行回数に達した後は、定義済みの繰り返し間隔の後に、データがあるかどうかをトリガーが再度チェックします。 |
| 500 | {none} | サーバー エラーのため、ワークフローを実行しません。
retryPolicy が定義されていない場合は、既定のポリシーが使用されます。 再試行回数に達した後は、定義済みの繰り返し間隔の後に、データがあるかどうかをトリガーが再度チェックします。 |
HTTPWebhook trigger
このトリガーを使用すると、ロジック アプリを呼び出し可能にすることができます。具体的にはエンドポイントが作成され、指定したエンドポイントの URL を呼び出してサブスクリプションを登録できます。 ワークフロー内にこのトリガーを作成すると、発信要求によってこのサブスクリプションを登録する呼び出しが行われます。 これで、トリガーはイベントのリッスンを開始できます。 操作によってこのトリガーが無効になったときは、このサブスクリプションを取り消す呼び出しが発信要求によって自動的に行われます。 For more information, see Endpoint subscriptions.
You can also specify asynchronous limits on an HTTPWebhook trigger. トリガーの動作は、どのセクションを使用または省略するかによって異なります。
"HTTP_Webhook": {
   "type": "HttpWebhook",
   "inputs": {
      "subscribe": {
         "method": "<method-type>",
         "uri": "<endpoint-subscribe-URL>",
         "headers": { "<header-content>" },
         "body": "<body-content>",
         "authentication": { "<authentication-type>" },
         "retryPolicy": { "<retry-behavior>" }
      },
      "unsubscribe": {
         "method": "<method-type>",
         "url": "<endpoint-unsubscribe-URL>",
         "headers": { "<header-content>" },
         "body": "<body-content>",
         "authentication": { "<authentication-type>" }
      }
   },
   "runTimeConfiguration": {
      "concurrency": {
         "runs": <max-runs>,
         "maximumWaitingRuns": <max-runs-queue>
      }
   },
   "operationOptions": "<operation-option>"
}
Some values, such as <method-type>, are available for both the "subscribe" and "unsubscribe" objects.
Required
| Value | タイプ | Description |
|---|---|---|
| < method-type> | String | サブスクリプション要求に使用する HTTP メソッド: "GET"、"PUT"、"POST"、"PATCH"、または "DELETE" |
| < endpoint-subscribe-URL> | String | サブスクリプション要求の送信先であるエンドポイント URL |
Optional
| Value | タイプ | Description |
|---|---|---|
| < method-type> | String | 取り消し要求に使用する HTTP メソッド: "GET"、"PUT"、"POST"、"PATCH"、または "DELETE" |
| < endpoint-unsubscribe-URL> | String | 取り消し要求の送信先であるエンドポイント URL |
| < body-content> | String | サブスクリプションまたは取り消しの要求で送信するメッセージの内容 |
| < authentication-type> | JSON Object | この要求で外部への要求の認証に使用される認証モデル。 詳細については、「送信呼び出しに認証を追加する」を参照してください。 |
| < retry-behavior> | JSON Object | 断続的なエラー (状態コード 408、429、5XX) と接続の例外に対する再試行動作をカスタマイズします。 For more information, see Retry policies. |
| < max-runs> | Integer | By default, workflow instances all run at the same time (concurrently or in parallel) up to the default limit. To change this limit by setting a new <count> value, see Change trigger concurrency. |
| < max-runs-queue> | Integer | When your workflow is already running the maximum number of instances, which you can change based on the runtimeConfiguration.concurrency.runs property, any new runs are put into this queue up to the default limit. 既定の制限を変更するには、「実行待機の制限を変更する」を参照してください。 |
| < operation-option> | String | 既定の動作を変更するには operationOptions プロパティを設定します。 For more information, see Operation options. |
Outputs
| Element | タイプ | Description |
|---|---|---|
| headers | JSON Object | 応答のヘッダー |
| body | JSON Object | 応答の本文 |
| 状態コード | Integer | 応答の状態コード |
Example
このトリガーは、指定されたエンドポイントへのサブスクリプションを作成し、一意のコールバック URL を提供し、新たに公開される技術情報記事を待ちます。
"HTTP_Webhook": {
   "type": "HttpWebhook",
   "inputs": {
      "subscribe": {
         "method": "POST",
         "uri": "https://pubsubhubbub.appspot.com/subscribe",
         "body": {
            "hub.callback": "@{listCallbackUrl()}",
            "hub.mode": "subscribe",
            "hub.topic": "https://pubsubhubbub.appspot.com/articleCategories/technology"
         },
      },
      "unsubscribe": {
         "method": "POST",
         "url": "https://pubsubhubbub.appspot.com/subscribe",
         "body": {
            "hub.callback": "@{workflow().endpoint}@{listCallbackUrl()}",
            "hub.mode": "unsubscribe",
            "hub.topic": "https://pubsubhubbub.appspot.com/articleCategories/technology"
         }
      }
   }
}
Recurrence trigger
このトリガーは、指定された繰り返しスケジュールに基づいて実行されるものであり、定期的に実行されるワークフローを作成するための簡単な方法として利用できます。
"Recurrence": {
   "type": "Recurrence",
   "recurrence": {
      "frequency": "<time-unit>",
      "interval": <number-of-time-units>,
      "startTime": "<start-date-time-with-format-YYYY-MM-DDThh:mm:ss>",
      "timeZone": "<time-zone>",
      "schedule": {
         // Applies only when frequency is Day or Week. Separate values with commas.
         "hours": [ <one-or-more-hour-marks> ],
         // Applies only when frequency is Day or Week. Separate values with commas.
         "minutes": [ <one-or-more-minute-marks> ],
         // Applies only when frequency is Week. Separate values with commas.
         "weekDays": [ "Monday, Tuesday, Wednesday, Thursday, Friday, Saturday, Sunday" ]
      }
   },
   "runtimeConfiguration": {
      "concurrency": {
         "runs": <max-runs>,
         "maximumWaitingRuns": <max-runs-queue>
      }
   },
   "operationOptions": "<operation-option>"
}
Required
| Value | タイプ | Description |
|---|---|---|
| < time-unit> | String | トリガーの起動間隔を表す時間の単位: "Second"、"Minute"、"Hour"、"Day"、"Week"、"Month" |
| < number-of-time-units> | Integer | トリガーの起動間隔を frequency に基づいて指定する値。トリガーが再び起動するまで待機する、時間の単位の数です。 間隔の最小値と最大値は次のとおりです。 - Month: 1-16 か月 - Day: 1-500 日 - Hour: 1-12,000 時間 - Minute: 1-72,000 分 - Second: 1-9,999,999 秒 たとえば、interval が 6 で frequency が "Month" の場合は、繰り返しは 6 か月ごとです。 |
Optional
| Value | タイプ | Description |
|---|---|---|
| < start-date-time-with-format-YYYY-MM-DDThh:mm:ss> | String | 次の形式の開始日時: タイム ゾーンを指定する場合は YYYY-MM-DDThh:mm:ss -or- タイム ゾーンを指定しない場合は YYYY-MM-DDThh:mm:ssZ たとえば、2017 年 9 月 18 日午後 2 時の場合は、「2017-09-18T14:00:00」と指定し、タイム ゾーン (たとえば "Pacific Standard Time") を指定します。タイム ゾーンを指定しない場合は、「2017-09-18T14:00:00Z」と指定します。 Note: This start time has a maximum of 49 years in the future and must follow the ISO 8601 date time specification in UTC date time format, but without a UTC offset. タイム ゾーンを指定しない場合は、末尾にアルファベットの "Z" を、スペースを入れずに追加する必要があります。 This "Z" refers to the equivalent nautical time. 単純なスケジュールでは、開始日時が初回の実行ですが、複雑なスケジュールでは、トリガーが作動するのは開始日時以降となります。 開始日時の詳細については、定期的に実行されるタスクの作成とスケジュールに関するページを参照してください。 |
| < time-zone> | String | Applies only when you specify a start time because this trigger doesn't accept UTC offset. 適用するタイム ゾーンを指定します。 |
| < one-or-more-hour-marks> | 整数または整数配列 |
frequency に "Day" または "Week" を指定した場合は、ワークフローを何時に実行するかを 0 以上 23 以下の 1 つまたは複数の整数としてコンマ区切りで指定できます。 たとえば "10"、"12"、"14" を指定した場合は、午前 10 時、正午、午後 2 時となります。 |
| < one-or-more-minute-marks> | 整数または整数配列 |
frequency に "Day" または "Week" を指定した場合は、ワークフローを実行する時刻の分の部分を 0 以上 59 以下の 1 つまたは複数の整数としてコンマ区切りで指定できます。 たとえば、前の例で指定した時を使用し、分を「30」と指定した場合は、午前 10:30、午後 0:30、午後 2:30 となります。 |
| weekDays | 文字列または文字列配列 |
frequency に "Week" を指定した場合は、ワークフローを実行する 1 つまたは複数の曜日 ("Monday"、"Tuesday"、"Wednesday"、"Thursday"、"Friday"、"Saturday"、および "Sunday") をコンマ区切りで指定できます。 |
| < max-runs> | Integer | By default, workflow instances all run at the same time (concurrently or in parallel) up to the default limit. To change this limit by setting a new <count> value, see Change trigger concurrency. |
| < max-runs-queue> | Integer | When your workflow is already running the maximum number of instances, which you can change based on the runtimeConfiguration.concurrency.runs property, any new runs are put into this queue up to the default limit. 既定の制限を変更するには、「実行待機の制限を変更する」を参照してください。 |
| < operation-option> | String | 既定の動作を変更するには operationOptions プロパティを設定します。 For more information, see Operation options. |
Example 1
次の基本的な Recurrence トリガーは、毎日実行されます。
"Recurrence": {
   "type": "Recurrence",
   "recurrence": {
      "frequency": "Day",
      "interval": 1
   }
}
Example 2
トリガー起動の開始日時を指定できます。 次の Recurrence トリガーは、指定された日に開始し、それ以降は毎日起動します。
"Recurrence": {
   "type": "Recurrence",
   "recurrence": {
      "frequency": "Day",
      "interval": 1,
      "startTime": "2017-09-18T00:00:00Z"
   }
}
Example 3
次の Recurrence トリガーは、2017 年 9 月 9 日午後 2 時に開始し、毎週月曜日の午前 10 時 30 分、午後 0 時 30 分、および午後 2 時 30 分 (太平洋標準時) に起動します。
"Recurrence": {
   "type": "Recurrence",
   "recurrence": {
      "frequency": "Week",
      "interval": 1,
      "schedule": {
         "hours": [ 10, 12, 14 ],
         "minutes": [ 30 ],
         "weekDays": [ "Monday" ]
      },
      "startTime": "2017-09-07T14:00:00",
      "timeZone": "Pacific Standard Time"
   }
}
このトリガーに関するその他の情報と例については、定期的に実行されるタスクの作成とスケジュールに関するページを参照してください。
Request trigger
このトリガーを使用すると、着信要求を受け入れることができるエンドポイントが作成されるため、ロジック アプリが呼び出し可能になります。 このトリガーに対しては、着信要求からトリガーが受け取るペイロード、つまり入力を記述および検証する JSON スキーマを指定します。 このスキーマには、トリガーのプロパティをワークフロー内の後続のアクションから参照しやすくするという利点もあります。
Note
The original name for the Request trigger was manual, which might still appear in some places. この名前は、トリガーを使用してビルドするワークフロー パターンの種類に関する一貫性を高めるために変更されました。
このトリガーを呼び出すには、listCallbackUrl API を使用する必要があります。これについては、ワークフロー サービス REST API の説明を参照してください。 このトリガーを HTTP エンドポイントとして使用する方法については、HTTP エンドポイントを使用してワークフローを呼び出す、トリガーする、または入れ子にすることに関するページを参照してください。
"Request": {
   "type": "Request",
   "kind": "Http",
   "inputs": {
      "method": "<method-type>",
      "relativePath": "<relative-path-for-accepted-parameter>",
      "schema": {
         "type": "object",
         "properties": {
            "<property-name>": {
               "type": "<property-type>"
            }
         },
         "required": [ "<required-properties>" ]
      }
   },
   "runTimeConfiguration": {
      "concurrency": {
         "runs": <max-runs>,
         "maximumWaitingRuns": <max-run-queue>
      },
   },
   "operationOptions": "<operation-option>"
}
Required
| Value | タイプ | Description |
|---|---|---|
| < property-name> | String | ペイロードを記述する JSON スキーマ内のプロパティの名前 |
| < property-type> | String | プロパティの型 |
Optional
| Value | タイプ | Description |
|---|---|---|
| < method-type> | String | 着信要求がロジック アプリを呼び出すために使用する必要があるメソッド: "GET"、"PUT"、"POST"、"PATCH"、"DELETE" |
| < relative-path-for-accepted-parameter> | String | エンドポイントの URL が受け入れ可能なパラメーターの相対パス |
| < required-properties> | Array | 値が必要な 1 つ以上のプロパティ |
| < max-runs> | Integer | By default, workflow instances all run at the same time (concurrently or in parallel) up to the default limit. To change this limit by setting a new <count> value, see Change trigger concurrency. |
| < max-runs-queue> | Integer | When your workflow is already running the maximum number of instances, which you can change based on the runtimeConfiguration.concurrency.runs property, any new runs are put into this queue up to the default limit. 既定の制限を変更するには、「実行待機の制限を変更する」を参照してください。 |
| < operation-option> | String | 既定の動作を変更するには operationOptions プロパティを設定します。 For more information, see Operation options. |
Example
このトリガーでは、着信要求がこのトリガーを呼び出すために HTTP POST メソッドを使用する必要があることが指定されており、着信要求からの入力を検証するスキーマが含まれています。
"Request": {
   "type": "Request",
   "kind": "Http",
   "inputs": {
      "method": "POST",
      "schema": {
         "type": "object",
         "properties": {
            "customerName": {
               "type": "String"
            },
            "customerAddress": {
               "type": "Object",
               "properties": {
                  "streetAddress": {
                     "type": "string"
                  },
                  "city": {
                     "type": "string"
                  }
               }
            }
         }
      }
   }
}
Trigger conditions
どのトリガーにも、ワークフローを実行するかどうかを決める条件を表す 1 つまたは複数の式が格納された配列を含めることができ、これができるのはトリガーだけです。 ワークフロー内のトリガーに conditions プロパティを追加するには、ロジック アプリをコード ビュー エディターで開きます。
たとえば、Web サイトから内部サーバー エラーが返されたときに限ってトリガーが起動するように指定する場合は、次のようにトリガーの状態コードを conditions プロパティ内で参照します。
"Recurrence": {
   "type": "Recurrence",
   "recurrence": {
      "frequency": "Hour",
      "interval": 1
   },
   "conditions": [ {
      "expression": "@equals(triggers().code, 'InternalServerError')"
   } ]
}
既定では、"200 OK" の応答を受信した後に限り、トリガーが起動します。 式でトリガーの状態コードが参照されているときは、トリガーの既定の動作が置き換えられます。 そのため、複数の状態コードに対してトリガーを起動させるには (たとえば状態コード "200" と "201")、この式を条件として含める必要があります。
@or(equals(triggers().code, 200),equals(triggers().code, 201))
配列で複数の実行をトリガーする
トリガーがワークフローで処理する配列を受け取った場合、"for each" ループが各配列項目を処理するのに時間がかかりすぎることがあります。 Instead, you can use the SplitOn property in your trigger to debatch the array. バッチ解除すると、配列の項目が分割されて、配列の項目ごとに実行される新しいワークフロー インスタンスが開始されます。 このアプローチが役立つのは、たとえば、エンドポイントをポーリングするときに、ポーリング間隔のたびに複数の新しい項目が返される場合です。
If your trigger's Swagger file describes a payload that's an array, the SplitOn property is automatically added to your trigger. それ以外の場合は、バッチ解除したい配列がある応答ペイロードの中にこのプロパティを追加してください。
SplitOn 機能を使用する前に、以下の考慮事項を確認してください。
If trigger concurrency is enabled, the SplitOn limit is significantly reduced. 項目数がこの上限を超えると、SplitOn 機能は無効になります。
同期応答パターンで SplitOn 機能を使用することはできません。 Any workflow that uses the SplitOn property and includes a response action runs asynchronously and immediately sends a
202 ACCEPTEDresponse.For the maximum number of array items that SplitOn can process in a single workflow run, see Limits and configuration.
Example
HTTP トリガーが API を呼び出して次の応答を受け取るとします。
{
   "Status": "Succeeded",
   "Rows": [
      {
         "id": 938109380,
         "name": "customer-name-one"
      },
      {
         "id": 938109381,
         "name": "customer-name-two"
      }
   ]
}
ワークフローに必要なのは Rows の配列のコンテンツだけなので、次の例のようなトリガーを作成できます。
"HTTP_Debatch": {
   "type": "Http",
    "inputs": {
        "uri": "https://mydomain.com/myAPI",
        "method": "GET"
    },
   "recurrence": {
      "frequency": "Second",
      "interval": 1
    },
    "splitOn": "@triggerBody()?.Rows"
}
Note
SplitOn コマンドを使う場合に、配列の外側にあるプロパティを取得することはできません。
つまり、この例では、API から返される応答の中にある status プロパティの取得はできません。
Rowsプロパティが存在しない場合のエラーを回避するために、この例では ? 演算子を使用しています。
これで、このワークフロー定義では、@triggerBody().name を使用して name の値 (最初の実行からは "customer-name-one"、2 番目の実行からは "customer-name-two") を取得できます。 したがって、トリガーの出力は次の例のようになります。
{
   "body": {
      "id": 938109380,
      "name": "customer-name-one"
   }
}
{
   "body": {
      "id": 938109381,
      "name": "customer-name-two"
   }
}
Actions overview
Azure Logic Apps には、さまざまなアクションの種類があり、それぞれに異なる入力が使用されてアクションの固有の動作が定義されます。 アクションには以下の上位要素がありますが、中には省略可能のものもあります。
"<action-name>": {
   "type": "<action-type>",
   "inputs": {
      "<input-name>": { "<input-value>" },
      "retryPolicy": "<retry-behavior>"
   },
   "runAfter": { "<previous-trigger-or-action-status>" },
   "runtimeConfiguration": { "<runtime-config-options>" },
   "operationOptions": "<operation-option>"
},
Required
| Value | タイプ | Description |
|---|---|---|
| < action-name> | String | アクションの名前 |
| < action-type> | String | アクションの種類 ("Http" や "ApiConnection" など) |
| < input-name> | String | アクションの動作を定義する入力の名前 |
| < input-value> | Various | 入力値。文字列、整数、JSON オブジェクトなどが可能です。 |
| < previous-trigger-or-action-status> | JSON Object | 現在のこのアクションを実行可能にするために直前に実行される必要のあるトリガーまたはアクションの名前と結果の状態 |
Optional
| Value | タイプ | Description |
|---|---|---|
| < retry-behavior> | JSON Object | 断続的なエラー (状態コード 408、429、5XX) と接続の例外に対する再試行動作をカスタマイズします。 詳細については、「再試行ポリシー」を参照してください。 |
| < runtime-config-options> | JSON Object | 一部のアクションについては、runtimeConfiguration プロパティを設定してアクションの動作を実行時に変更できます。 詳細については、「実行時の構成設定」を参照してください。 |
| < operation-option> | String | 一部のアクションについては、operationOptions プロパティを設定して既定の動作を変更できます。 For more information, see Operation options. |
アクションの種類の一覧
よく使用されるアクションの種類を次に示します。
組み込みアクションの種類。主な例は次のとおりです。
HTTP for calling endpoints over HTTP or HTTPS
Response for responding to requests
JavaScript コードの実行: JavaScript コード スニペットを実行するため
Function for calling Azure Functions
Data operation actions such as Join, Compose, Table, Select, and others that create or transform data from various inputs
Workflow for calling another logic app workflow
マネージド API アクションの種類 (ApiConnection や ApiConnectionWebHook など) は、Microsoft が管理するさまざまなコネクタと API を呼び出します (たとえば、Azure Service Bus、Office 365 Outlook、Power BI、Azure Blob Storage、OneDrive、GitHub など)。
ワークフロー制御アクションの種類 (If、Foreach、Switch、Scope、Until など) は、その中で他のアクションが指定され、ワークフローの実行を調整するために使用できます。
Built-in actions
| Action type | Description |
|---|---|
| Compose | 複数の入力 (それぞれ種類が異なっていてもかまいません) から、単一の出力を作成します。 |
| JavaScript コードの実行 | 特定の条件に適合する JavaScript コード スニペットを実行します。 コードの要件と詳細については、インライン コードを使用してコード スニペットを追加および実行することに関するページを参照してください。 |
| Function | Azure 関数を呼び出します。 |
| HTTP | HTTP エンドポイントを呼び出します。 |
| Join | 配列内のすべての項目から 1 個の文字列を作成し、指定された区切り文字を使ってこれらの項目を区切ります。 |
| Parse JSON | JSON のコンテンツ内にあるプロパティから、ユーザー フレンドリなトークンを作成します。 これで、そのトークンをロジック アプリ内に含めるという方法でそのプロパティを参照できます。 |
| Query | 条件またはフィルターに基づいて配列を別の配列内の項目から作成します。 |
| Response | 着信する呼び出しまたは要求に対する応答を作成します。 |
| Select | JSON オブジェクトの配列を、指定されたマップに基づいて別の配列からの項目を変換することによって作成します。 |
| Table | CSV または HTML のテーブルを配列から作成します。 |
| Terminate | アクティブに実行中のワークフローを停止します。 |
| Wait | 指定された長さの時間が経過するまで、または指定された日時まで、ワークフローを一時停止します。 |
| Workflow | ワークフローを別のワークフローの中に入れ子にします。 |
マネージド API アクション
| Action type | Description |
|---|---|
| ApiConnection | Calls an HTTP endpoint by using a Microsoft-managed API. |
| ApiConnectionWebhook | Works like HTTP Webhook but uses a Microsoft-managed API. |
ワークフロー制御アクション
これらのアクションは、ワークフローの実行を制御するのに利用でき、他のアクションを含めることができます。 ワークフロー制御アクションの外側から、そのワークフロー制御アクションの内側にあるアクションを直接参照できます。 たとえば、あるスコープの内側に Http アクションがある場合に、@body('Http') という式をワークフロー内のどこからでも参照できます。 ただし、ワークフロー制御アクションの内側に存在するアクションは、同じワークフロー制御構造体の中にある他のアクションの "後に実行" することしかできません。
| Action type | Description |
|---|---|
| ForEach | 同じアクションを配列内の項目それぞれに対してループ実行します。 |
| If | 指定された条件が true か false かに基づいて、アクションを実行します。 |
| Scope | 一連のアクションの結果であるグループ状態に基づいてアクションを実行します。 |
| Switch | アクションをいくつかのケースに分類し、式、オブジェクト、またはトークンの値が各ケースで指定された値と一致する場合に、そのアクションを実行します。 |
| Until | 指定された条件が true になるまで、アクションをループ実行します。 |
アクション - 詳細なリファレンス
APIConnection action
This action sends an HTTP request to a Microsoft-managed API and requires information about the API and parameters plus a reference to a valid connection.
"<action-name>": {
   "type": "ApiConnection",
   "inputs": {
      "host": {
         "connection": {
            "name": "@parameters('$connections')['<api-name>']['connectionId']"
         },
         "<other-action-specific-input-properties>"
      },
      "method": "<method-type>",
      "path": "/<api-operation>",
      "retryPolicy": "<retry-behavior>",
      "queries": { "<query-parameters>" },
      "<other-action-specific-properties>"
    },
    "runAfter": {}
}
Required
| Value | タイプ | Description |
|---|---|---|
| < action-name> | String | コネクタによって提供されるアクションの名前 |
| < api-name> | String | 接続に使用される Microsoft マネージド API の名前 |
| < method-type> | String | API を呼び出すための HTTP メソッド: "GET"、"PUT"、"POST"、"PATCH"、または "DELETE" |
| < api-operation> | String | 呼び出す API 操作 |
Optional
| Value | タイプ | Description |
|---|---|---|
| < other-action-specific-input-properties> | JSON Object | この特定のアクションに適用するその他の入力プロパティ |
| < retry-behavior> | JSON Object | 断続的なエラー (状態コード 408、429、5XX) と接続の例外に対する再試行動作をカスタマイズします。 For more information, see Retry policies. |
| < query-parameters> | JSON Object | API 呼び出しに含めるクエリ パラメーター (ある場合)。 たとえば、 "queries": { "api-version": "2018-01-01" } というオブジェクトによって ?api-version=2018-01-01 が呼び出しに追加されます。 |
| < other-action-specific-properties> | JSON Object | この特定のアクションに適用されるその他のプロパティ (ある場合) |
Example
この定義は、Microsoft マネージド API である Office 365 Outlook コネクタに対するメールの送信アクションを記述するものです。
"Send_an_email": {
   "type": "ApiConnection",
   "inputs": {
      "body": {
         "Body": "Thank you for your membership!",
         "Subject": "Hello and welcome!",
         "To": "Sophie.Owen@contoso.com"
      },
      "host": {
         "connection": {
            "name": "@parameters('$connections')['office365']['connectionId']"
         }
      },
      "method": "POST",
      "path": "/Mail"
    },
    "runAfter": {}
}
APIConnectionWebhook action
This action sends a subscription request over HTTP to an endpoint by using a Microsoft-managed API, provides a callback URL to where the endpoint can send a response, and waits for the endpoint to respond. For more information, see Endpoint subscriptions.
"<action-name>": {
   "type": "ApiConnectionWebhook",
   "inputs": {
      "subscribe": {
         "method": "<method-type>",
         "uri": "<api-subscribe-URL>",
         "headers": { "<header-content>" },
         "body": "<body-content>",
         "authentication": { "<authentication-type>" },
         "retryPolicy": "<retry-behavior>",
         "queries": { "<query-parameters>" },
         "<other-action-specific-input-properties>"
      },
      "unsubscribe": {
         "method": "<method-type>",
         "uri": "<api-unsubscribe-URL>",
         "headers": { "<header-content>" },
         "body": "<body-content>",
         "authentication": { "<authentication-type>" },
         "<other-action-specific-properties>"
      },
   },
   "runAfter": {}
}
Some values, such as <method-type>, are available for both the "subscribe" and "unsubscribe" objects.
Required
| Value | タイプ | Description |
|---|---|---|
| < action-name> | String | コネクタによって提供されるアクションの名前 |
| < method-type> | String | エンドポイントのサブスクライブまたはサブスクライブ解除に使用する HTTP メソッド: "GET"、"PUT"、"POST"、"PATCH"、または "DELETE" |
| < api-subscribe-URL> | String | API へのサブスクライブに使用する URI |
Optional
| Value | タイプ | Description |
|---|---|---|
| < api-unsubscribe-URL> | String | API のサブスクライブ解除に使用する URI |
| < header-content> | JSON Object | 要求で送信するヘッダー (ある場合) 言語と種類を要求で設定する場合の例を次に示します。 "headers": { "Accept-Language": "en-us", "Content-Type": "application/json" } |
| < body-content> | JSON Object | 要求で送信するメッセージの内容 |
| < authentication-type> | JSON Object | この要求で外部への要求の認証に使用される認証モデル。 詳細については、「送信呼び出しに認証を追加する」を参照してください。 |
| < retry-behavior> | JSON Object | 断続的なエラー (状態コード 408、429、5XX) と接続の例外に対する再試行動作をカスタマイズします。 For more information, see Retry policies. |
| < query-parameters> | JSON Object | API 呼び出しに含めるクエリ パラメーター (ある場合) たとえば、 "queries": { "api-version": "2018-01-01" } というオブジェクトによって ?api-version=2018-01-01 が呼び出しに追加されます。 |
| < other-action-specific-input-properties> | JSON Object | この特定のアクションに適用するその他の入力プロパティ |
| < other-action-specific-properties> | JSON Object | この特定のアクションに適用されるその他のプロパティ (ある場合) |
You can also specify limits on an ApiConnectionWebhook action in the same way as HTTP asynchronous limits.
Compose action
このアクションは、複数の入力 (これには式も含まれます) から単一の出力を作成します。 出力と入力のどちらも、Azure Logic Apps でネイティブにサポートされている任意の型 (配列、JSON オブジェクト、XML、バイナリなど) を使用できます。 このアクションの出力を他のアクションで使用できます。
"Compose": {
   "type": "Compose",
   "inputs": "<inputs-to-compose>",
   "runAfter": {}
},
Required
| Value | タイプ | Description |
|---|---|---|
| < inputs-to-compose> | Any | 単一の出力を作成するための複数入力 |
Example 1
このアクション定義によって、abcdefg に後続のスペースと値 1234 が結合されます。
"Compose": {
   "type": "Compose",
   "inputs": "abcdefg 1234",
   "runAfter": {}
},
このアクションで作成される出力は次のようになります。
abcdefg 1234
Example 2
このアクション定義によって、abcdefg が格納された文字列型の変数と、1234 が格納された整数型の変数が結合されます。
"Compose": {
   "type": "Compose",
   "inputs": "@{variables('myString')}@{variables('myInteger')}",
   "runAfter": {}
},
このアクションで作成される出力は次のようになります。
"abcdefg1234"
JavaScript コードの実行アクション
このアクションは、JavaScript コード スニペットを実行し、その結果を、ワークフロー内の後続のアクションが参照できるトークンとして返します。
"Execute_JavaScript_Code": {
   "type": "JavaScriptCode",
   "inputs": {
      "code": "<JavaScript-code-snippet>",
      "explicitDependencies": {
         "actions": [ <preceding-actions> ],
         "includeTrigger": true
      }
   },
   "runAfter": {}
}
Required
| Value | タイプ | Description |
|---|---|---|
| < JavaScript-code-snippet> | Varies | 実行したい JavaScript コード。 コードの要件と詳細については、「ワークフローでコード スニペットを実行する」を参照してください。 code 属性の中のコード スニペットは、読み取り専用の workflowContext オブジェクトを入力として使用できます。 このオブジェクト内のサブプロパティにより、コードからワークフロー内のトリガーや以前のアクションの出力結果にアクセスできます。
workflowContext オブジェクトの詳細についは、「workflowContext オブジェクトを使用してトリガーとアクションの出力を参照する」を参照してください。 |
場合により必須
explicitDependencies 属性は、トリガー、前のアクション、またはその両方からの結果をコード スニペットのための依存関係として明示的に含めることを指定します。 これらの依存関係の追加の詳細については、「インライン コード アクションに依存関係をパラメーターとして追加する」を参照してください。
includeTrigger 属性には、true または false という値を指定できます。
| Value | タイプ | Description |
|---|---|---|
| < preceding-actions> | String array | JSON 形式のアクション名を依存関係として持つ配列。 Make sure to use the action names that appear in your workflow definition where action names use underscores (_), not spaces (" "). |
Example 1
このアクションで実行されるコードは、ロジック アプリ ワークフローの名前を取得して、"Hello world from <logic-app-name>" というテキストを結果として返します。 この例では、コードはワークフローの名前を参照するために読み取り専用の workflowContext.workflow.name オブジェクトを介して workflowContext プロパティにアクセスします。
workflowContext オブジェクトの使用方法の詳細については、コード内でトリガーとアクションの結果を参照することについてのページを参照してください。
"Execute_JavaScript_Code": {
   "type": "JavaScriptCode",
   "inputs": {
      "code": "var text = \"Hello world from \" + workflowContext.workflow.name;\r\n\r\nreturn text;"
   },
   "runAfter": {}
}
Example 2
このアクションは、Outlook アカウントに新しい電子メールが届いたときにトリガーされるロジック アプリ ワークフロー内でコードを実行します。 このワークフローでは、受信した電子メールの内容と承認要求を転送する、Office 365 Outlook の承認メールの送信アクションも使用します。
このコードは、電子メール メッセージの Body プロパティから電子メール アドレスを抽出し、そのアドレスと承認アクションの SelectedOption プロパティ値を返します。 このアクションは、承認メールの送信アクションを actions オブジェクト内の explicitDependencies オブジェクトに依存関係として明示的に含めます。
"Execute_JavaScript_Code": {
   "type": "JavaScriptCode",
   "inputs": {
      "code": "var myResult = /(([^<>()\\[\\]\\\\.,;:\\s@\"]+(\\.[^<>()\\[\\]\\\\.,;:\\s@\"]+)*)|(\".+\"))@((\\[[0-9]{1,3}\\.[0-9]{1,3}\\.[0-9]{1,3}\\.[0-9]{1,3}])|(([a-zA-Z\\-0-9]+\\.)+[a-zA-Z]{2,}))/g;\r\n\r\nvar email = workflowContext.trigger.outputs.body.Body;\r\n\r\nvar reply = workflowContext.actions.Send_approval_email.outputs.body.SelectedOption;\r\n\r\nreturn email.match(myResult) + \" - \" + reply;\r\n;",
      "explicitDependencies": {
         "actions": [
            "Send_approval_email"
         ]
      }
   },
   "runAfter": {}
}
Function action
This action calls a previously created Azure function.
"<Azure-function-name>": {
   "type": "Function",
   "inputs": {
     "function": {
        "id": "<Azure-function-ID>"
      },
      "method": "<method-type>",
      "headers": { "<header-content>" },
      "body": { "<body-content>" },
      "queries": { "<query-parameters>" }
   },
   "runAfter": {}
}
Required
| Value | タイプ | Description |
|---|---|---|
| < Azure-function-ID> | String | 呼び出したい Azure 関数を表すリソース ID。 この値の形式は次のとおりです。 "/subscriptions/<Azure-subscription-ID>/resourceGroups/<Azure-resource-group>/providers/Microsoft.Web/sites/<Azure-function-app-name>/functions/<Azure-function-name>" |
| < method-type> | String | 関数を呼び出すために使用する HTTP メソッド: "GET"、"PUT"、"POST"、"PATCH"、または "DELETE" 指定されていない場合の既定のメソッドは "POST" です。 |
Optional
| Value | タイプ | Description |
|---|---|---|
| < header-content> | JSON Object | 呼び出しで送信するヘッダー (ある場合) 言語と種類を要求で設定する場合の例を次に示します。 "headers": { "Accept-Language": "en-us", "Content-Type": "application/json" } |
| < body-content> | JSON Object | 要求で送信するメッセージの内容 |
| < query-parameters> | JSON Object | API 呼び出しに含めるクエリ パラメーター (ある場合) たとえば、 "queries": { "api-version": "2018-01-01" } というオブジェクトによって ?api-version=2018-01-01 が呼び出しに追加されます。 |
| < other-action-specific-input-properties> | JSON Object | この特定のアクションに適用するその他の入力プロパティ |
| < other-action-specific-properties> | JSON Object | この特定のアクションに適用されるその他のプロパティ (ある場合) |
ロジック アプリを保存すると、参照される関数に対するこれらのチェックが Azure Logic Apps によって実行されます。
ワークフローからその関数にアクセスできる必要があります。
ワークフローでは、標準 HTTP トリガーまたは汎用 JSON webhook トリガーだけを使用できます。
Azure Logic Apps によってトリガーの URL が取得されてキャッシュされ、これが実行時に使用されます。 However, if any operation invalidates the cached URL, the Function action fails at runtime. この問題を解決するには、ロジック アプリをもう一度保存します。これで、ロジック アプリによって再びトリガーの URL が取得されてキャッシュされます。
関数にルートが定義されていてはなりません。
許容される認可レベルは、"function" と "anonymous" だけです。
Example
このアクション定義は、作成済みの "GetProductID" 関数を呼び出します。
"GetProductID": {
   "type": "Function",
   "inputs": {
     "function": {
        "id": "/subscriptions/<XXXXXXXXXXXXXXXXXXXX>/resourceGroups/myLogicAppResourceGroup/providers/Microsoft.Web/sites/InventoryChecker/functions/GetProductID"
      },
      "method": "POST",
      "headers": {
          "x-ms-date": "@utcnow()"
       },
      "body": {
          "Product_ID": "@variables('ProductID')"
      }
   },
   "runAfter": {}
}
HTTP action
このアクションは、指定された HTTP または HTTPS エンドポイントに要求を送信し、応答を調べてワークフローを実行するかどうかを判断します。 詳細については、「Azure Logic Apps から HTTP または HTTPS でサービス エンドポイントを呼び出す」を参照してください。
"HTTP": {
   "type": "Http",
   "inputs": {
      "method": "<method-type>",
      "uri": "<HTTP-or-HTTPS-endpoint-URL>",
      "headers": { "<header-content>" },
      "queries": { "<query-parameters>" },
      "body": "<body-content>",
      "authentication": { "<authentication-type-and-property-values>" },
      "retryPolicy": {
         "type": "<retry-behavior>"
      },
   },
   "runAfter": {}
}
Required
| Property | Value | タイプ | Description |
|---|---|---|---|
method |
< method-type> | String | 発信要求の送信に使用するメソッド: "GET"、"PUT"、"POST"、"PATCH"、または "DELETE" |
uri |
< HTTP-or-HTTPS-endpoint-URL> | String | 発信要求の送信先となる HTTP または HTTPS エンドポイント URL。 文字列の最大サイズ: 2 KB Azure のサービスまたはリソースの場合は、アクセスしたいリソースのリソース ID とパスがこの URI 構文に含まれます。 |
Optional
| Property | Value | タイプ | Description |
|---|---|---|---|
headers |
< header-content> | JSON Object | 要求に含める必要があるヘッダー (ある場合) 言語と種類を設定する場合の例を次に示します。 "headers": { "Accept-Language": "en-us", "Content-Type": "application/json" } |
queries |
< query-parameters> | JSON Object | 要求の中で使用する必要があるクエリ パラメーター (ある場合) たとえば、 "queries": { "api-version": "2018-01-01" } というオブジェクトによって ?api-version=2018-01-01 が呼び出しに追加されます。 |
body |
< body-content> | JSON Object | ペイロードとして要求とともに送信するメッセージの内容 |
authentication |
< authentication-type-and-property-values> | JSON Object | この要求で外部への要求の認証に使用される認証モデル。 詳細については、「送信呼び出しに認証を追加する」を参照してください。 Scheduler 以外に、authority プロパティがサポートされています。 指定されていないときの既定値は https://management.azure.com/ ですが、別の値を使用できます。 |
retryPolicy > type |
< retry-behavior> | JSON Object | 断続的なエラー (状態コード 408、429、5XX) と接続の例外に対する再試行動作をカスタマイズします。 For more information, see Retry policies. |
| < other-action-specific-input-properties> | < input-property> | JSON Object | この特定のアクションに適用するその他の入力プロパティ |
| < other-action-specific-properties> | < property-value> | JSON Object | この特定のアクションに適用されるその他のプロパティ (ある場合) |
Example
このアクション定義は、指定のエンドポイントに要求を送信して最新のニュースを取得します。
"HTTP": {
   "type": "Http",
   "inputs": {
      "method": "GET",
      "uri": "https://mynews.example.com/latest"
   }
}
Join action
このアクションは、配列内のすべての項目から 1 個の文字列を作成し、指定された区切り文字を使ってこれらの項目を区切ります。
"Join": {
   "type": "Join",
   "inputs": {
      "from": <array>,
      "joinWith": "<delimiter>"
   },
   "runAfter": {}
}
Required
| Value | タイプ | Description |
|---|---|---|
| < array> | Array | ソース項目を渡す配列または式。 式を指定する場合は、その式を二重引用符で囲みます。 |
| < delimiter> | 1 文字の文字列 | 文字列内の各項目を区切る文字 |
Example
あらかじめ作成した "myIntegerArray" という変数があり、次の整数型配列が格納されているとします。
[1,2,3,4]
このアクション定義は、式の中で variables() 関数を使用してこの変数から値を取得し、これらの値をコンマで区切った "1,2,3,4" という文字列を作成します。
"Join": {
   "type": "Join",
   "inputs": {
      "from": "@variables('myIntegerArray')",
      "joinWith": ","
   },
   "runAfter": {}
}
JSON の解析アクション
This action creates user-friendly fields or tokens from the properties in JSON content. そのプロパティにロジック アプリ内でアクセスするには、トークンを代わりに使用します。 たとえば、Azure Service Bus や Azure Cosmos DB などのサービスからの JSON 出力を使用したい場合に、このアクションをロジック アプリに追加すると、その出力の中のデータをより簡単に参照できます。
"Parse_JSON": {
   "type": "ParseJson",
   "inputs": {
      "content": "<JSON-source>",
         "schema": { "<JSON-schema>" }
      },
      "runAfter": {}
},
Required
| Value | タイプ | Description |
|---|---|---|
| < JSON-source> | JSON Object | 解析する対象の JSON コンテンツ |
| < JSON-schema> | JSON Object | 基になる JSON コンテンツを記述する JSON スキーマ。このアクションでソースの JSON コンテンツを解析するために使用されます。 Tip: In the workflow designer, you can either provide the schema or provide a sample payload so that the action can generate the schema. |
Example
This action definition creates these tokens that you can use in your workflow but only in actions that run following the Parse JSON action:
FirstName、LastName、Email
"Parse_JSON": {
   "type": "ParseJson",
   "inputs": {
      "content": {
         "Member": {
            "Email": "Sophie.Owen@contoso.com",
            "FirstName": "Sophie",
            "LastName": "Owen"
         }
      },
      "schema": {
         "type": "object",
         "properties": {
            "Member": {
               "type": "object",
               "properties": {
                  "Email": {
                     "type": "string"
                  },
                  "FirstName": {
                     "type": "string"
                  },
                  "LastName": {
                     "type": "string"
                  }
               }
            }
         }
      }
   },
   "runAfter": { }
},
この例では、アクションによる解析の対象である JSON コンテンツを "content" プロパティで指定しています。 スキーマを生成するためのサンプル ペイロードとして、次の JSON コンテンツを指定することもできます。
"content": {
   "Member": {
      "FirstName": "Sophie",
      "LastName": "Owen",
      "Email": "Sophie.Owen@contoso.com"
   }
},
"schema" プロパティでは、JSON コンテンツを記述するために使用される JSON スキーマを指定します。
"schema": {
   "type": "object",
   "properties": {
      "Member": {
         "type": "object",
         "properties": {
            "FirstName": {
               "type": "string"
            },
            "LastName": {
               "type": "string"
            },
            "Email": {
               "type": "string"
            }
         }
      }
   }
}
Query action
このアクションは、指定された条件またはフィルターに基づいて配列を別の配列内の項目から作成します。
"Filter_array": {
   "type": "Query",
   "inputs": {
      "from": <array>,
      "where": "<condition-or-filter>"
   },
   "runAfter": {}
}
Required
| Value | タイプ | Description |
|---|---|---|
| < array> | Array | ソース項目を渡す配列または式。 式を指定する場合は、その式を二重引用符で囲みます。 |
| < condition-or-filter> | String | ソース配列内の項目をフィルター処理するために使用される条件 Note: If no values satisfy the condition, then the action creates an empty array. |
Example
このアクション定義は、指定された値 2 より大きい値の配列を作成します。
"Filter_array": {
   "type": "Query",
   "inputs": {
      "from": [ 1, 3, 0, 5, 4, 2 ],
      "where": "@greater(item(), 2)"
   }
}
Response action
このアクションは、HTTP 要求に対する応答のペイロードを作成します。
"Response" {
    "type": "Response",
    "kind": "http",
    "inputs": {
        "statusCode": 200,
        "headers": { <response-headers> },
        "body": { <response-body> }
    },
    "runAfter": {}
},
Required
| Value | タイプ | Description |
|---|---|---|
| < response-status-code> | Integer | 着信要求に送信される HTTP 状態コード。 既定のコードは "200 OK" ですが、2xx、4xx、または 5xx で始まる任意の有効な状態コードを使用できます。3xxx で始まるコードは使用できません。 |
Optional
| Value | タイプ | Description |
|---|---|---|
| < response-headers> | JSON Object | 応答に含める 1 つまたは複数のヘッダー |
| < response-body> | Various | 応答本文。文字列、JSON オブジェクト、または先行アクションからのバイナリ コンテンツを指定できます。 |
Example
このアクション定義は、指定された状態コード、メッセージ本文、メッセージ ヘッダーを使用して HTTP 要求への応答を作成します。
"Response": {
   "type": "Response",
   "inputs": {
      "statusCode": 200,
      "body": {
         "ProductID": 0,
         "Description": "Organic Apples"
      },
      "headers": {
         "x-ms-date": "@utcnow()",
         "content-type": "application/json"
      }
   },
   "runAfter": {}
}
Restrictions
Unlike other actions, the Response action has special restrictions:
Your workflow can use the Response action only when the workflow starts with an HTTP request trigger, meaning your workflow must be triggered by an HTTP request.
Your workflow can use the Response action anywhere except inside Foreach loops, Until loops, including sequential loops, and parallel branches.
The original request gets your workflow's response only when all actions required by the Response action are finished within the HTTP timeout limit.
ただし、ワークフローが、入れ子になったワークフローとして別のロジック アプリを呼び出す場合は、親ワークフローは入れ子になったワークフローが終了するまで、どれだけ時間がかかるかにかかわらず待機します。
When your workflow uses the Response action and a synchronous response pattern, the workflow can't also use the splitOn command in the trigger definition because that command creates multiple runs. PUT メソッドを使用する場合は、これに該当しているかどうかを調べて、該当している場合は "bad request (無効な要求)" 応答を返してください。
Otherwise, if your workflow uses the splitOn command and a Response action, the workflow runs asynchronously and immediately returns a "202 ACCEPTED" response.
When your workflow's execution reaches the Response action, but the incoming request has already received a response, the Response action is marked as "Failed" due to the conflict. その結果、ロジック アプリの実行も "Failed" 状態となります。
Select action
このアクションは、JSON オブジェクトの配列を、指定されたマップに基づいて別の配列の項目を変換することによって作成します。 出力配列とソース配列の項目数は常に同じです。 出力配列内のオブジェクトの数は変更できませんが、これらのオブジェクトのプロパティとその値を追加または削除することはできます。
select プロパティには、キーと値のペアを少なくとも 1 つ指定し、これでソース配列内の項目を変換するためのマップを定義します。 キーと値のペアは、出力配列内のすべてのオブジェクトのプロパティとその値を表します。
"Select": {
   "type": "Select",
   "inputs": {
      "from": <array>,
      "select": {
          "<key-name>": "<expression>",
          "<key-name>": "<expression>"
      }
   },
   "runAfter": {}
},
Required
| Value | タイプ | Description |
|---|---|---|
| < array> | Array | ソース項目を渡す配列または式。 式は必ず二重引用符で囲みます。 Note: If the source array is empty, the action creates an empty array. |
| < key-name> | String | The property name assigned to the result from <expression> To add a new property across all objects in the output array, provide a <key-name> for that property and an <expression> for the property value. To remove a property from all objects in the array, omit the <key-name> for that property. |
| < expression> | String | The expression that transforms the item in the source array and assigns the result to <key-name> |
The Select action creates an array as output, so any action that wants to use this output must either accept an array, or you must convert the array into the type that the consumer action accepts. For example, to convert the output array to a string, you can pass that array to the Compose action, and then reference the output from the Compose action in your other actions.
Example
このアクション定義は、JSON オブジェクトの配列を整数の配列から作成します。 アクションはソース配列を反復処理し、式 @item() を使用して各整数値を取得すると、各値を各 JSON オブジェクトの "number" プロパティに割り当てます。
"Select": {
   "type": "Select",
   "inputs": {
      "from": [ 1, 2, 3 ],
      "select": {
         "number": "@item()"
      }
   },
   "runAfter": {}
},
このアクションで作成される配列は次のようになります。
[ { "number": 1 }, { "number": 2 }, { "number": 3 } ]
To use this array output in other actions, pass this output into a Compose action:
"Compose": {
   "type": "Compose",
   "inputs": "@body('Select')",
   "runAfter": {
      "Select": [ "Succeeded" ]
   }
},
You can then use the output from the Compose action in your other actions, for example, the Office 365 Outlook - Send an email action:
"Send_an_email": {
   "type": "ApiConnection",
   "inputs": {
      "body": {
         "Body": "@{outputs('Compose')}",
         "Subject": "Output array from Select and Compose actions",
         "To": "<your-email@domain>"
      },
      "host": {
         "connection": {
            "name": "@parameters('$connections')['office365']['connectionId']"
         }
      },
      "method": "post",
      "path": "/Mail"
   },
   "runAfter": {
      "Compose": [ "Succeeded" ]
   }
},
Table action
このアクションは、CSV または HTML のテーブルを配列から作成します。 JSON オブジェクトの配列の場合は、このアクションによって列ヘッダーが自動的にオブジェクトのプロパティ名から作成されます。 他のデータ型の配列の場合は、列ヘッダーと値をユーザーが指定する必要があります。 たとえば、この配列には "ID" と "Product_Name" というプロパティが含まれており、このアクションで列ヘッダー名として使用できます。
[ {"ID": 0, "Product_Name": "Apples"}, {"ID": 1, "Product_Name": "Oranges"} ]
"Create_<CSV | HTML>_table": {
   "type": "Table",
   "inputs": {
      "format": "<CSV | HTML>",
      "from": <array>,
      "columns": [
         {
            "header": "<column-name>",
            "value": "<column-value>"
         },
         {
            "header": "<column-name>",
            "value": "<column-value>"
         }
      ]
   },
   "runAfter": {}
}
Required
| Value | タイプ | Description |
|---|---|---|
| <CSV or HTML> | String | 作成するテーブルの形式 |
| < array> | Array | テーブルのソース項目を表す配列または式 Note: If the source array is empty, the action creates an empty table. |
Optional
列ヘッダーと値を指定またはカスタマイズするには、columns 配列を使用します。 複数の header-value のペアのヘッダー名が同じである場合は、これらの値がそのヘッダー名の下の同じ列に表示されます。 それ以外の場合は、一意のヘッダーごとに一意の列が定義されます。
| Value | タイプ | Description |
|---|---|---|
| < column-name> | String | 列のヘッダー名 |
| < column-value> | Any | その列の中の値 |
Example 1
あらかじめ作成した "myItemArray" という変数があり、現在は次の配列が格納されているとします。
[ {"ID": 0, "Product_Name": "Apples"}, {"ID": 1, "Product_Name": "Oranges"} ]
このアクション定義によって、CSV テーブルが "myItemArray" 変数から作成されます。
from プロパティで使用されている式によって、variables() 関数を使用して "myItemArray" から配列が取得されます。
"Create_CSV_table": {
   "type": "Table",
   "inputs": {
      "format": "CSV",
      "from": "@variables('myItemArray')"
   },
   "runAfter": {}
}
このアクションで作成される CSV テーブルは次のようになります。
ID,Product_Name
0,Apples
1,Oranges
Example 2
このアクション定義は、HTML テーブルを "myItemArray" 変数から作成します。
from プロパティで使用されている式によって、variables() 関数を使用して "myItemArray" から配列が取得されます。
"Create_HTML_table": {
   "type": "Table",
   "inputs": {
      "format": "HTML",
      "from": "@variables('myItemArray')"
   },
   "runAfter": {}
}
このアクションで作成される HTML テーブルは次のようになります。
| ID | Product_Name |
|---|---|
| 0 | Apples |
| 1 | Oranges |
Example 3
このアクション定義は、HTML テーブルを "myItemArray" 変数から作成します。 ただし、この例では、既定の列ヘッダー名を "Stock_ID" と "Description" でオーバーライドし、"Description" 列の値に "Organic" という単語を追加します。
"Create_HTML_table": {
   "type": "Table",
   "inputs": {
      "format": "HTML",
      "from": "@variables('myItemArray')",
      "columns": [
         {
            "header": "Stock_ID",
            "value": "@item().ID"
         },
         {
            "header": "Description",
            "value": "@concat('Organic ', item().Product_Name)"
         }
      ]
    },
   "runAfter": {}
},
このアクションで作成される HTML テーブルは次のようになります。
| Stock_ID | Description |
|---|---|
| 0 | Organic Apples |
| 1 | Organic Oranges |
Terminate action
このアクションは、ワークフロー インスタンスの実行を停止し、進行中のアクションがある場合はキャンセルし、残りのアクションがある場合はスキップして、指定された状態を返します。 For example, you can use the Terminate action when your logic app must exit completely from an error state. This action doesn't affect already completed actions and can't appear inside Foreach and Until loops, including sequential loops.
"Terminate": {
   "type": "Terminate",
   "inputs": {
       "runStatus": "<status>",
       "runError": {
            "code": "<error-code-or-name>",
            "message": "<error-message>"
       }
   },
   "runAfter": {}
}
Required
| Value | タイプ | Description |
|---|---|---|
| < status> | String | 実行に対して返す状態: "Failed"、"Cancelled"、または "Succeeded" |
Optional
"runError" オブジェクトのプロパティは、"runStatus" プロパティが "Failed" 状態に設定されている場合にのみ適用されます。
| Value | タイプ | Description |
|---|---|---|
| < error-code-or-name> | String | エラーのコードまたは名前 |
| < error-message> | String | エラーとアプリ ユーザーが実行できる対処について説明するメッセージまたはテキスト |
Example
このアクション定義は、ワークフローの実行を停止し、実行の状態を "Failed" に設定して、状態、エラー コード、およびエラー メッセージを返します。
"Terminate": {
    "type": "Terminate",
    "inputs": {
        "runStatus": "Failed",
        "runError": {
            "code": "Unexpected response",
            "message": "The service received an unexpected response. Please try again."
        }
   },
   "runAfter": {}
}
Wait action
このアクションは、指定された長さの時間が経過するまで、または指定された日時まで (両方は不可)、ワークフローの実行を一時停止します。
Specified interval
"Delay": {
   "type": "Wait",
   "inputs": {
      "interval": {
         "count": <number-of-units>,
         "unit": "<interval>"
      }
   },
   "runAfter": {}
},
Specified time
"Delay_until": {
   "type": "Wait",
   "inputs": {
      "until": {
         "timestamp": "<date-time-stamp>"
      }
   },
   "runAfter": {}
},
Required
| Value | タイプ | Description |
|---|---|---|
| < number-of-units> | Integer | For the Delay action, the number of units to wait |
| < interval> | String | For the Delay action, the interval to wait: "Second", "Minute", "Hour", "Day", "Week", "Month" |
| < date-time-stamp> | String | For the Delay Until action, the date and time to resume execution. この値には UTC の日付と時刻の形式を使用する必要があります。 |
Example 1
このアクション定義は、ワークフローを 15 分間一時停止します。
"Delay": {
   "type": "Wait",
   "inputs": {
      "interval": {
         "count": 15,
         "unit": "Minute"
      }
   },
   "runAfter": {}
},
Example 2
このアクション定義は、ワークフローを指定の日時まで一時停止します。
"Delay_until": {
   "type": "Wait",
   "inputs": {
      "until": {
         "timestamp": "2017-10-01T00:00:00Z"
      }
   },
   "runAfter": {}
},
Workflow action
このアクションは、作成済みの別のロジック アプリを呼び出します。つまり、他のロジック アプリ ワークフローを組み込んで再利用することができます。 You can also use the outputs from the child or nested logic app in actions that follow the nested logic app, provided that the child logic app returns a response.
呼び出そうとしているトリガーへのアクセスが Azure Logic Apps によってチェックされるため、自分がそのトリガーにアクセスできることを確認してください。 また、入れ子になったロジック アプリは、以下の条件を満たす必要があります。
A trigger makes the nested logic app callable, such as a Request or HTTP trigger
Azure サブスクリプションが親ロジック アプリと同じ
To use the outputs from the nested logic app in your parent logic app, the nested logic app must have a Response action
"<nested-logic-app-name>": {
   "type": "Workflow",
   "inputs": {
      "body": { "<body-content" },
      "headers": { "<header-content>" },
      "host": {
         "triggerName": "<trigger-name>",
         "workflow": {
            "id": "/subscriptions/<Azure-subscription-ID>/resourceGroups/<Azure-resource-group>/providers/Microsoft.Logic/<nested-logic-app-name>"
         }
      }
   },
   "runAfter": {}
}
Required
| Value | タイプ | Description |
|---|---|---|
| < nested-logic-app-name> | String | 呼び出したいロジック アプリの名前 |
| < trigger-name> | String | 入れ子になったロジック アプリ内の、呼び出したいトリガーの名前 |
| < Azure-subscription-ID> | String | 入れ子になったロジック アプリの Azure サブスクリプション ID |
| < Azure-resource-group> | String | 入れ子になったロジック アプリの Azure リソース グループ名 |
Optional
| Value | タイプ | Description |
|---|---|---|
| < header-content> | JSON Object | 呼び出しで送信するヘッダー (ある場合) |
| < body-content> | JSON Object | 呼び出しで送信するメッセージの内容 |
Outputs
このアクションの出力は、入れ子になったロジック アプリの Response アクションに応じて異なります。 入れ子になったロジック アプリに Response アクションが含まれていない場合、出力は空です。
Example
"Start_search" アクションが正常に完了した後に、このワークフロー アクション定義は "Get_product_information" という名前の別のロジック アプリを呼び出して、指定された入力を渡します。
"actions": {
   "Start_search": { <action-definition> },
   "Get_product_information": {
      "type": "Workflow",
      "inputs": {
         "body": {
            "ProductID": "24601",
         },
         "host": {
            "id": "/subscriptions/XXXXXXXXXXXXXXXXXXXXXXXXXX/resourceGroups/InventoryManager-RG/providers/Microsoft.Logic/Get_product_information",
            "triggerName": "Find_product"
         },
         "headers": {
            "content-type": "application/json"
         }
      },
      "runAfter": {
         "Start_search": [ "Succeeded" ]
      }
   }
},
ワークフロー制御アクションの詳細
Foreach action
このループ アクションは、配列を反復処理し、配列の各項目に対してアクションを実行します。 既定では、"for each" ループはループの最大数まで並列で実行されます。 この最大値については、制限と構成に関するセクションを参照してください。"for each" ループを作成する方法については、こちらを参照してください。
"For_each": {
   "type": "Foreach",
   "actions": {
      "<action-1>": { "<action-definition-1>" },
      "<action-2>": { "<action-definition-2>" }
   },
   "foreach": "<for-each-expression>",
   "runAfter": {},
   "runtimeConfiguration": {
      "concurrency": {
         "repetitions": <count>
      }
    },
    "operationOptions": "<operation-option>"
}
Required
| Value | タイプ | Description |
|---|---|---|
| < action-1...n> | String | 配列の各項目に対して実行するアクションの名前 |
| < action-definition-1...n> | JSON Object | 実行するアクションの定義 |
| < for-each-expression> | String | 指定された配列内の各項目を参照する式 |
Optional
| Value | タイプ | Description |
|---|---|---|
| < count> | Integer | By default, the "for each" loop iterations run at the same time (concurrently or in parallel) up to the default limit. To change this limit by setting a new <count> value, see Change "for each" loop concurrency. |
| < operation-option> | String | To run a "for each" loop sequentially, rather than in parallel, set either <operation-option> to Sequential or <count> to 1, but not both. 詳細については、「"for each" ループを順次実行する」を参照してください。 |
Example
この "for each" ループは、配列の項目ごとに 1 通の電子メールを、受信メールからの添付ファイルを付けて送信します。 このループから送信される電子メール (添付ファイルも含まれます) の送信先は、その添付ファイルのレビュー担当者です。
"For_each": {
   "type": "Foreach",
   "actions": {
      "Send_an_email": {
         "type": "ApiConnection",
         "inputs": {
            "body": {
               "Body": "@base64ToString(items('For_each')?['Content'])",
               "Subject": "Review attachment",
               "To": "Sophie.Owen@contoso.com"
                },
            "host": {
               "connection": {
                  "id": "@parameters('$connections')['office365']['connectionId']"
               }
            },
            "method": "post",
            "path": "/Mail"
         },
         "runAfter": {}
      }
   },
   "foreach": "@triggerBody()?['Attachments']",
   "runAfter": {}
}
To specify only an array that is passed as output from the trigger, this expression gets the <array-name> array from the trigger body. 配列が存在しない場合のエラーを回避するために、式では ? 演算子を使用しています。
@triggerBody()?['<array-name>']
If action
This action, which is a conditional statement, evaluates an expression that represents a condition and runs a different branch based on whether the condition is true or false. 条件が true の場合は、その条件の状態は "Succeeded" となります。 条件付きステートメントを作成する方法については、こちらを参照してください。
"Condition": {
   "type": "If",
   "expression": { "<condition>" },
   "actions": {
      "<action-1>": { "<action-definition>" }
   },
   "else": {
      "actions": {
        "<action-2>": { "<action-definition" }
      }
   },
   "runAfter": {}
}
| Value | タイプ | Description |
|---|---|---|
| < condition> | JSON Object | 評価する条件 (式を指定することもできます) |
| < action-1> | JSON Object | The action to run when <condition> evaluates to true |
| < action-definition> | JSON Object | アクションの定義 |
| < action-2> | JSON Object | The action to run when <condition> evaluates to false |
actions または else オブジェクト内のアクションが取る状態は次のとおりです。
- "Succeeded": 実行されて成功したとき
- "Failed": 実行されて失敗したとき
- "Skipped": 対応する分岐が実行されないとき
Example
この条件は、整数型の変数の値が 0 より大きいときに、ある Web サイトをワークフローがチェックすることを指定しています。 変数が 0 以下の場合は、ワークフローは別の Web サイトをチェックします。
"Condition": {
   "type": "If",
   "expression": {
      "and": [ {
         "greater": [ "@variables('myIntegerVariable')", 0 ]
      } ]
   },
   "actions": {
      "HTTP - Check this website": {
         "type": "Http",
         "inputs": {
         "method": "GET",
            "uri": "http://this-url"
         },
         "runAfter": {}
      }
   },
   "else": {
      "actions": {
         "HTTP - Check this other website": {
            "type": "Http",
            "inputs": {
               "method": "GET",
               "uri": "http://this-other-url"
            },
            "runAfter": {}
         }
      }
   },
   "runAfter": {}
}
条件で式を使用する方法
条件で式を使用する方法の例を次に示します。
| JSON | Result |
|---|---|
| "expression": "@parameters('<hasSpecialAction>')" | ブール式の場合に限り、値が true と評価されれば条件が満たされます。 他の型をブール値に変換するには、関数 empty() または equals() を使用します。 |
| "expression": "@greater(actions('<action>').output.value, parameters('<threshold>'))" | For comparison functions, the action runs only when the output from <action> is more than the <threshold> value. |
| "expression": "@or(greater(actions('<action>').output.value, parameters('<threshold>')), less(actions('<same-action>').output.value, 100))" | For logic functions and creating nested Boolean expressions, the action runs when the output from <action> is more than the <threshold> value or under 100. |
| "expression": "@equals(length(actions('<action>').outputs.errors), 0)" | 配列に項目が存在するかどうかを確認するには、配列関数を使用できます。 アクションは errors 配列が空のときに実行されます。 |
Scope action
This action logically groups actions into scopes, which get their own status after the actions in that scope finish running. このスコープの状態を使用して、他のアクションを実行するかどうかを判断できます。 スコープを作成する方法については、こちらを参照してください。
"Scope": {
   "type": "Scope",
   "actions": {
      "<inner-action-1>": {
         "type": "<action-type>",
         "inputs": { "<action-inputs>" },
         "runAfter": {}
      },
      "<inner-action-2>": {
         "type": "<action-type>",
         "inputs": { "<action-inputs>" },
         "runAfter": {}
      }
   }
}
Required
| Value | タイプ | Description |
|---|---|---|
| < inner-action-1...n> | JSON Object | スコープの内側で実行される 1 つ以上のアクション |
| < action-inputs> | JSON Object | 各アクションの入力 |
Switch action
This action, also known as a switch statement, organizes other actions into cases, and assigns a value to each case, except for the default case if one exists. When your workflow runs, the Switch action compares the value from an expression, object, or token against the values specified for each case. If the Switch action finds a matching case, your workflow runs only the actions for that case. Each time the Switch action runs, either only one matching case exists or no matches exist. If no matches exist, the Switch action runs the default actions. switch ステートメントを作成する方法については、こちらを参照してください。
"Switch": {
   "type": "Switch",
   "expression": "<expression-object-or-token>",
   "cases": {
      "Case": {
         "actions": {
           "<action-name>": { "<action-definition>" }
         },
         "case": "<matching-value>"
      },
      "Case_2": {
         "actions": {
           "<action-name>": { "<action-definition>" }
         },
         "case": "<matching-value>"
      }
   },
   "default": {
      "actions": {
         "<default-action-name>": { "<default-action-definition>" }
      }
   },
   "runAfter": {}
}
Required
| Value | タイプ | Description |
|---|---|---|
| < expression-object-or-token> | Varies | 評価する対象の式、JSON オブジェクト、またはトークン |
| < action-name> | String | 一致するケースがある場合に実行するアクションの名前 |
| < action-definition> | JSON Object | 一致するケースがある場合に実行するアクションの定義 |
| < matching-value> | Varies | 評価された結果と比較する値 |
Optional
| Value | タイプ | Description |
|---|---|---|
| < default-action-name> | String | 一致するケースが存在しないときに実行する既定のアクションの名前 |
| < default-action-definition> | JSON Object | 一致するケースが存在しないときに実行するアクションの定義 |
Example
このアクション定義は、承認要求の電子メールに応答した担当者が "承認" オプションと "拒否" オプションのどちらを選択したかを評価します。 Based on this choice, the Switch action runs the actions for the matching case, which is to send another email to the responder but with different wording in each case.
"Switch": {
   "type": "Switch",
   "expression": "@body('Send_approval_email')?['SelectedOption']",
   "cases": {
      "Case": {
         "actions": {
            "Send_an_email": {
               "type": "ApiConnection",
               "inputs": {
                  "Body": "Thank you for your approval.",
                  "Subject": "Response received",
                  "To": "Sophie.Owen@contoso.com"
               },
               "host": {
                  "connection": {
                     "name": "@parameters('$connections')['office365']['connectionId']"
                  }
               },
               "method": "post",
               "path": "/Mail"
            },
            "runAfter": {}
         },
         "case": "Approve"
      },
      "Case_2": {
         "actions": {
            "Send_an_email_2": {
               "type": "ApiConnection",
               "inputs": {
                  "Body": "Thank you for your response.",
                  "Subject": "Response received",
                  "To": "Sophie.Owen@contoso.com"
               },
               "host": {
                  "connection": {
                     "name": "@parameters('$connections')['office365']['connectionId']"
                  }
               },
               "method": "post",
               "path": "/Mail"
            },
            "runAfter": {}
         },
         "case": "Reject"
      }
   },
   "default": {
      "actions": {
         "Send_an_email_3": {
            "type": "ApiConnection",
            "inputs": {
               "Body": "Please respond with either 'Approve' or 'Reject'.",
               "Subject": "Please respond",
               "To": "Sophie.Owen@contoso.com"
            },
            "host": {
               "connection": {
                  "name": "@parameters('$connections')['office365']['connectionId']"
               }
            },
            "method": "post",
            "path": "/Mail"
         },
         "runAfter": {}
      }
   },
   "runAfter": {
      "Send_approval_email": [
         "Succeeded"
      ]
   }
}
Until action
このループ アクションには、指定した条件が true になるまで実行されるアクションが含まれています。 このループは、他のすべてのアクションが実行された後に、最後のステップとして条件をチェックします。 複数のアクションを "actions" オブジェクトに含めることができ、そのアクションには少なくとも 1 つの制限が定義されている必要があります。
"until" ループを作成する方法については、こちらを参照してください。
 "Until": {
   "type": "Until",
   "actions": {
      "<action-name>": {
         "type": "<action-type>",
         "inputs": { "<action-inputs>" },
         "runAfter": {}
      },
      "<action-name>": {
         "type": "<action-type>",
         "inputs": { "<action-inputs>" },
         "runAfter": {}
      }
   },
   "expression": "<condition>",
   "limit": {
      "count": <loop-count>,
      "timeout": "<loop-timeout>"
   },
   "runAfter": {}
}
| Value | タイプ | Description |
|---|---|---|
| < action-name> | String | ループ内で実行するアクションの名前 |
| < action-type> | String | 実行するアクションの種類 |
| < action-inputs> | Various | 実行するアクションへの入力 |
| < condition> | String | ループ内のすべてのアクションの実行が終了した後に評価する条件または式 |
| < loop-count> | Integer | アクションで実行できる最大ループ回数に対する制限。 既定の制限と上限の詳細については、Azure Logic Apps の制限と構成に関する記事を参照してください。 |
| < loop-timeout> | String | ループを実行できる最長時間に対する制限。
timeout の既定値は PT1H です。これは、必須の ISO 8601 フォーマットです。 |
Note
式が Until ループ内の任意のアクションからの出力に依存している場合は、そのアクションから発生するすべてのエラーを必ず考慮に入れてください。
Example
このループ アクション定義は、以下のいずれかの条件が満たされるまで、指定された URL に HTTP 要求を送信します。
- 要求に対して状態コード "200 OK" の応答が返される。
- ループの実行回数が 60 回に達する。
- ループの実行時間が 1 時間に達する。
 "Run_until_loop_succeeds_or_expires": {
    "type": "Until",
    "actions": {
        "HTTP": {
            "type": "Http",
            "inputs": {
                "method": "GET",
                "uri": "http://myurl"
            },
            "runAfter": {}
        }
    },
    "expression": "@equals(outputs('HTTP')['statusCode'], 200)",
    "limit": {
        "count": 60,
        "timeout": "PT1H"
    },
    "runAfter": {}
}
Webhook とサブスクリプション
Webhook ベースのトリガーとアクションは、エンドポイントの定期的なチェックを行う代わりに、そのエンドポイントでの特定のイベントまたはデータを待ちます。 These triggers and actions subscribe to the endpoints by providing a callback URL where the endpoint can send responses.
subscribe 呼び出しは、ワークフローに何らかの変更があったとき (たとえば、資格情報が更新されたときや、トリガーまたはアクションの入力パラメーターが変更されたとき) に行われます。 この呼び出しでは、標準の HTTP アクションと同じパラメーターが使用されます。
unsubscribe 呼び出しは、以下のような操作によってトリガーまたはアクションが無効になったときに自動的に行われます。
- トリガーを削除または無効にする。
- ワークフローを削除または無効にする。
- サブスクリプションを削除または無効にする。
これらの呼び出しをサポートするために、@listCallbackUrl() 式によってトリガーまたはアクションのための一意の "コールバック URL" が返されます。 この URL は、サービスの REST API を使用するエンドポイントの一意識別子を表します。 この関数のパラメーターは、webhook トリガーまたはアクションと同じです。
非同期の継続時間を変更する
トリガーとアクションの両方について、非同期パターンの継続時間を特定の長さに制限でき、それには limit.timeout プロパティを追加します。 このようにすると、その時間が経過した時点でアクションが終了していない場合に、アクションの状態は Cancelled となり、ActionTimedOut コードが指定されます。
timeout プロパティには ISO 8601 形式を使用します。
"<trigger-or-action-name>": {
   "type": "Workflow | Webhook | Http | ApiConnectionWebhook | ApiConnection",
   "inputs": {},
   "limit": {
      "timeout": "PT10S"
   },
   "runAfter": {}
}
実行時の構成設定
トリガーまたはアクションの定義にこれらの runtimeConfiguration プロパティを追加することによって、トリガーとアクションの既定の実行時ビヘイビアーを変更できます。
| Property | タイプ | Description | トリガーまたはアクション |
|---|---|---|---|
runtimeConfiguration.concurrency.runs |
Integer | Change the default limit on the number of workflow instances that can run at the same time (concurrently or in parallel). この値を調整することで、バックエンド システムが受信する要求の数を制限できます。 runs プロパティを 1 に設定すると、operationOptions プロパティを SingleInstance に設定したのと同じように機能します。 どちらのプロパティも設定できますが、両方を設定することはできません。 既定の制限を変更するには、「トリガーのコンカレンシーを変更する」または「インスタンスを順次トリガーする」を参照してください。 |
All triggers |
runtimeConfiguration.concurrency.maximumWaitingRuns |
Integer | Change the default limit on the number of workflow instances that must wait to run when your logic app is already running the maximum concurrent instances. 既定の制限を変更するには、「実行待機の制限を変更する」を参照してください。 |
All triggers |
runtimeConfiguration.concurrency.repetitions |
Integer | Change the default limit on the number of "for each" loop iterations that can run at the same time (concurrently or in parallel). repetitions プロパティを 1 に設定すると、operationOptions プロパティを SingleInstance に設定したのと同じように機能します。 どちらのプロパティも設定できますが、両方を設定することはできません。 既定の制限を変更するには、「"for each" のコンカレンシーを変更する」、または「"for each" ループを順次実行する」を参照してください。 |
Action: Foreach |
runtimeConfiguration.paginationPolicy.minimumItemCount |
Integer | For specific actions that support and have pagination turned on, this value specifies the minimum number of results to retrieve. 改ページ位置の自動修正を有効にするには、改ページ位置の自動修正によるデータ、アイテム、または結果の一括取得に関する記事を参照してください |
Action: Varied |
runtimeConfiguration.secureData.properties |
Array | 多くのトリガーおよびアクションでは、これらの設定によって入力または出力またはその両方がロジック アプリの実行履歴に表示されなくなります。 このデータの保護の詳細については、実行履歴からの入力と出力の非表示に関するページを参照してください。 |
ほとんどのトリガーとアクション |
runtimeConfiguration.staticResult |
JSON Object | For actions that support and have the static result setting turned on, the staticResult object has these attributes: - name。現在のアクションの静的結果定義名を参照します。この名前は、ロジック アプリ ワークフローの staticResults 属性内の definition 属性の中に出現します。 詳細については、静的結果 - ワークフロー定義言語のスキーマ参照に関するページを参照してください。 - staticResultOptions。現在のアクションに対して静的結果が Enabled であるかどうかを指定します。 静的結果を有効にするには、静的結果を設定してモック データでロジック アプリをテストすることについての記事を参照してください。 |
Action: Varied |
Operation options
トリガーまたはアクションの定義内の operationOptions プロパティを使用して、トリガーとアクションの既定の動作を変更できます。
| Operation option | タイプ | Description | トリガーまたはアクション |
|---|---|---|---|
DisableAsyncPattern |
String | HTTP ベースのアクションを非同期ではなく同期的に実行します。 このオプションを設定するには、アクションを同期的に実行することについての記事を参照してください。 |
Actions: ApiConnection, HTTP, Response |
IncludeAuthorizationHeadersInOutputs |
String | ロジック アプリで、要求ベースのトリガー エンドポイントへの着信呼び出しへのアクセスを認可するために Microsoft Entra ID を使用した OAuth を有効化する場合に、OAuth アクセス トークンからの Authorization ヘッダーをトリガー出力に含めます。 詳細については、「要求トリガーの出力に "Authorization" ヘッダーを含める」を参照してください。 |
Triggers: Request, HTTP Webhook |
Sequential |
String | "for each" ループの反復処理を、すべて同時に並列で実行するのではなく、一度に 1 つずつ実行します。 このオプションの機能は、 runtimeConfiguration.concurrency.repetitions プロパティを 1 に設定したときと同じです。 どちらのプロパティも設定できますが、両方を設定することはできません。 このオプションを設定するには、「"for each" ループを順次実行する」を参照してください。 |
Action: Foreach |
SingleInstance |
String | 各ロジック アプリ インスタンスのトリガーを順次実行し、直前のアクティブな実行が終了するまで待機してから、次のロジック アプリ インスタンスをトリガーします。 このオプションの機能は、 runtimeConfiguration.concurrency.runs プロパティを 1 に設定したときと同じです。 どちらのプロパティも設定できますが、両方を設定することはできません。 このオプションを設定するには、「インスタンスを順次トリガーする」を参照してください。 |
All triggers |
SuppressWorkflowHeaders |
String | 発信する要求内で x-ms-* メタデータ ヘッダーを送信しません。 既定では、ヘッダー名に x-ms- プレフィックスを付けた追加のメタデータ ヘッダーが、発信する要求の一部として Azure Logic Apps によって追加されます。 ただし、一部のレガシ サービスでは、未知のヘッダーが追加された要求は受け入れられないため、要求は失敗となります。 |
Actions: HTTP, Function, APIManagement |
SuppressWorkflowHeadersOnResponse |
String | 着信するトリガー要求への応答の中で x-ms-* メタデータ ヘッダーを送信しません。 既定では、着信する要求に対して Azure Logic Apps によって送信される応答には、ヘッダー名に x-ms- プレフィックスを付けた追加のメタデータ ヘッダーが含まれます。 ただし、一部のレガシ サービスでは、未知のヘッダーが追加された要求や応答は受け入れられないため、要求は失敗となります。 |
Triggers: Request, HTTP Webhook |
トリガーのコンカレンシーを変更する
既定では、ロジック アプリ ワークフロー インスタンスはすべて (同時にまたは並行して) 実行されます。 この動作は、直前のアクティブなワークフロー インスタンスが実行を終了する前に各トリガー インスタンスが起動することを意味します。 However, the number of concurrently running instances has a default limit. 同時に実行されるワークフロー インスタンスの数がこの制限に達すると、その他の新しいインスタンスは実行を待機する必要があります。 この制限を利用すると、バックエンド システムが受信する要求の数を制限できます。
When you turn on the trigger's concurrency control, trigger instances run in parallel up to the default limit. 既定のコンカレンシー制限を変更するには、コード ビュー エディターまたはワークフロー デザイナーのどちらを使用してもかまいません。コンカレンシーの設定をデザイナーから変更すると、基になるトリガー定義の中の runtimeConfiguration.concurrency.runs プロパティが追加または更新され、その逆も同様であるからです。 このプロパティは、並列で実行できる新しいワークフロー インスタンスの最大数を制御します。
トリガーでコンカレンシーを有効にする前に、次の考慮事項を確認してください。
コンカレンシー制御を有効にした後にコンカレンシーを無効にすることはできません。
同時トリガー実行の最大数が並列処理の最大度に達すると、後続のトリガー実行で調整または "429 - 要求が多すぎます" エラーが発生する可能性があります。 429 エラーを処理する再試行ポリシーを設定した場合、トリガーで再試行と調整の動作のサイクルが発生し、新しいトリガー要求の処理に長い遅延が発生する可能性があります。
When concurrency is enabled, the SplitOn limit is significantly reduced for debatching arrays. 項目数がこの上限を超えると、SplitOn 機能は無効になります。
コンカレンシーを有効にすると、実行時間の長いロジック アプリ インスタンスによって、新しいロジック アプリ インスタンスが待機状態になることがあります。 この状態になると、Azure Logic Apps は新しいインスタンスを作成しなくなります。この状態は、同時実行の数が、指定された同時実行の最大数よりも少ない場合でも発生します。
To interrupt this state, cancel the earliest instances that are still running.
On your logic app's menu, select Overview.
In the Runs history section, select the earliest instance that is still running, for example:
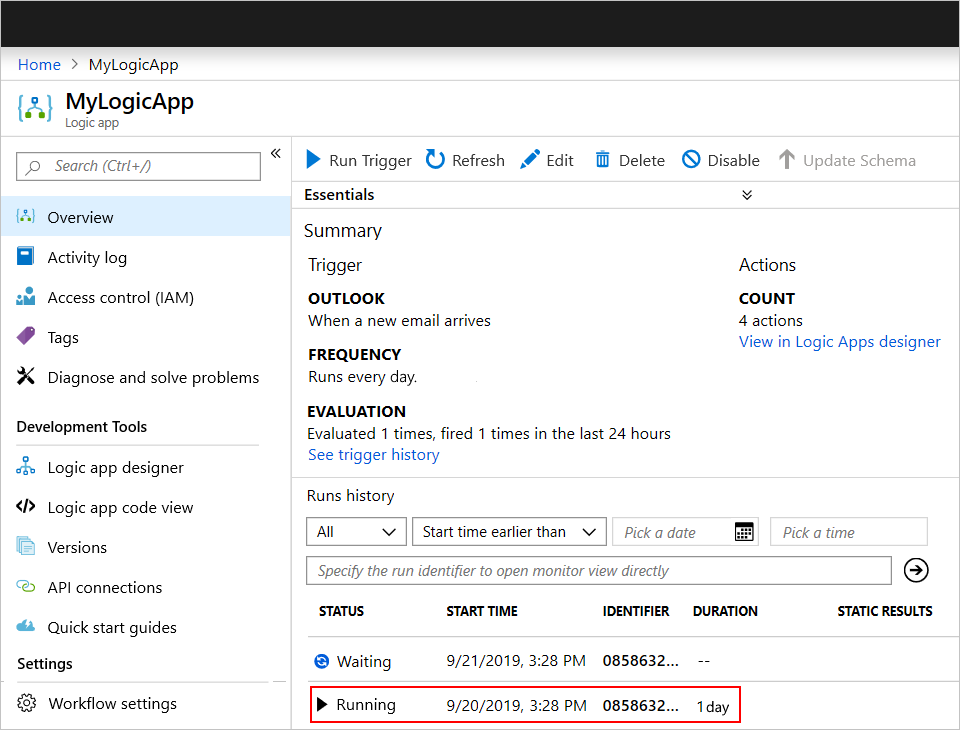
Tip
To view only instances that are still running, open the All list, and select Running.
[ロジック アプリの実行] で、[実行の取り消し] を選択します。

この可能性を回避するには、これらの実行を止めさせるおそれのあるアクションにタイムアウトを追加します。 コード エディターで作業している場合は、「非同期の継続時間を変更する」を参照してください。 それ以外の場合で、デザイナーを使用している場合は、次の手順に従います。
ロジック アプリ ワークフローで、タイムアウトを追加するアクションを選択します。 In the action's upper-right corner, select the ellipses (...) button, and then select Settings.
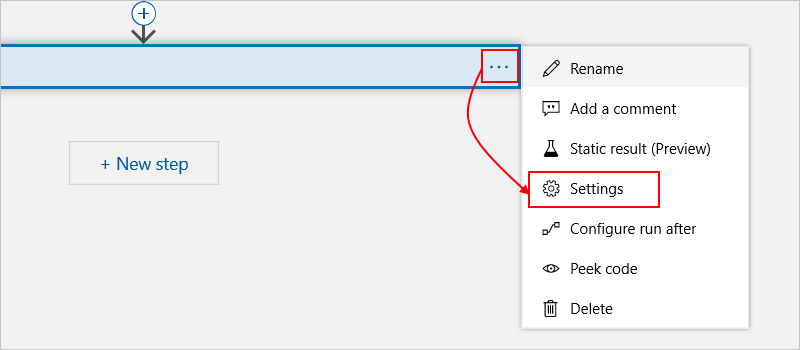
Under Timeout, specify the timeout duration in ISO 8601 format.

ロジック アプリを順番に実行するには、コード ビュー エディターまたはデザイナーを使用して、トリガーのコンカレンシーを
1に設定します。 コード ビュー エディターで、トリガーのoperationOptionsプロパティをSingleInstanceに設定しないようにしてください。 これに従わないと、検証エラーになります。 詳細については、「インスタンスを順次トリガーする」を参照してください。
コード ビューで編集する
基になるトリガーの定義で、runtimeConfiguration.concurrency.runs プロパティを追加し、トリガーのコンカレンシーの制限に基づいて値を設定します。 ワークフローを順番に実行するには、プロパティの値を 1 に設定します。
この例では、同時実行の数を 10 インスタンスに制限しています。
"<trigger-name>": {
   "type": "<trigger-name>",
   "recurrence": {
      "frequency": "<time-unit>",
      "interval": <number-of-time-units>,
   },
   "runtimeConfiguration": {
      "concurrency": {
         "runs": 10
      }
   }
}
詳細については、「実行時の構成設定」を参照してください。
ワークフロー デザイナーで編集する
In the trigger's upper-right corner, select the ellipses (...) button, and then select Settings.
Under Concurrency Control, set Limit to On.
[並列処理の次数] スライダーをドラッグして必要な値に設定します。 To run your logic app sequentially, drag the slider value to 1.
"for each" のコンカレンシーを変更する
既定では、"for each" ループの反復処理はすべて (同時にまたは並行して) 実行されます。 この動作は、前の反復処理の実行が完了する前に各反復処理の実行が開始されることを意味します。 However, the number of concurrently running iterations has a default limit. 同時に実行される反復処理の数がこの制限に達すると、その他の反復処理は実行を待機する必要があります。
既定の制限を変更するには、コード ビュー エディターまたはワークフロー デザイナーのどちらを使用してもかまいません。コンカレンシーの設定をデザイナーから変更すると、基になる "for each" アクション定義の中の runtimeConfiguration.concurrency.repetitions プロパティが追加または更新され、その逆も同様であるからです。 このプロパティは、並列で実行できる反復処理の最大数を制御します。
Note
デザイナーまたはコード ビュー エディターを使用して "for each" アクションの順次実行を設定する場合は、コード ビュー エディターでアクションの operationOptions プロパティを Sequential に設定しないでください。 これに従わないと、検証エラーになります。 詳細については、「"for each" ループを順次実行する」を参照してください。
コード ビューで編集する
基になる "for each" 定義内で、runtimeConfiguration.concurrency.repetitions プロパティを追加または更新します。この値は 1 以上 50 以下の範囲内で指定できます。
同時実行を 10 個の反復処理に制限する例を次に示します。
"For_each" {
   "type": "Foreach",
   "actions": { "<actions-to-run>" },
   "foreach": "<for-each-expression>",
   "runAfter": {},
   "runtimeConfiguration": {
      "concurrency": {
         "repetitions": 10
      }
   }
}
詳細については、「実行時の構成設定」を参照してください。
ワークフロー デザイナーで編集する
In the For each action, from the upper-right corner, select the ellipses (...) button, and then select Settings.
Under Concurrency Control, set Concurrency Control to On.
[並列処理の次数] スライダーをドラッグして必要な値に設定します。 To run your logic app sequentially, drag the slider value to 1.
実行待機の制限を変更する
既定では、ロジック アプリ ワークフロー インスタンスはすべて (同時にまたは並行して) 実行されます。 この動作は、直前のアクティブなワークフロー インスタンスが実行を終了する前に各トリガー インスタンスが起動することを意味します。 However, a default limit exists on the number of concurrently running workflow instances. 同時実行数がこの制限に達すると、その他の新しいワークフロー インスタンスは実行を待機する必要があります。 A default limit also exists on the number of waiting workflow instances. 待機インスタンス数がこの上限に達すると、Azure Logic Apps では新しいワークフロー インスタンスの実行が承認されなくなります。 要求と webhook のトリガーは「429 - 要求が多すぎます」エラーを返し、繰り返しトリガーによるポーリングの試行がスキップされ始めます。
トリガー コンカレンシーの既定の制限を変更し、実行待機の既定の制限を変更することもできます。 ただし、この変更は主に同時実行によるプレッシャーを和らげるためにトリガーをスローダウンするものです。 たとえば、ポーリング トリガーがある場合、進行中の実行によって実行待機キューがいっぱいになると、Azure Logic Apps でポーリングが停止されます。 ワークフローが要求ベースのトリガーを使用し、実行待機キューがいっぱいになると、Azure Logic Apps で 429 エラーが返されます。 一部のシナリオでは、Azure Logic Apps がエラーを発生させることなくトリガーによるポーリングを停止させることができない場合がありますが、そのような実行は実行待機キューに追加することが選択され、呼び出し元の実行が失敗となることはありません。
基になるトリガー定義内で、runtimeConfiguration.concurrency.maximumWaitingRuns プロパティを追加します。この値は 1 以上 100 以下の範囲内で指定できます。
"<trigger-name>": {
   "type": "<trigger-name>",
   "recurrence": {
      "frequency": "<time-unit>",
      "interval": <number-of-time-units>,
   },
   "runtimeConfiguration": {
      "concurrency": {
         "maximumWaitingRuns": 50
      }
   }
}
詳細については、「実行時の構成設定」を参照してください。
インスタンスを順次トリガーする
各ロジック アプリ ワークフロー インスタンスを、必ず直前のインスタンスの実行が終了してから実行するには、トリガーの順次実行を設定します。 コード ビュー エディターまたはワークフロー デザイナーのどちらを使用してもかまいません。コンカレンシーの設定をデザイナーから変更すると、基になるトリガー定義内の runtimeConfiguration.concurrency.runs プロパティの追加または更新も行われ、その逆も同様であるからです。
Note
デザイナーまたはコード ビュー エディターを使用してトリガーの順次実行を設定する場合は、コード ビュー エディターでトリガーの operationOptions プロパティを Sequential に設定しないでください。
これに従わないと、検証エラーになります。
コード ビューで編集する
トリガー定義内で、以下のプロパティのどちらか一方を設定します。両方を設定することはできません。
runtimeConfiguration.concurrency.runs プロパティを 1 に設定します。
"<trigger-name>": {
   "type": "<trigger-name>",
   "recurrence": {
      "frequency": "<time-unit>",
      "interval": <number-of-time-units>,
   },
   "runtimeConfiguration": {
      "concurrency": {
         "runs": 1
      }
   }
}
-or-
operationOptions プロパティを SingleInstance に設定します。
"<trigger-name>": {
   "type": "<trigger-name>",
   "recurrence": {
      "frequency": "<time-unit>",
      "interval": <number-of-time-units>,
   },
   "operationOptions": "SingleInstance"
}
詳細については、「ランタイム構成の設定」および「操作オプション」を参照してください。
ワークフロー デザイナーで編集する
In the trigger's upper-right corner, select the ellipses (...) button, and then select Settings.
Under Concurrency Control, set Limit to On.
[並列処理の次数] スライダーをドラッグして数値
1に設定します。
"for each" ループを順次実行する
"for each" ループを、必ず直前の反復処理の実行が終了してから実行するには、"for each" アクションの順次実行を設定します。 コード ビュー エディターまたはワークフロー デザイナーのどちらを使用してもかまいません。アクションのコンカレンシーの設定をデザイナーから変更すると、基になるアクション定義内の runtimeConfiguration.concurrency.repetitions プロパティも追加または更新され、その逆も同様であるからです。
Note
デザイナーまたはコード ビュー エディターを使用して "for each" アクションの順次実行を設定するときは、コード ビュー エディターでアクションの operationOptions プロパティを Sequential に設定しないでください。
これに従わないと、検証エラーになります。
コード ビューで編集する
アクション定義内で、以下のプロパティのどちらか一方を設定します。両方を設定することはできません。
runtimeConfiguration.concurrency.repetitions プロパティを 1 に設定します。
"For_each" {
   "type": "Foreach",
   "actions": { "<actions-to-run>" },
   "foreach": "<for-each-expression>",
   "runAfter": {},
   "runtimeConfiguration": {
      "concurrency": {
         "repetitions": 1
      }
   }
}
-or-
operationOptions プロパティを Sequential に設定します。
"For_each" {
   "type": "Foreach",
   "actions": { "<actions-to-run>" },
   "foreach": "<for-each-expression>",
   "runAfter": {},
   "operationOptions": "Sequential"
}
詳細については、「ランタイム構成の設定」および「操作オプション」を参照してください。
ワークフロー デザイナーで編集する
In the For each action's upper-right corner, select the ellipses (...) button, and then select Settings.
Under Concurrency Control, set Concurrency Control to On.
[並列処理の次数] スライダーをドラッグして数値
1に設定します。
同期操作パターンでアクションを実行する
既定では、Azure Logic Apps の HTTP アクションと APIConnection アクションは、標準的な非同期操作パターンに従いますが、Response アクションは同期操作パターンに従います。 The asynchronous pattern specifies that after an action calls or sends a request to the specified endpoint, service, system, or API, the receiver immediately returns a "202 ACCEPTED" response. このコードは、受信側が要求を受け入れたが、処理が完了していないことを確認します。 The response can include a location header that specifies the URL and a refresh ID that the caller can use to continually poll or check the status for the asynchronous request until the receiver stops processing and returns a "200 OK" success response or other non-202 response. 詳細については、「マイクロサービスの非同期統合によるマイクロサービスの自律性の強制」を参照してください。
In the Logic App Designer, the HTTP action, APIConnection actions, and Response action have the Asynchronous Pattern setting. この設定を有効にした場合、呼び出し元は処理が終了するのを待たず、次のアクションに進むことができますが、処理が停止するまで状態のチェックは続行されます。 無効にした場合、この設定は次のアクションに進む前に、呼び出し元が処理の終了を待機することを指定します。 この設定を見つけるには、次の手順を実行します。
On the HTTP action's title bar, select the ellipses (...) button, which opens the action's settings.
Find the Asynchronous Pattern setting.
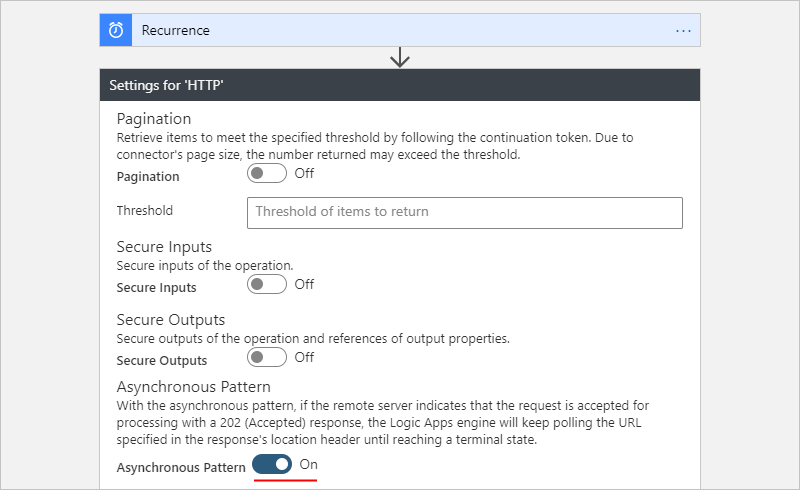
アクションの基になる JavaScript Object Notation (JSON) 定義では、HTTP アクションと APIConnection アクションは暗黙的に非同期操作パターンに従います。
シナリオによっては、代わりに同期パターンに従うアクションが必要になることがあります。 たとえば、HTTP アクションを使用する際に、以下を行いたい場合があるとします。
このような場合は、以下のオプションを使用してアクションを同期的に実行することができます。
使用可能な場合は、そのアクションのポーリングバージョンを Webhook バージョンに置き換えます。
次のいずれかのオプションを使用して、アクションの非同期動作を無効にします。
ロジック アプリ デザイナーで、非同期パターン設定をオフにします。
アクションの基になる JSON 定義で、
"DisableAsyncPattern"操作オプションを追加します。
Turn off Asynchronous Pattern setting
In the Logic App Designer, on the action's title bar, select the ellipses (...) button, which opens the action's settings.
Find the Asynchronous Pattern setting, turn the setting to Off if enabled, and select Done.
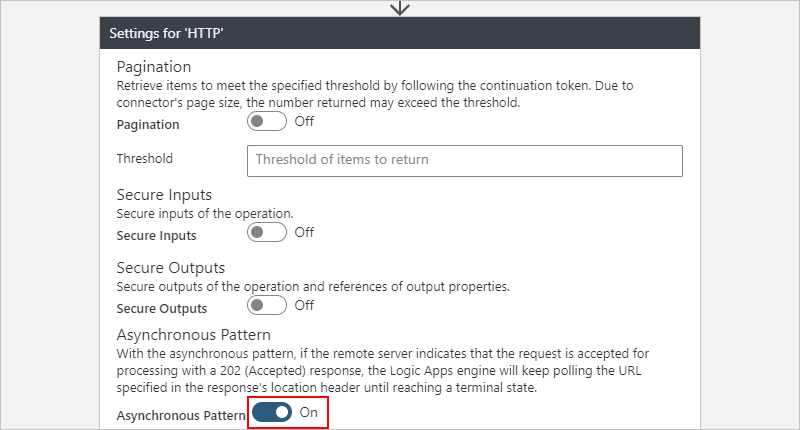
アクションの JSON 定義で非同期パターンを無効にする
In the action's underlying JSON definition, add and set the "operationOptions" property to "DisableAsyncPattern" under the action's "inputs" section, for example:
"<some-long-running-action>": {
   "type": "Http",
   "inputs": { "<action-inputs>" },
   "operationOptions": "DisableAsyncPattern",
   "runAfter": {}
}
トリガーとアクションを認証する
HTTP および HTTPS エンドポイントでは、さまざまな種類の認証がサポートされています。 これらのエンドポイントにアクセスする発信呼び出しまたは要求を行うために使用するトリガーまたはアクションに基づいて、さまざまな認証の種類から選択できます。 詳細については、「送信呼び出しに認証を追加する」を参照してください。
Next steps
- ワークフロー定義言語についてさらに学習します。