Note
Access to this page requires authorization. You can try signing in or changing directories.
Access to this page requires authorization. You can try changing directories.
This article shows you how to create and configure an agent in Microsoft 365 Copilot that connects to your Power Pages MCP Server, and how end users can interact with your Power Pages data through conversational AI.
After completing these steps, users in your organization can perform CRUD operations on Power Pages data through natural language conversations in Microsoft 365 Copilot.
Prerequisites
Before you begin, ensure you have:
- Completed the Configure redirect URIs for MCP clients setup
- The third-party app registration details (Client ID, Client Secret, Authorization URL, Token URL, and Scopes)
- Microsoft 365 Copilot license for end users who use the agent
Create and configure agent in Microsoft Copilot Studio
Create an agent
Create a new agent in Microsoft Copilot Studio that serves as the interface.
- Sign in to Microsoft Copilot Studio.
- In the left navigation pane, select Create, and then select New agent.
This will create a new agent that we will publish later to Microsoft 365 Copilot.
Add MCP tool to agent
Configure the Model Context Protocol tool to connect your agent to the Power Pages MCP Server.
- In the agent configuration, select Tools, and then select Add a tool.
- In the search bar, enter
Model Context Protocol, select Model Context Protocol from the results, and then select New tool.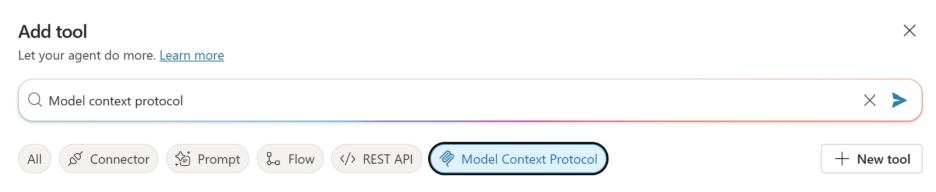
- Select Model Context Protocol again and enter the MCP server details:
- Server Name: Enter a descriptive name for your server
- Server Description: Enter a description of what the server provides
- Server URL: Enter your Power Pages MCP Server endpoint URL
Configure OAuth authentication
Set up OAuth 2.0 authentication to enable secure connections between the agent and your MCP Server.
- Under Authentication, select OAuth 2.0, and then select Manual as the type.
- Enter the OAuth configuration details from your third-party app registration:
- Client ID: Enter the application (client) ID
- Client Secret: Enter the client secret value
- Authorization URL: Enter the authorization endpoint
- Token URL Template: Enter the token endpoint
- Scopes: Enter the required scopes (MCP scope URI such as
api://00000000-0000-0000-0000-000000000000/mcp, openid, profile)
- In the Refresh URL field, enter a period (
.). - Select Create.
Add redirect URI to app registration
Copy the redirect URL from Copilot Studio and add it to your third-party app registration.
- After creating the tool, copy the Redirect URL from the success message, and then select Next.
- Go to the Microsoft Entra admin center, select App registrations, and find your third-party app.
- Select Authentication, select Add URI, paste the redirect URL, and then select Save.
Create connection for agent
Establish a connection that allows the agent to authenticate with your MCP Server.
- Return to Microsoft Copilot Studio and select Next.
- Select the Connection dropdown and select Create new connection.
- Select Create. A sign-in window appears.
- Enter your maker credentials, and then select Sign in.
- After signing in, select Add and configure.
Verify MCP server in the Tools section
Check your MCP server details in the Tools section of the agent you created.

To review more details, select the MCP server as shown in the following image:

Publish agent
Make the agent available to users by publishing it and configuring channels.
- On the agent configuration screen, select Publish.
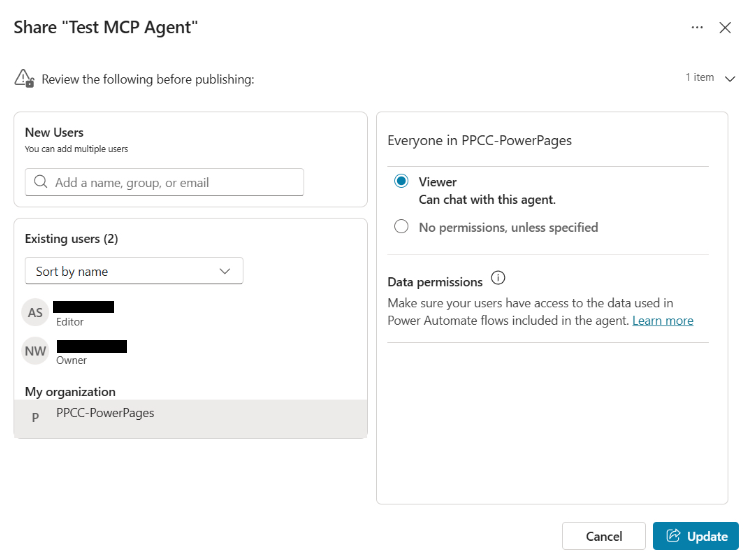
- Select the menu button (three dots) at the top right of the page, and then select Share.
- Select the users or groups that should have access to this agent, assign the Viewer role so they can chat with the agent, and then select Update.
Tip
Before making an agent available to users, provide a clear description and appropriate branding to help users understand the agent's purpose.
Add channels
Configure the agent to be available in Microsoft 365 Copilot.
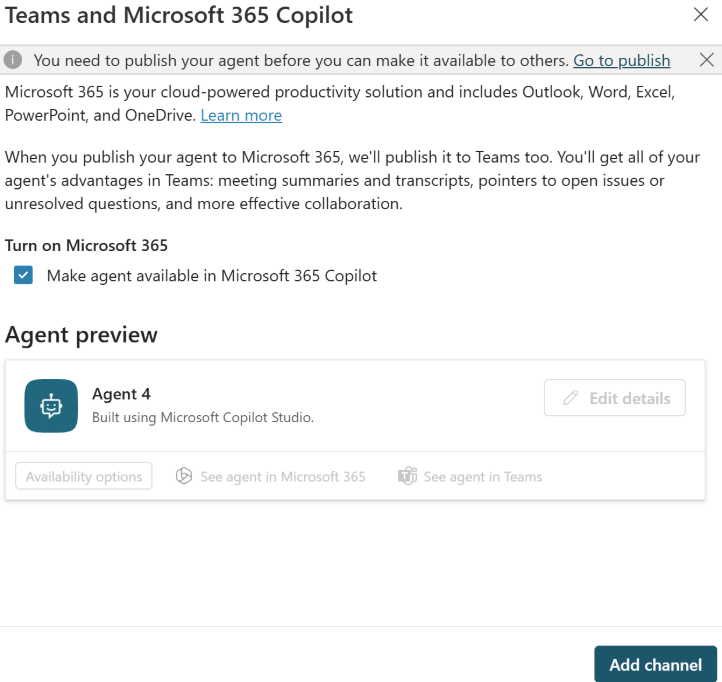
Select Channels and select Teams and Microsoft 365 Copilot.
In the pane that appears, select Add channel.
After the channel is added, you see links to access the agent in Microsoft 365 Copilot.
Note
For detailed guidance on creating channels and configuring permissions, see Connect and configure an agent for Teams and Microsoft 365.
Connect via Microsoft 365 Copilot
After you publish the agent, end users can add it to Microsoft 365 Copilot and interact with Power Pages data through natural language.
Prerequisites
- Membership in the organization or group that has access to the agent
- A valid Microsoft 365 Copilot license
Add agent in Microsoft 365 Copilot and perform operations
- Sign in to Microsoft 365 Copilot with your credentials.
- Add the agent from the left pane. The agent appears in the left pane and the chat interface opens on the right.
- Enter a query related to your Power Pages data. For example: "Find me the account details".
Note
The current release supports CRUD (Create, Read, Update, Delete) operations through the MCP interface.
Establish connection (first-time users)
First-time users need to establish a connection through the Connection Manager.
- When prompted, select the Open Connection Manager link.
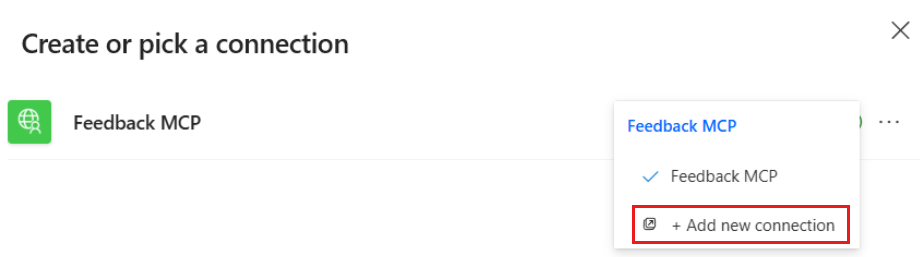
- In the Connection Manager window, select Connect.
- Select the menu button (three dots) and select Add new connection.
- Enter your credentials and select Sign in. After signing in, select Submit.
- After the connection is established, a confirmation message appears.
- Return to the chat window and select Retry to resubmit your query.
- After a few moments, the agent returns the response to your query.