Note
Access to this page requires authorization. You can try signing in or changing directories.
Access to this page requires authorization. You can try changing directories.
This article shows you how to set up Microsoft Entra ID or Microsoft Entra External ID as an identity provider for your Power Pages site and configure it to expose the MCP scope. This is the first step for implementing MCP server in Power Pages.
You can choose between two options:
- Microsoft Entra ID: Standard identity provider with simpler configuration
- Microsoft Entra External ID: External customer identity and access management (CIAM) solution
Prerequisites
Before you begin, ensure you have:
- A functional Power Pages site
- Maker or admin access to the Power Pages environment
- Access to an MCP protocol-compatible client (VS Code, Microsoft Copilot Studio)
- Access to the Microsoft Entra admin center with permissions to create app registrations
Configure identity provider
In this section, you configure delegated access that MCP clients need to authenticate by using the Power Pages MCP server.
If you want to use Microsoft Entra ID, follow the steps in the following sections to add a custom scope, create a new app registration, and assign delegated permissions.
Expose a custom scope
- Sign in to the Microsoft Entra admin center, and go to App Registration.
- Copy the application ID of the portal from Power Pages design studio Site Details and paste it in the search bar. Select the application.
- On the overview page of the application, expand Manage, select Expose an API, and then select Add a scope.
- On the Add a Scope pane, configure the following settings:
- Scope name: Enter an appropriate scope name.
- Who can consent: Select the option that works best for your organization.
- Admin consent display name: Enter an appropriate display name.
- Admin consent description: Enter an appropriate description.
- Select Add scope to complete.
Create a new app registration
- Go to App Registration, and then select New Registration.
- Enter a friendly name for your application (for example, MCP-Demo-Testing), and then select Register.
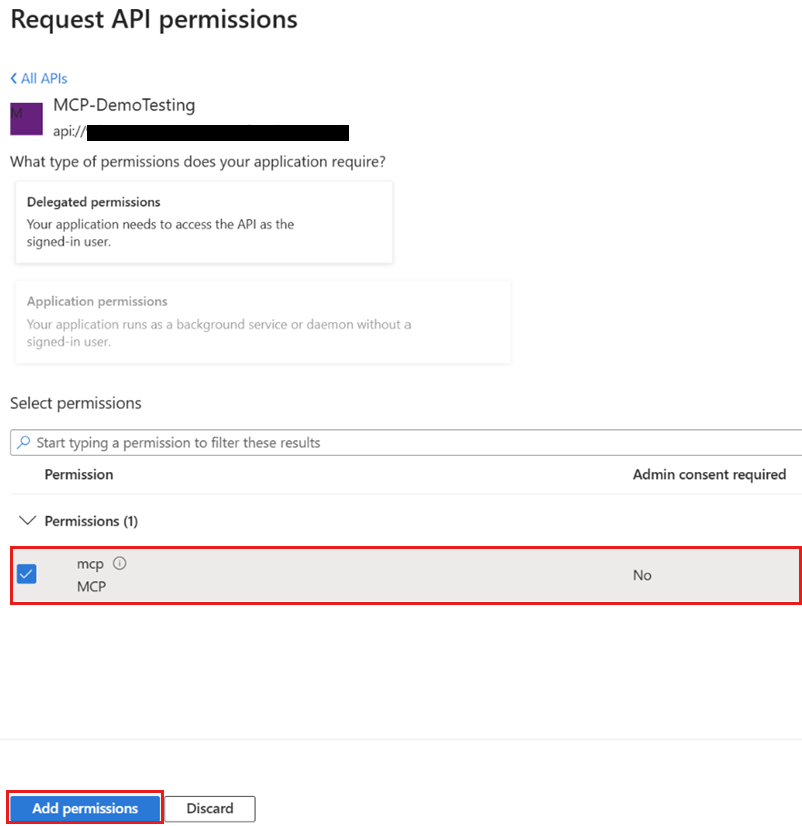
Assign delegated permissions to app registration
- Select API permissions, and then select Add a permission.
- On the Request API permissions tab, select APIs my organization uses, search for the name of the Microsoft Entra ID app that you created earlier, and select it.

- Select the check box next to MCP and select Add permissions.
- From the left navigation, select API permissions again, and then select Add a permission.
- Select Microsoft APIs and then select Microsoft Graph.
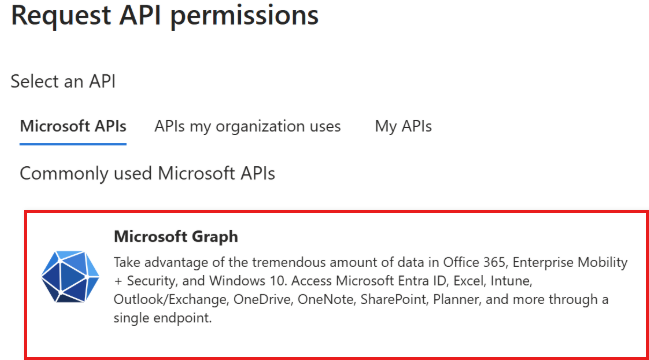
- Select Delegated permissions, select the check boxes next to openid and profile, and then select Add permissions.

- Select Grant admin consent for [your tenant], and then select Yes to finish the permissions setup.

Next steps
After you create and configure the third party app registration, configure the site settings for MCP server.