Note
Access to this page requires authorization. You can try signing in or changing directories.
Access to this page requires authorization. You can try changing directories.
Use Plan designer to create user roles, data tables, and apps that address your business needs.
This article uses a sample scenario to show how Plan designer works by building a solution for managing paid time off (PTO) requests for employees and managers.
Access Plan designer from the Power Apps home page. Sign in to Power Apps.
Enter your prompt in the text box, like the example. Add context such as process diagrams, data models, or screenshots of legacy apps. When you're done, select Enter.
Employees need to log vacation days, and managers need to approve them.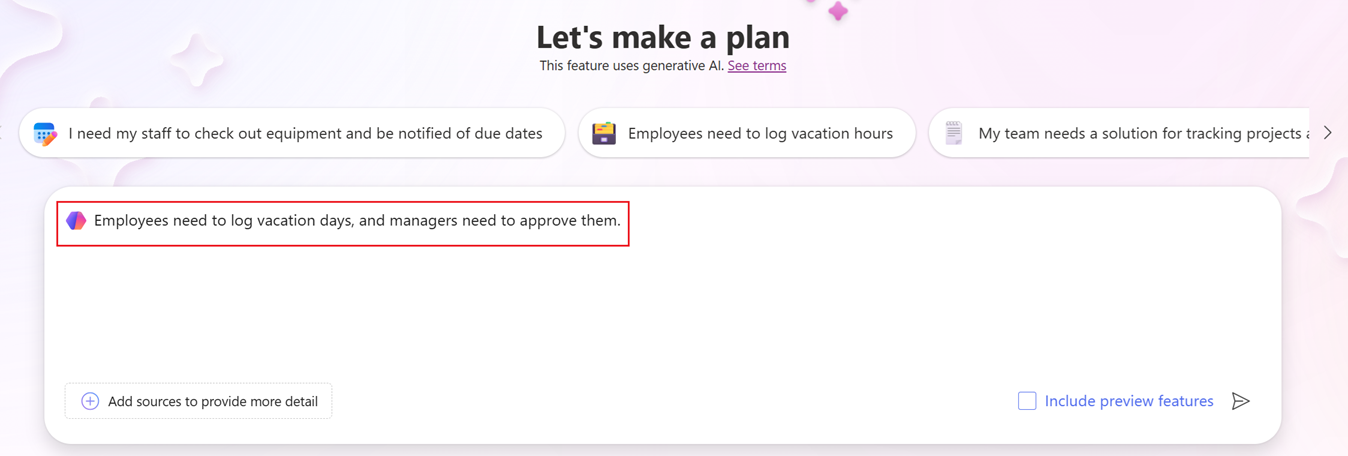
Copilot opens Plan designer and analyzes your business scenario based on the description.
Plan agents and copresence
In Plan designer, view the presence status of collaborators including plan agents. These AI assistants analyze your business problem and help generate a plan.
- The Requirement Agent examines the business problem and uses AI to generate user requirements. This step is first step in the plan.
- The Data Agent suggests a set of tables for storing business information, complete with recommended columns, data types, and relationships.
- The Solution Agent evaluates the needs, processes, and data to create a solution that includes technologies such as apps, flows, and AI agents to address your business problem.
As the plan builds, review and edit the outputs generated by the agents.

Copresence
Plan designer lets multiple authors use the same plan at the same time. The first author who enters the plan gets editing rights, and any author who joins later can only view the plan in read-only mode. You see other authors in the command bar, along with the agents in the plan. If you have read-only permissions, you can get editing rights after the author with editing permission exits the plan or after a period of inactivity. Plan designer supports up to 100 authors for copresence, but only one author can edit at a time. Multi-author coauthoring isn't supported.
Important
Multiple users can't edit the plan at the same time.
Generate user requirements
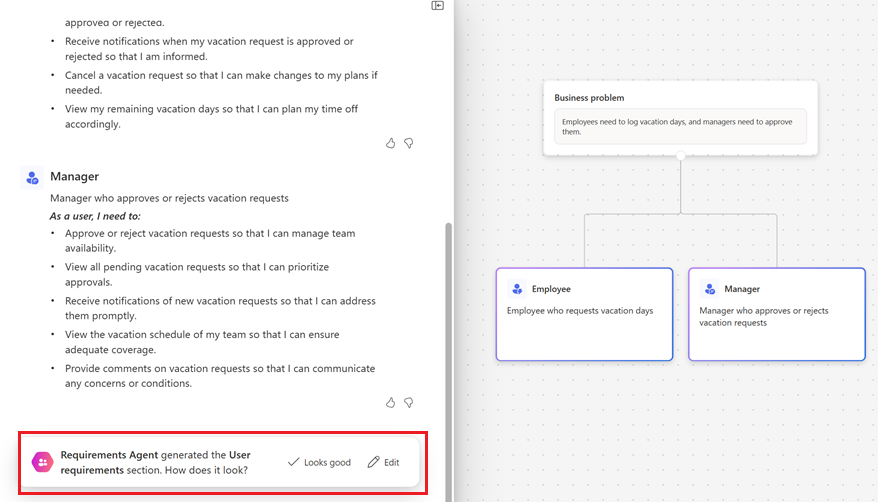
When Plan designer starts, the Requirements Agent identifies user needs based on your description.
In this scenario, two user roles are generated: the employee and the manager. Each user role includes a description and user needs. The user roles and needs appear in a bullet list and on the right side is a visual diagram.
Review the user roles and needs. Then, choose one of the following options:
Select Looks good to move to the next step and generate a data model.
Select Edit to make edits inline or add new user roles or needs.
Making edits
Inline editing provides these options:
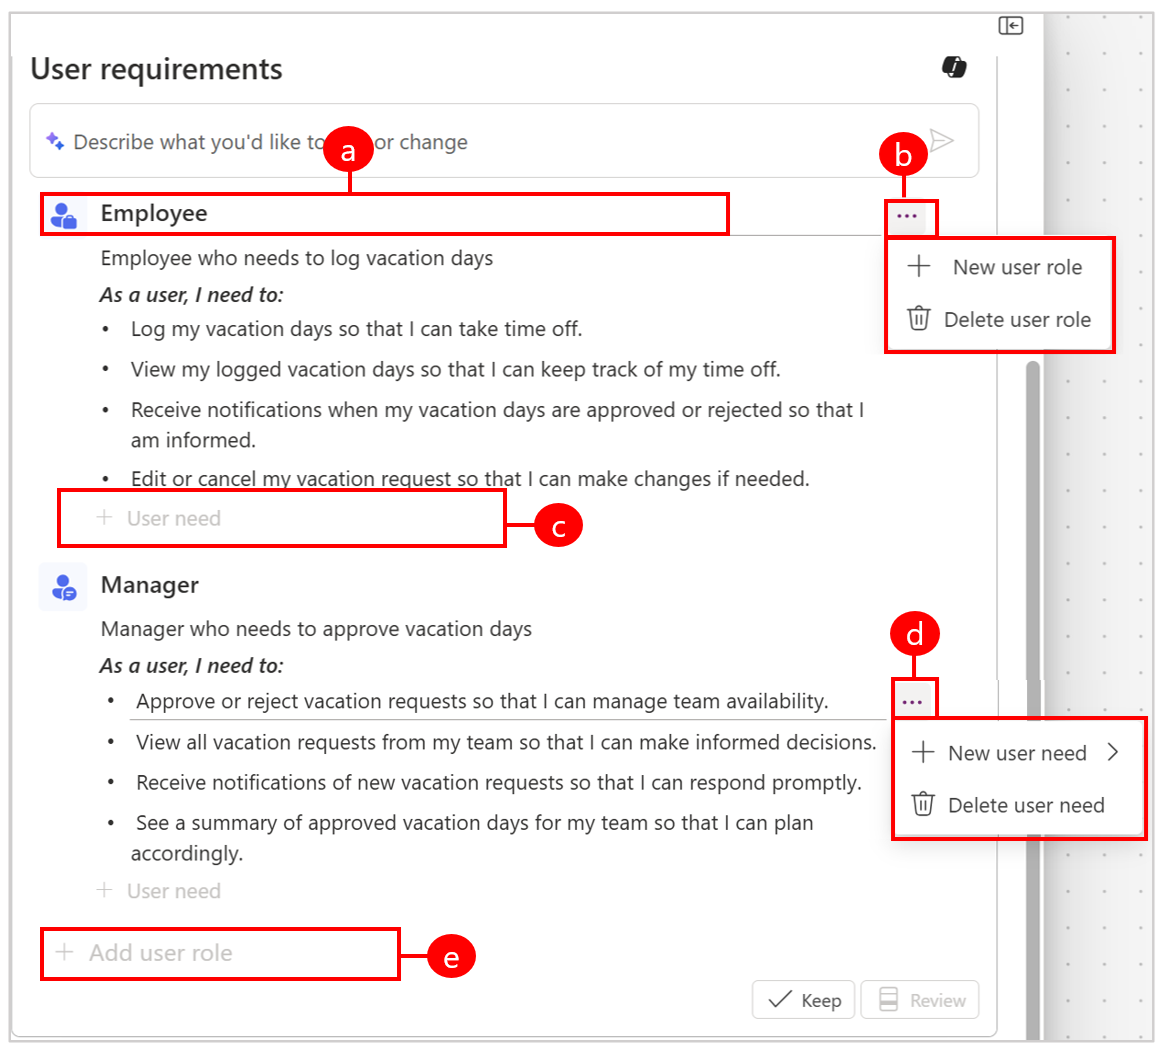
Legend:
a. Select and modify a user role. b. Add a new user role or delete the selected user role.
c. Add a new user need.
d. Add a new user need either at top of selected user need or after it, or delete the selected user need.
e. Add a new user role.Alternatively, use Copilot to provide feedback on the generated user needs.
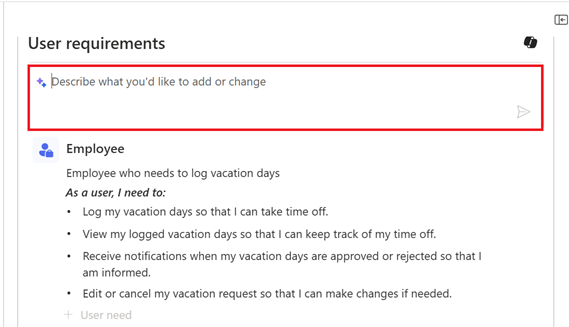
To make changes, provide a brief description of what you want to modify. Here are examples of what to ask Copilot to do:
- Add a user role for HR admin to monitor PTO across teams to manage payroll.
- Add a user need for employees to view PTO blackout dates.
- Remove the user need for managers for viewing vacation history of team members.
Select Keep or Review to finalize your edits.
When you're done, select Looks good to proceed to the next step and generate data tables.

Generate data model
Next, the Data Agent suggests tables to store your business data.
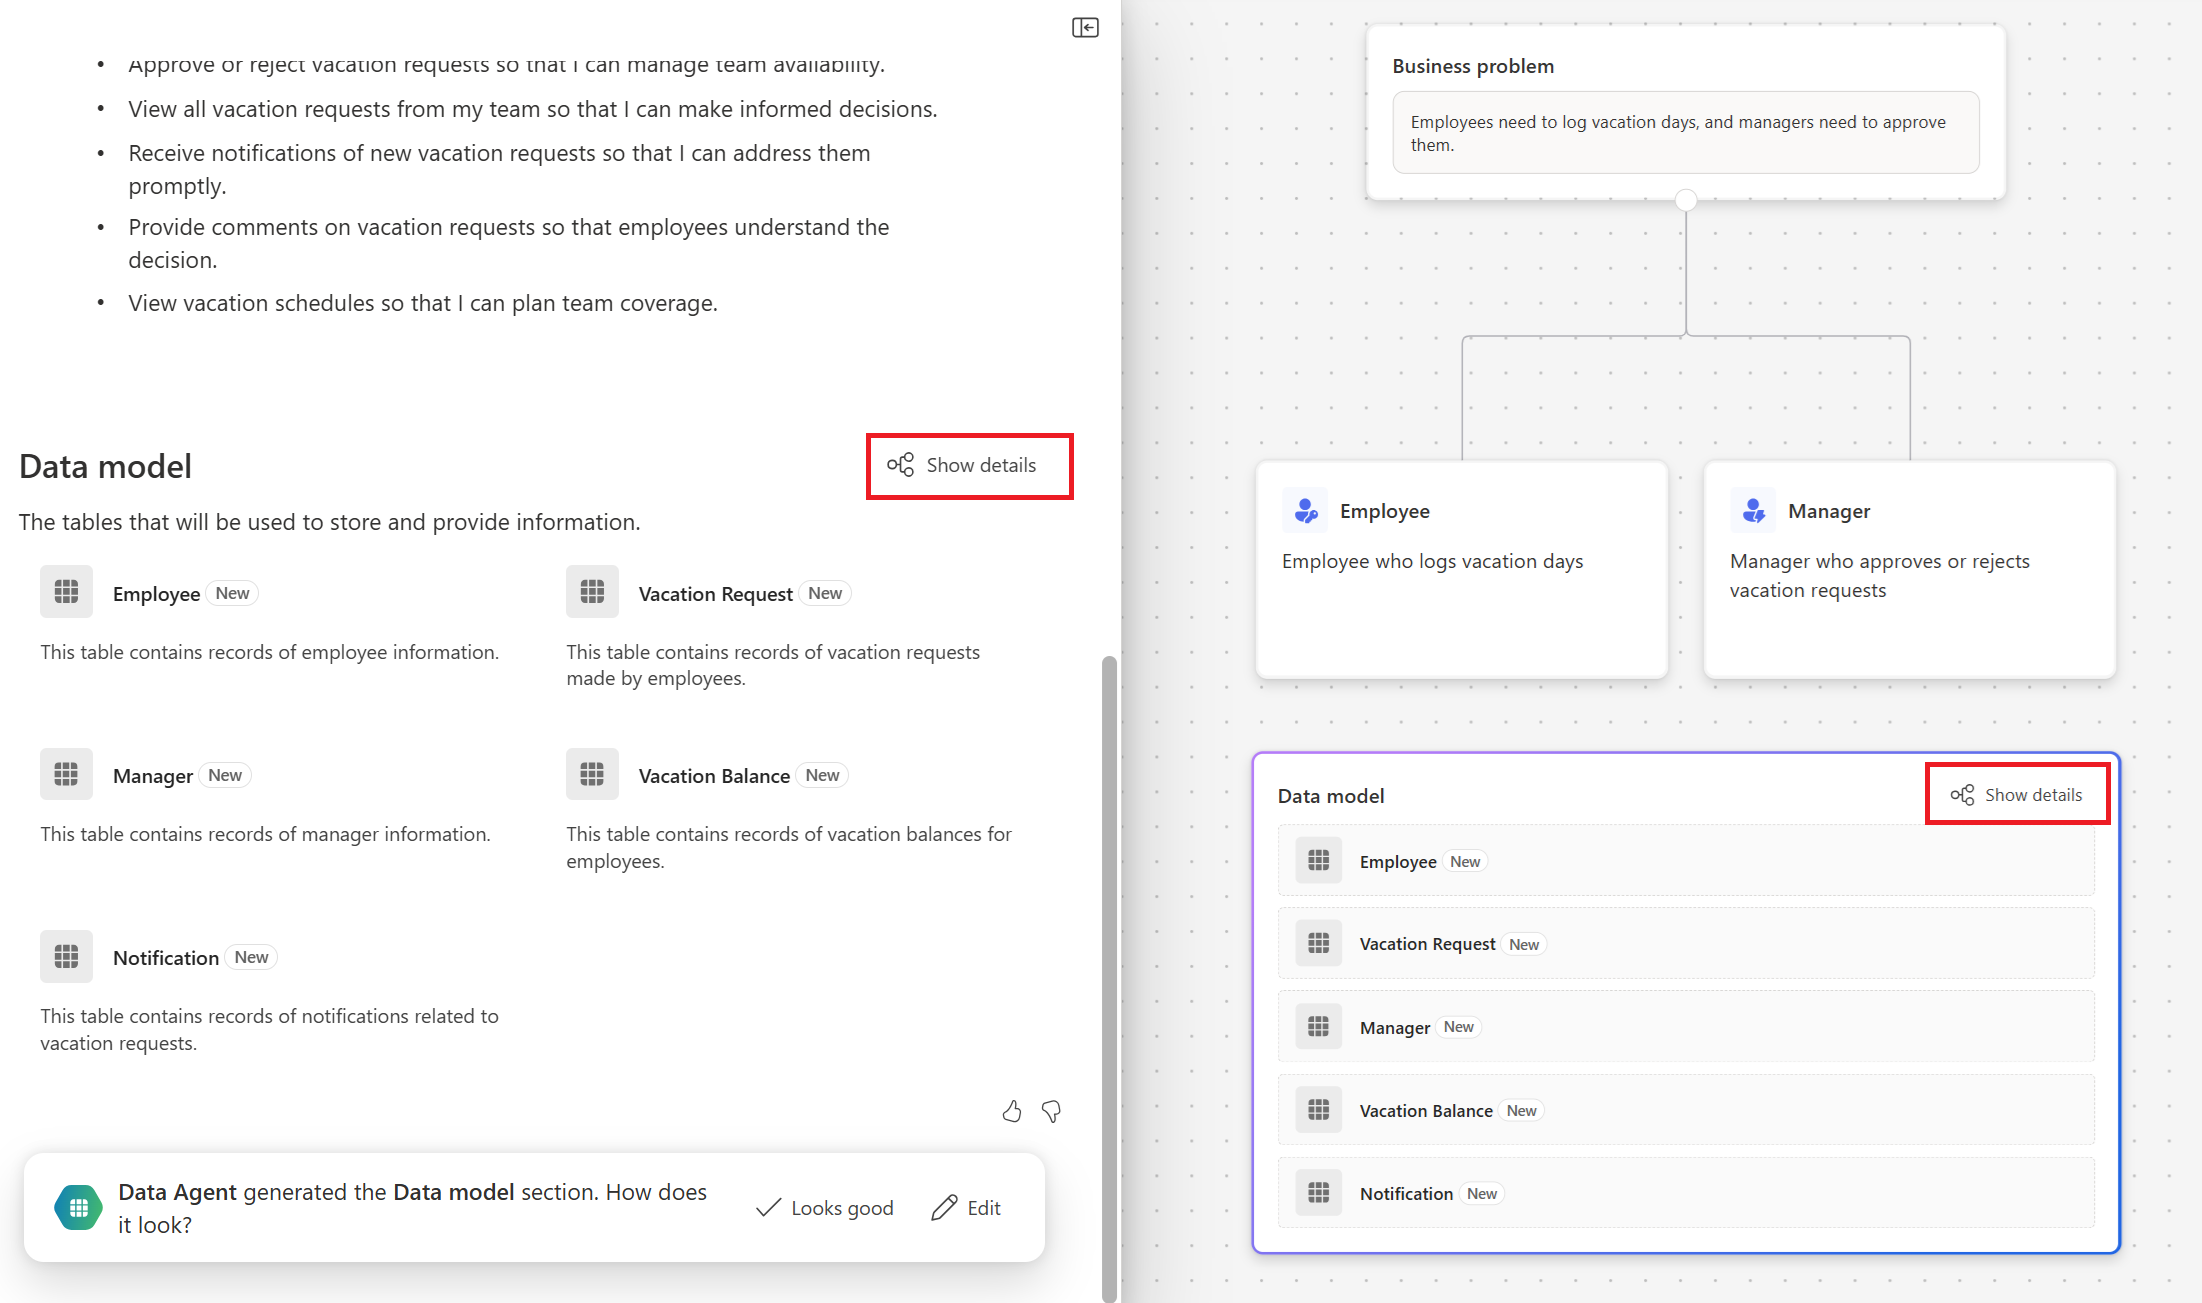
Suggested data tables appear in the Data model section of the plan.
Select Edit and use Copilot to describe what you want to change or add.
Select Show details to view the data in a diagram, and edit it.
If you select, Show details it opens the data workspace. Use the data workspace to create tables, set up relationships, and view a data diagram. For more information, see Create and edit tables using Power Apps.
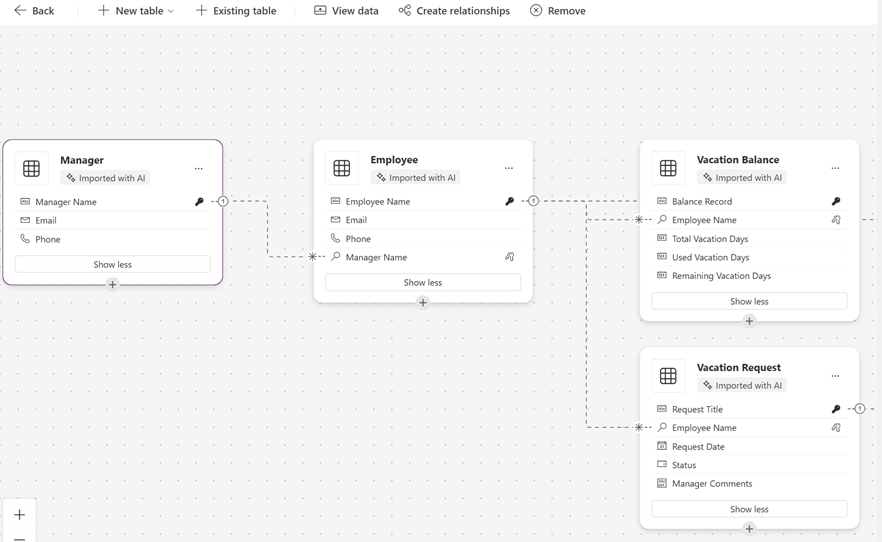
When you're done, select Back.
When you're ready to generate the technology proposal, select Looks good to continue.

Generate technology proposal
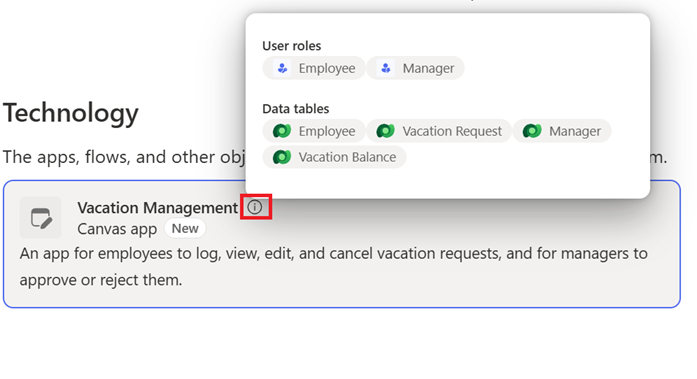
The Solution Agent analyzes the plan and proposes technologies tailored to solve your business problem. In this scenario, a canvas app, a model-driven app, and a Power Automate flow are created.

To view details of the proposed technologies, hover over the information icon. The pop-up info card shows the user roles being met and the data tables being used by the proposed technology.
Select Looks good to accept the proposed technologies, or select Edit to use Copilot and describe what you want to change.
Proposed technologies
Plan designer suggests technologies from the following list:
- Apps like canvas apps or model-driven apps
- Power Pages websites
- Power Automate flows
- Power BI Report
- Copilot Studio Agents
Save tables
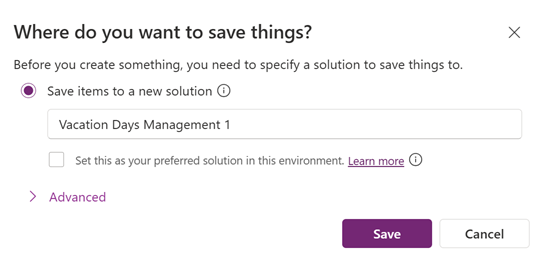
To create objects such as apps, flows, sites, and agents, you need to save your plan and tables.
Select Save tables.

Enter a solution name.
Choose a publisher or select an existing solution to contain the items generated from the plan, and then select Save.
The plan is stored in a solution. This action enables the Objects view in Plan designer, so you can switch between the plan and the solution view without leaving Plan designer. Learn more about solutions in Solution view.
Note
- The solution name must only contain letters, numbers, and underscores. For more information, see Create a solution.
- Anyone with the required plan privileges can access your plan.
You’re now ready to build your solutions.

Export your plan to a PDF
The export to PDF feature lets you share plans with stakeholders. It includes all content from the document side of the plan, but not the diagram side. Use this feature to share user requirements, data models, and proposed data tables with leaders who don't have access to Power Apps.
To export a plan to PDF, select Export this plan as a PDF in the top right corner.

View and edit plans
Use the Plans menu in the left navigation pane to access and edit your plans.
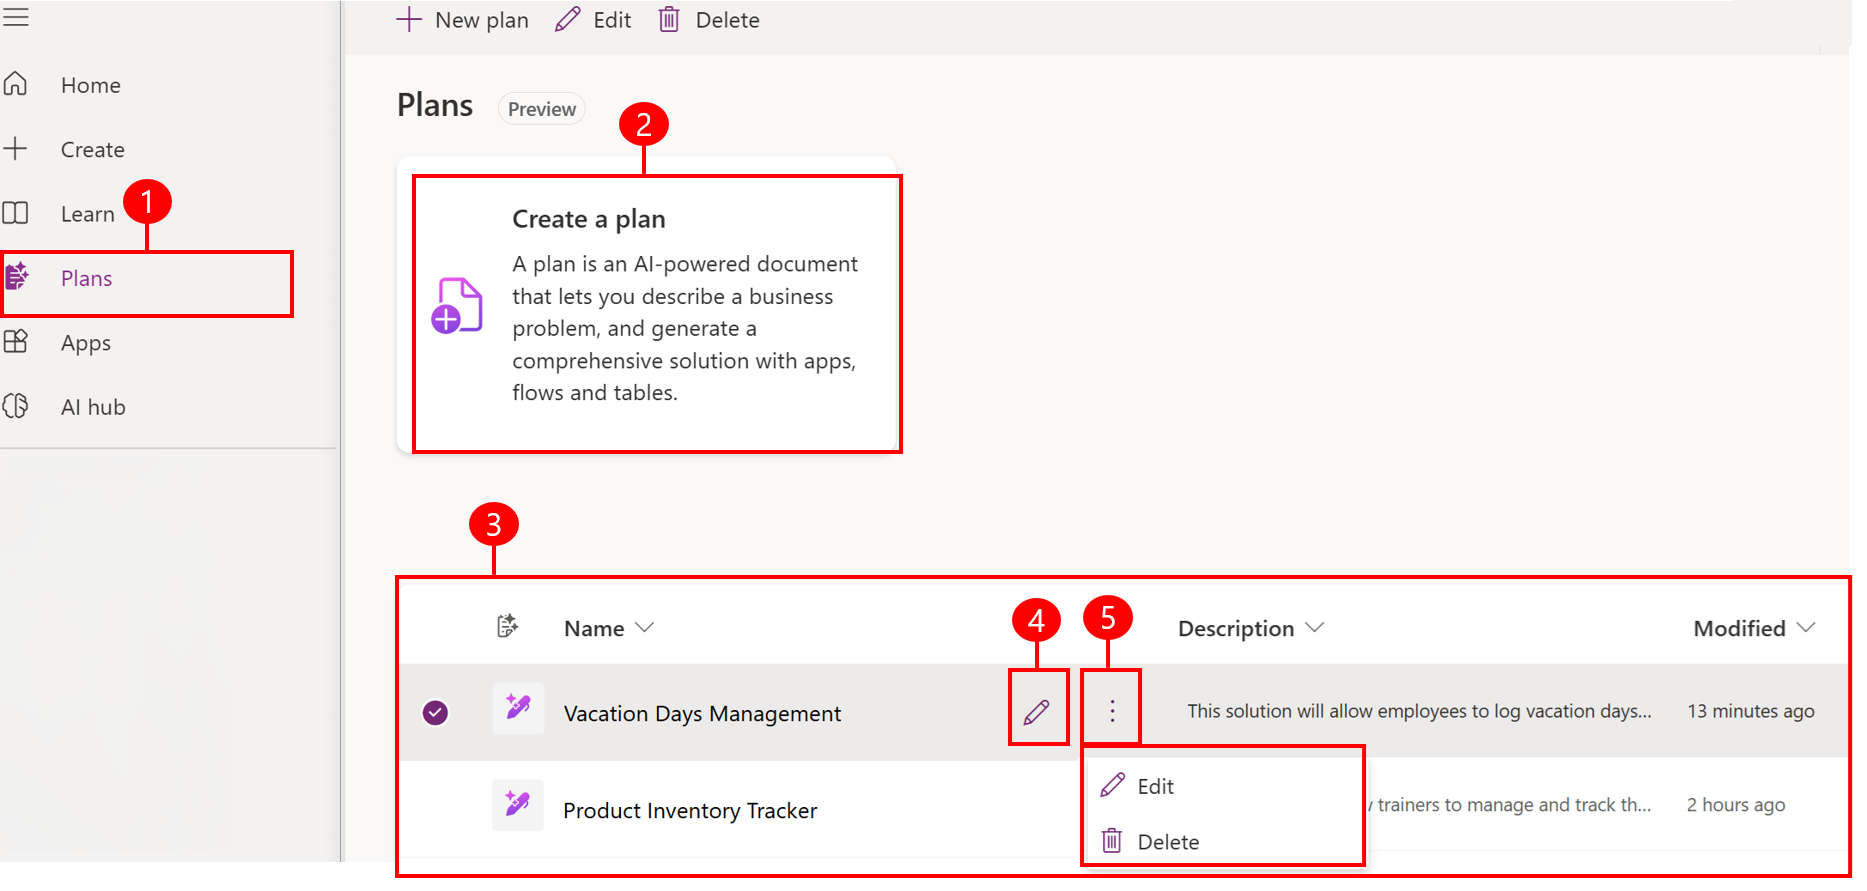
Legend:
- Plans: Access your plans.
- Create a plan: Create a new plan.
- Your plans: View your plans.
- Edit: Edit the selected plan.
- Edit or Delete: Edit or delete the selected plan.