Note
Access to this page requires authorization. You can try signing in or changing directories.
Access to this page requires authorization. You can try changing directories.
Azure Managed Instance for Apache Cassandra is a fully managed service for pure open-source Apache Cassandra clusters. The service also allows configurations to be overridden, depending on the specific needs of each workload, for maximum flexibility and control.
This quickstart demonstrates how to use the Azure portal to create an Azure Managed Instance for Apache Cassandra cluster.
Prerequisite
If you don't have an Azure subscription, create a free account before you begin.
Create a managed instance cluster
Sign in to the Azure portal.
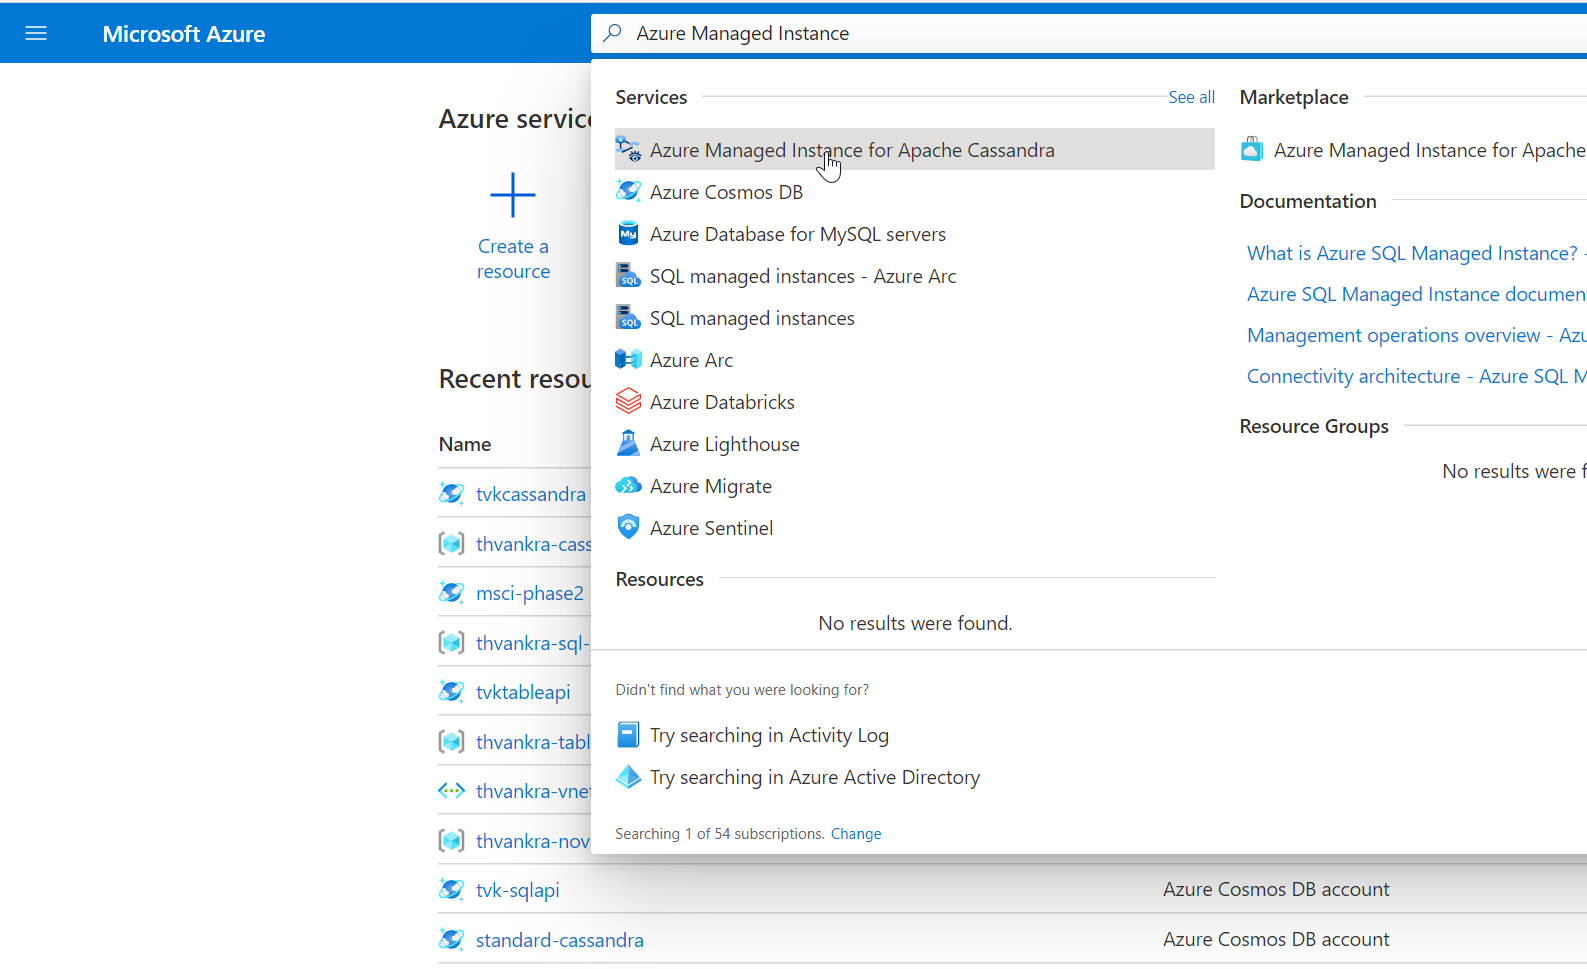
In the search bar, search for Managed Instance for Apache Cassandra and select the result.
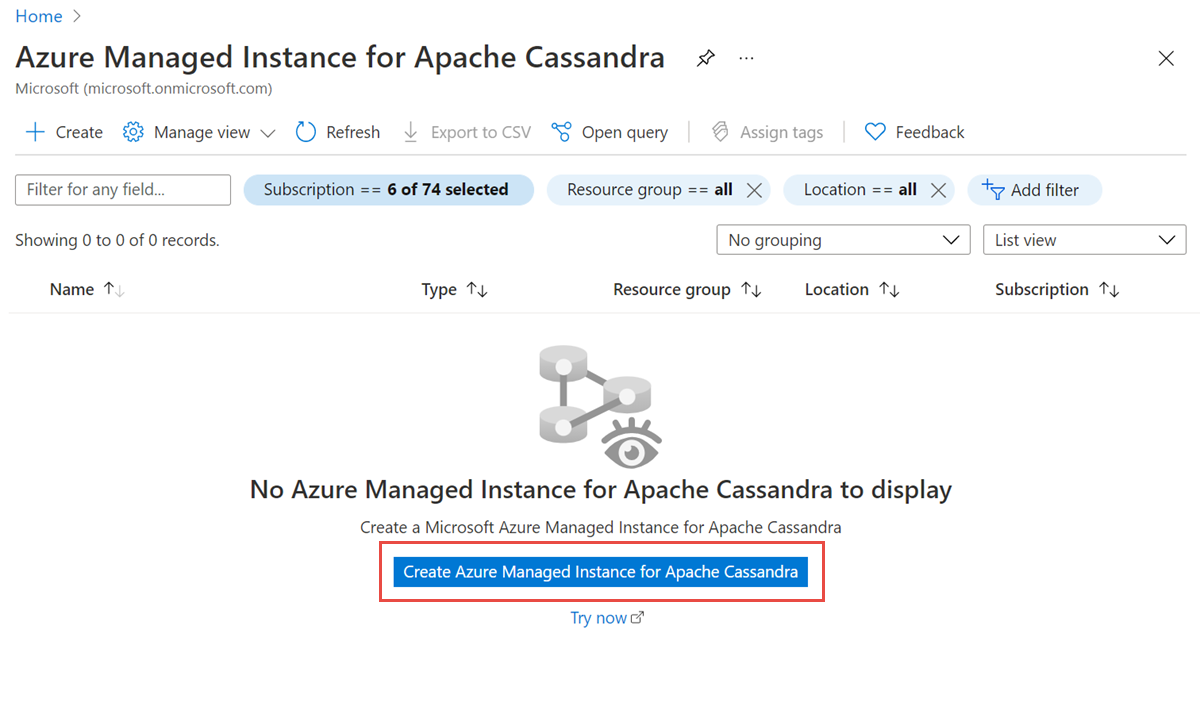
Select Create Managed Instance for Apache Cassandra cluster.
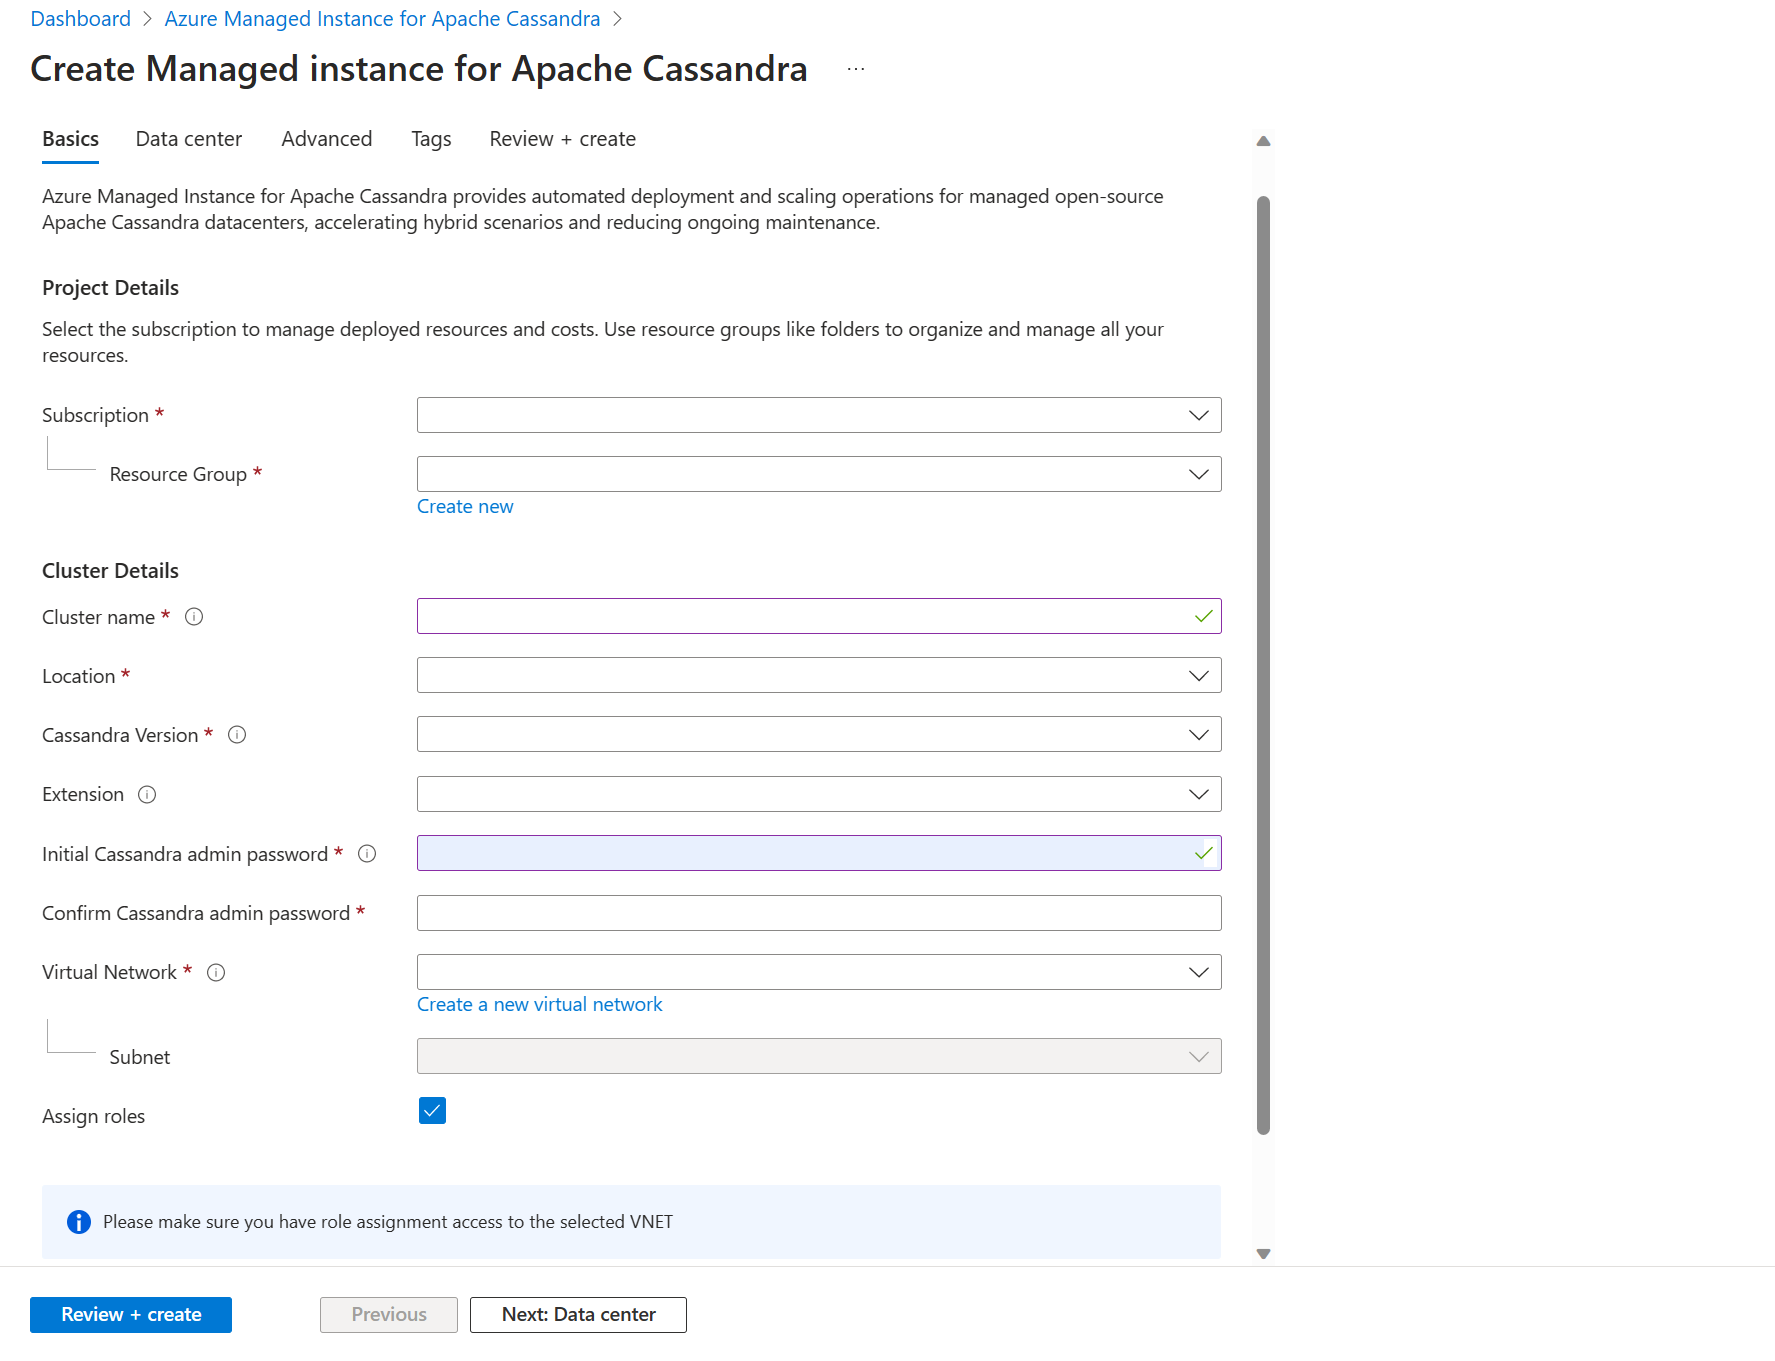
On the Create Managed Instance for Apache Cassandra pane, enter the following information:
Subscription: From the dropdown list, select your Azure subscription.
Resource group: Specify whether you want to create a new resource group or use an existing one. A resource group is a container that holds related resources for an Azure solution.
Cluster name: Enter a name for your cluster.
Location: Select the location to deploy the cluster.
Cassandra version: Select the version of Apache Cassandra to deploy.
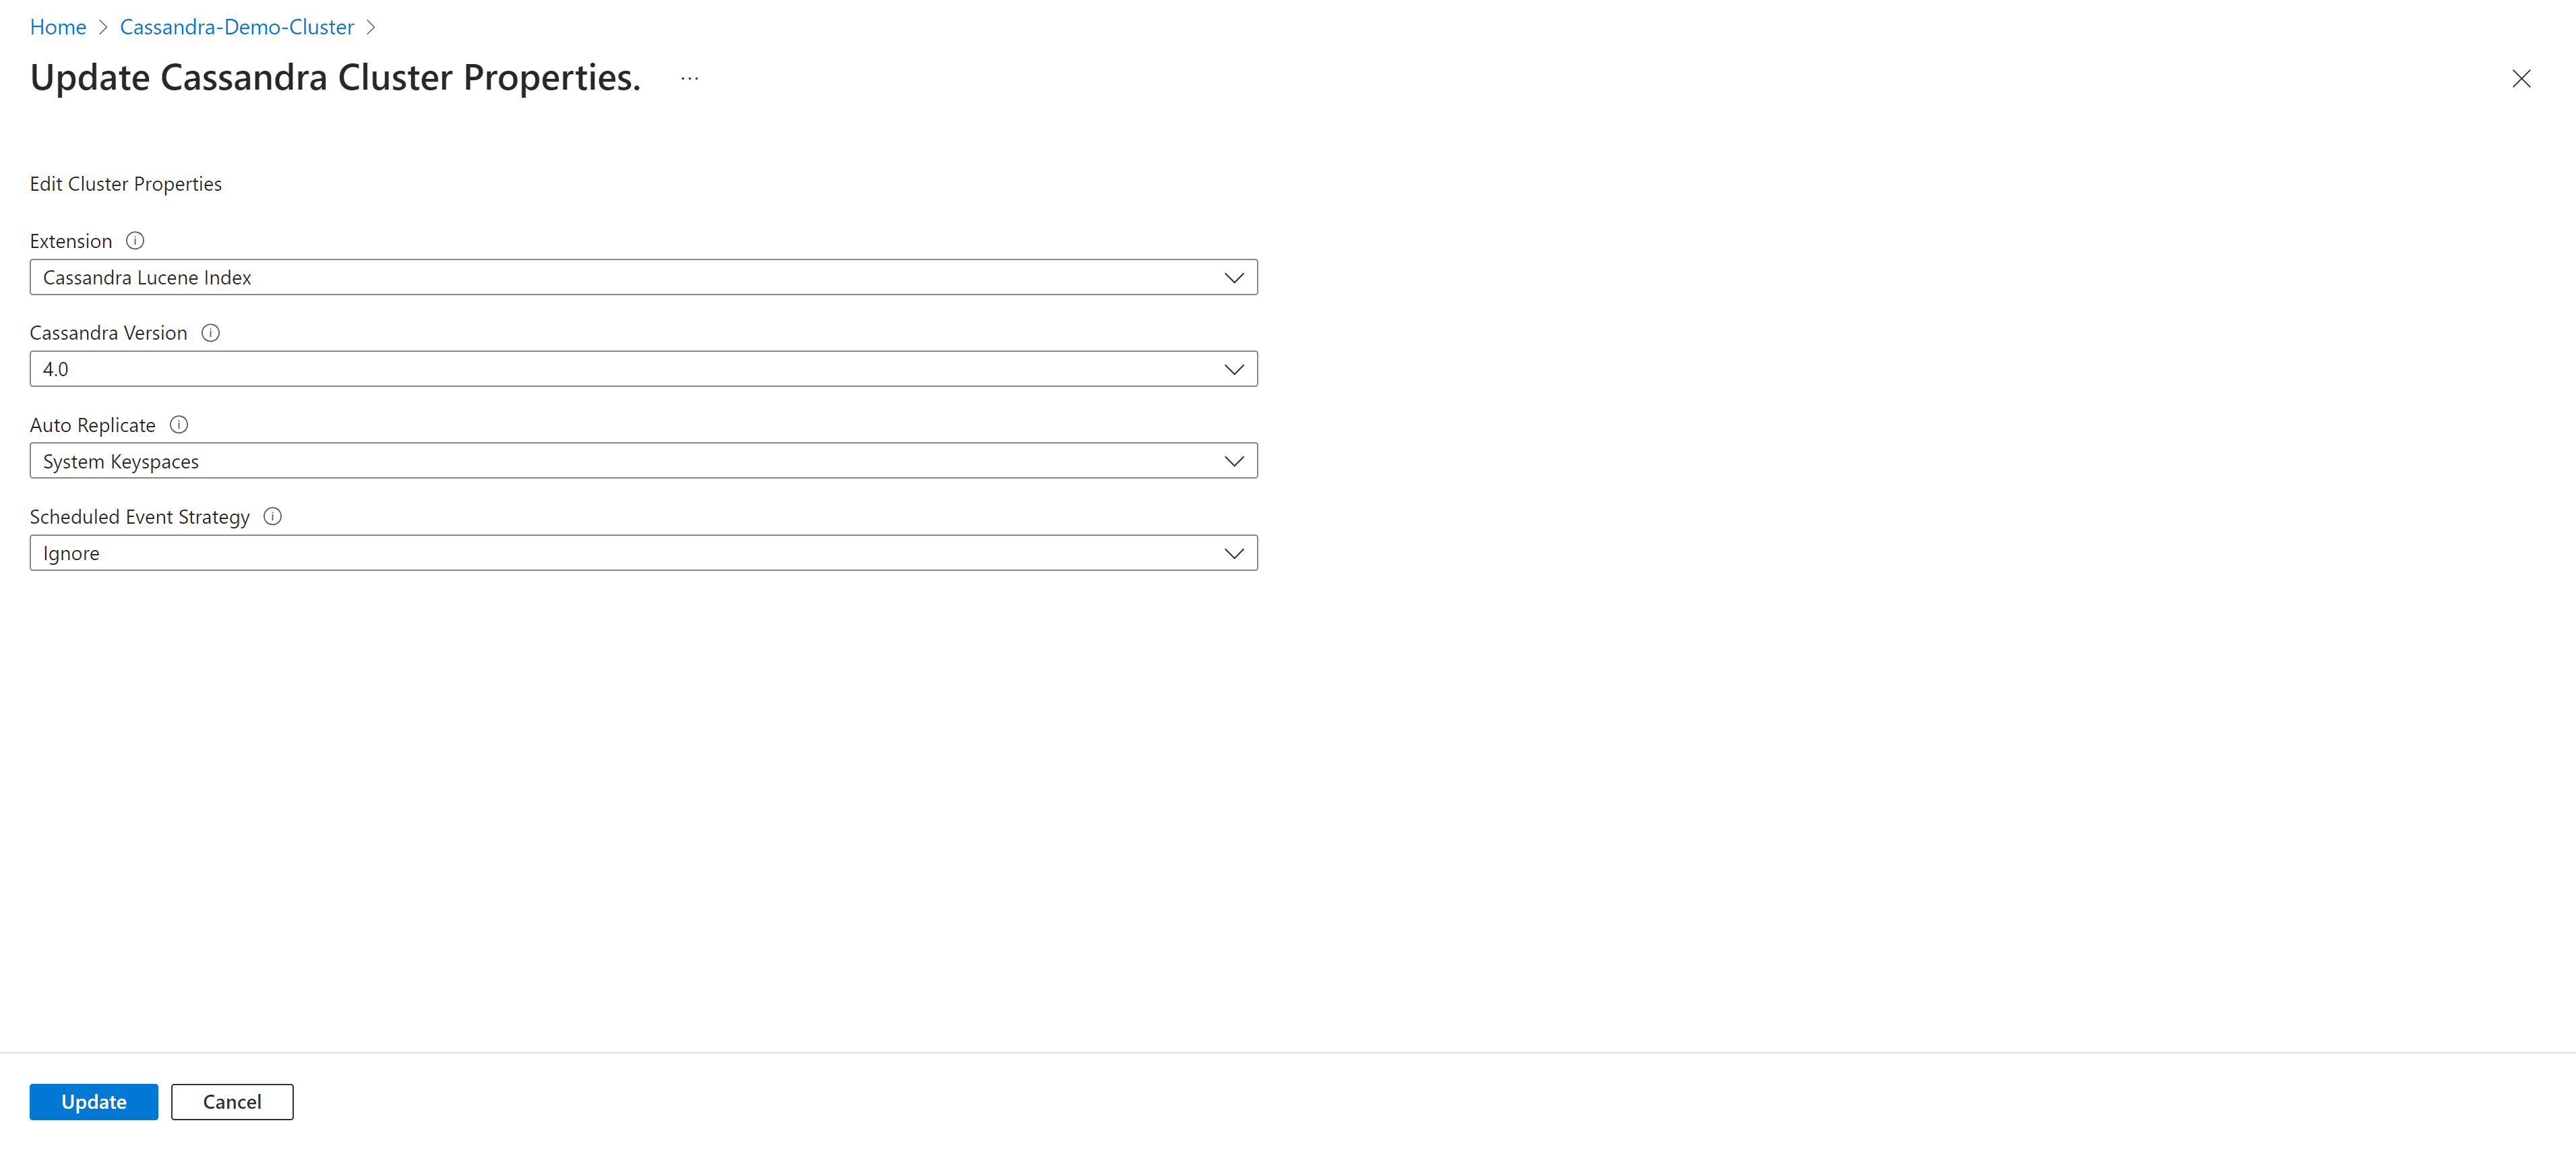
Extension: Select extensions to add, including Cassandra Lucene Index.
Initial Cassandra admin password: Enter the password used to create the cluster.
Confirm Cassandra admin password: Reenter your password.
Virtual network: Select an existing virtual network and subnet, or create a new one.
Assign roles: Virtual networks require special permissions to allow managed Cassandra clusters to be deployed. Keep this box selected if you create a new virtual network or use an existing virtual network without permissions applied. If you use a virtual network where you previously deployed Azure SQL Managed Instance Cassandra clusters, clear this option.
If you use a virtual private network, you don't need to open another connection.
The deployment of Azure Managed Instance for Apache Cassandra requires internet access. Deployment fails in environments where internet access is restricted. Make sure that you aren't blocking access in your virtual network to the following vital Azure services that are necessary for Managed Cassandra to work properly. For more information, see Required outbound network rules.
Azure Storage
Azure Key Vault
Azure Virtual Machine Scale Sets
Azure Monitor
Microsoft Entra ID
Microsoft Defender for Cloud
Auto replicate: Choose the form of autoreplication to use. For more information, see Turnkey replication.
Schedule event strategy: The strategy the cluster uses for scheduled events.
Tip
StopANYmeans stop any node when there's a scheduled event for the node.StopByRackmeans stop nodes only in a specific rack for a specific scheduled event. For instance, if several events are scheduled for nodes in different racks at the same time, nodes in only one rack stop. Other nodes in other racks are delayed.
Select the Data center tab.
Enter the following information:
Data center name: Enter a datacenter name in the text field.
Availability zone: Select this checkbox if you want to enable availability zones.
SKU size: Choose from the available virtual machine (VM) product tier sizes.
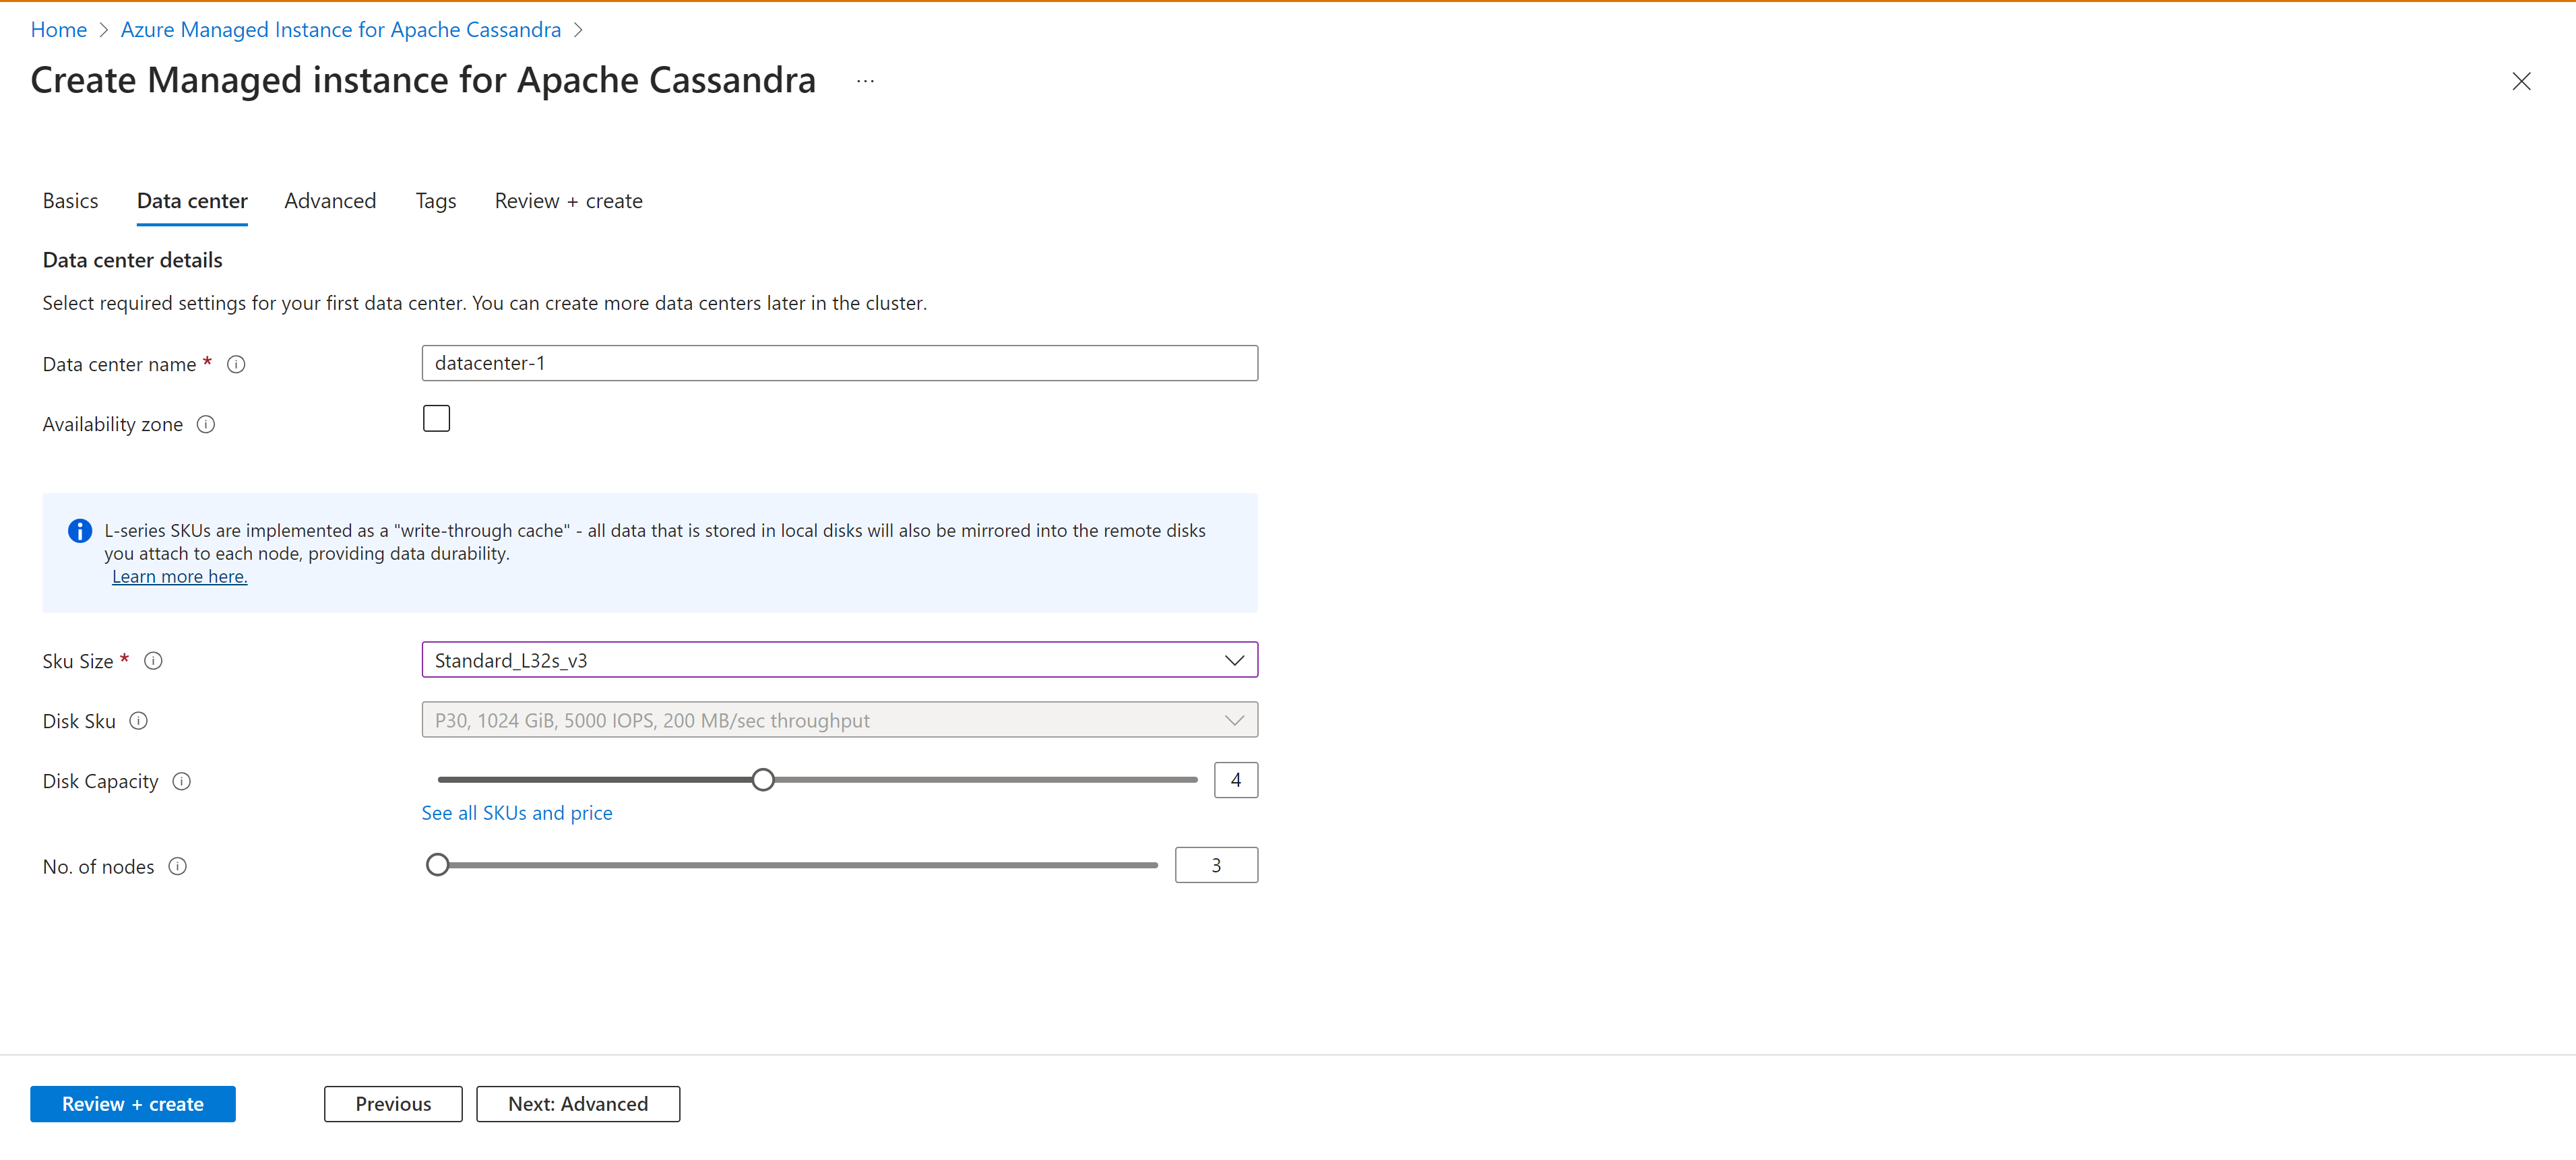
We introduced write-through caching (public preview) by using L-series VM product tiers. This implementation aims to minimize tail latencies and enhance read performance, particularly for read-intensive workloads. These specific product tiers are equipped with locally attached disks, which ensure increased IOPS for read operations and reduced tail latency.
Write-through caching is provided without a service-level agreement (SLA). We don't recommend it for production workloads. For more information, see Supplemental Terms of Use for Microsoft Azure Previews.
No. of disks: Choose the number of p30 disks to be attached to each Cassandra node.
No. of nodes: Choose the number of Cassandra nodes to deploy to this datacenter.

Availability zones aren't supported in all regions. Deployments fail if you select a region where availability zones aren't supported. For more information, see the Azure regions list.
The successful deployment of availability zones is also subject to the availability of compute resources in all the zones in the specific region. Deployments might fail if the product tier you selected, or capacity, isn't available across all the zones.
Select Review + create > Create.
It can take up to 15 minutes to create a cluster.
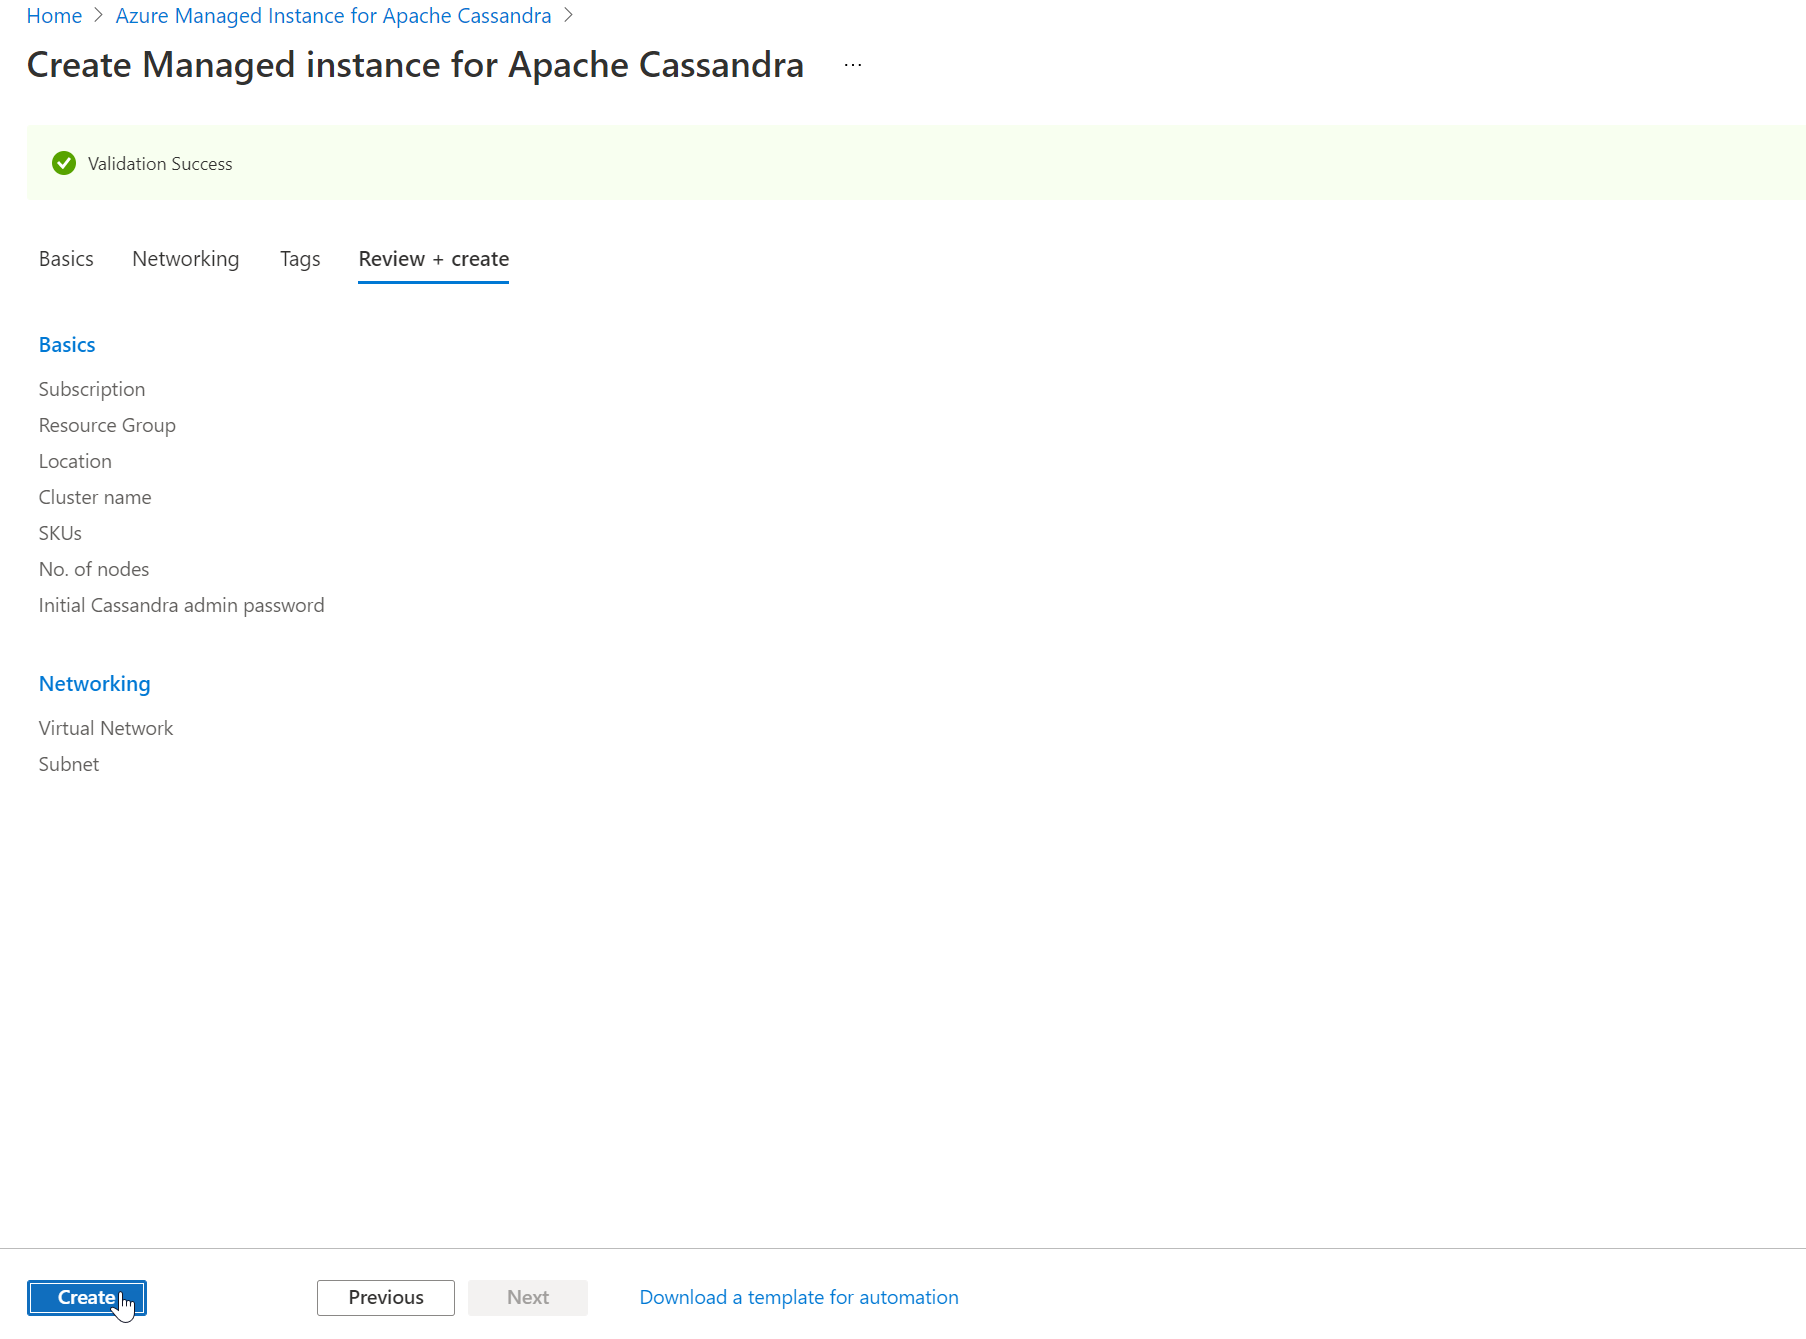
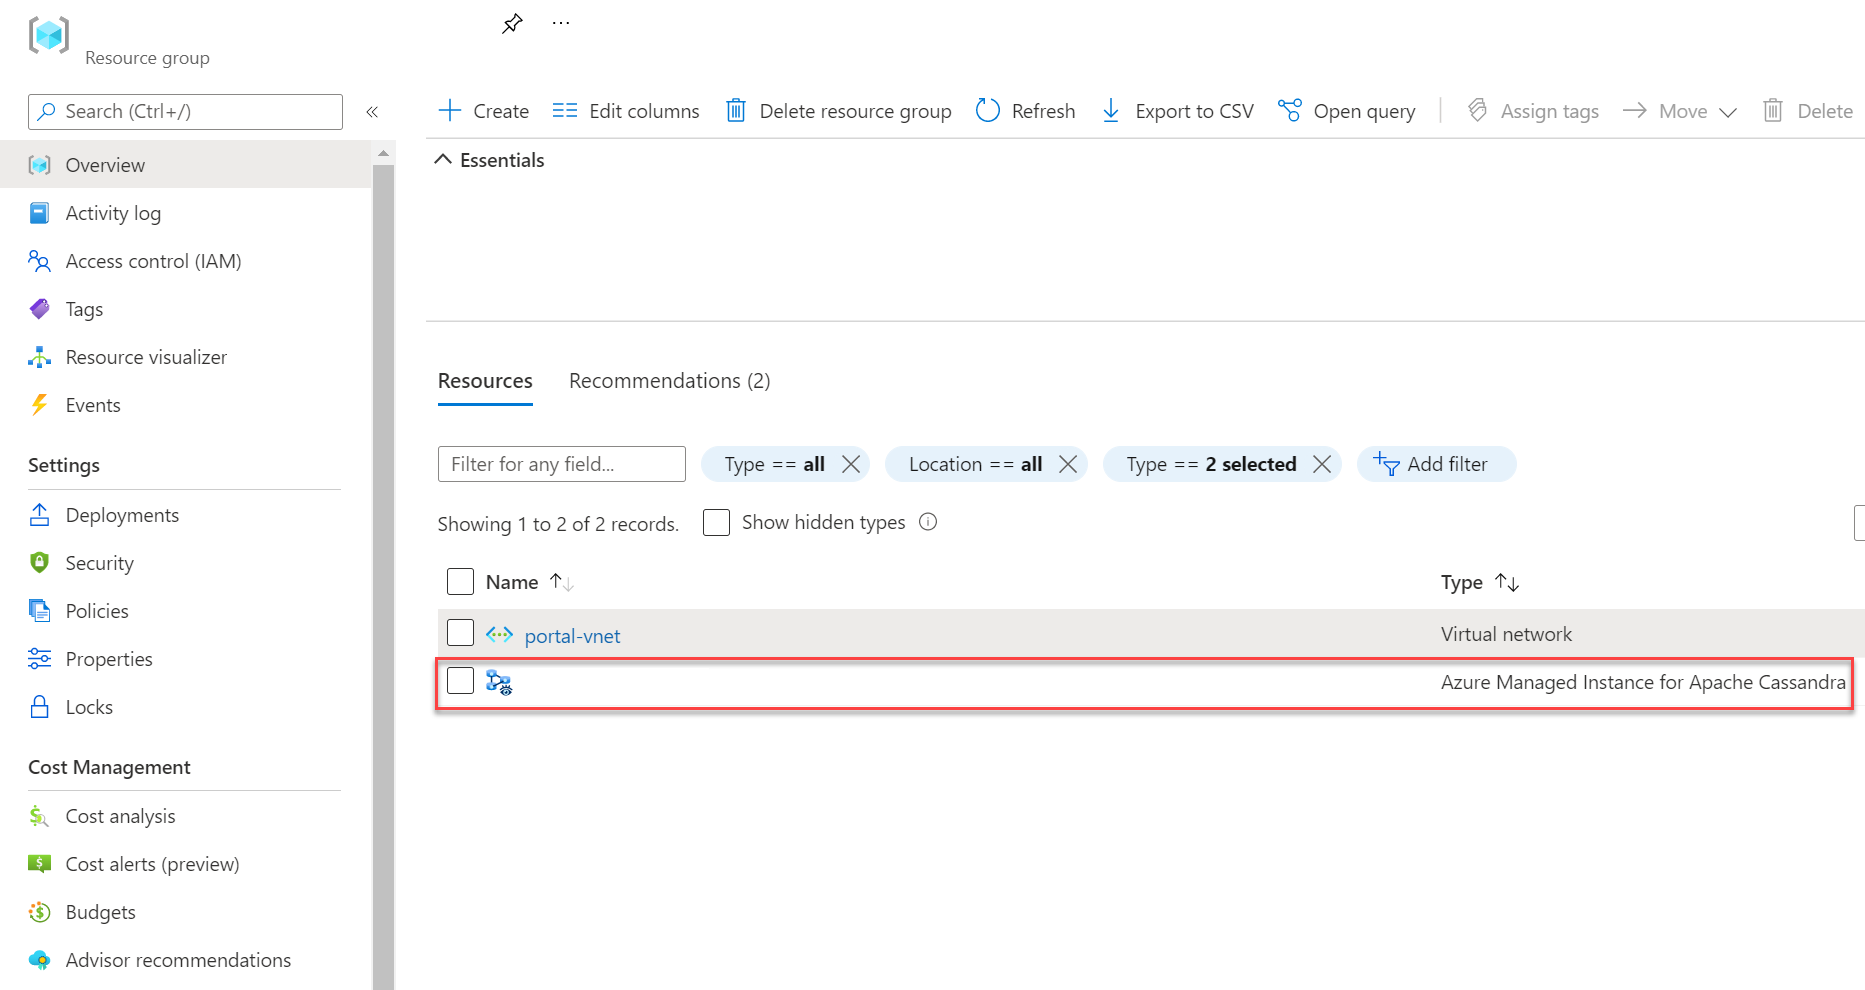
After the deployment finishes, check your resource group to see the newly created managed instance cluster.
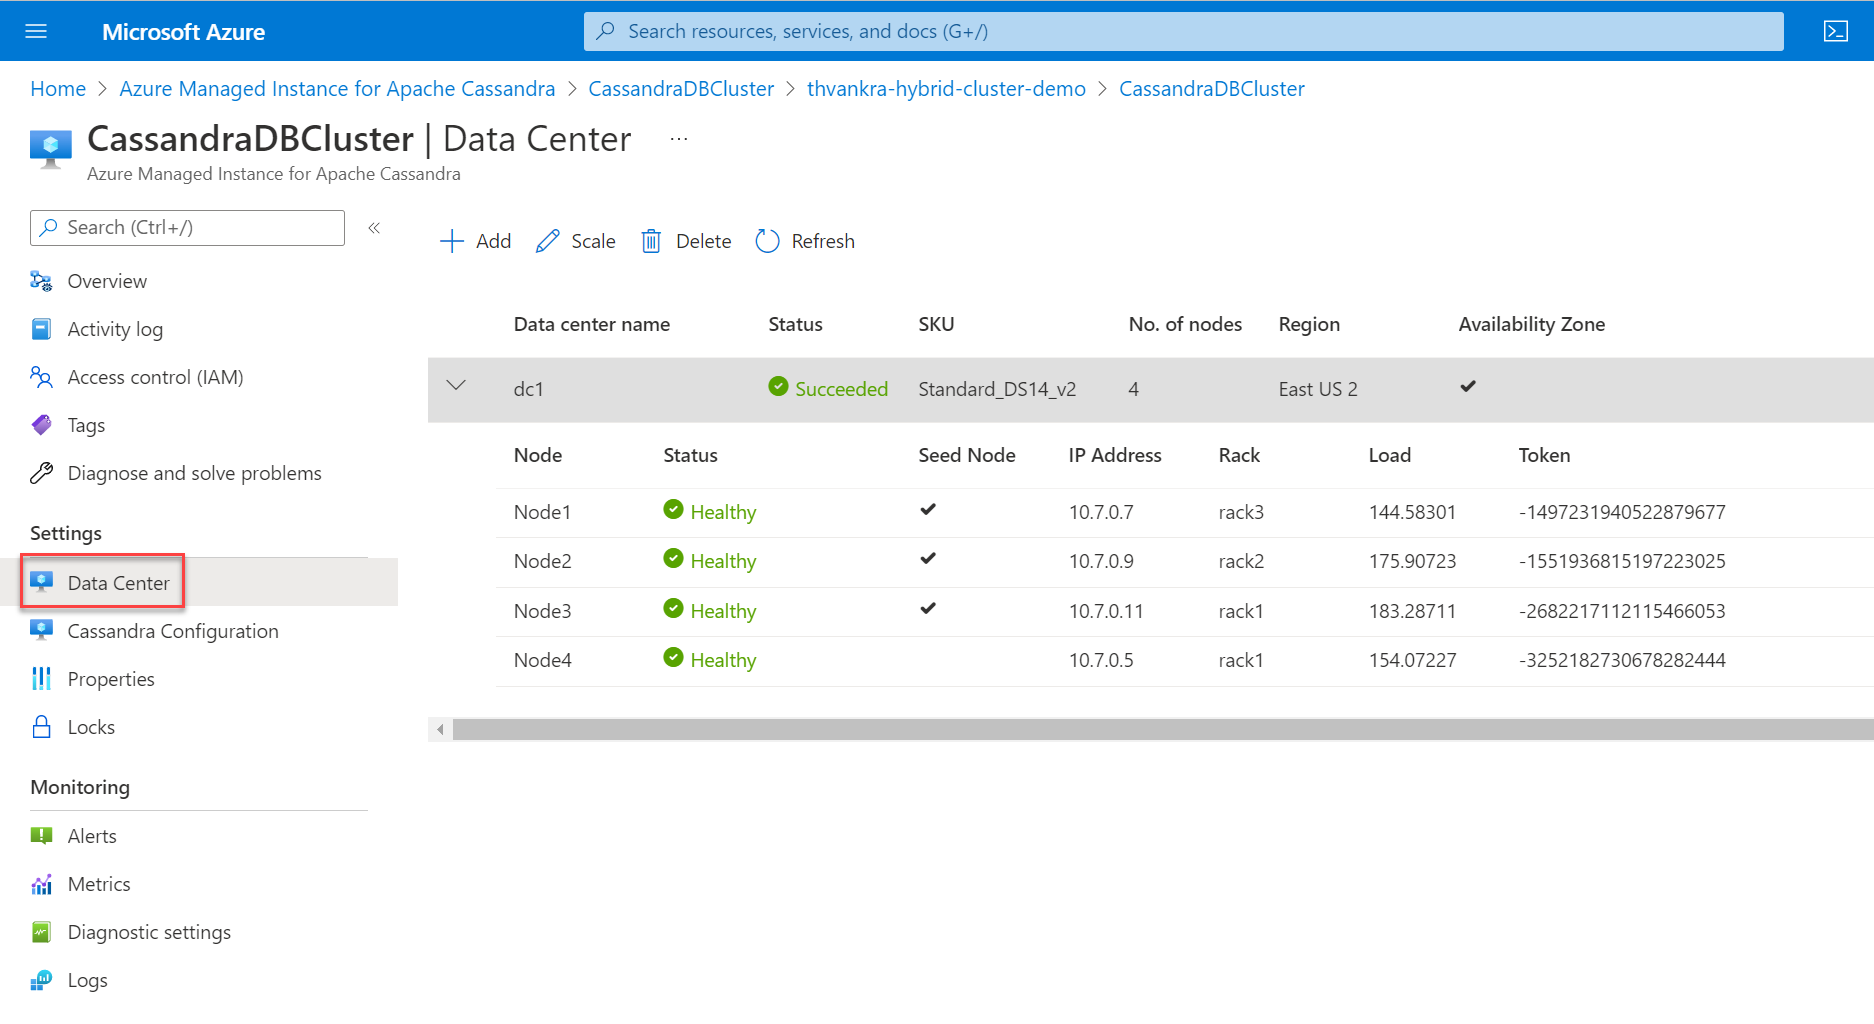
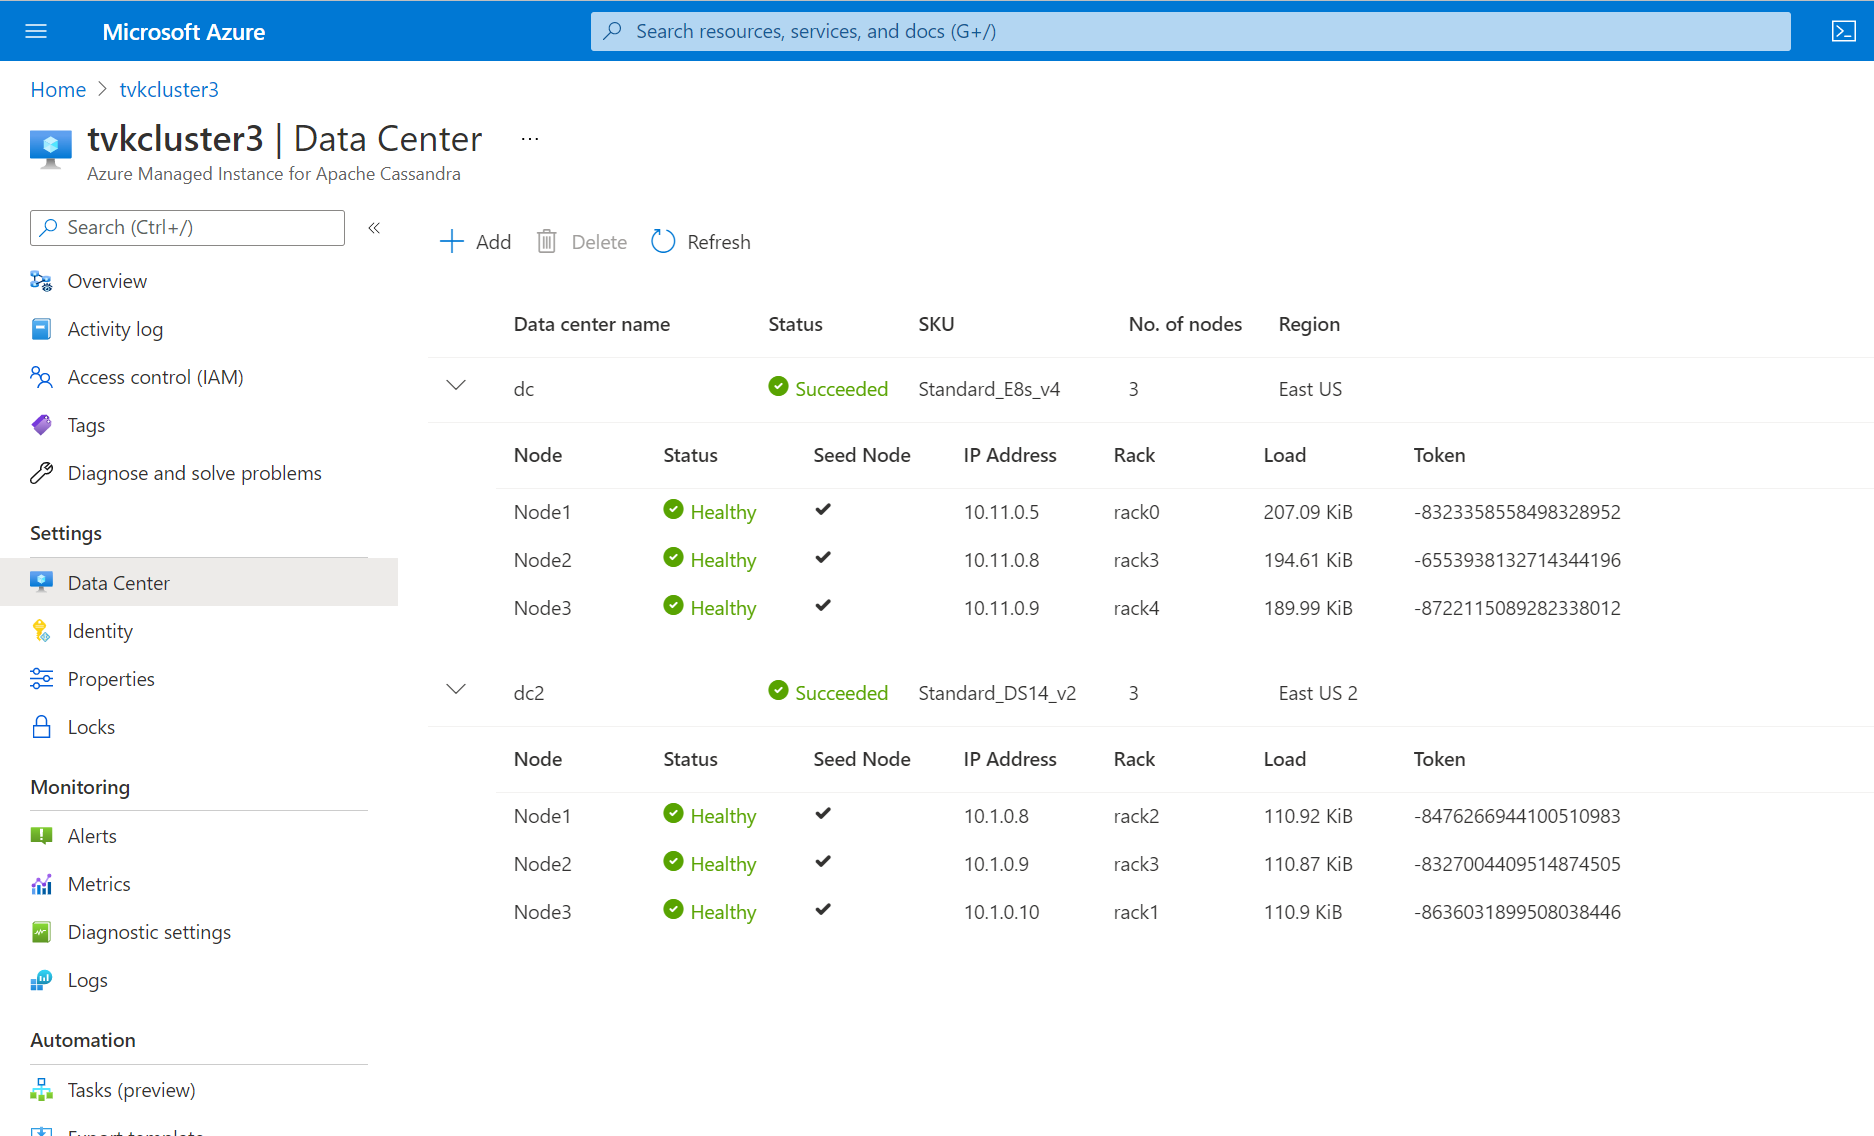
To browse through the cluster nodes, go to the cluster resource and open the Data Center pane.


Scale a datacenter
After you deploy a cluster with a single datacenter, you can scale horizontally or vertically. Highlight the datacenter and then select Scale.

Horizontal scale
To scale out or scale in on nodes, move the slider to the number that you want. You can also edit the value. When you're finished, select Scale.

Vertical scale
To scale up or scale down the product tier size for your nodes, select options from the SKU Size dropdown list. When you're finished, select Scale.

The length of time that it takes for a scaling operation depends on various factors. The operation might take several minutes. When Azure notifies you that the scale operation is finished, it doesn't mean that all of your nodes joined the Cassandra ring. Nodes are fully commissioned when they all show a status of Healthy and the datacenter status reads Succeeded.
Scaling is an online operation and works in the same manner as described for patching. For more information, see Patching.
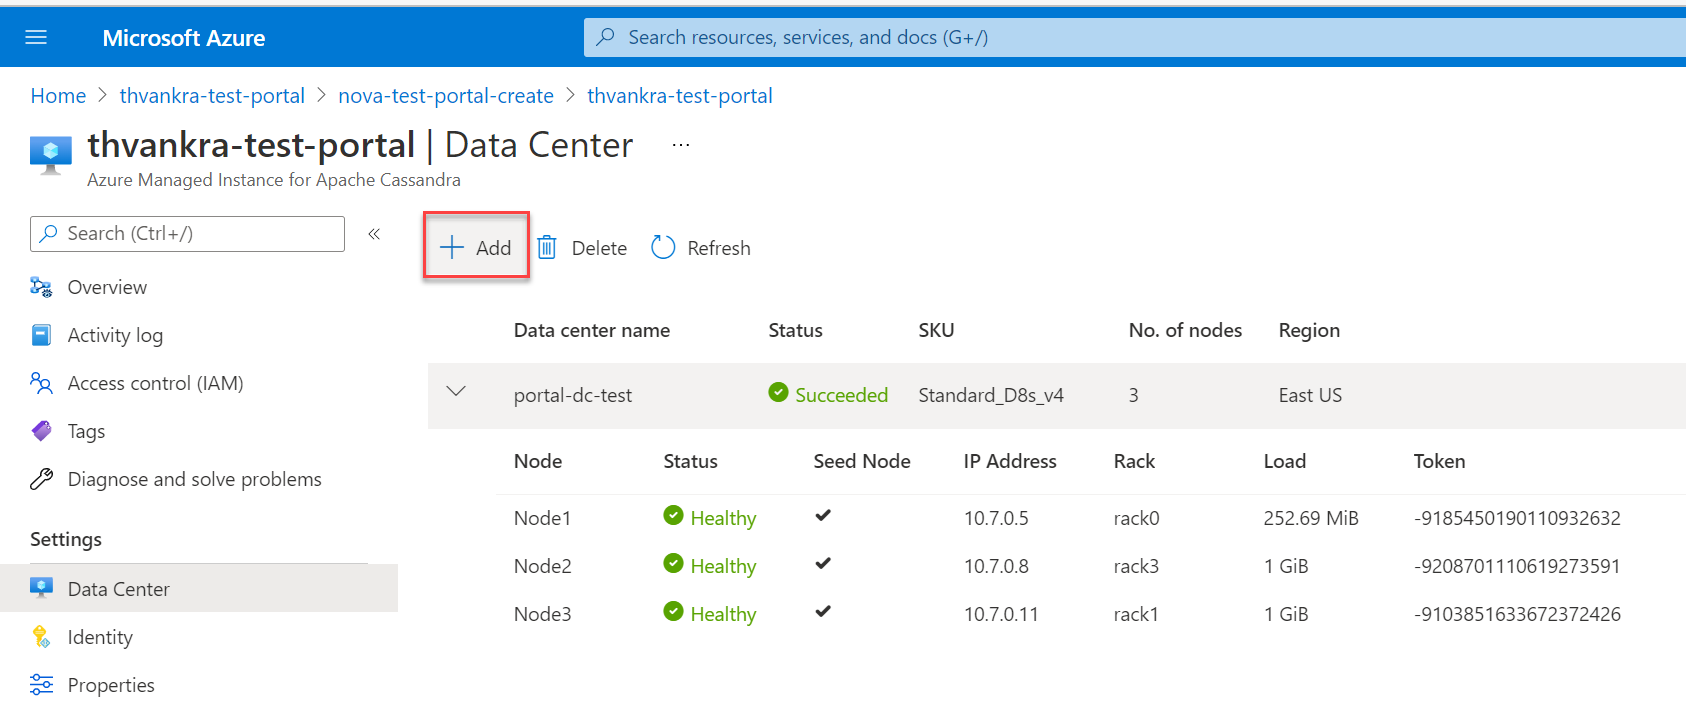
Add a datacenter
To add another datacenter, on the Data Center pane, select Add.
If you add a datacenter in a different region, you need to select a different virtual network. Ensure that this virtual network has connectivity to the primary region's virtual network that was created previously. Also, make sure that any other virtual networks that host datacenters are within the managed instance cluster. For more information, see Connect virtual networks with virtual network peering.
Make sure that you applied the appropriate role to your virtual network before you attempt to deploy a managed instance cluster. Use the following Azure CLI command:
   az role assignment create \
   --assignee a232010e-820c-4083-83bb-3ace5fc29d0b \
   --role 4d97b98b-1d4f-4787-a291-c67834d212e7 \
   --scope /subscriptions/<subscriptionID>/resourceGroups/<resourceGroupName>/providers/Microsoft.Network/virtualNetworks/<vnetName>
Fill in the appropriate fields:
Datacenter name: From the dropdown list, select your Azure subscription.
Availability zone: Select if you want to enable availability zones in this datacenter.
Location: Location where your datacenter is deployed.
SKU size: Choose from the available VM product tier sizes.
No. of disks: Choose the number of p30 disks to be attached to each Cassandra node.
No. of nodes: Choose the number of Cassandra nodes to deploy to this datacenter.
Virtual network: Select an existing virtual network and subnet.
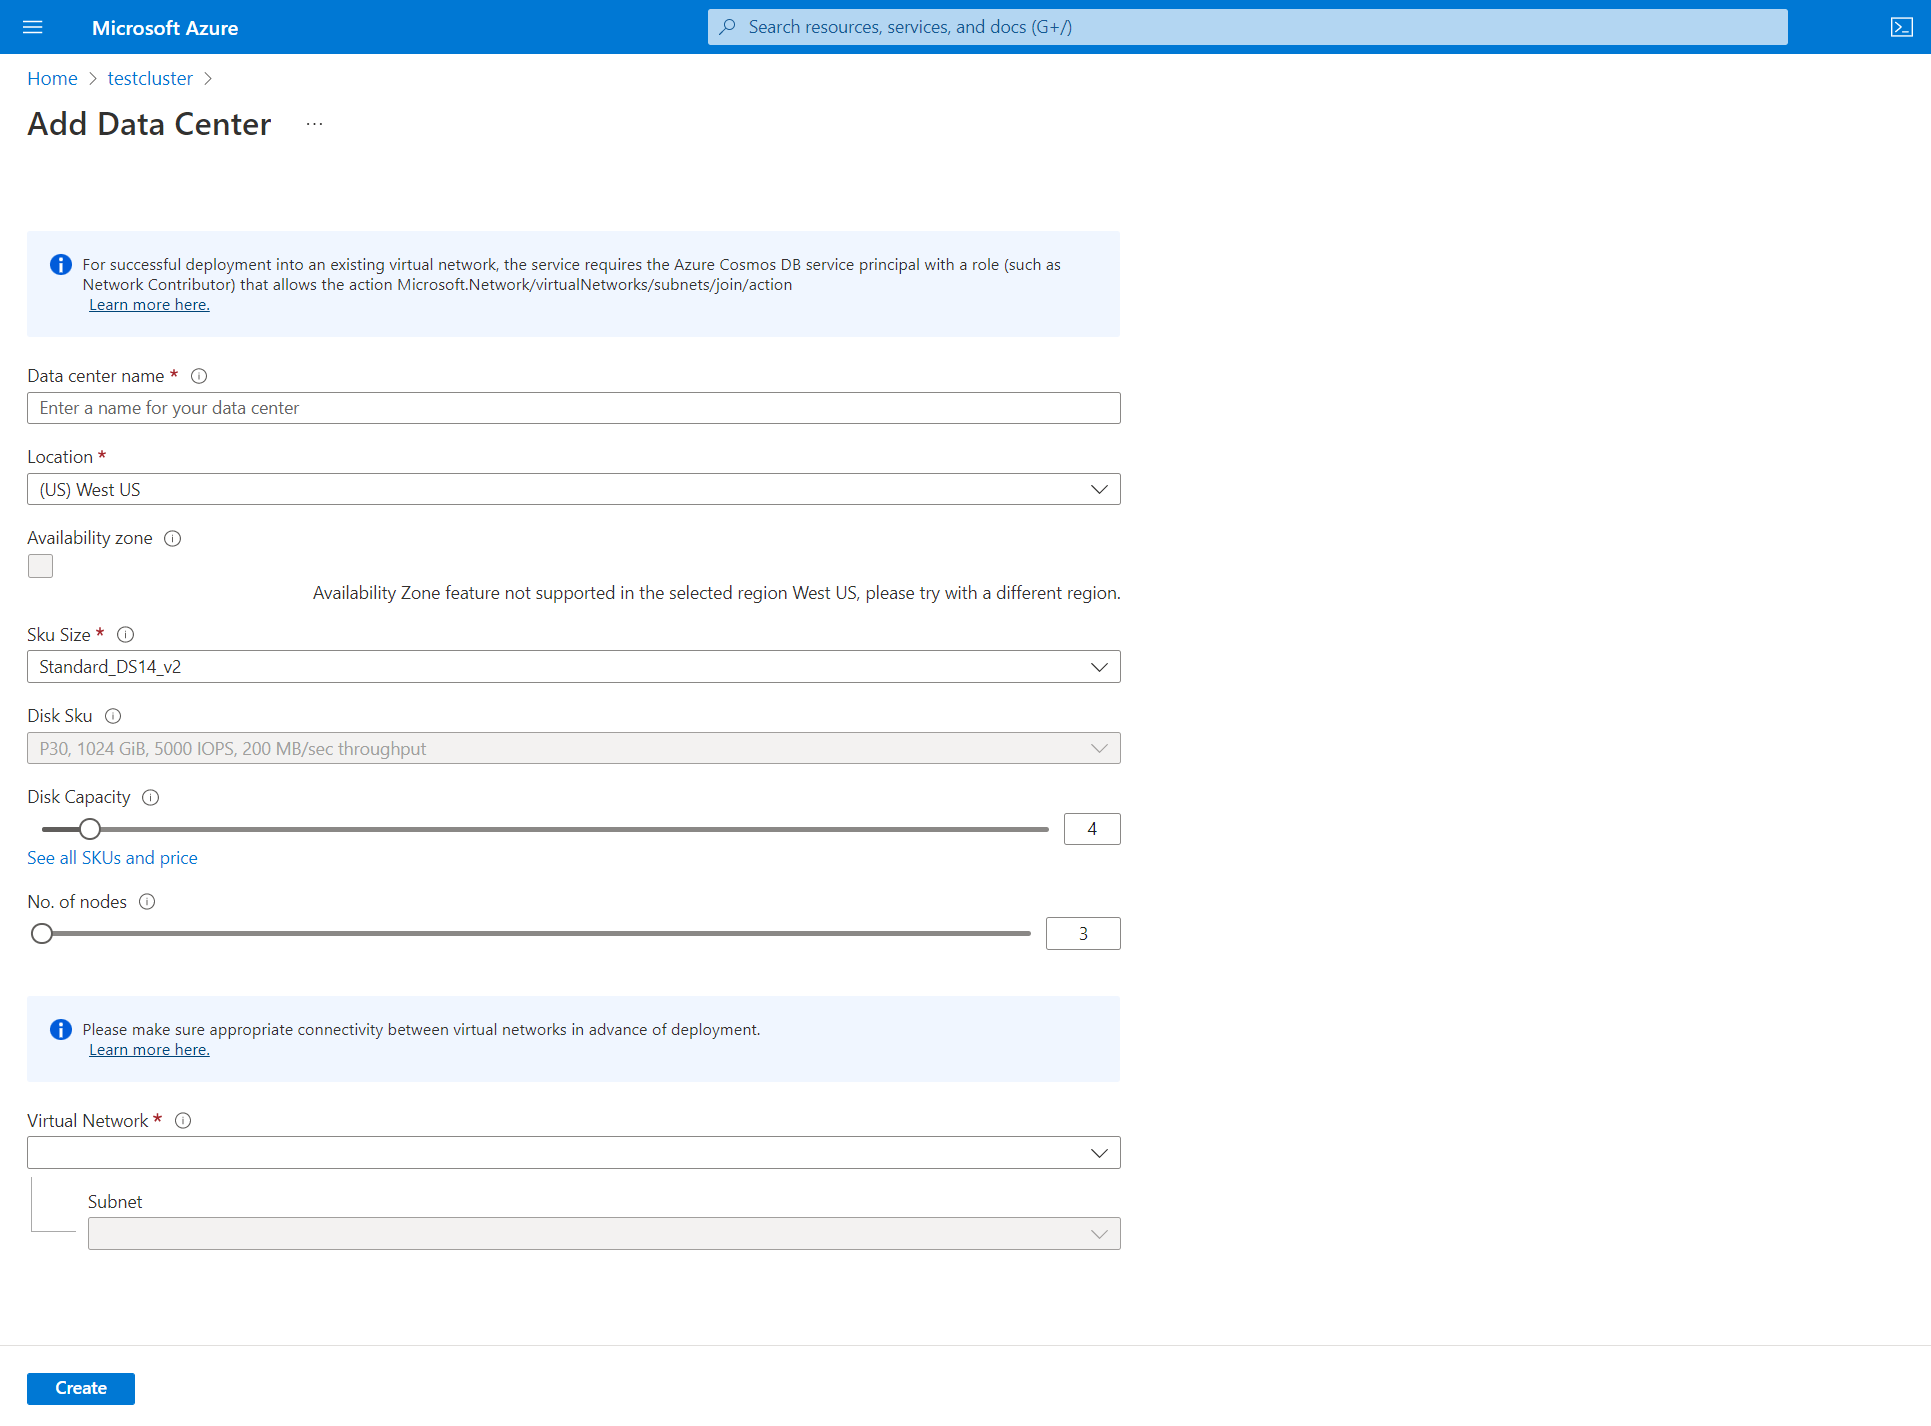
The Azure portal doesn't allow creation of a new virtual network when you add a datacenter. You need to choose an existing virtual network and you need to ensure that there's connectivity between the target subnets where datacenters are deployed. You also need to apply the appropriate role to the virtual network to allow deployment, as described previously.
When the datacenter is deployed, you should be able to view all the datacenter information on the Data Center pane.
To ensure replication between datacenters, connect to Cassandra Query Language Shell (CQLSH) and use the following CQL query to update the replication strategy in each keyspace to include all the datacenters across the cluster. System tables are updated automatically.
ALTER KEYSPACE "ks" WITH REPLICATION = {'class': 'NetworkTopologyStrategy', 'dc': 3, 'dc2': 3};If you add a datacenter to a cluster that already has data, run
rebuildto replicate the historical data. In the Azure CLI, use the following command and runnodetool rebuildon each node of the new datacenter. This action replaces<new dc ip address>with the IP address of the node and replaces<olddc>with the name of your existing datacenter:az managed-cassandra cluster invoke-command \ --resource-group $resourceGroupName \ --cluster-name $clusterName \ --host <new dc ip address> \ --command-name nodetool --arguments rebuild="" "<olddc>"=""


Don't allow application clients to write to the new datacenter until you apply keyspace replication changes. Otherwise, rebuild doesn't work and you need to create a support request so that our team can run repair for you.
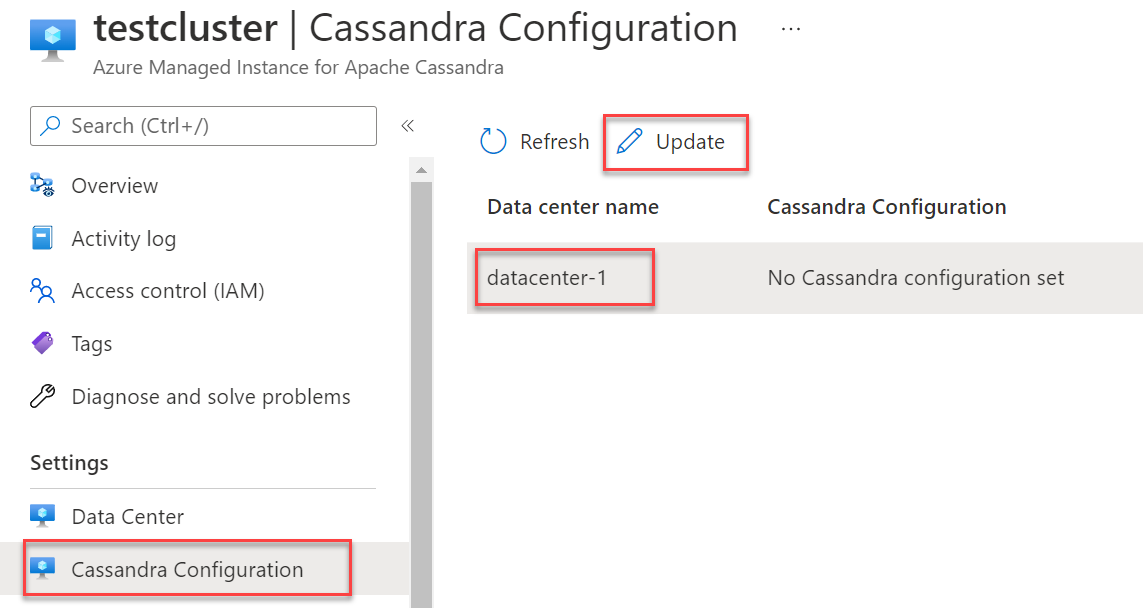
Update Cassandra configuration
You can use the Azure portal or CLI commands to update Cassandra YAML configuration on a datacenter. To update settings in the portal:
Under Settings, select Cassandra Configuration. Highlight the datacenter whose configuration you want to change, and then select Update.
In the window that opens, enter the field names in YAML format, as shown here. Then select Update.
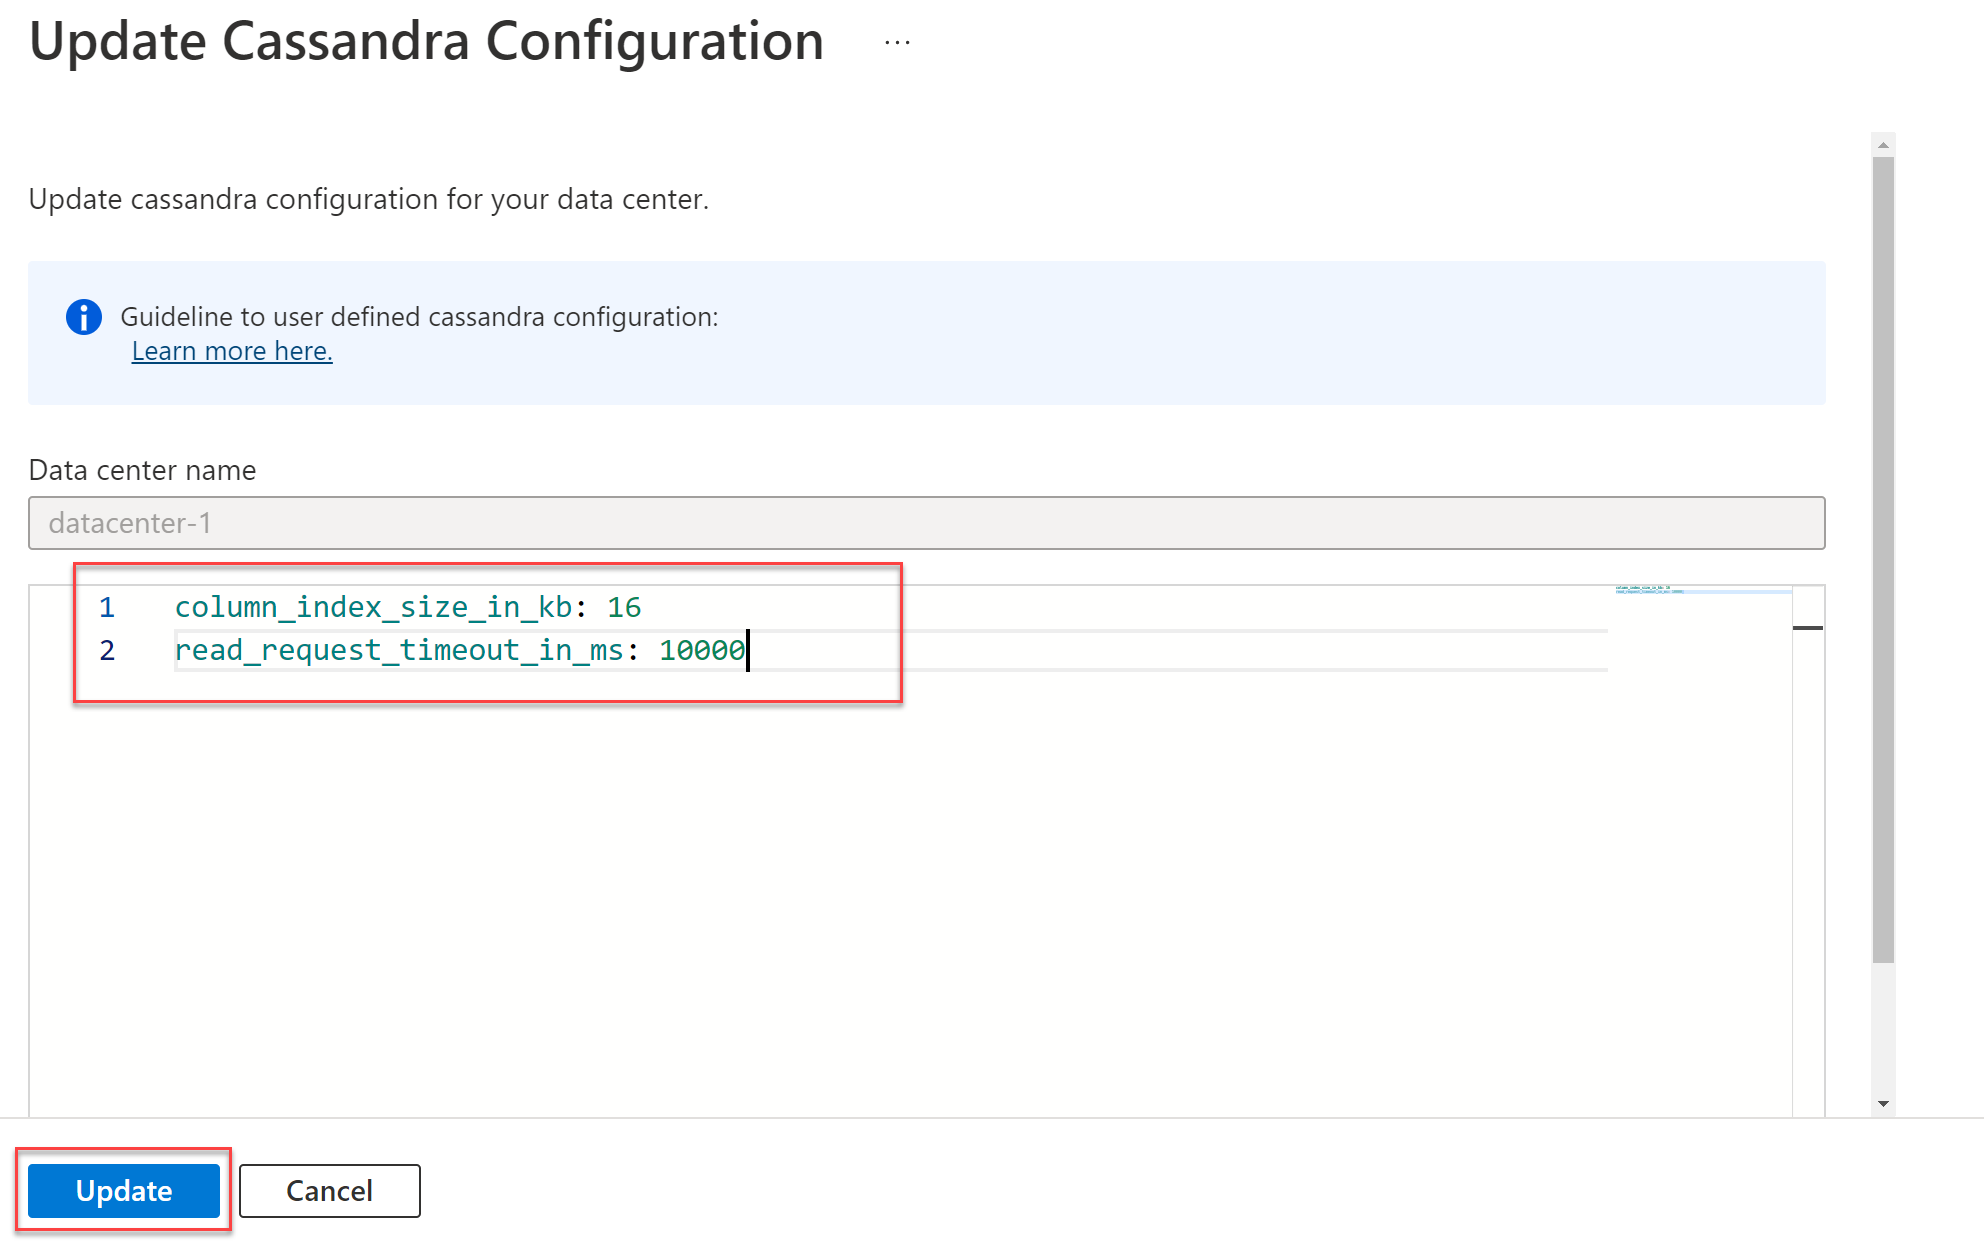
When the update is finished, the overridden values appear on the Cassandra Configuration pane.
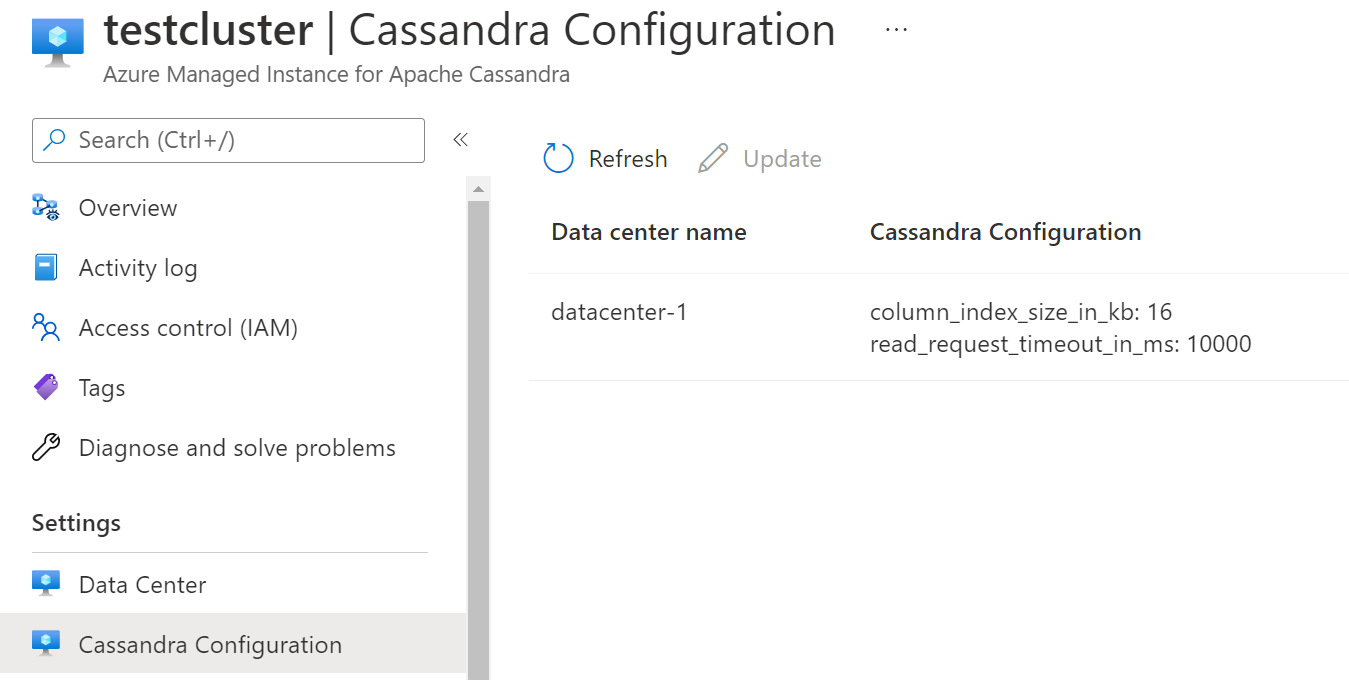
Only overridden Cassandra configuration values are shown in the Azure portal.
Ensure that the Cassandra YAML settings that you provide are appropriate for the version of Cassandra that you deployed. For more information, see Cassandra v3.11 for Cassandra v3.11 settings and Cassandra v4.0 for v4.0. You can't update the following YAML settings:
cluster_nameseed_providerinitial_tokenautobootstrapclient_encryption_optionsserver_encryption_optionstransparent_data_encryption_optionsaudit_logging_optionsauthenticatorauthorizerrole_managerstorage_portssl_storage_portnative_transport_portnative_transport_port_ssllisten_addresslisten_interfacebroadcast_addresshints_directorydata_file_directoriescommitlog_directorycdc_raw_directorysaved_caches_directoryendpoint_snitchpartitionerrpc_addressrpc_interface


Update the Cassandra version
Cassandra 5.0 and Turnkey version updates are in public preview. These features are provided without an SLA. We don't recommend these features for production workloads. For more information, see Supplemental Terms of Use for Microsoft Azure Previews.
You can conduct in-place major version upgrades directly from the portal or through the Azure CLI, Terraform, or Azure Resource Manager templates.
On the Overview tab, select Update.
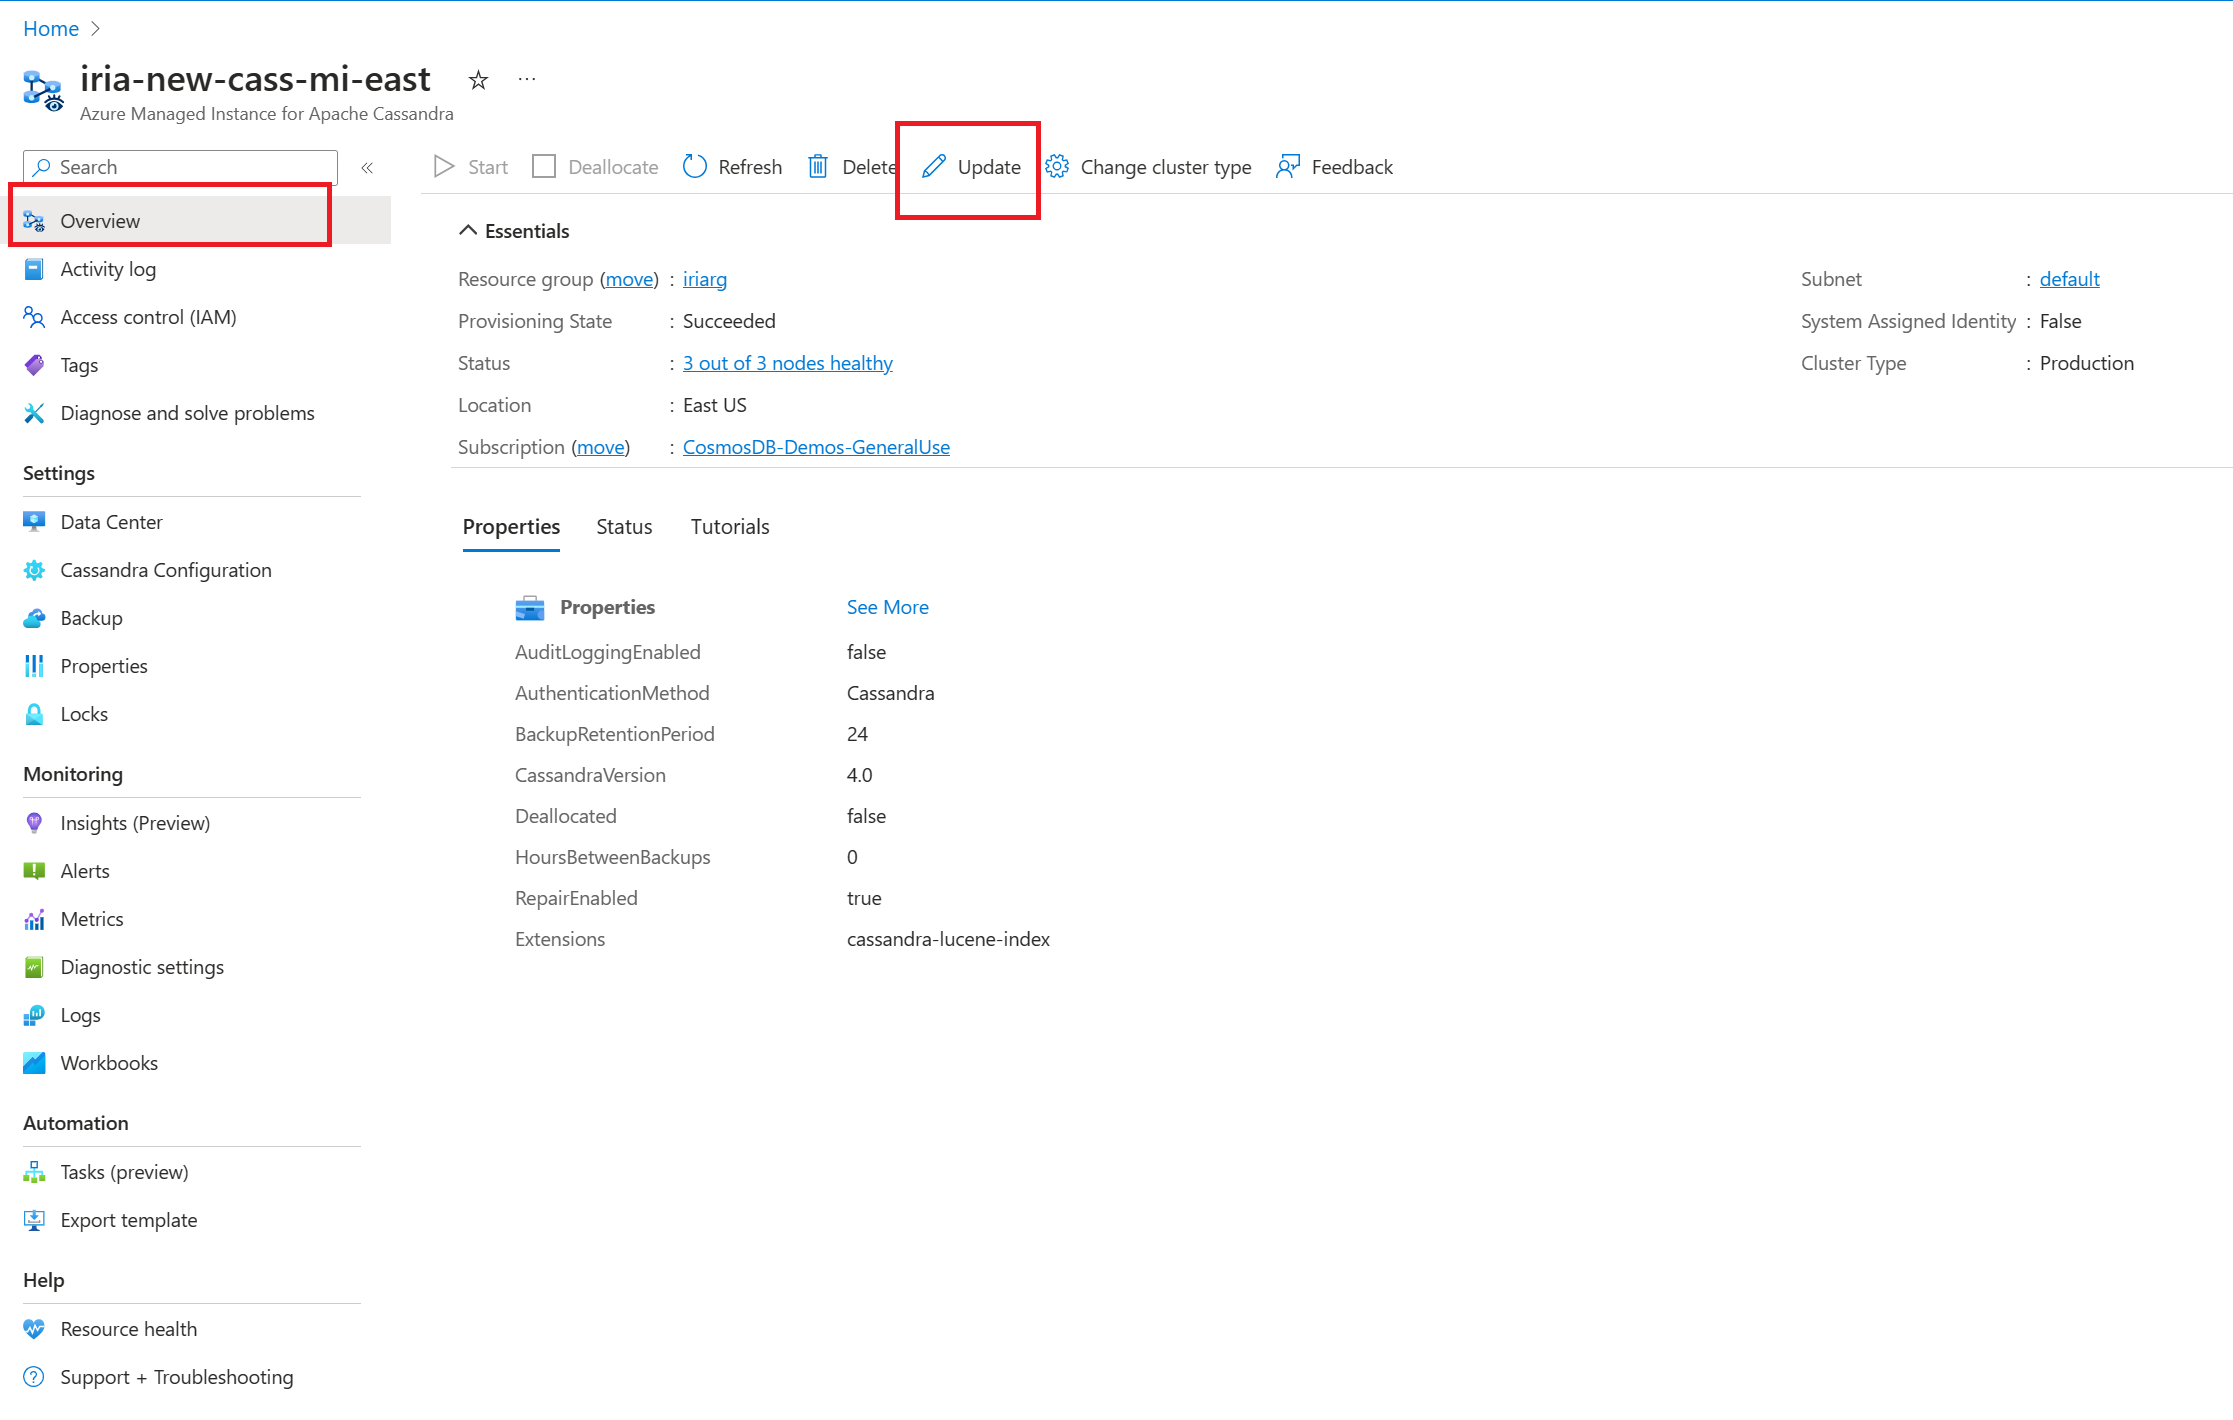
Select the Cassandra version from the dropdown list.
Don't skip versions. We recommend that you update from only one version to another. For example, update 3.11 to 4.0 or 4.0 to 4.1.
Select Update to save.


Turnkey replication
Cassandra 5.0 introduces a streamlined approach to deploy multi-region clusters, which offer enhanced convenience and efficiency. If you use turnkey replication functionality, setting up and managing multi-region clusters is more accessible. You gain smoother integration and operation across distributed environments.
This update reduces the complexities that are associated with deploying and maintaining multiple region configurations. Users can use Cassandra's capabilities with greater ease and effectiveness.

- None: The Auto Replicate option is set to None.
- System Keyspaces: Autoreplicate all system keyspaces (
system_auth,system_traces, andsystem_auth). - All Keyspaces: Autoreplicate all keyspaces, monitor if new keyspaces are created, and then apply autoreplicate settings automatically.
Autoreplication scenarios
When you add a new datacenter, the autoreplicate feature in Cassandra seamlessly runs nodetool rebuild to ensure the successful replication of data across the added datacenter. Removing a datacenter triggers an automatic removal of the specific datacenter from the keyspaces.
For external datacenters, such as those hosted on-premises, use the external datacenter property to include them in the keyspaces. This approach enables Cassandra to incorporate these external datacenters as sources for the rebuilding process.
If you set Auto Replicate to All Keyspaces, your keyspaces replication changes to include:
WITH REPLICATION = { 'class' : 'NetworkTopologyStrategy', 'on-prem-datacenter-1' : 3, 'mi-datacenter-1': 3 }
If this topology isn't what you want, use SystemKeyspaces, adjust them yourself, and run nodetool rebuild manually on the Azure Managed Instance for Apache Cassandra cluster.
Deallocate a cluster
For nonproduction environments, you can pause or deallocate resources in the cluster to avoid being charged for them. You continue to be charged for storage. First, change Cluster Type to NonProduction, and then select Deallocate.
Use the NonProduction cluster type only to save development costs. This cluster type might come with smaller product tiers. Don't use it to run production workloads.
- Cluster types defined as NonProduction don't have SLA guarantees applied to them.
- Don't run any schema or write operations during deallocation. This action can lead to data loss. In rare cases, you might experience schema corruption, which requires manual intervention from the support team.

Troubleshooting
If you encounter an error when you apply permissions to your virtual network when you use the Azure CLI, you can apply the same permission manually from the Azure portal. An example of such an error is "Cannot find user or service principal in graph database for e5007d2c-4b13-4a74-9b6a-605d99f03501." For more information, see Use the Azure portal to add Azure Cosmos DB service principal.
The Azure Cosmos DB role assignment is used for deployment purposes only. Azure Managed Instanced for Apache Cassandra has no back-end dependencies on Azure Cosmos DB.
Connect to your cluster
Azure Managed Instance for Apache Cassandra doesn't create nodes with public IP addresses. To connect to your newly created Cassandra cluster, create another resource inside the virtual network. This resource could be an application or a VM with Apache's open-source query tool CQLSH installed. You can use a template to deploy an Ubuntu VM.
Connect from CQLSH
After the VM is deployed, use Secure Shell to connect to the machine. To install CQLSH, use the following commands:
# Install default-jre and default-jdk
sudo apt update
sudo apt install openjdk-8-jdk openjdk-8-jre

# Install the Cassandra libraries in order to get CQLSH:
echo "deb http://archive.apache.org/dist/cassandra/debian 311x main" | sudo tee -a /etc/apt/sources.list.d/cassandra.sources.list
curl https://downloads.apache.org/cassandra/KEYS | sudo apt-key add -
sudo apt-get update
sudo apt-get install cassandra

# Export the SSL variables:
export SSL_VERSION=TLSv1_2
export SSL_VALIDATE=false

# Connect to CQLSH (replace <IP> with the private IP addresses of a node in your Datacenter):
host=("<IP>")
initial_admin_password="Password provided when creating the cluster"
cqlsh $host 9042 -u cassandra -p $initial_admin_password --ssl
Connect from an application
As with CQLSH, when you use one of the supported Apache Cassandra client drivers to connect from an application, Transport Layer Security/Secure Sockets Layer (TLS/SSL) encryption must be enabled and certificate verification must be disabled. For samples that are used to connect to Azure Managed Instance for Apache Cassandra, see Java, .NET, Node.js, and Python.
We recommend that you disable certificate verification because it doesn't work unless you map IP addresses of your cluster nodes to the appropriate domain. If an internal policy mandates that you perform TLS/SSL certificate verification for any application, add entries like 10.0.1.5 host1.managedcassandra.cosmos.azure.com in your hosts file for each node to facilitate this setup. If you take this approach, you also need to add new entries whenever you scale up nodes.
For Java, we recommend that you enable the speculative execution policy where applications are sensitive to tail latency. For a demo that illustrates how this approach works and to see how to enable the policy, see Demo: Implement speculative execution.
In most cases, it shouldn't be necessary to configure or install certificates (such as rootCA, node, client, or truststore) to connect to Azure Managed Instance for Apache Cassandra. To enable TLS/SSL encryption, use the default trust store and password of the runtime that the client is using. That environment trusts the Azure Managed Instance for Apache Cassandra certificates. In rare cases, if the certificate isn't trusted, you might need to add it to the trust store. For sample code, see Java, .NET, Node.js, and Python.
Configure client certificates (optional)
Configuring client certificates is optional. A client application can connect to Azure Managed Instance for Apache Cassandra if the preceding steps are finished. If you prefer, you can also create and configure client certificates for authentication. In general, there are two ways to create certificates:
- Self-signed certificates: Private and public certificates with no Certificate Authority (CA) for each node. In this case, you need all public certificates.
- Certificates signed by a CA: Certificates issued by a self-signed CA or a public CA. In this case, you need the root CA certificate and all intermediaries, if applicable. For more information, see Prepare SSL certificates for production.
If you want to implement client-to-node certificate authentication or mutual Transport Layer Security (mTLS), use the Azure CLI to provide the certificates. The following command uploads and applies your client certificates to the trust store for the managed instance cluster. You don't need to edit cassandra.yaml settings. After you apply the command, your cluster requires Cassandra to verify the certificates when a client connects. For more information, see require_client_auth: true in Cassandra client_encryption_options.
resourceGroupName='<Resource_Group_Name>'
clusterName='<Cluster Name>'

az managed-cassandra cluster update \
  --resource-group $resourceGroupName \
  --cluster-name $clusterName \
  --client-certificates /usr/csuser/clouddrive/rootCert.pem /usr/csuser/clouddrive/intermediateCert.pem
Clean up resources
If you aren't going to continue to use this managed instance cluster, follow these steps to delete it:
- On the left menu of the Azure portal, select Resource groups.
- From the list, select the resource group that you created for this quickstart.
- On the resource group Overview pane, select Delete resource group.
- On the next pane, enter the name of the resource group to delete, and then select Delete.