Note
Access to this page requires authorization. You can try signing in or changing directories.
Access to this page requires authorization. You can try changing directories.
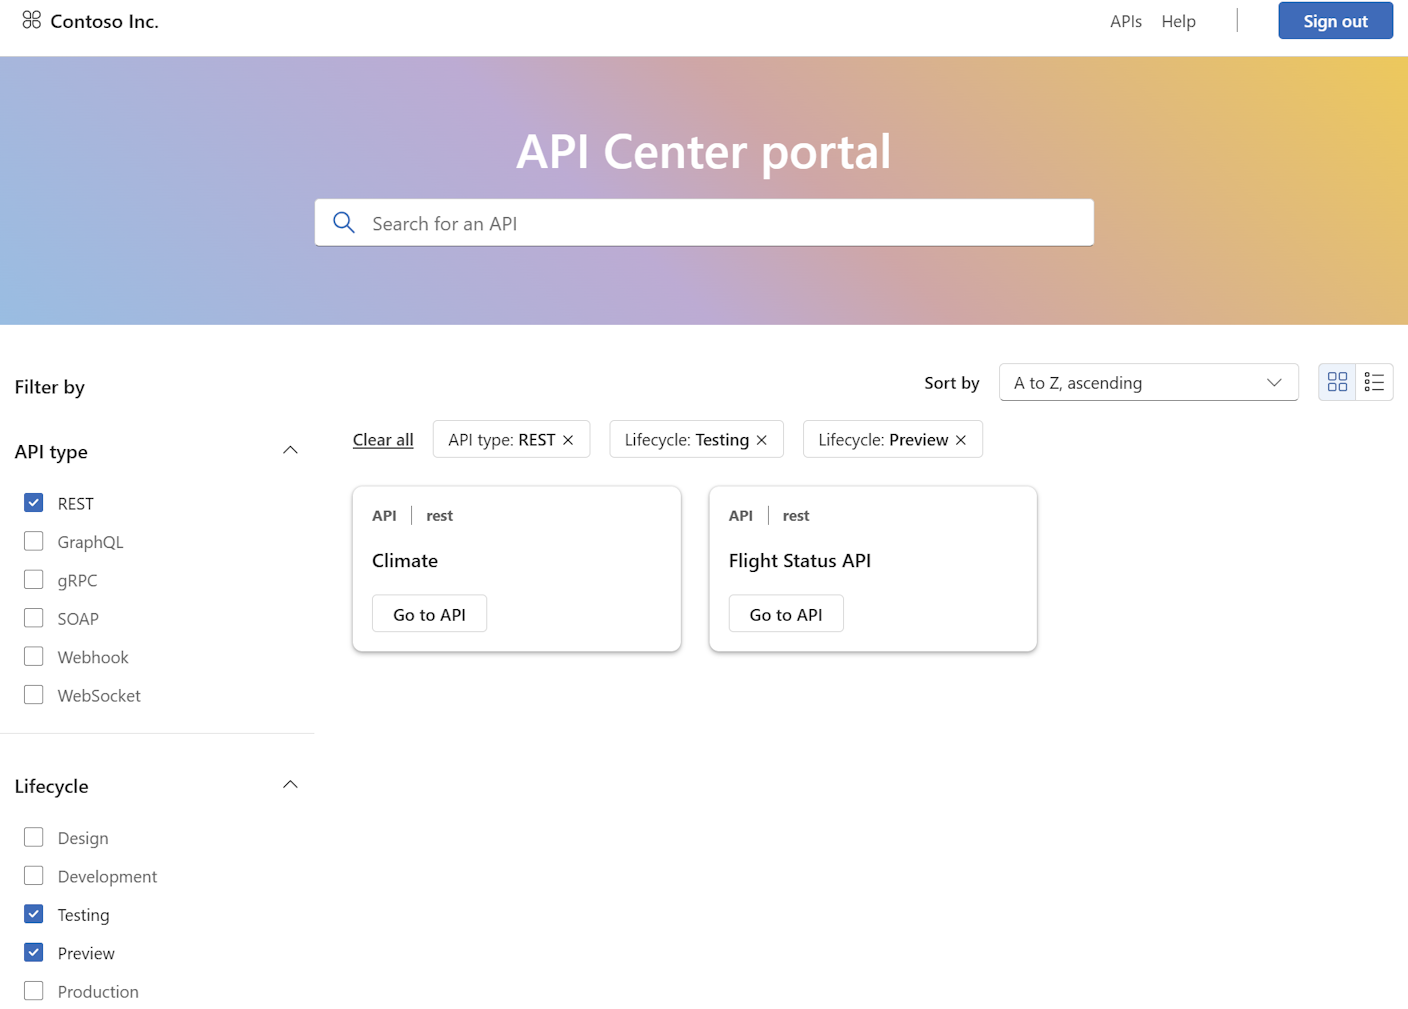
This article shows you how to set up the API Center portal (preview), an Azure-managed website that developers and other stakeholders in your organization use to discover the APIs in your API center. Signed-in users can browse and filter APIs and view API details such as API definitions and documentation. User access to API information is based on Microsoft Entra ID and Azure role-based access control.
Note
The API Center portal is currently in preview.
Tip
Both Azure API Management and Azure API Center provide API portal experiences for developers. Compare the portals
Prerequisites
An API center in your Azure subscription. If you haven't created one already, see Quickstart: Create your API center.
Permissions to create an app registration in a Microsoft Entra tenant associated with your Azure subscription, and permissions to grant access to data in your API center.
Create Microsoft Entra app registration
First configure an app registration in your Microsoft Entra ID tenant. The app registration enables the API Center portal to access data from your API center on behalf of a signed-in user.
API Center can set up the app registration automatically, or you can create the app registration manually.
Set up the app registration automatically
To set up the app registration automatically, follow these steps:
- In the Azure portal, navigate to your API center.
- In the left-hand menu, select API Center portal > Settings.
- On the Identity provider tab, select Start set up.
- On the Quick setup tab, select Save + publish.
If you need to access the app registration later, you can find it in the portal under App registrations. The application is named with the following format: <api-center-name>-apic-aad.
Set up the app registration manually
If you want to create the app registration manually, follow these steps:
In the Azure portal, navigate to Microsoft Entra ID > Manage > App registrations.
Select + New registration.
On the Register an application page, set the values as follows:
- Set Name to a meaningful name such as api-center-portal
- Under Supported account types, select Accounts in this organizational directory only (<Directory name> - Single tenant).
- In Redirect URI, select Single-page application (SPA) and set the URI.
Enter the URI of your API Center portal deployment, in the following form:
https://<service-name>.portal.<location>.azure-apicenter.ms. Replace<service name>and<location>with the name of your API center and the location where it's deployed, Example:https://myapicenter.portal.eastus.azure-apicenter.ms. - Select Register.
Configure additional redirect URIs for VS Code extension
When enabling the API Center portal view in the Visual Studio Code extension for API Center, also configure the following redirect URIs in the app registration:
In the Azure portal, navigate to your app registration.
On the Manage > Authentication page, select Add a platform and select Mobile and desktop applications.
Configure the following three custom redirect URIs:
https://vscode.dev/redirect
http://localhost
ms-appx-web://Microsoft.AAD.BrokerPlugin/<application-client-id>Replace
<application-client-id>with the application (client) ID of this app. You can find this value on the Overview page of the app registration.
Configure and publish the API Center portal
After creating the API Center portal app registration, you can customize settings and publish your API Center portal. Complete the following steps in the Azure portal.
In the Azure portal, navigate to your API center.
In the left menu, under API Center portal, select Settings.
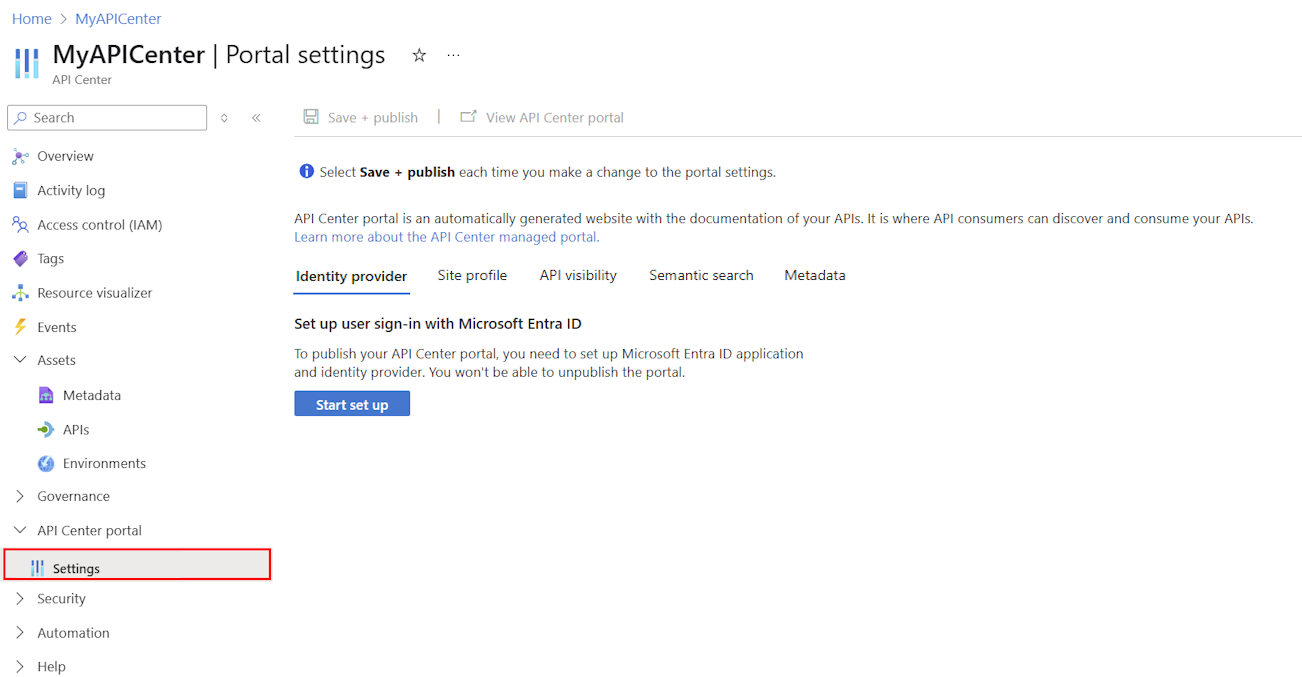
If you set up an app registration manually, on the Identity provider tab, select Start set up. If you used the quick setup, this step is already complete, and you can continue to settings on other tabs.
- On the Manual tab, in Client ID, enter the Application (client) ID from the app registration you created in the previous section.
- Confirm that the Redirect URI is the value you configured in the app registration.
- Select Save + publish.
On the remaining tabs, optionally customize the settings for your API Center portal. For information on the settings, see Customize your API Center portal.
Select Save + publish.

Access the portal
After publishing, you can access the API Center portal in your browser.
- On the portal's Settings page, select View API Center portal to open the portal in a new tab.
- Or, enter the following URL in your browser, replacing
<service-name>and<location>with the name of your API center and the location where it's deployed:
https://<service-name>.portal.<location>.azure-apicenter.ms
By default, the portal home page is reachable publicly but requires sign-in to access APIs. See Enable sign-in to portal by Microsoft Entra users and groups for details on how to configure user access to the portal.
Enable sign-in to portal by Microsoft Entra users and groups
To enable sign-in to the API Center portal to access APIs, assign the Azure API Center Data Reader role to users or groups in your organization, scoped to your API center.
Important
By default, you and other administrators of the API center must sign-in to access APIs in the API Center portal. Be sure to assign the Azure API Center Data Reader role to yourself and other administrators.
For detailed prerequisites and steps to assign a role to users and groups, see Assign Azure roles using the Azure portal. Brief steps follow:
- In the Azure portal, navigate to your API center.
- In the left menu, select Access control (IAM) > + Add role assignment.
- In the Add role assignment pane, set the values as follows:
- On the Role page, search for and select Azure API Center Data Reader. Select Next.
- On the Members page, In Assign access to, select User, group, or service principal > + Select members.
- On the Select members page, search for and select the users or groups to assign the role to. Click Select and then Next.
- Review the role assignment, and select Review + assign.
Note
To streamline access configuration for new users, we recommend that you assign the role to a Microsoft Entra group and configure a dynamic group membership rule. To learn more, see Create or update a dynamic group in Microsoft Entra ID.
After you configure access to the portal, configured users can sign in to the portal and view the APIs in your API center.
Note
The first user to sign in to the portal is prompted to consent to the permissions requested by the API Center portal app registration. Thereafter, other configured users aren't prompted to consent.
API discovery and consumption in the API Center portal
The API Center portal supports and streamlines the work of developers who use and create APIs within your organization. Signed-in users can:
Search for APIs by name or using AI-assisted semantic search
Filter APIs by type or lifecycle stage
View API details and definitions including endpoints, methods, parameters, and response formats
Download API definitions to a local computer or open them in Visual Studio Code
Try out APIs that support API key authentication or OAuth 2.0 authorization
API Management and API Center portals
The Azure API Management and Azure API Center services both provide portals for developers to discover and consume APIs:
- The API Management developer portal allows users to find managed APIs, learn how to use them, request access, and test them.
- The API Center portal (preview) is a multi-gateway portal where users can discover and filter the organization's complete API inventory.
While the two portals share some features, they also have distinct differences. The following table compares current capabilities to help determine which portal to use. Some organizations may prefer one portal, while others may need both.
| Feature | API Management developer portal | API Center portal (preview) |
|---|---|---|
| Search and filter API inventory | API Management instance only | All APIs1 |
| View API details and definitions | ✔️ | ✔️ |
| View API documentation | ✔️ | ✔️ |
| Customize with branding | ✔️ | Name only |
| Integrate with Microsoft Entra ID | ✔️ | ✔️ |
| Add custom widgets | ✔️ | ❌ |
| Customize with WordPress | ✔️ | ❌ |
| Test APIs in test console | ✔️ | ✔️ |
| Subscribe to APIs | ✔️ | ❌ |
| View API usage analytics | ✔️ | ❌ |
1 The API Center portal can contain all APIs in your organization, including those managed in Azure API Management and other platforms, as well as unmanaged APIs and APIs under development.