你当前正在访问 Microsoft Azure Global Edition 技术文档网站。 如果需要访问由世纪互联运营的 Microsoft Azure 中国技术文档网站,请访问 https://docs.azure.cn。
Important
Customer-managed key (CMK) encryption in Azure Cosmos DB for MongoDB vCore is currently in preview. This preview version is provided without a service level agreement, and it isn't recommended for production workloads. Some features are unsupported or have limited capabilities.
In this article, you learn how to configure customer-managed key (CMK) for data encryption at rest in Azure Cosmos DB for MongoDB vCore. The steps in this guide configure a new Azure Cosmos DB for MongoDB vCore cluster, a replica cluster, or a restored cluster with customer-managed key stored in an Azure Key Vault and user-assigned managed identity.
Prerequisites
An Azure subscription
- If you don't have an Azure subscription, create a free account before you begin.
The latest version of the Azure CLI in Azure Cloud Shell.
- If you prefer to run CLI reference commands locally, sign in to the Azure CLI by using the
az logincommand.
- If you prefer to run CLI reference commands locally, sign in to the Azure CLI by using the
Prepare user-assigned managed identity and Azure Key Vault
To configure customer-managed key encryption on your Azure Cosmos DB for MonogDB vCore cluster, you need a user-assigned managed identity, an Azure Key Vault instance, and permissions properly configured.
Important
User-managed identity and Azure Key Vault instance used to configure CMK should be in the same Azure region where Azure Cosmos DB for MongoDB cluster is hosted and all belong to the same Microsoft tenant.
Using the Azure portal:
Create one user-assigned managed identity, if you don't have one yet.
Create one Azure Key Vault, if you don't have one key store created yet. Make sure that you meet the requirements. Also, follow the recommendations before you configure the key store, and before you create the key and assign the required permissions to the user-assigned managed identity.
Grant user-assigned managed identity permissions to the Azure Key Vault instance as outlined in the requirements.
Configure data encryption with customer-managed key during cluster provisioning
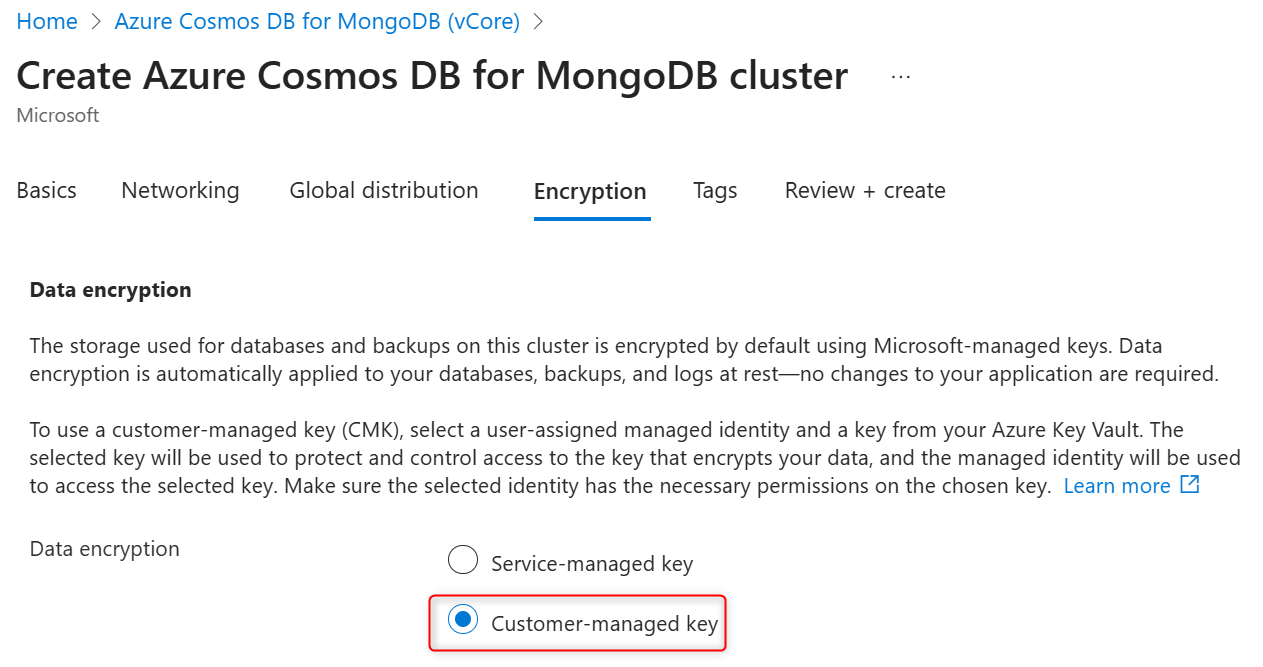
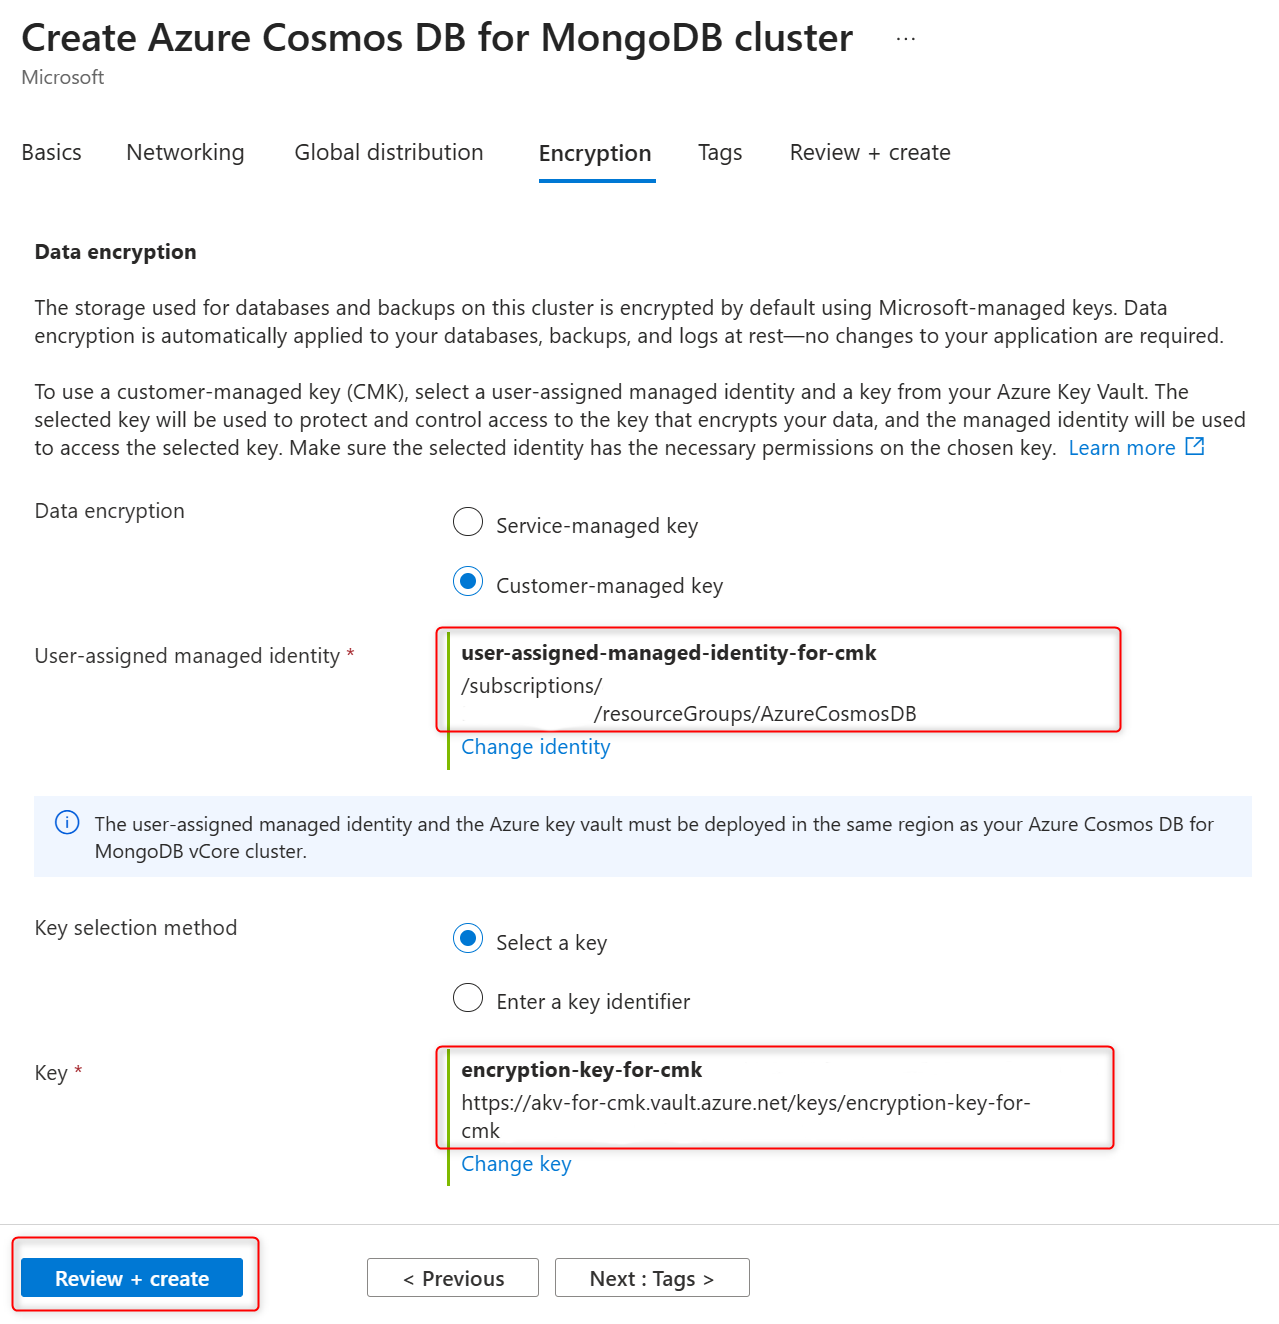
During provisioning of a new Azure Cosmos DB for MongoDB vCore cluster, service-managed or customer-managed keys for cluster data encryption is configured in the Encryption tab. Select the Customer-managed key for Data encryption.
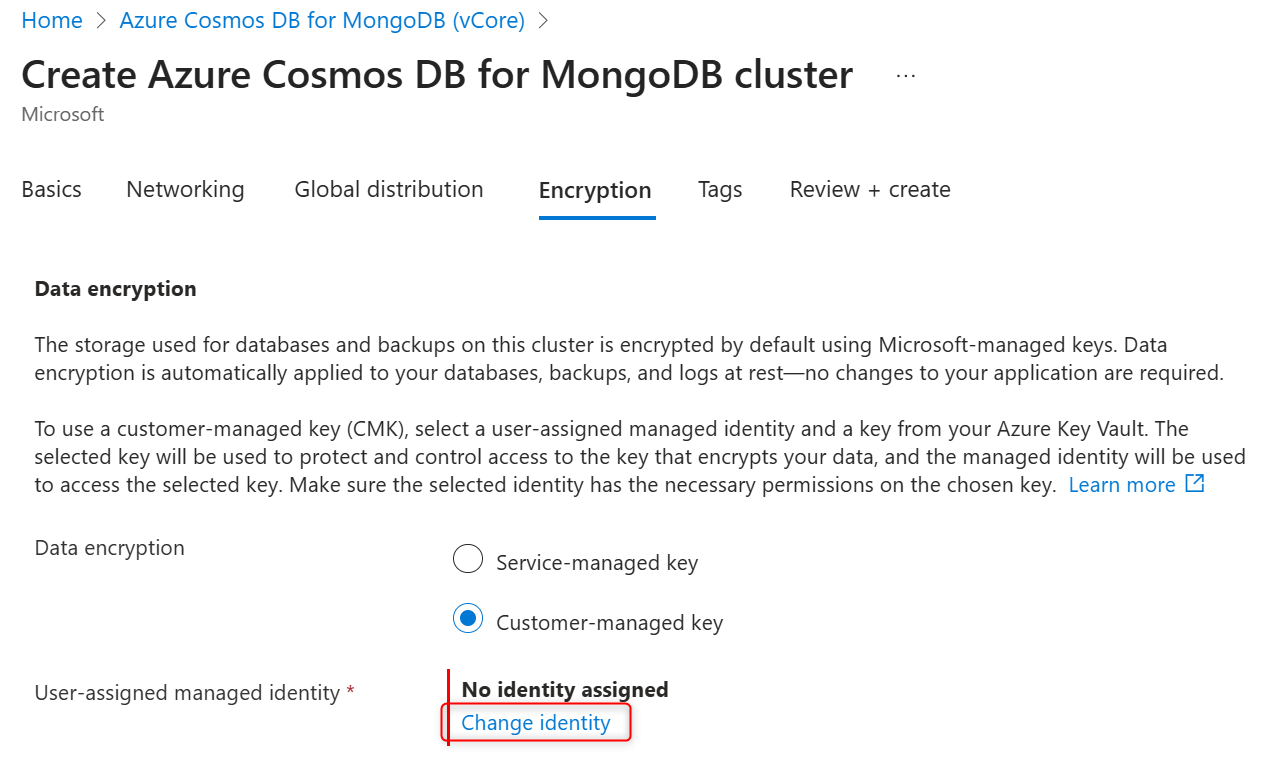
In User-assigned managed identity section select Change identity.
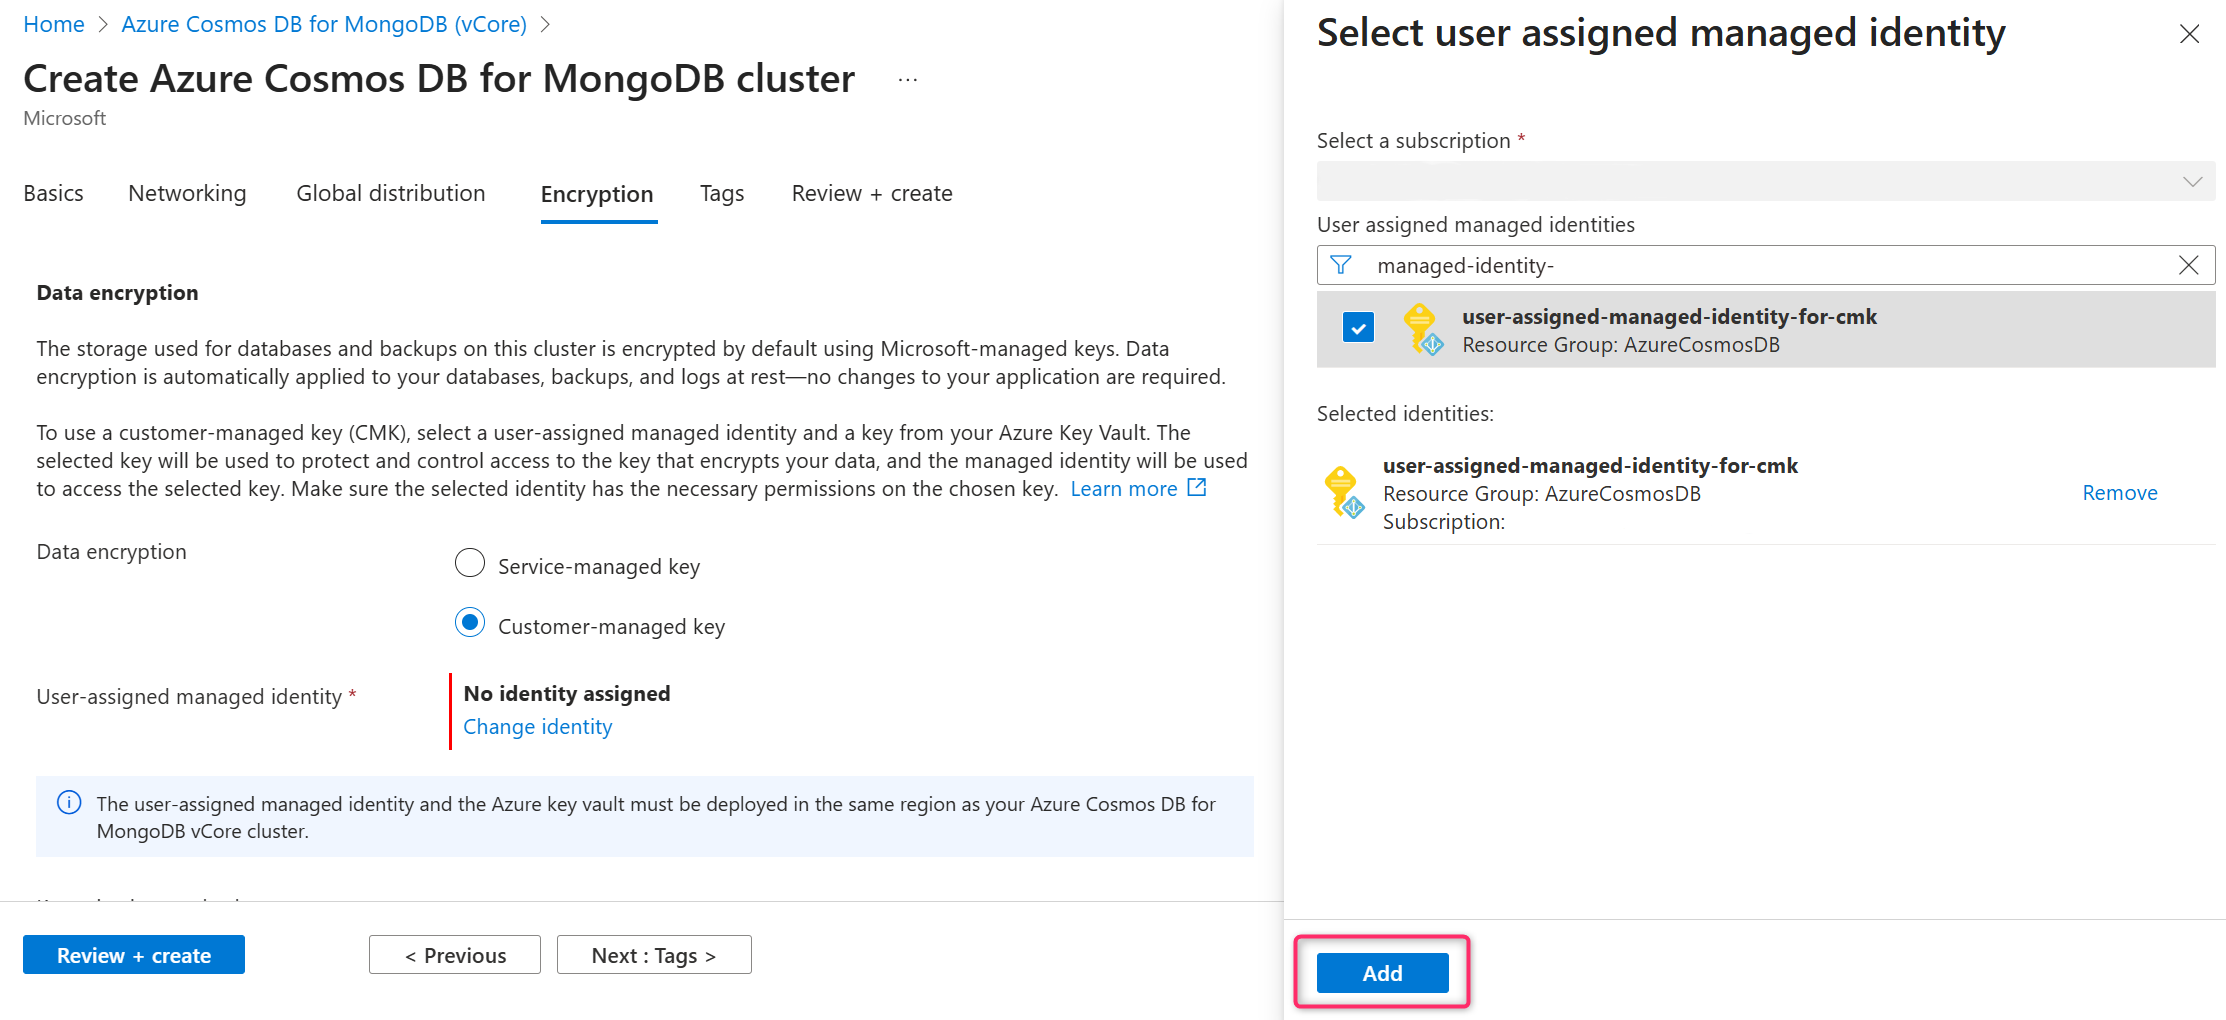
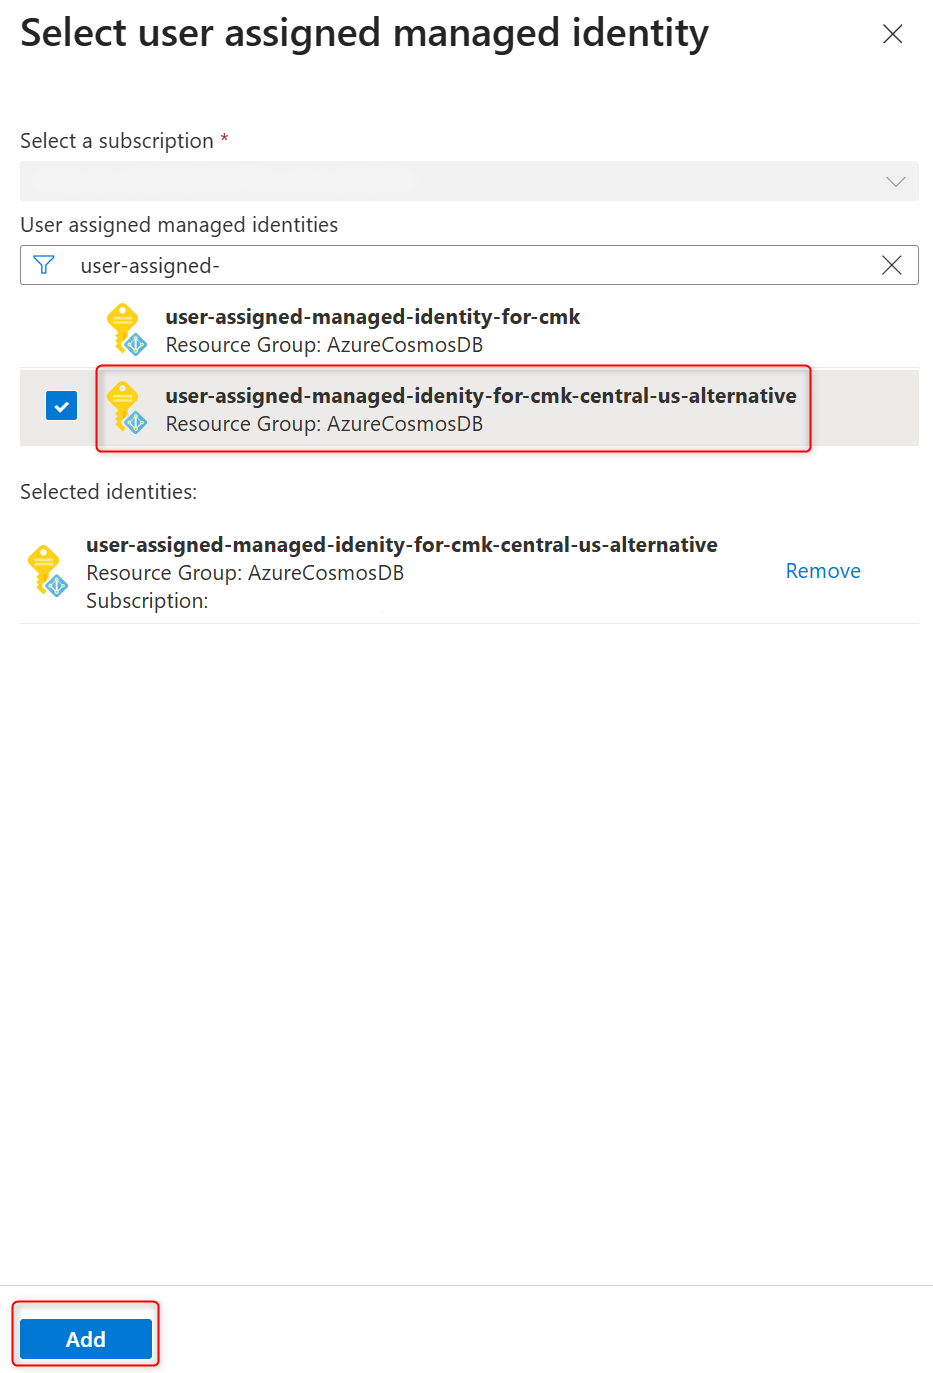
In the list of user-assigned managed identities, select the one you want your cluster to use to access the data encryption key stored in an Azure Key Vault.
Select Add.
In the Key selection method, choose Select a key .
In the Key section, select Change key .
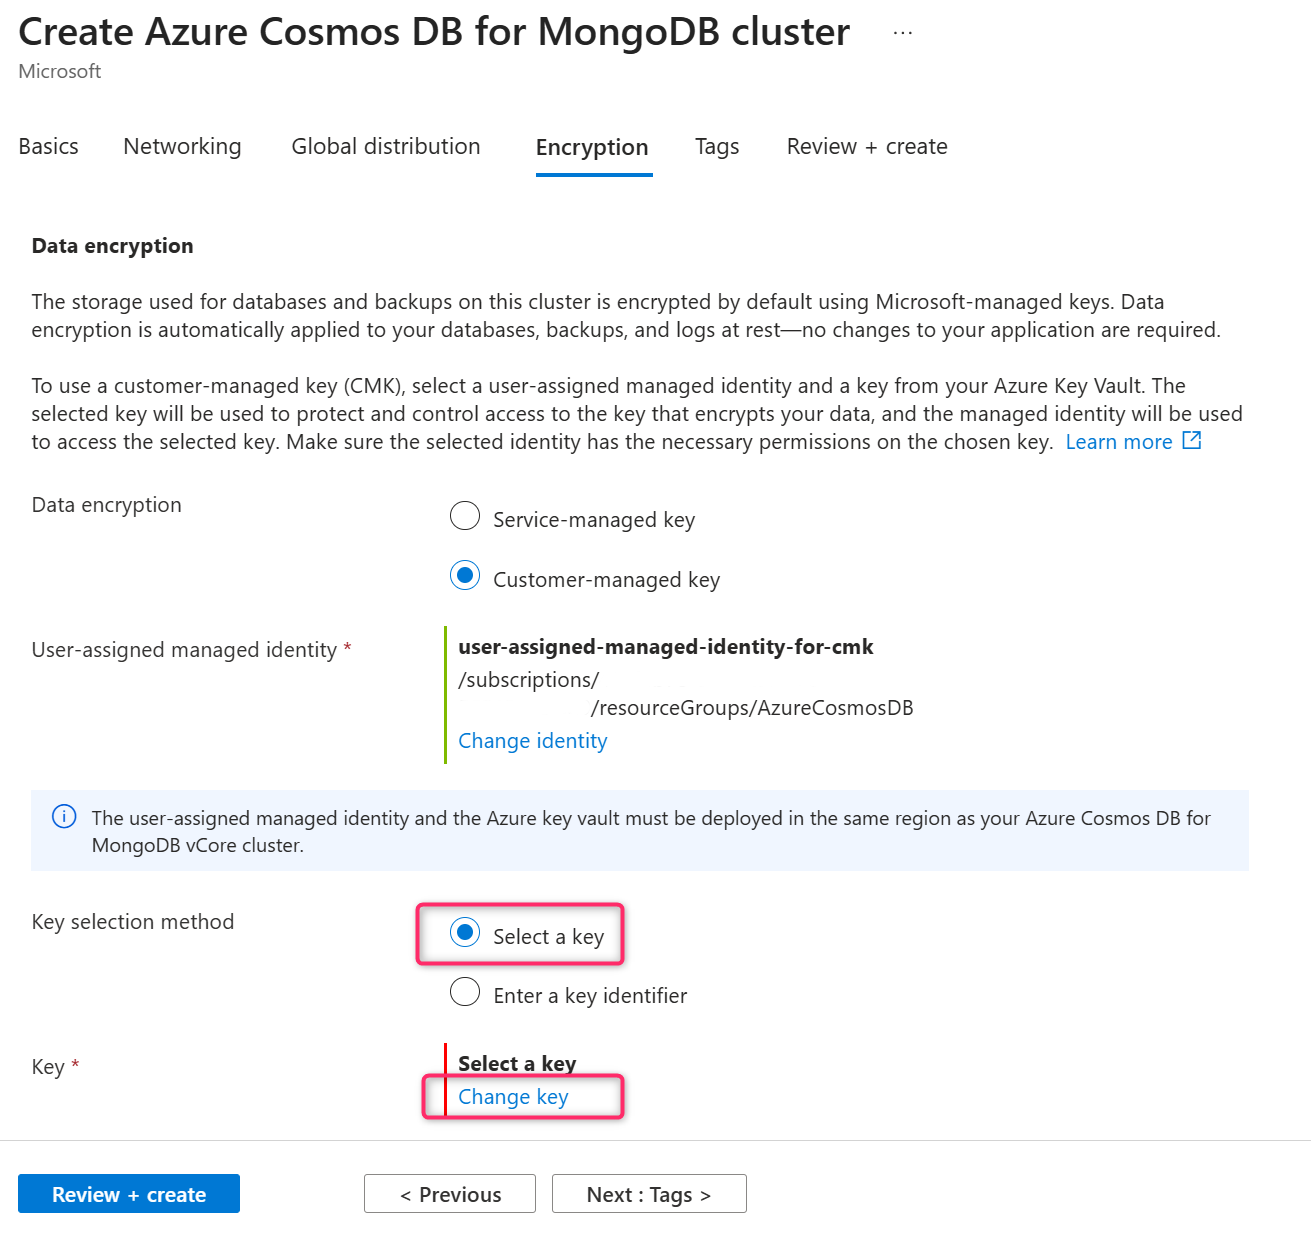
In the Select a key pane select the Azure Key Vault in the Key vault and encryption key in the Key, and confirm your choices by selecting Select.
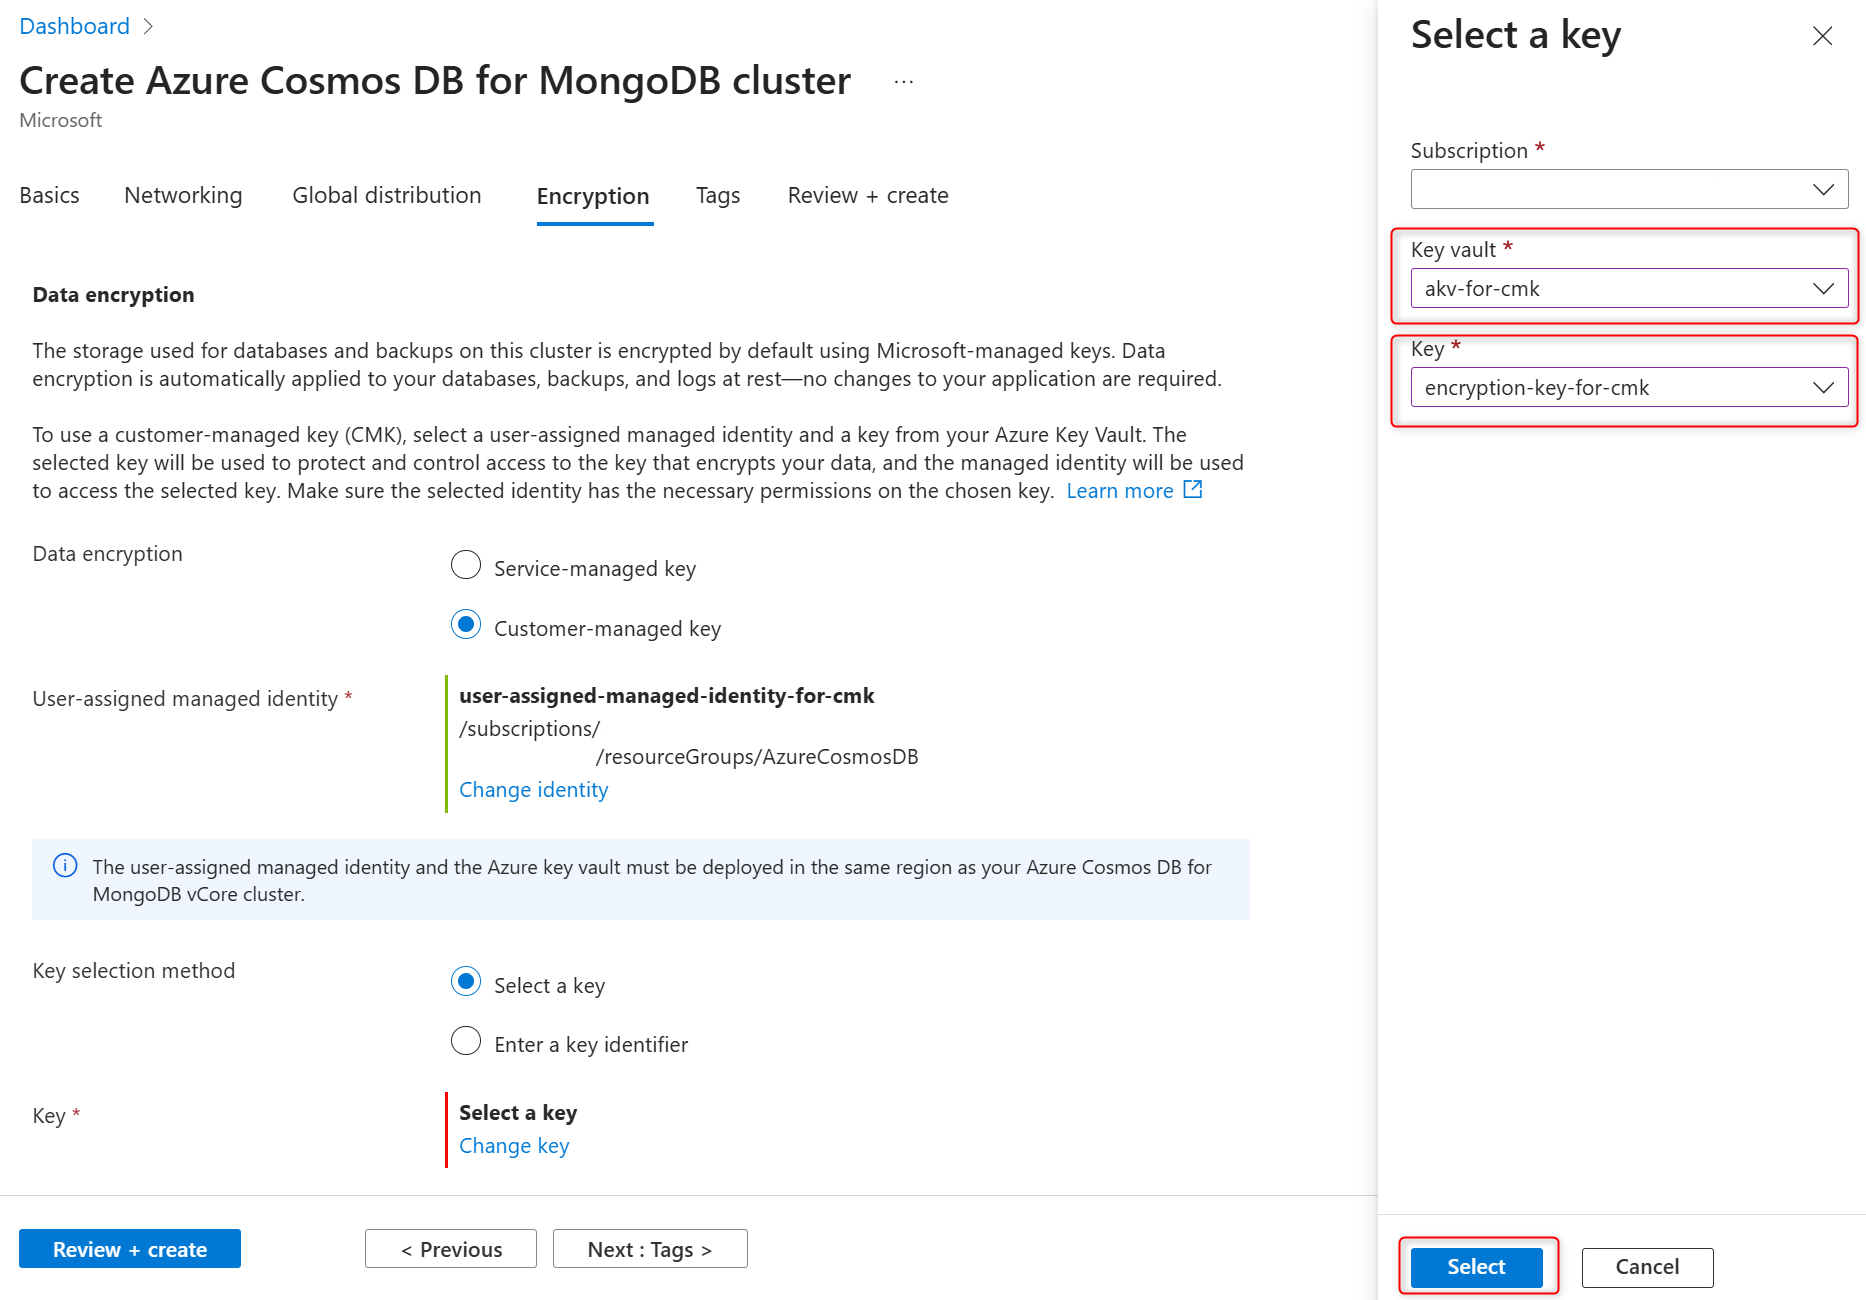
Important
Selected Azure Key Vault instance should be in the same Azure region where Azure Cosmos DB for MongoDB cluster is going to be hosted.
Confirm selected user-assigned managed identity and encryption key on the Encryption tab and select Review + create to create cluster.


Update data encryption settings on cluster with CMK enabled
For existing clusters that were deployed with data encryption using a customer-managed key, you can do several configuration changes. Things that can be changed are the references to the keys used for encryption including key vault and key used as a customer-managed key, and references to the user-assigned managed identities used by the service to access the keys kept in the key stores.
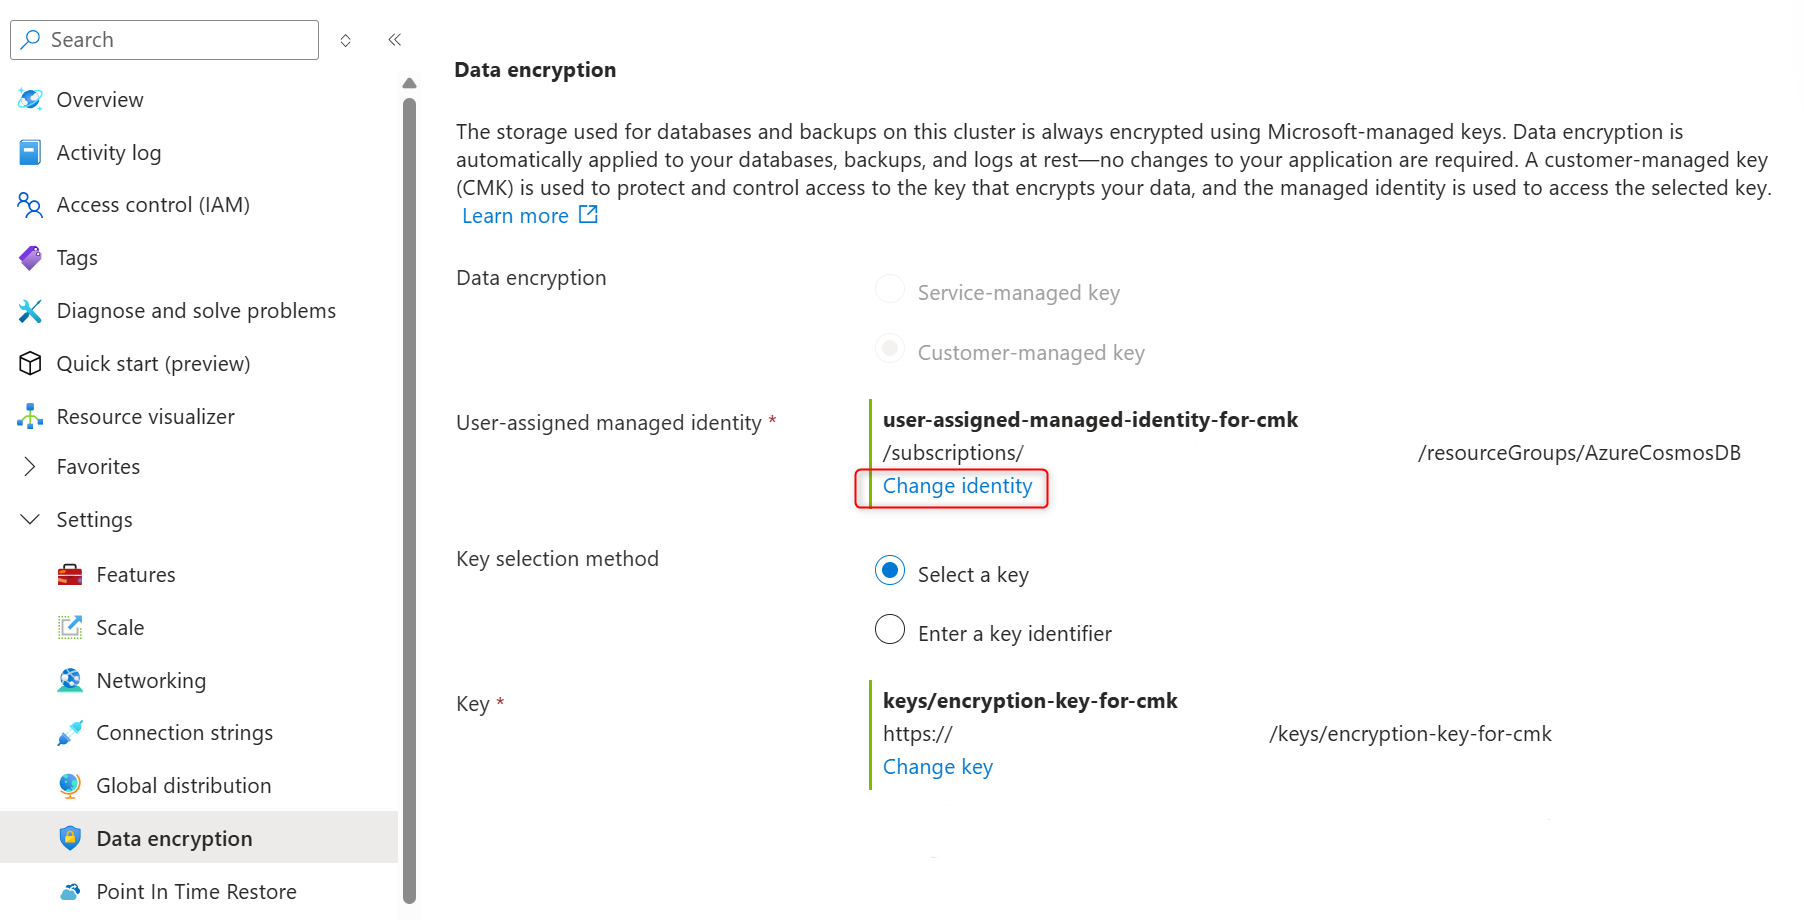
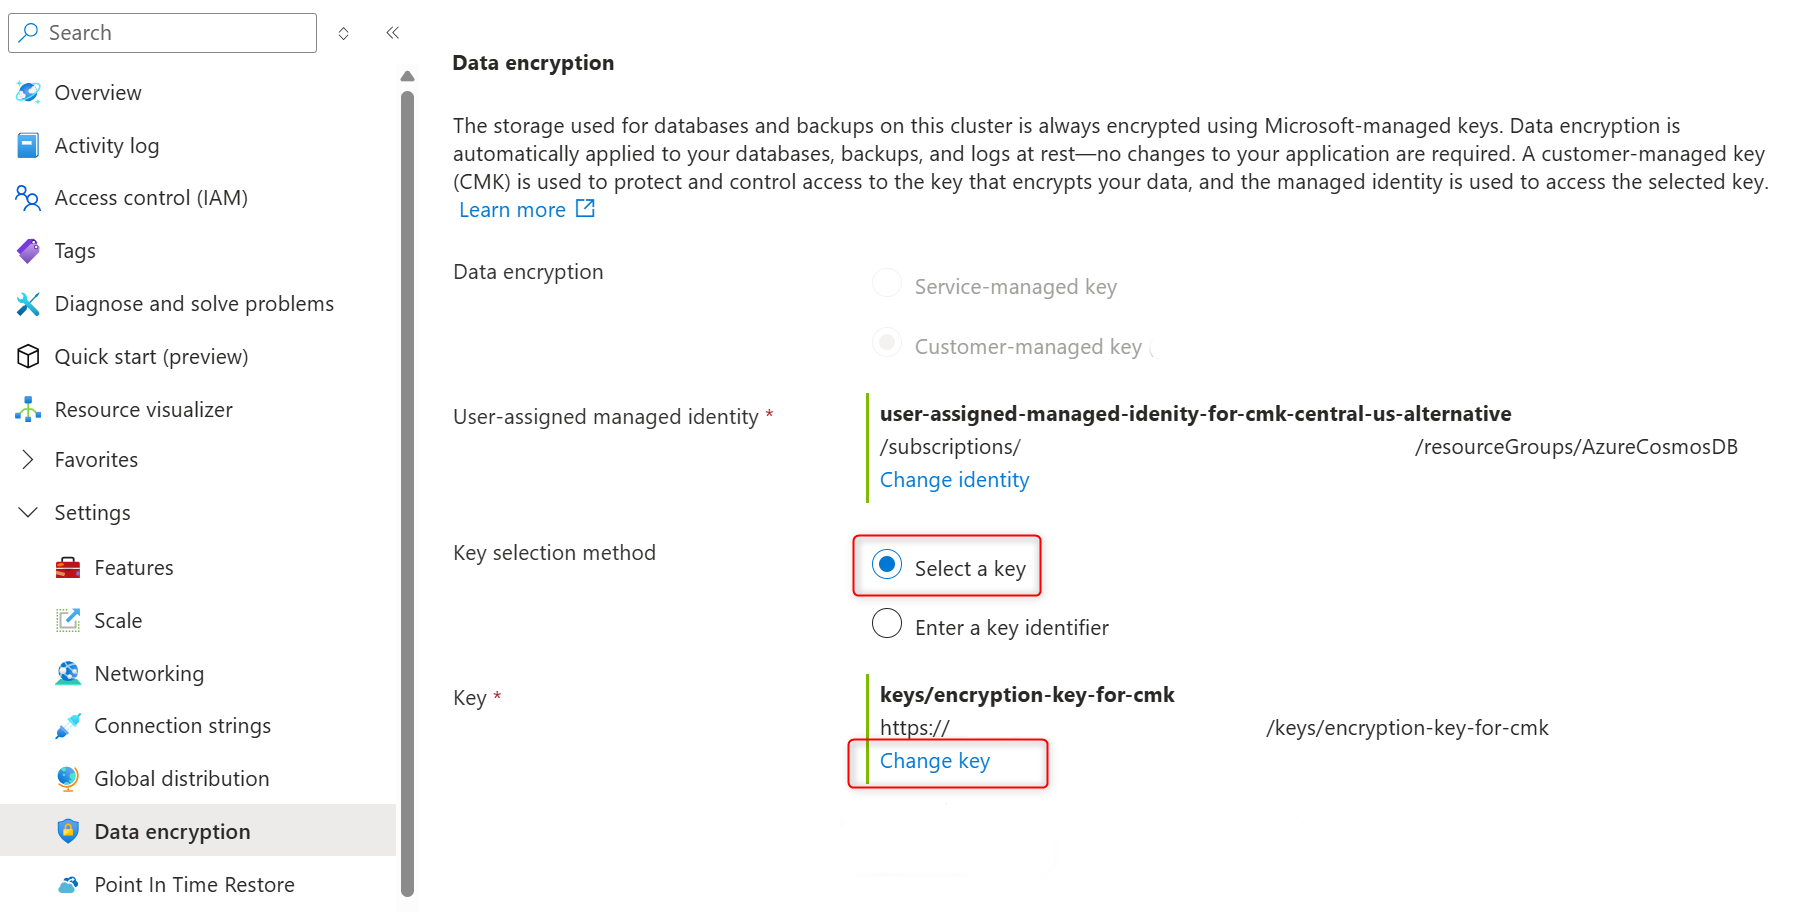
On the cluster sidebar, under Settings, select Data encryption.
In User-assigned managed identity section select Change identity.
In the list of user-assigned managed identities, select the one you want your cluster to use to access the data encryption key stored in an Azure Key Vault.
Select Add.
In the Key selection method, choose Select a key .
In the Key, choose Change key.
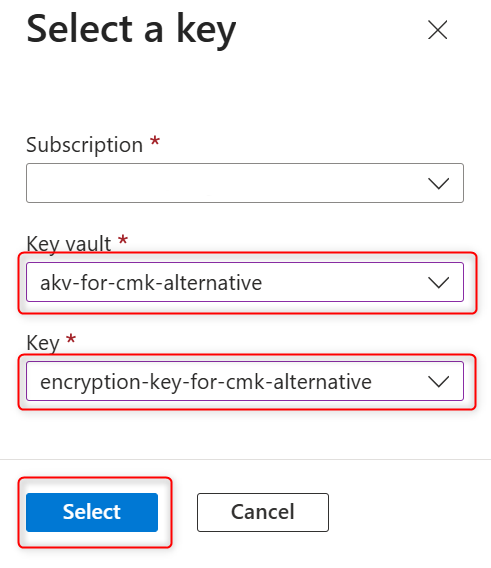
In the Select a key pane select the Azure Key Vault in the Key vault and encryption key in the Key, and confirm your choices by selecting Select.
Important
Selected Azure Key Vault instance should be in the same Azure region where Azure Cosmos DB for MongoDB cluster is hosted.
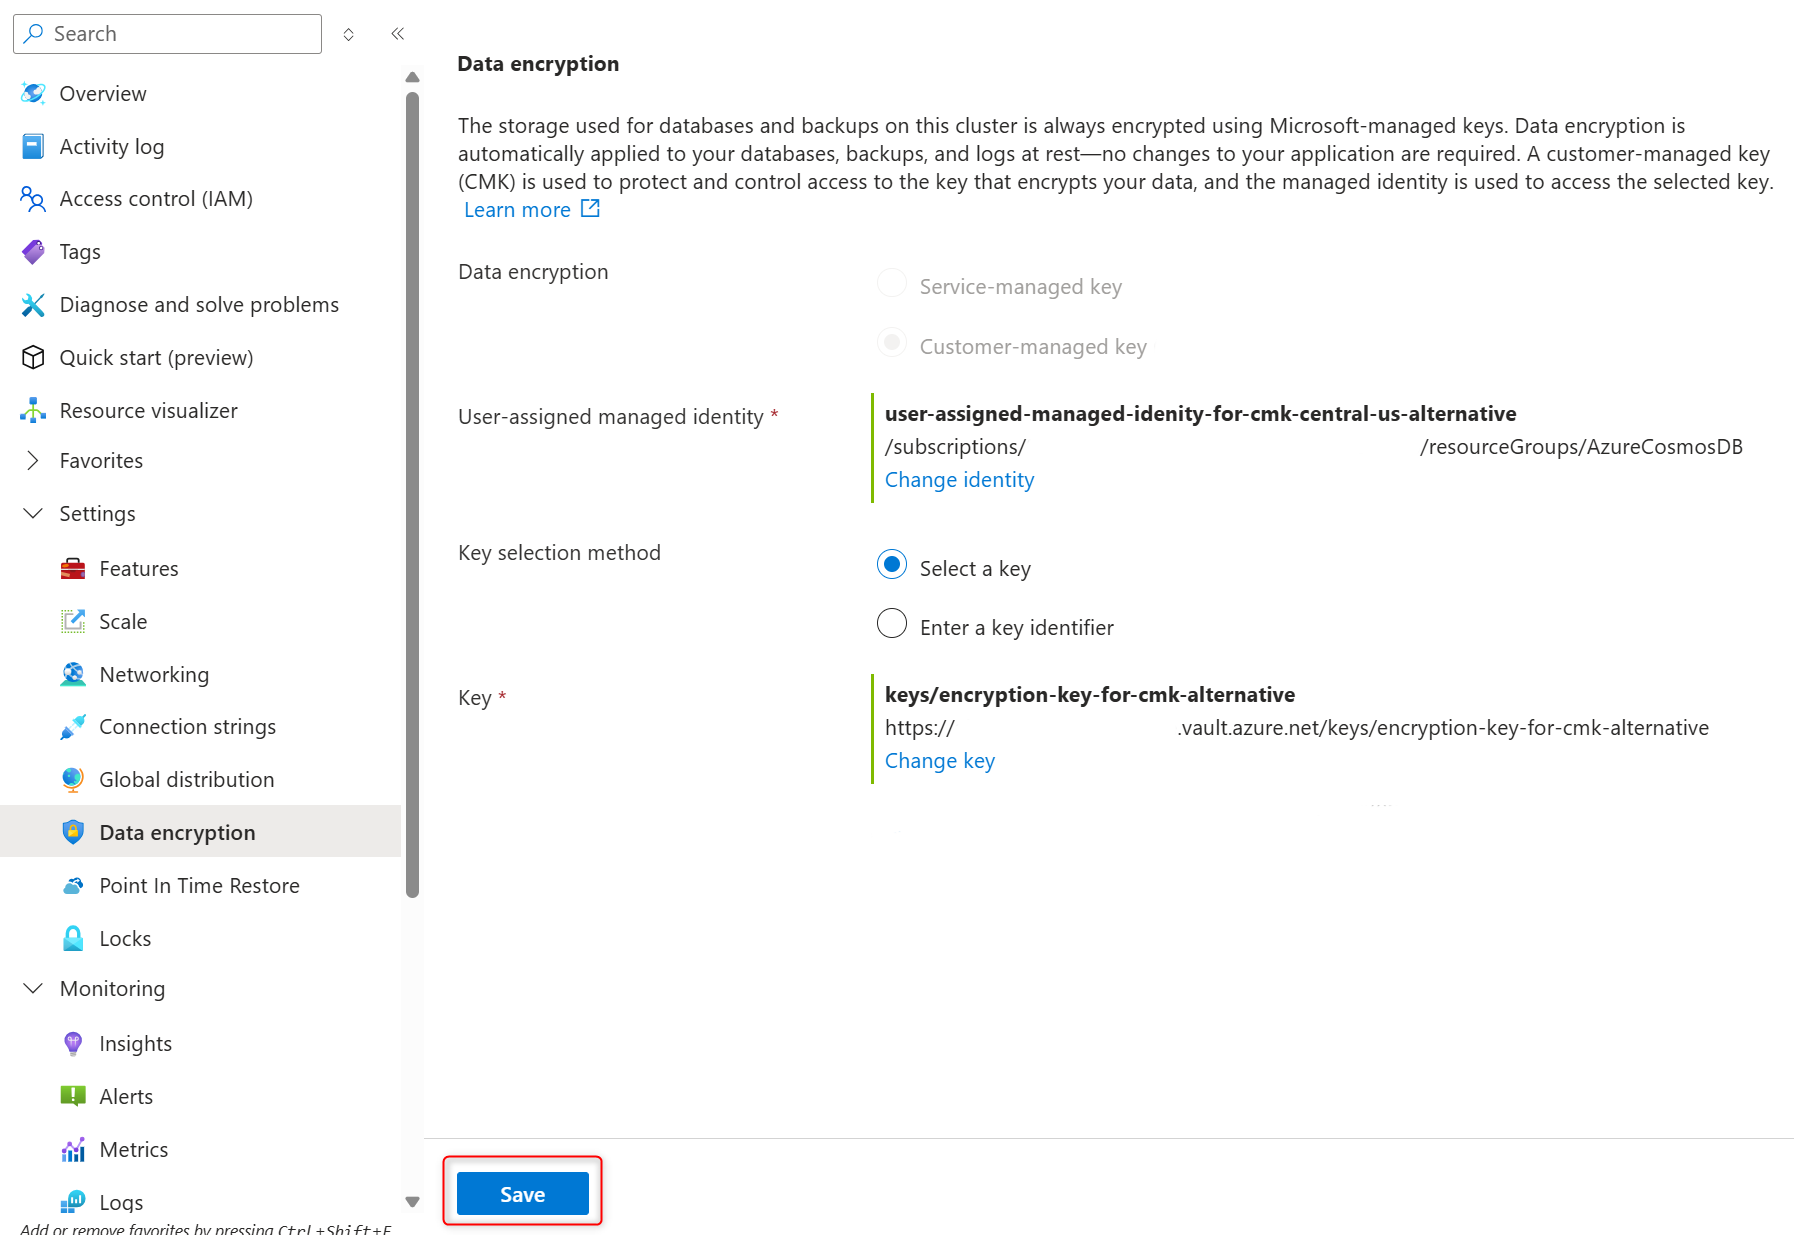
Confirm selected user-assigned managed identity and encryption key on the Data encryption page and select Save to confirm your selections and create replica cluster.


Whether you want to only change the user-assigned managed identity used to access the key, or you want to only change the key used for data encryption, or you want to change both at the same time, you're required to provide all parameters listed in the JSON file.
If the key or the user-assigned managed identity specified don't exist, you get the error.
Identities passed as parameters, if they exist and are valid, are automatically added to the list of user-assigned managed identities associated with your Azure Cosmos DB for MongoDB vCore cluster. This is the case even if the command later fails with some other error.
Change data encryption mode on existing clusters
The only point at which you can decide if you want to use a service-managed key or a customer-managed key (CMK) for data encryption, is at cluster creation time. Once you make that decision and create the cluster, you can't switch between the two options. To create a copy of your Azure Cosmos DB for MongoDB vCore cluster with a different encryption option, you can either create a replica cluster or perform a cluster restore and select the new encryption mode during replica cluster or restored cluster creation.
Enable or disable customer-managed key (CMK) data encryption during replica cluster creation
Follow these steps to create a replica cluster with CMK or SMK data encryption to enable or disable CMK on a replica cluster.
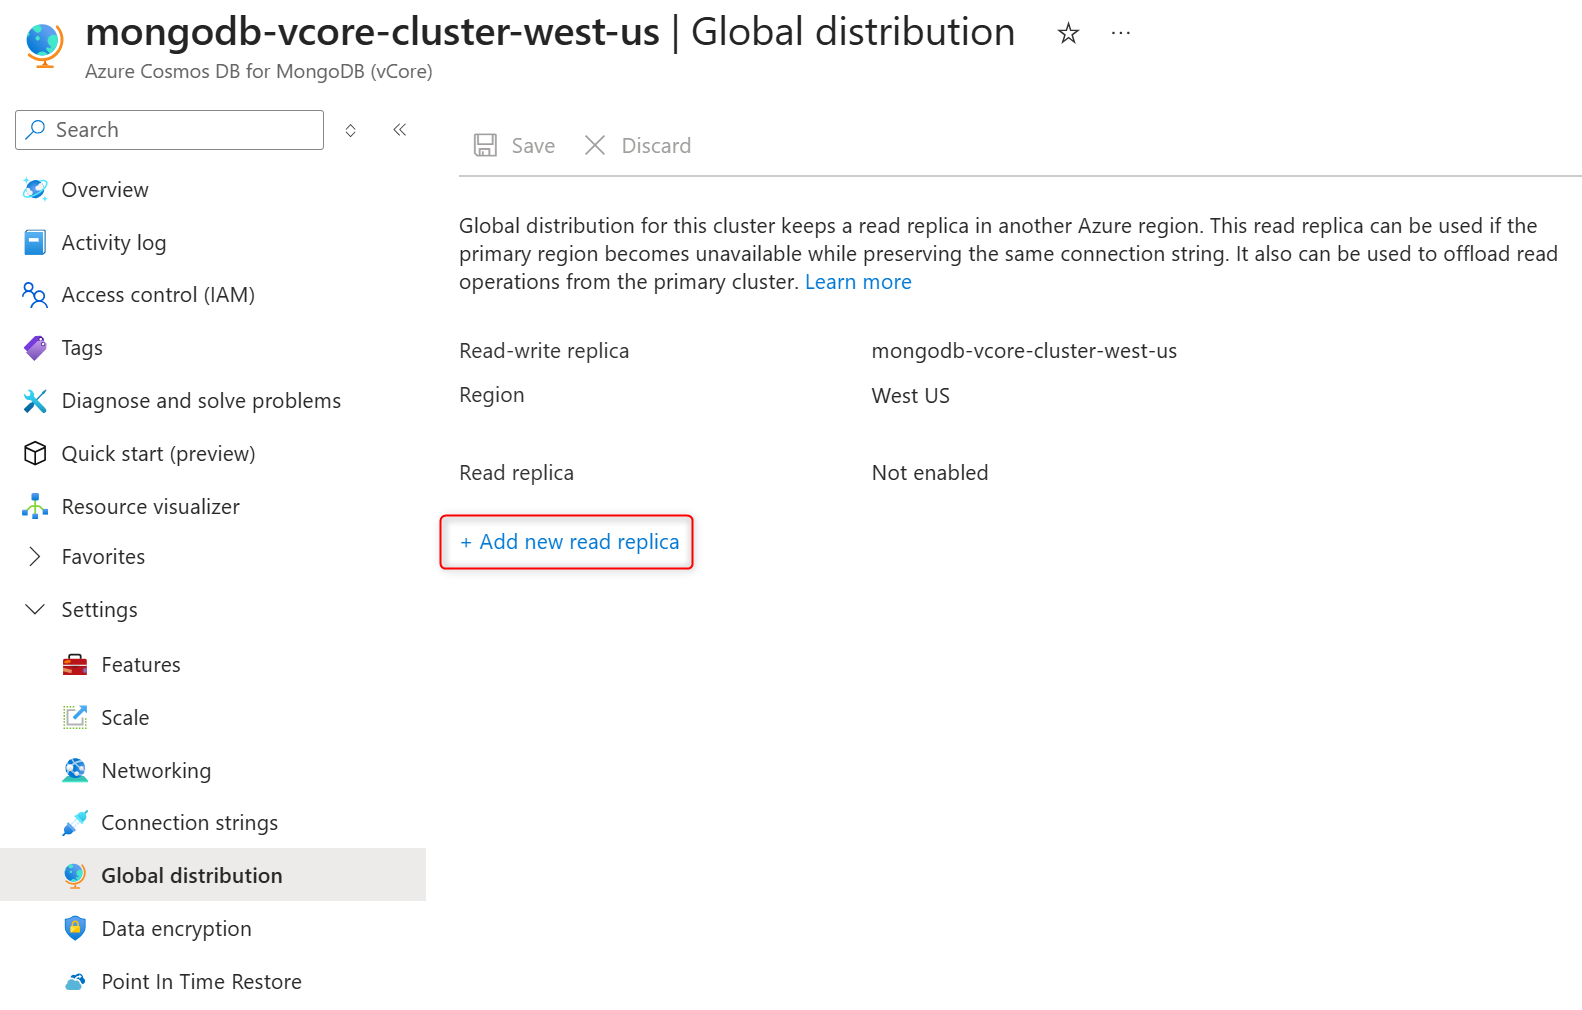
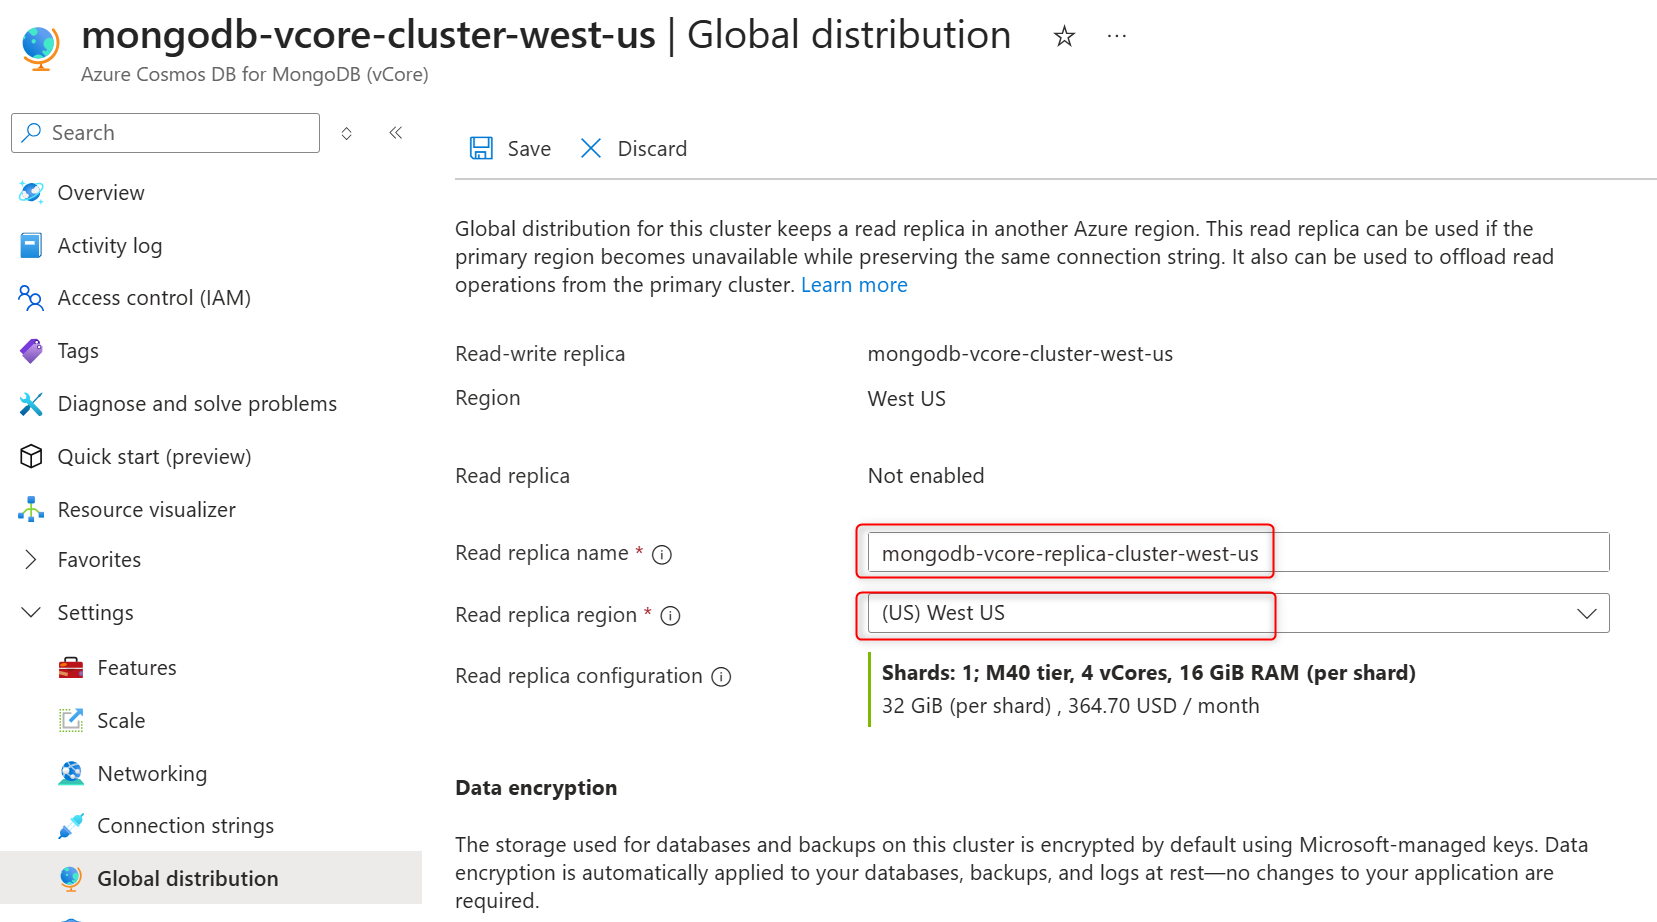
On the cluster sidebar, under Settings, select Global distribution.
Select Add new read replica.
Provide a replica cluster name in the Read replica name field.
Select a region in the Read replica region. The replica cluster is hosted in the selected Azure region.
Note
Replica cluster is always created in the same Azure subscription and resource group as its primary (read-write) cluster.
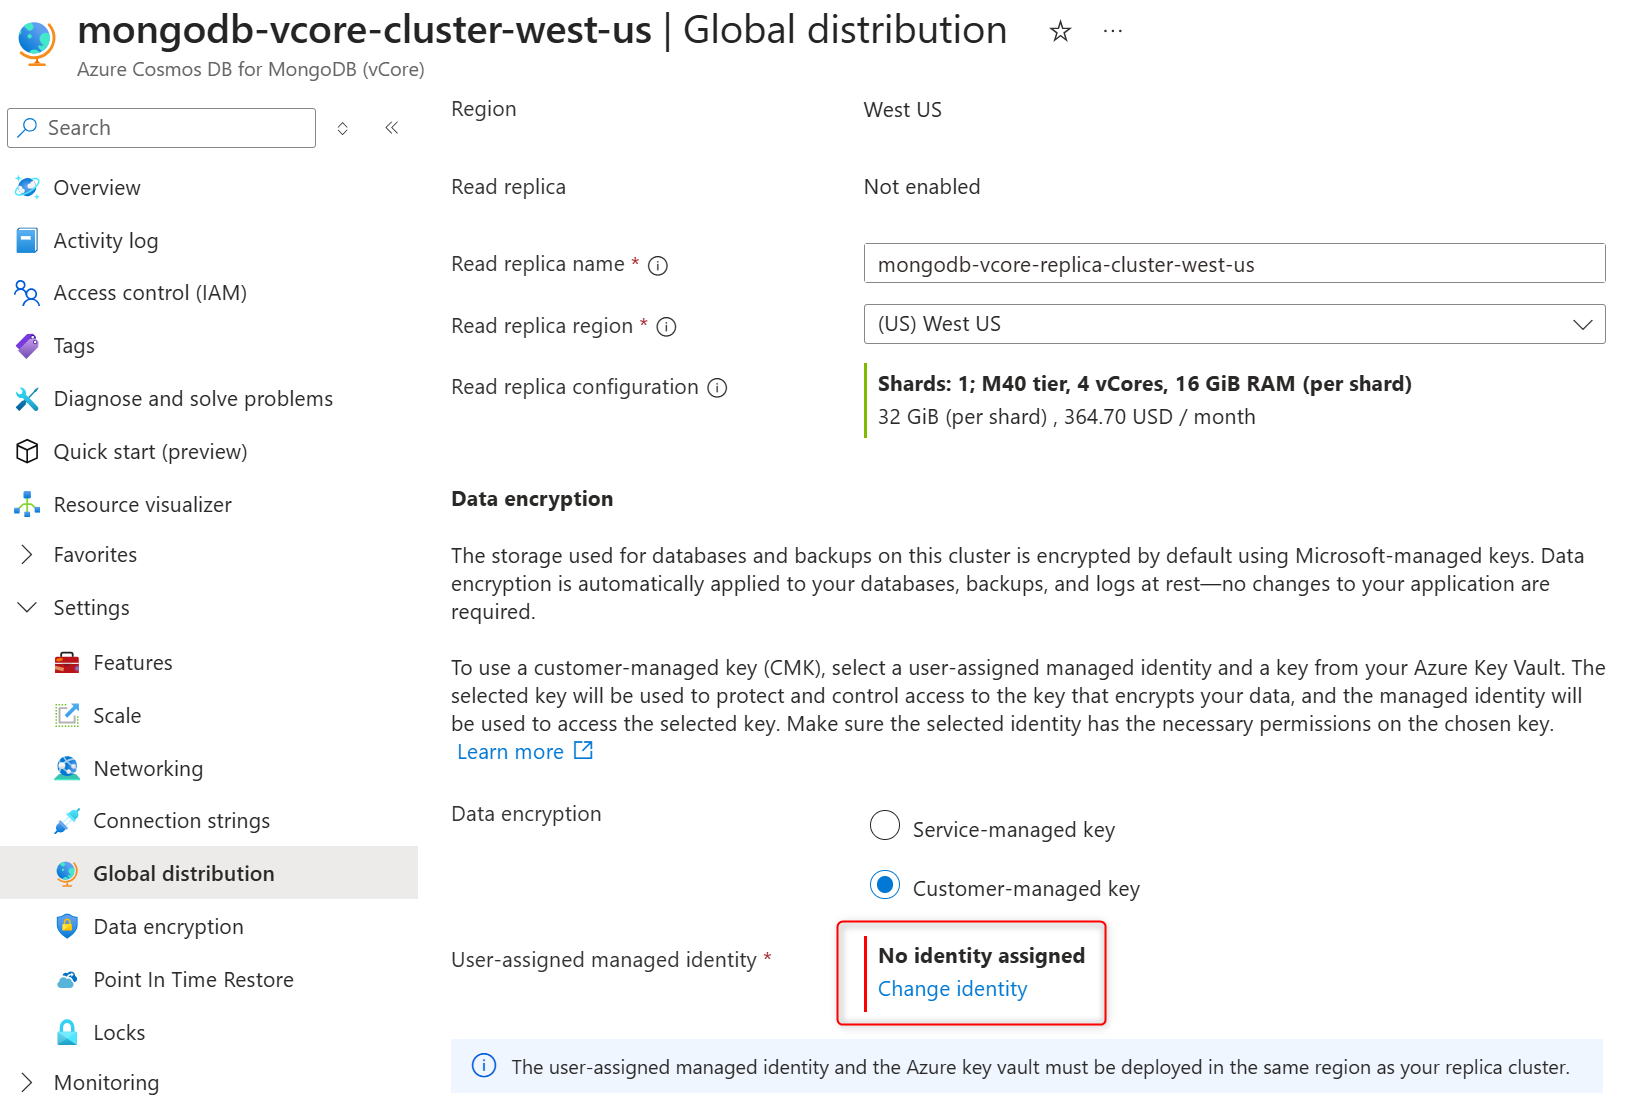
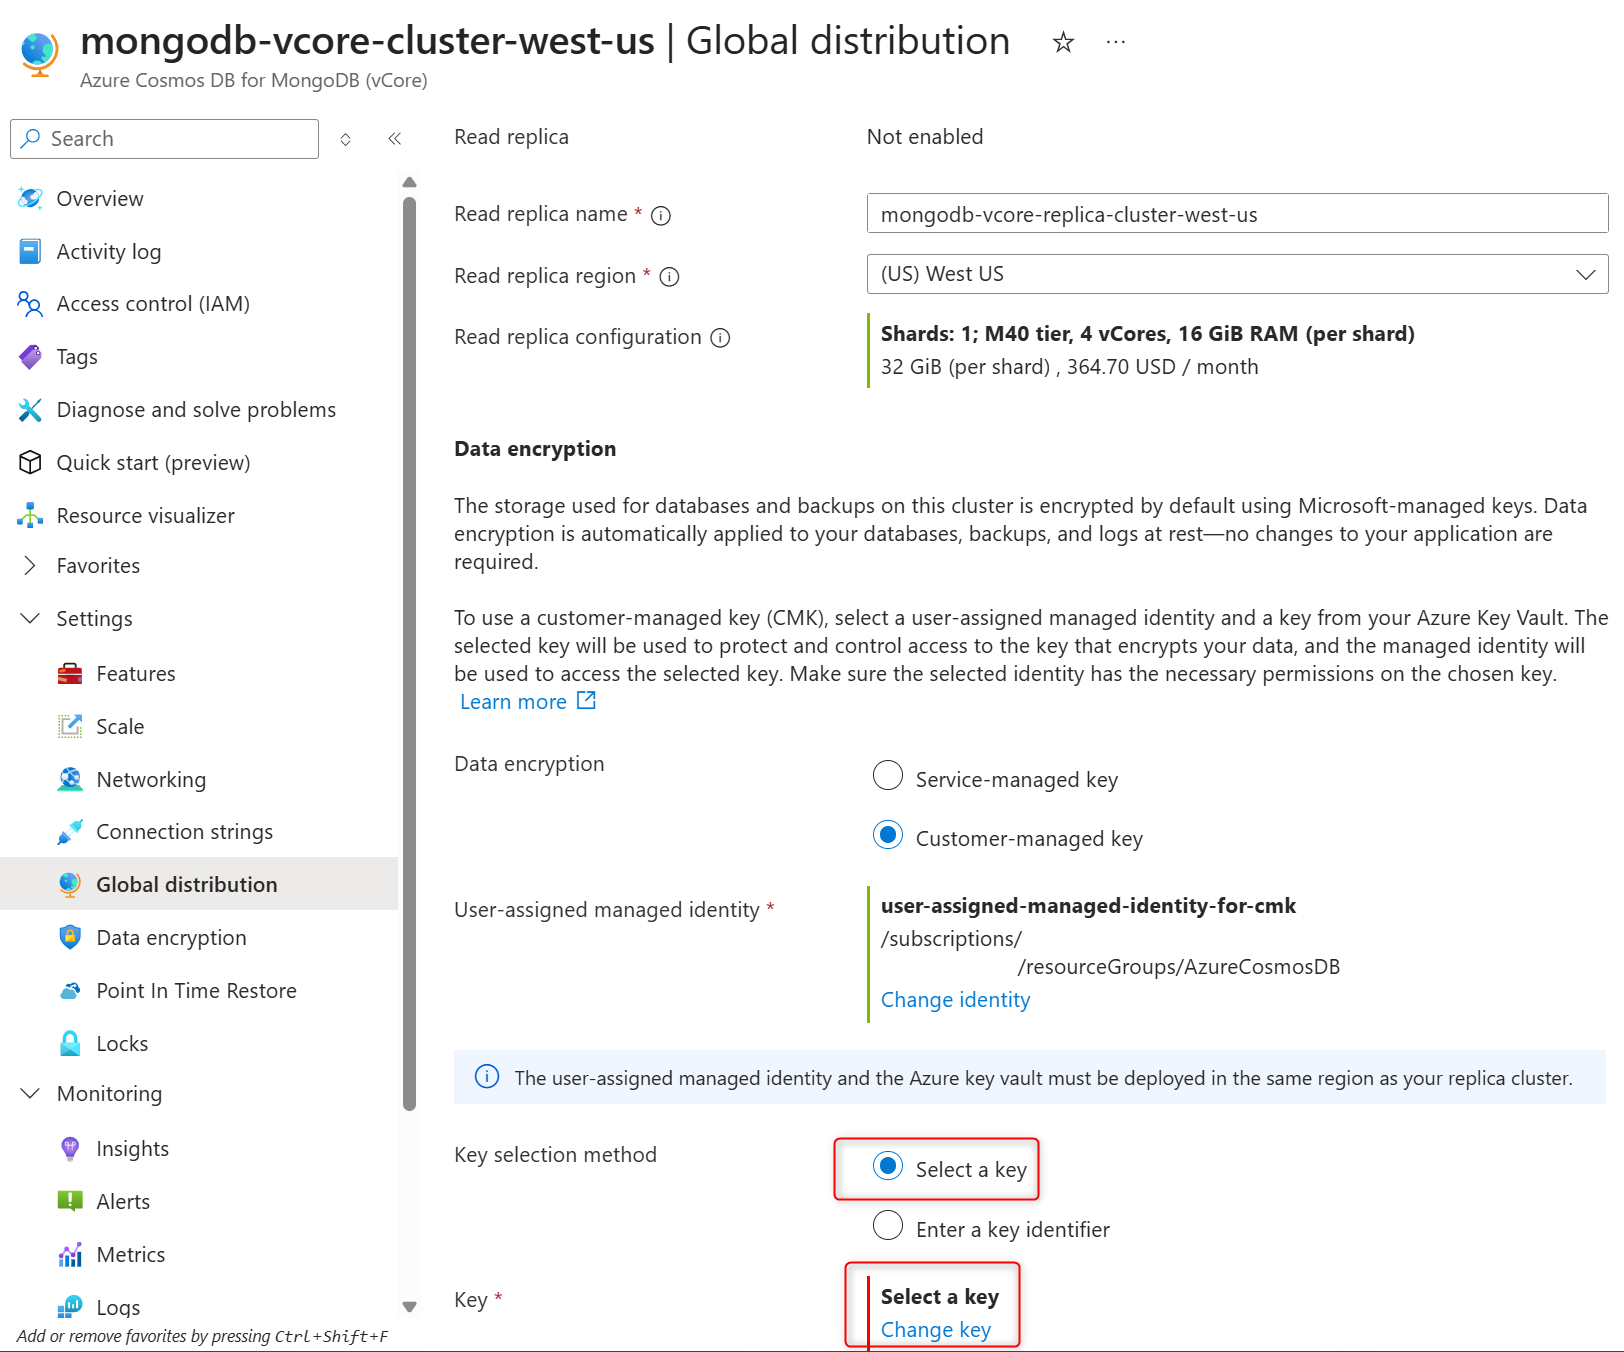
In Data encryption section, select the Customer-managed key to enable CMK or Service-managed key to disable CMK on the replica cluster.
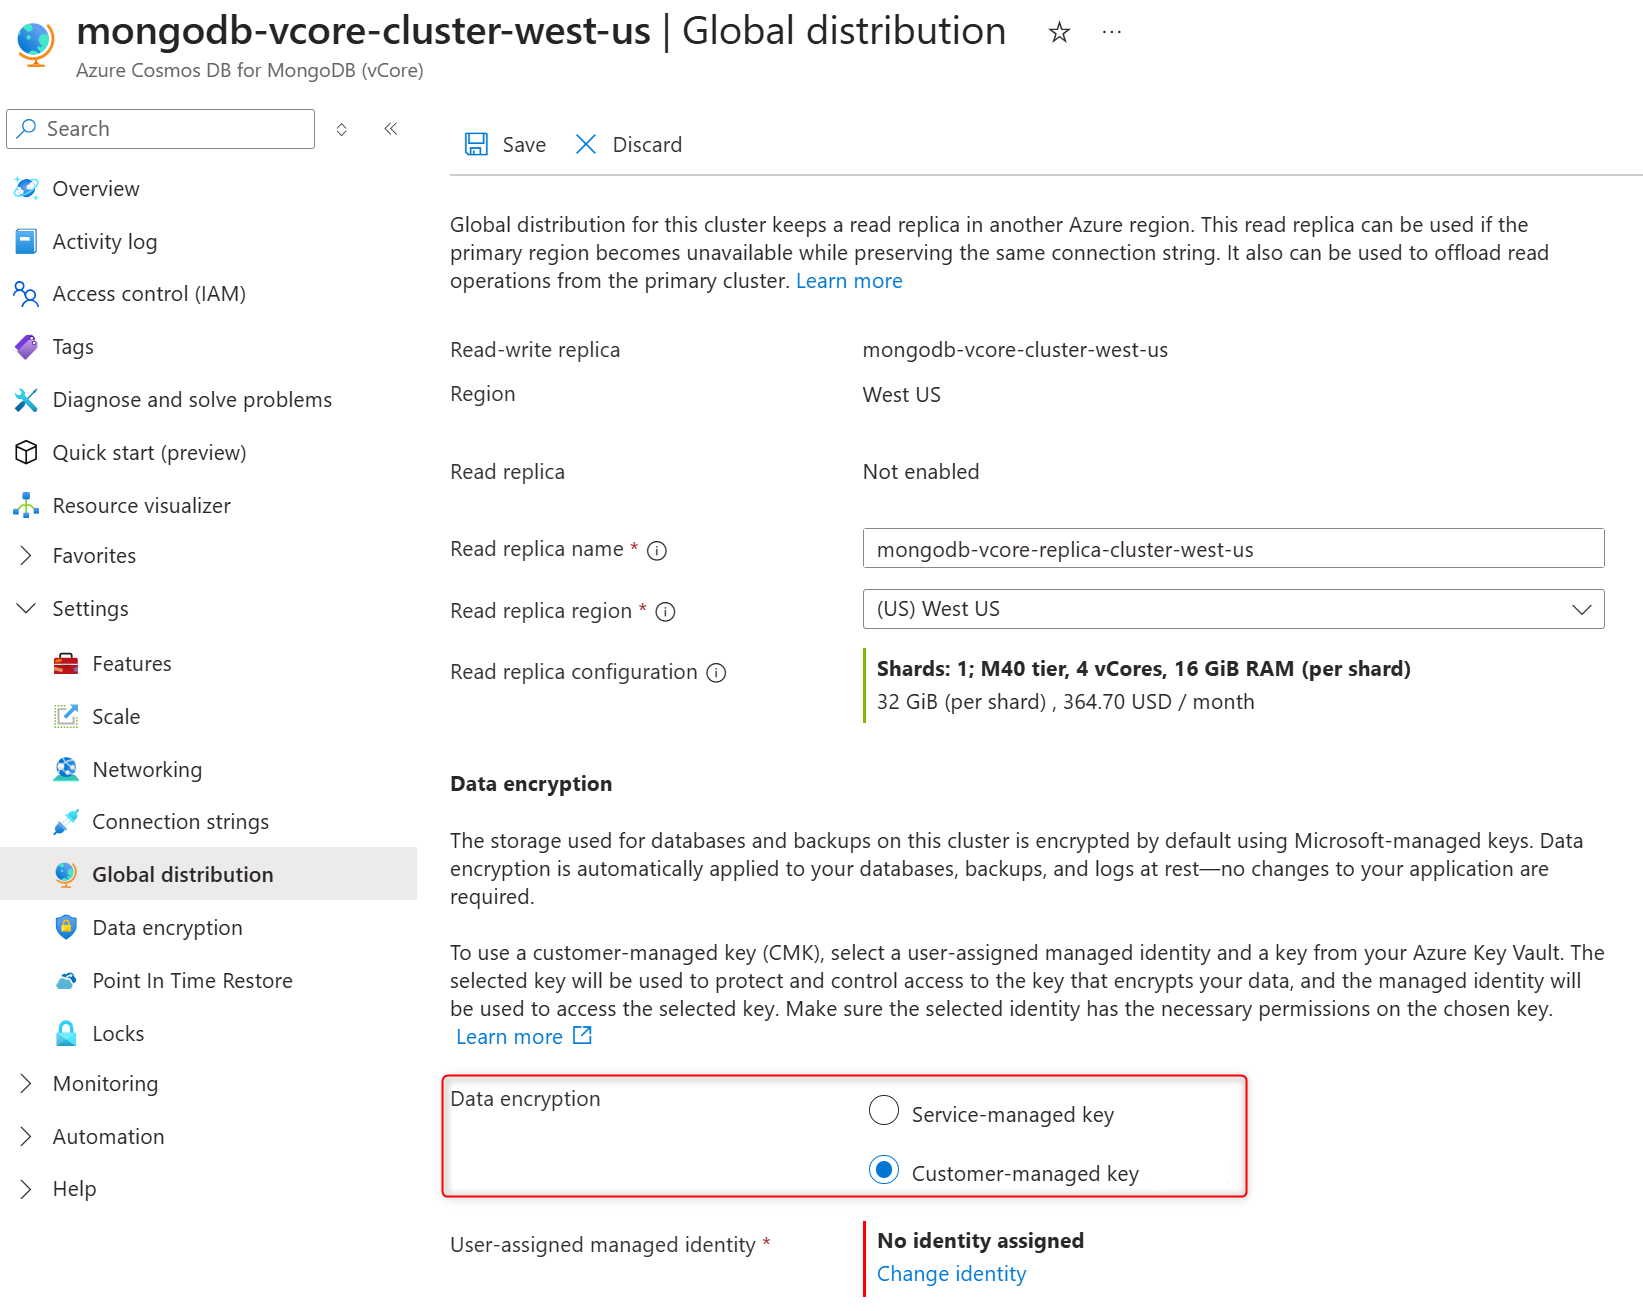
In User-assigned managed identity section select Change identity.
In the list of user-assigned managed identities, select the one you want your cluster to use to access the data encryption key stored in an Azure Key Vault.
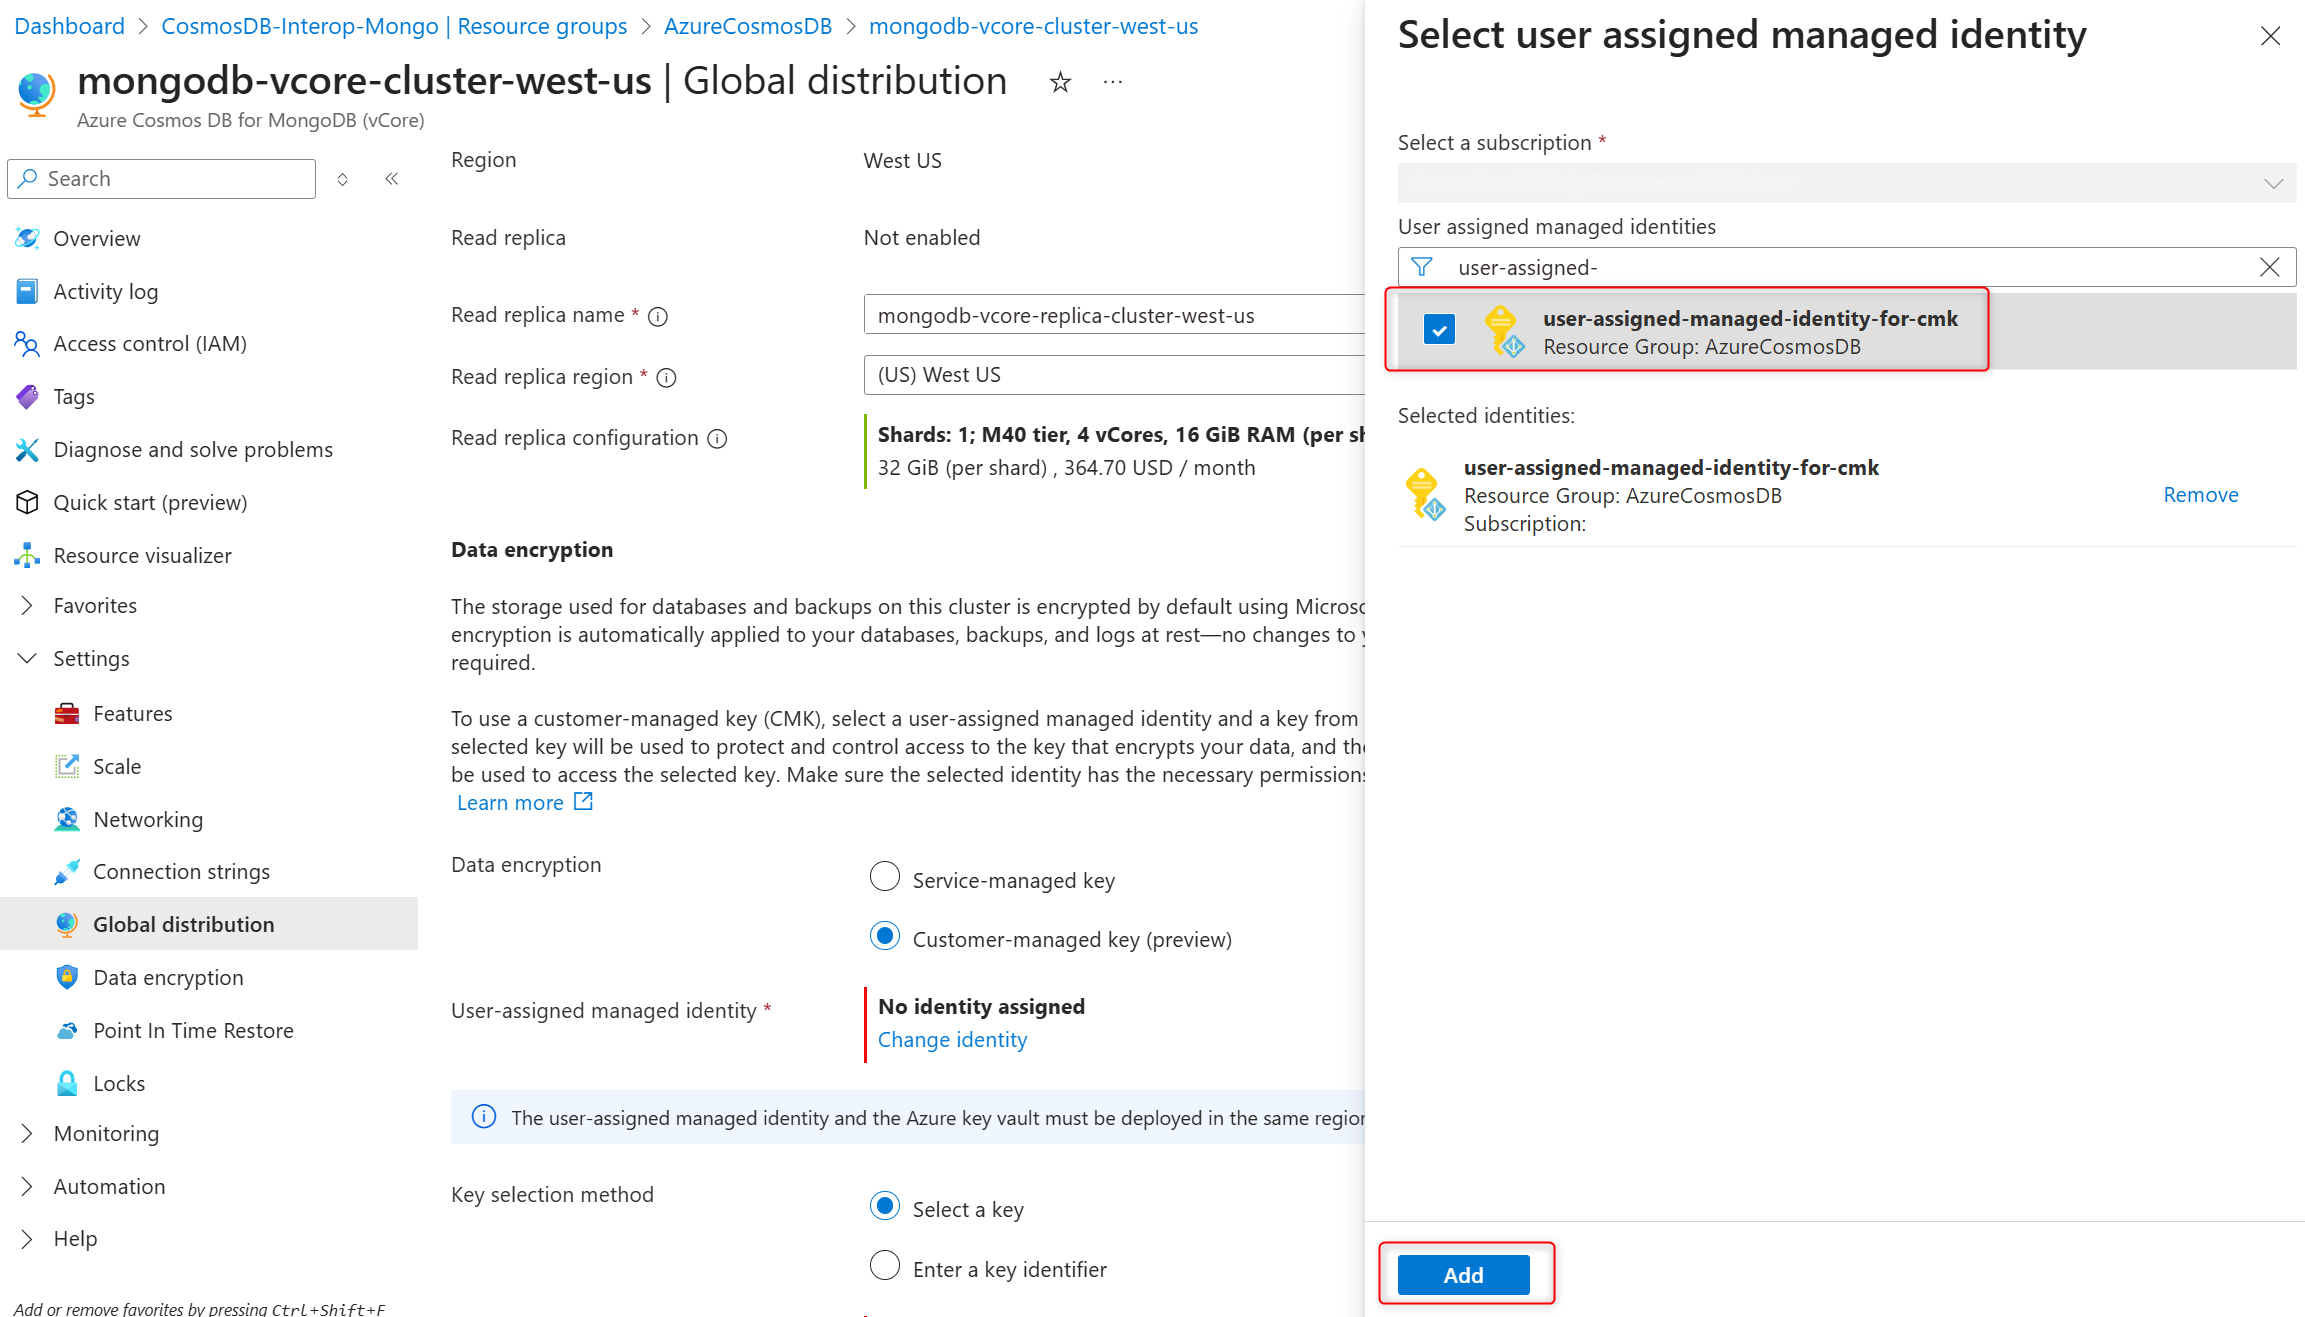
Select Add.
In the Key selection method, choose Select a key .
In the Key, choose Change key.
In the Select a key pane select the Azure Key Vault in the Key vault and encryption key in the Key, and confirm your choices by selecting Select.
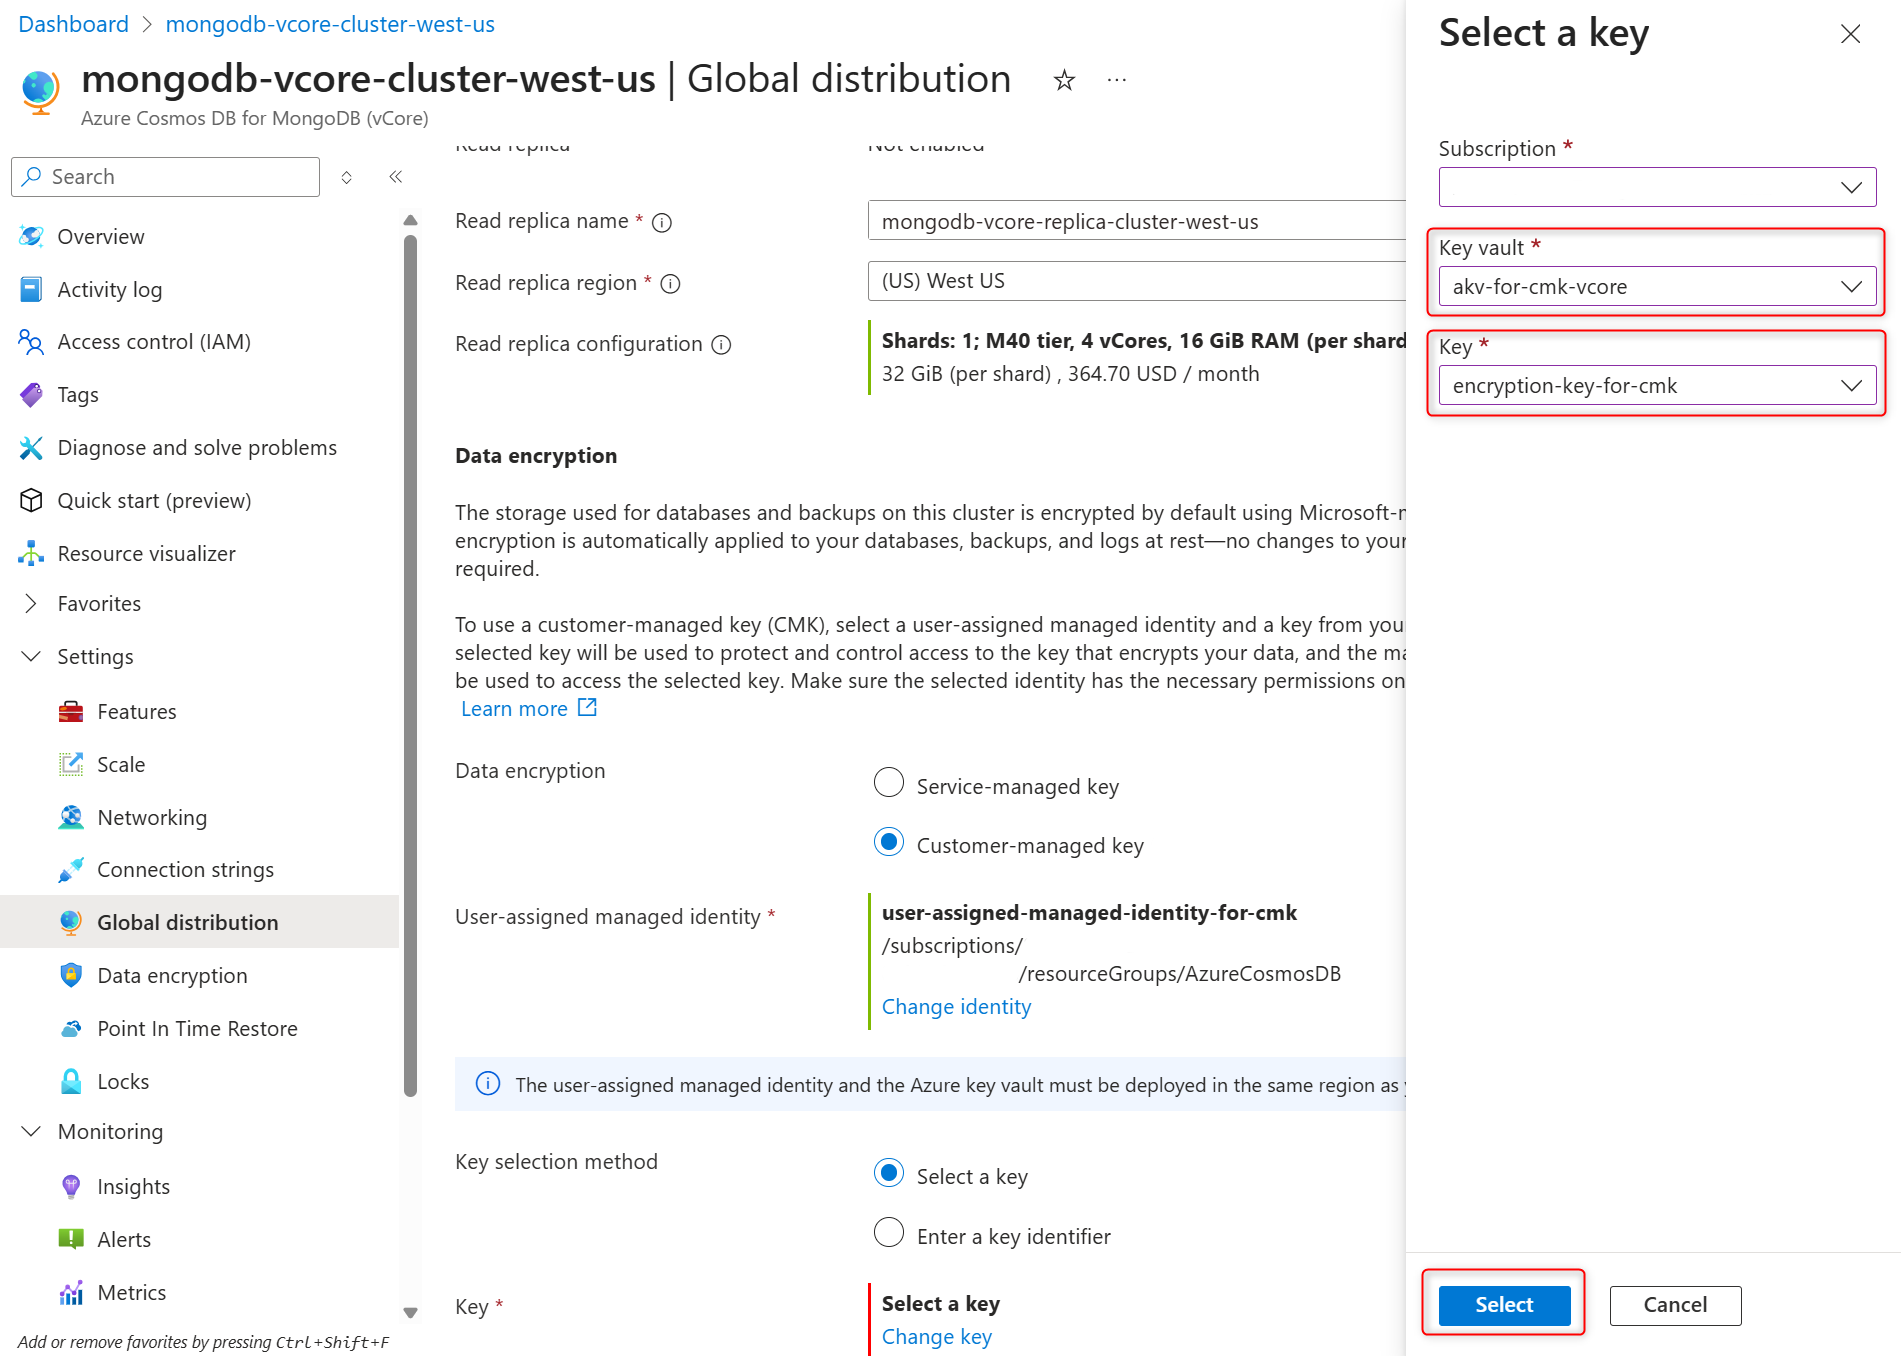
Confirm selected user-assigned managed identity and encryption key on the Global distribution page and select Save to confirm your selections and create replica cluster.


Enable or disable customer-managed key data encryption during cluster restore
The restore process creates a new cluster with the same configuration in the same Azure region, subscription, and resource group as the original. Follow these steps to create a restored cluster with CMK or SMK enabled.
Select an existing Azure Cosmos DB for MongoDB vCore cluster.
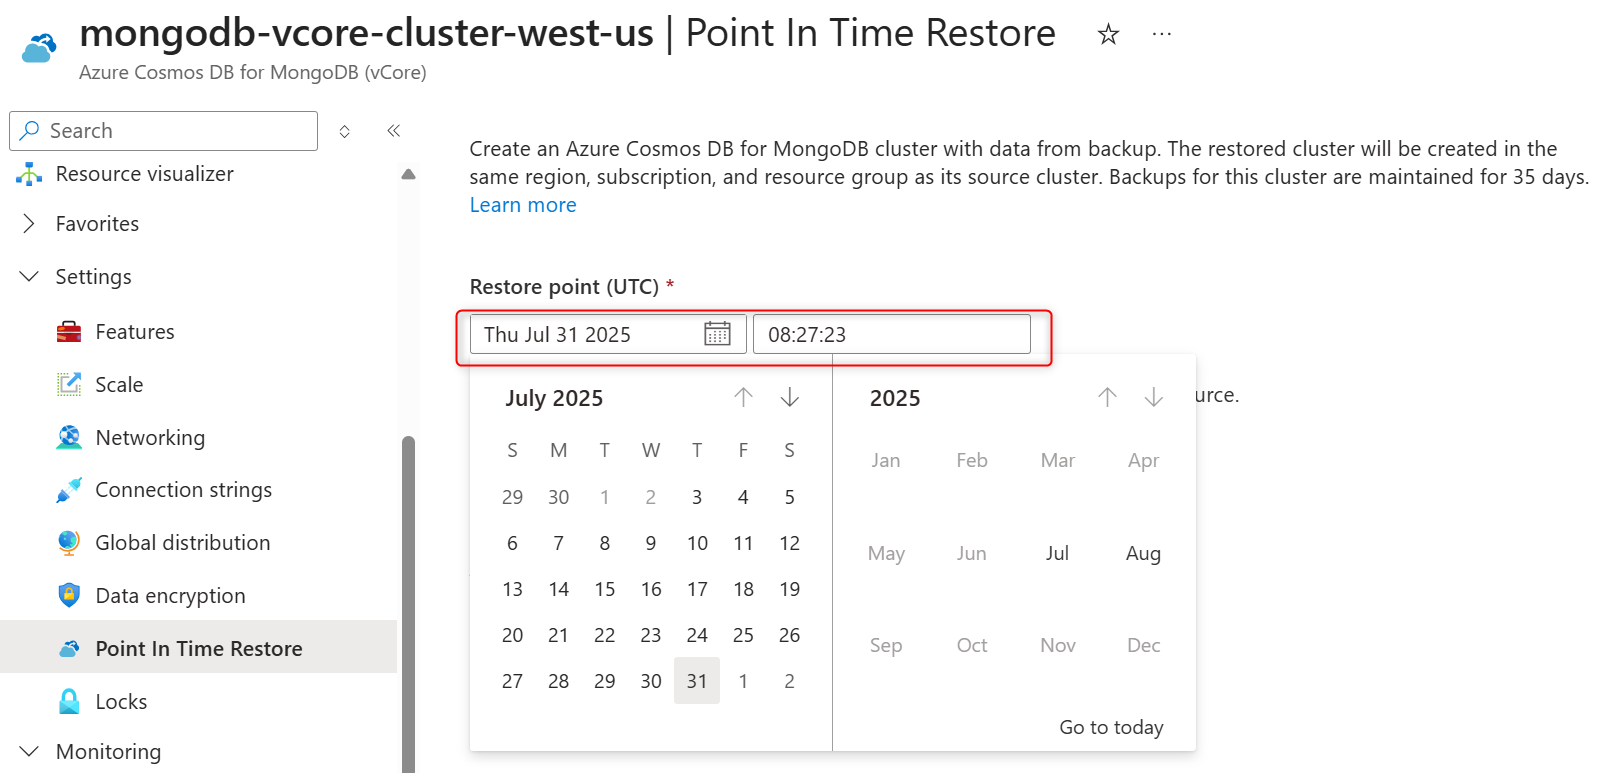
On the cluster sidebar, under Settings, select Point In Time Restore.
Select a date and provide a time (in UTC time zone) in the date and time fields.
Enter a cluster name in the Restore target cluster name field.
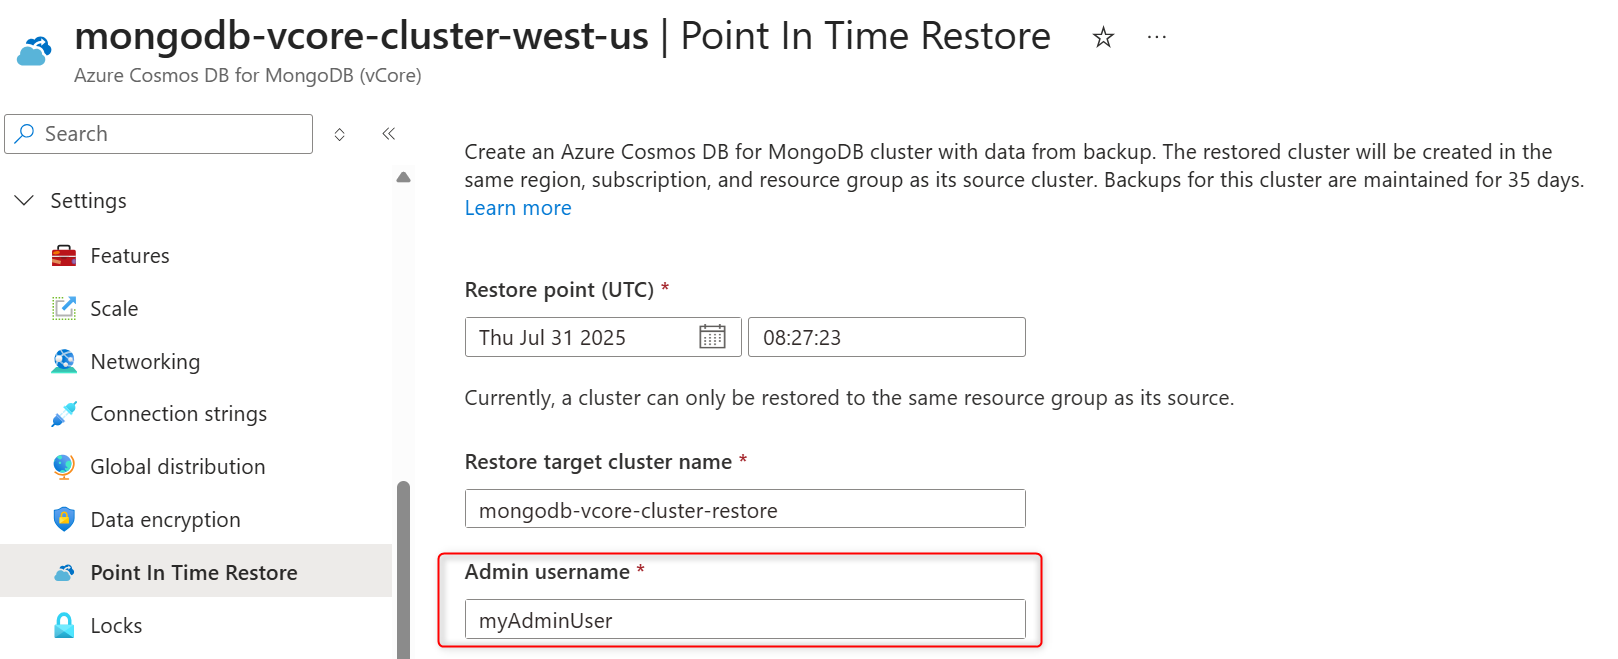
Enter a cluster admin name for the restored cluster in the Admin user name field.
Enter a password for the admin role in the Password and Confirm password fields.
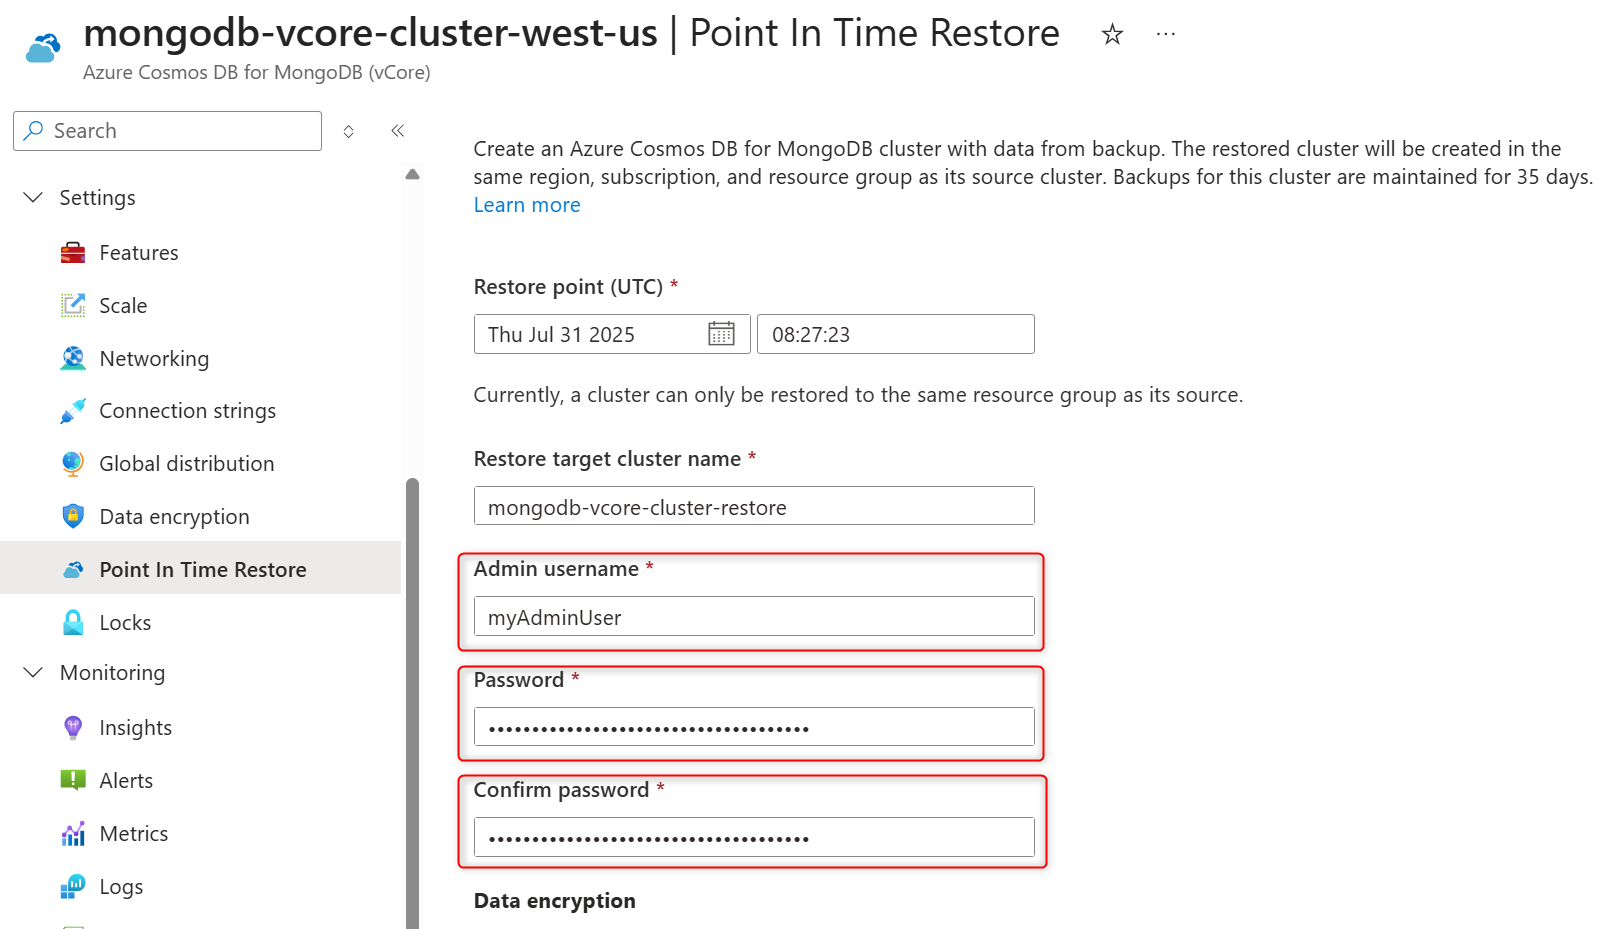
In Data encryption section, select the Customer-managed key to enable CMK. If you need to have CMK disabled on the restored cluster, select Service-managed key.
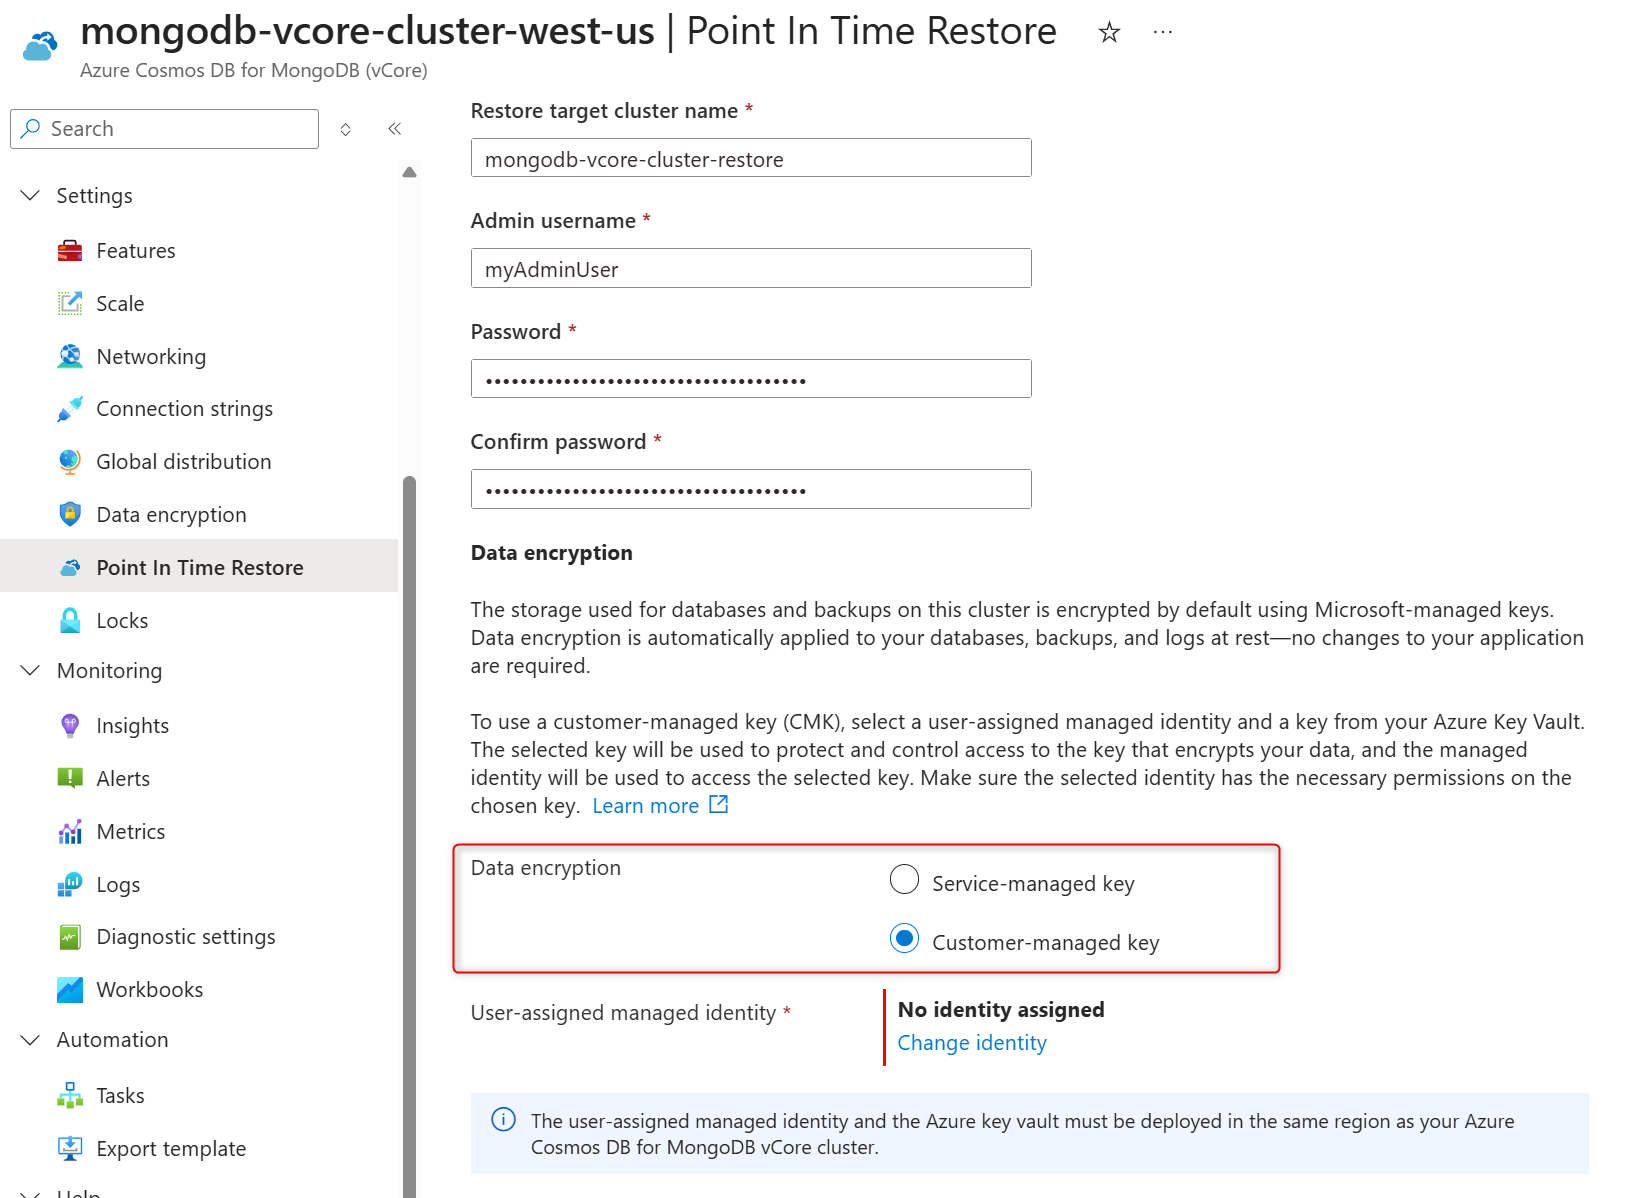
In User-assigned managed identity section select Change identity.

In the list of user-assigned managed identities, select the one you want your cluster to use to access the data encryption key stored in an Azure Key Vault.
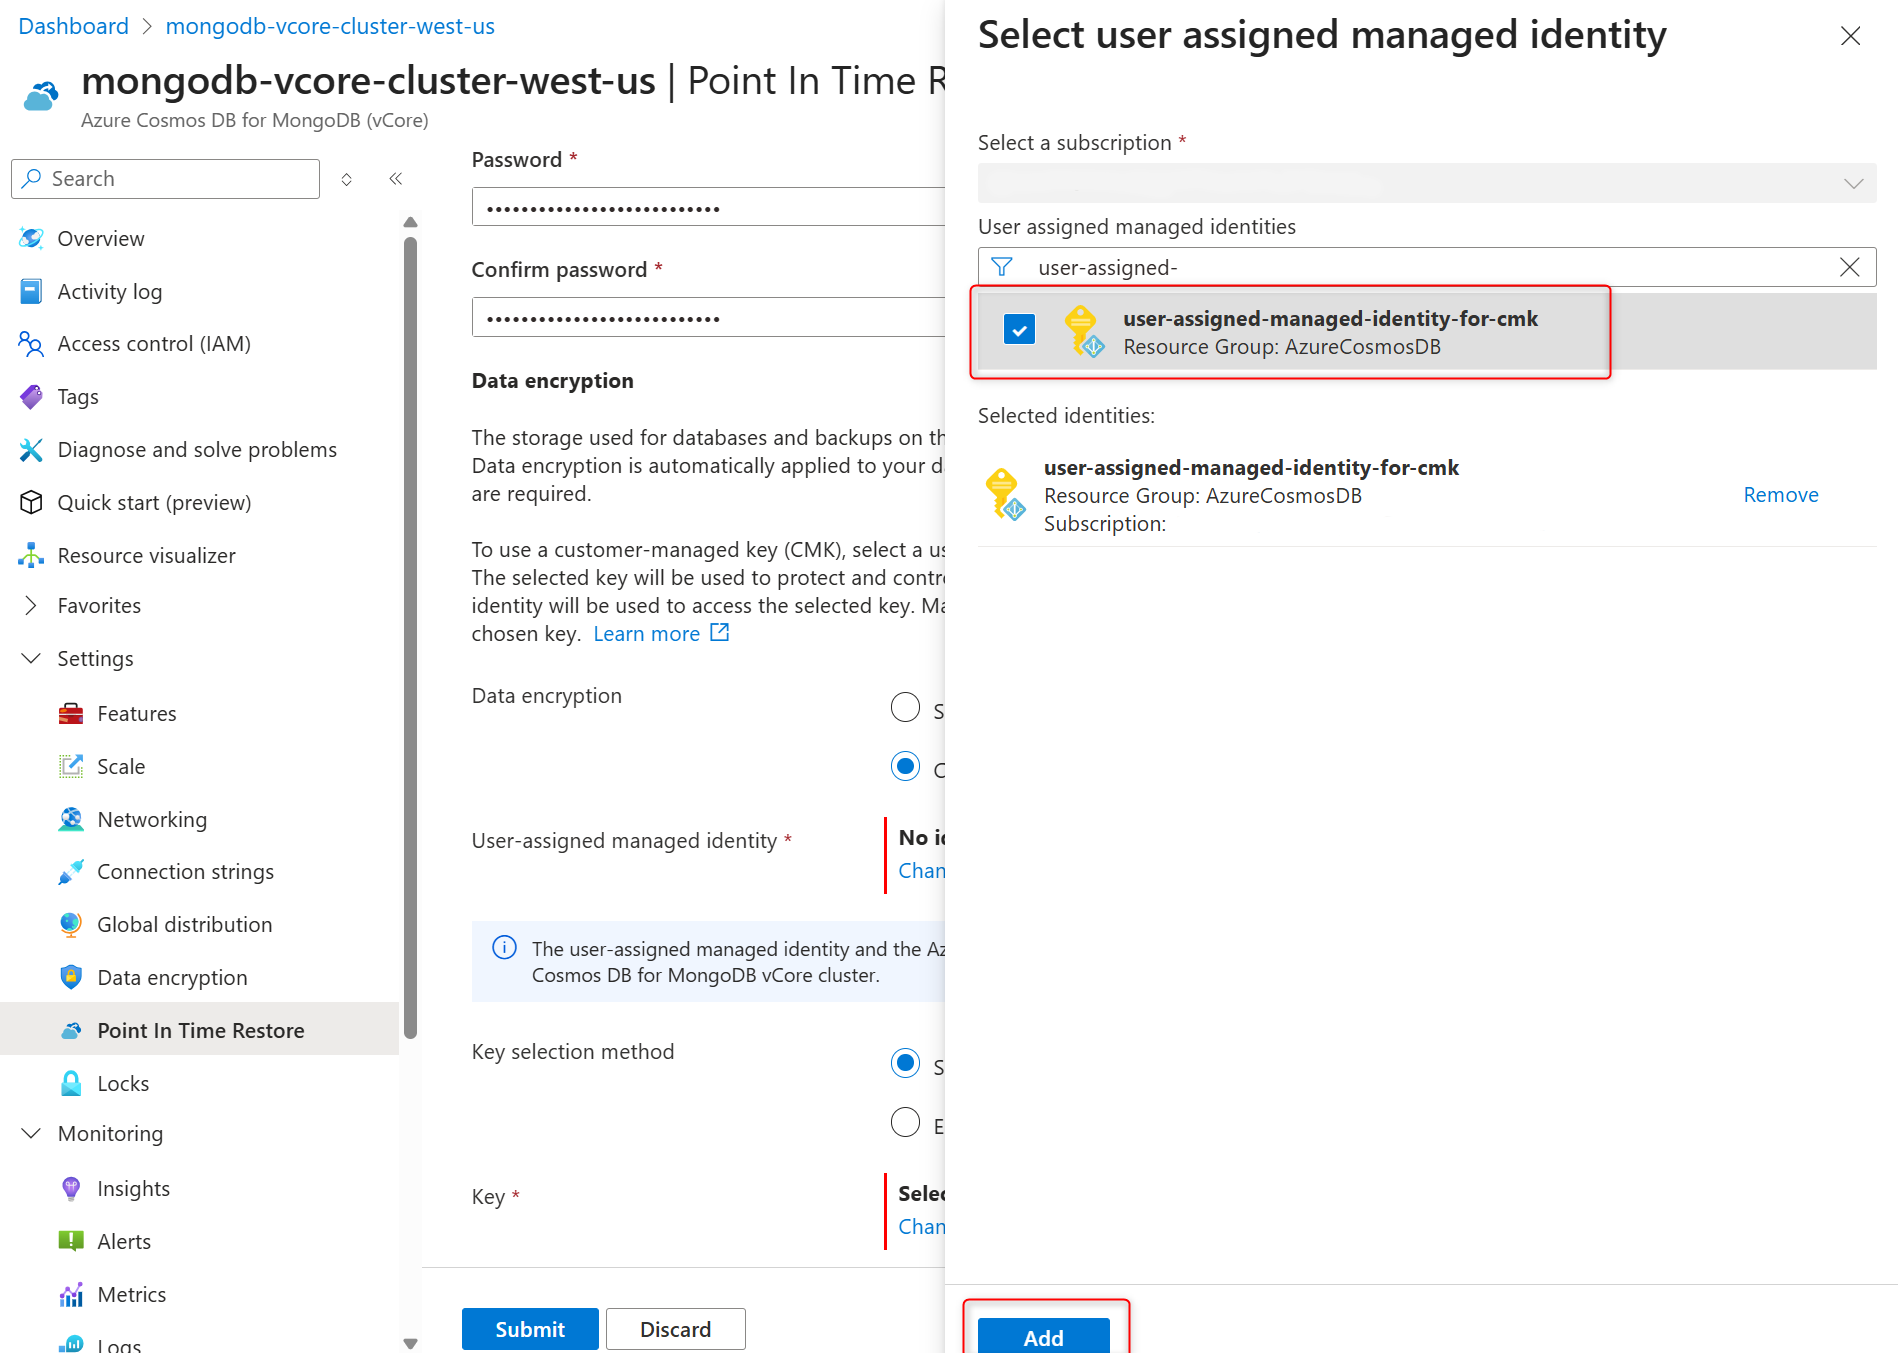
Select Add.
In the Key selection method, choose Select a key .
In the Key, choose Change key.
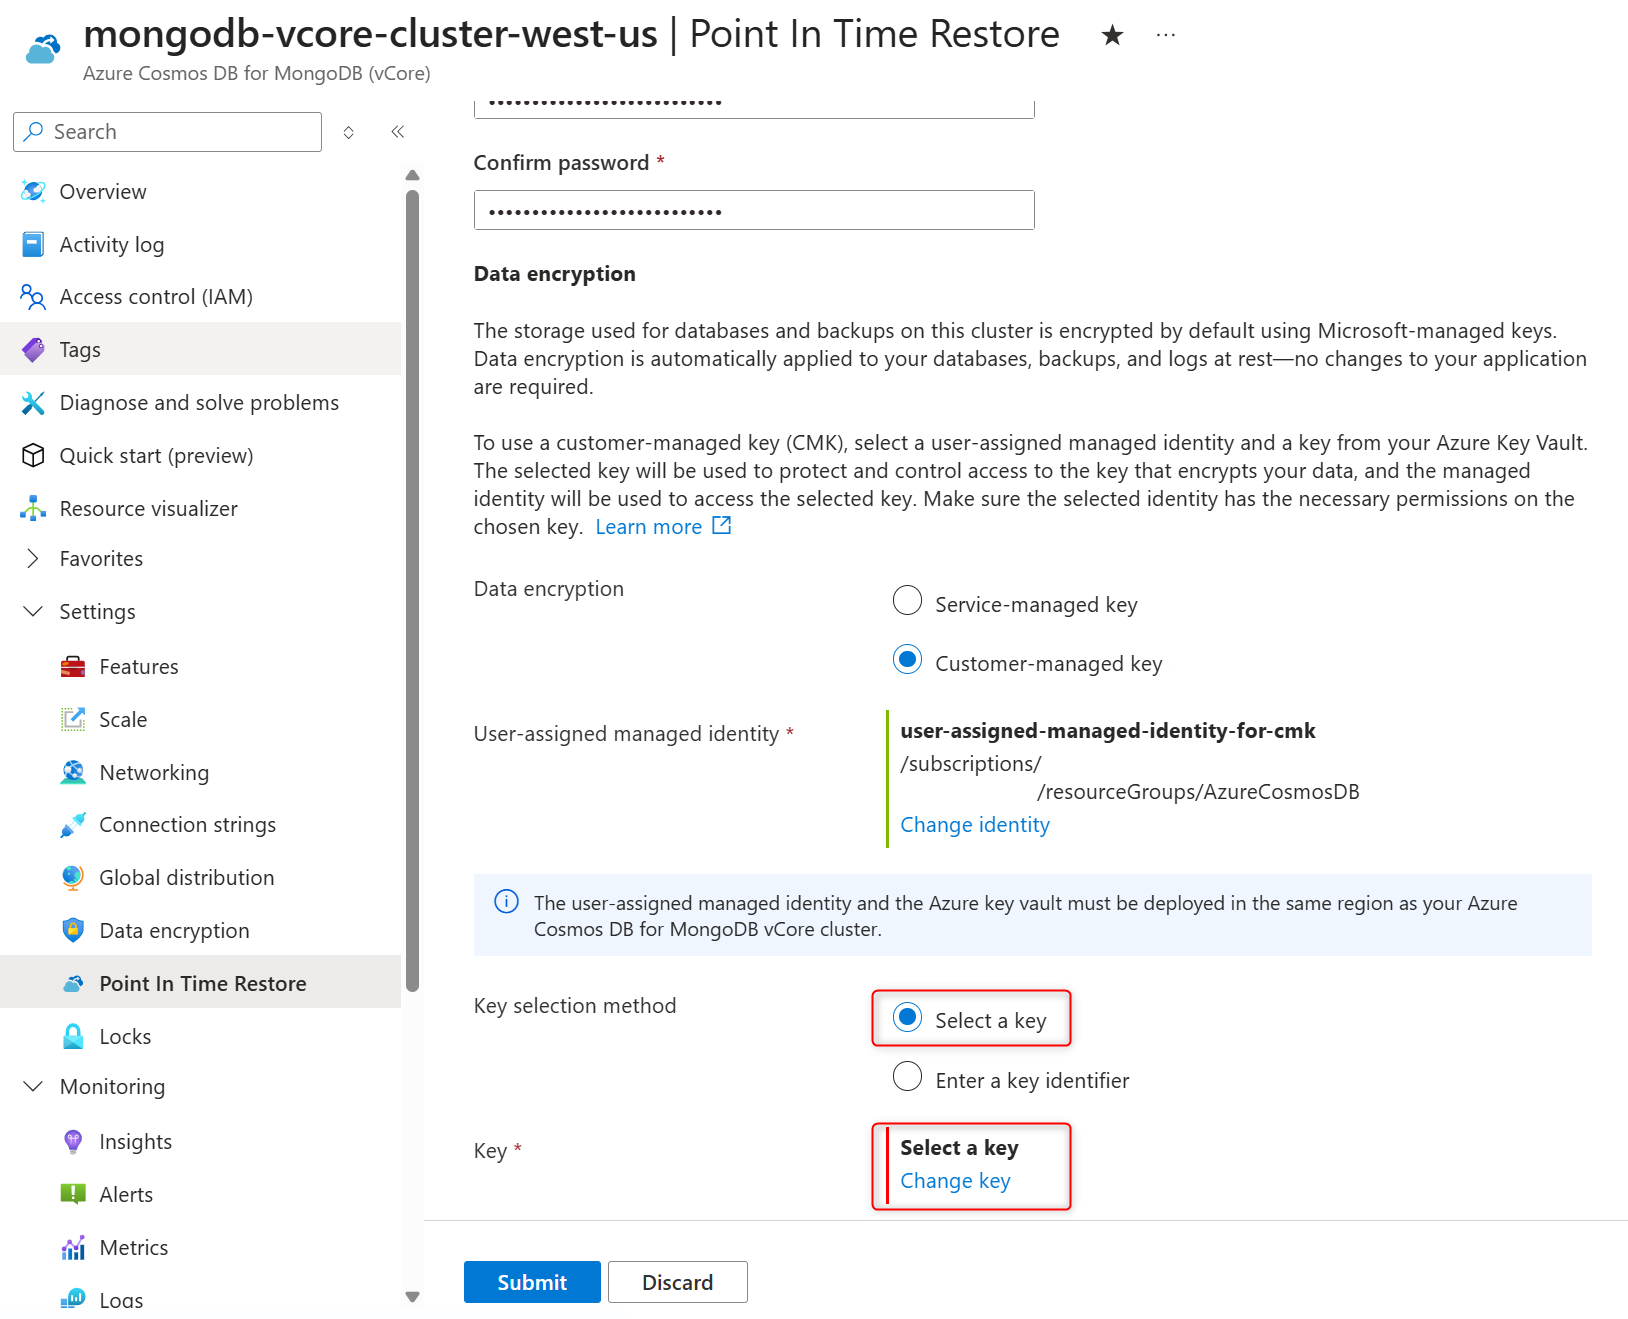
In the Select a key pane select the Azure Key Vault in the Key vault and encryption key in the Key, and confirm your choices by selecting Select.
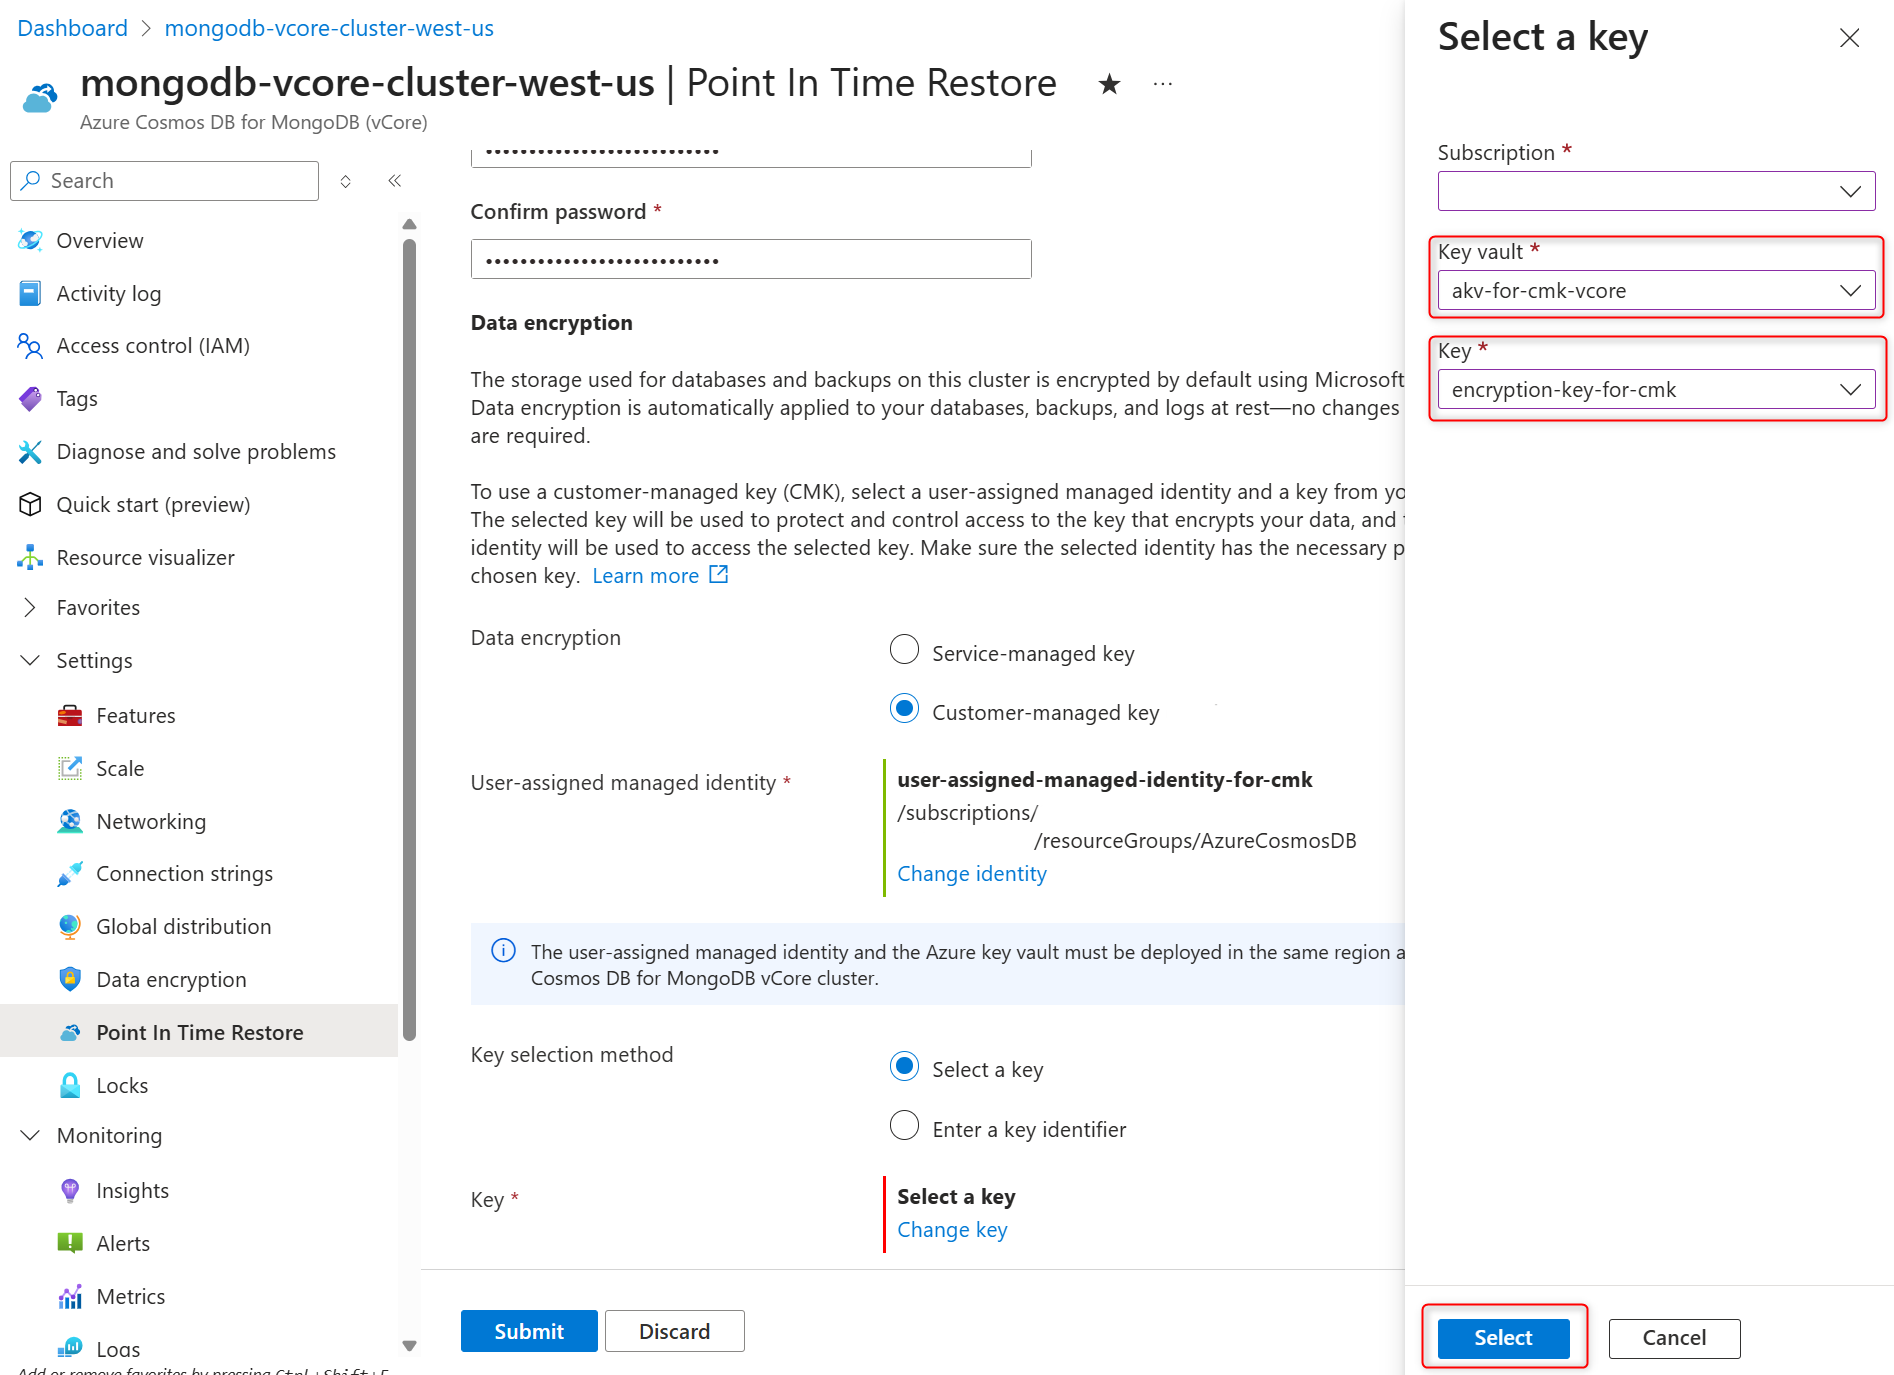
Select Submit to initiate cluster restore.


One restored cluster is created, review the list of post-restore tasks.