你当前正在访问 Microsoft Azure Global Edition 技术文档网站。 如果需要访问由世纪互联运营的 Microsoft Azure 中国技术文档网站,请访问 https://docs.azure.cn。
本文介绍如何在 Azure Monitor 中创建或编辑活动日志、服务运行状况或资源运行状况警报规则。 To learn more about alerts, see the alerts overview.
可以通过合并要监视的资源、来自资源的监视数据以及要触发警报的条件来创建警报规则。 You can then define action groups and alert processing rules to determine what happens when an alert is triggered.
由这些警报规则触发的警报会包含使用通用警报架构的数据负载。
Prerequisites
若要创建或编辑警报规则,你必须具有以下权限:
- 对警报规则的目标资源的读取权限。
- 对在其中创建警报规则的资源组具有写入权限。 如果从 Azure 门户中创建预警规则,则默认在目标资源所在的同一资源组中创建预警规则。
- 对关联到警报规则的任何操作组具有读取权限(如果适用)。
在 Azure 门户中访问警报规则向导
可通过多种方式创建或编辑警报规则。
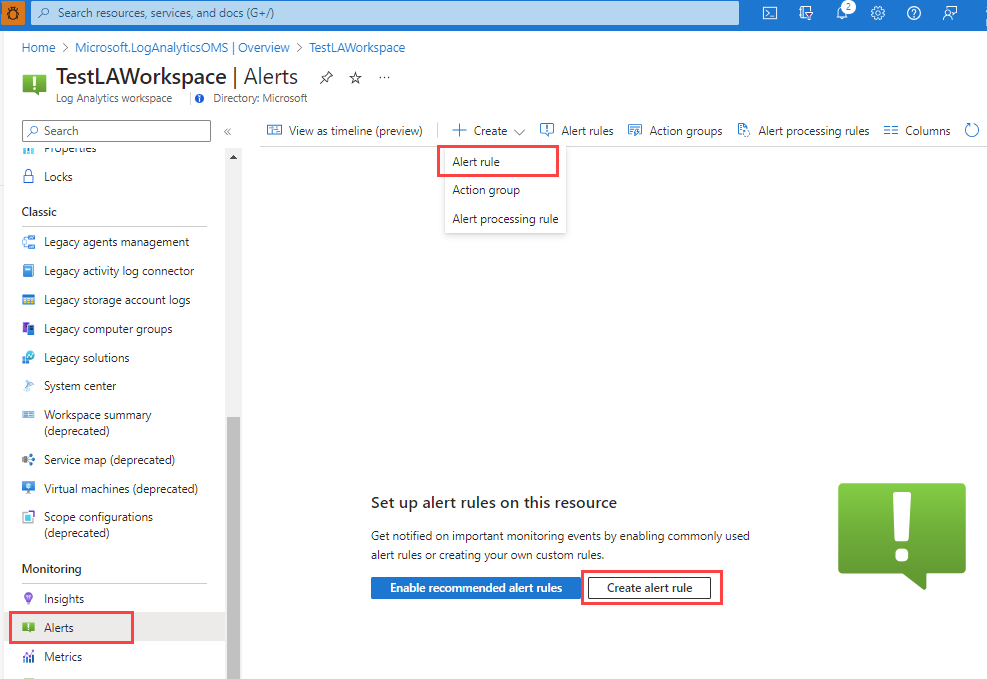
从门户主页创建或编辑警报规则
- In the Azure portal, select Monitor.
- On the left pane, select Alerts.
- Select + Create>Alert rule.

从特定资源创建或编辑警报规则
- In the Azure portal, go to the resource.
- On the left pane, select Alerts.
- Select + Create>Alert rule.
- 警报规则的范围设置为所选资源。 继续设置警报规则的条件。
编辑现有警报规则
In the Azure portal, either from the home page or from a specific resource, select Alerts on the left pane.
Select Alert rules.
Select the alert rule you want to edit, and then select Edit.
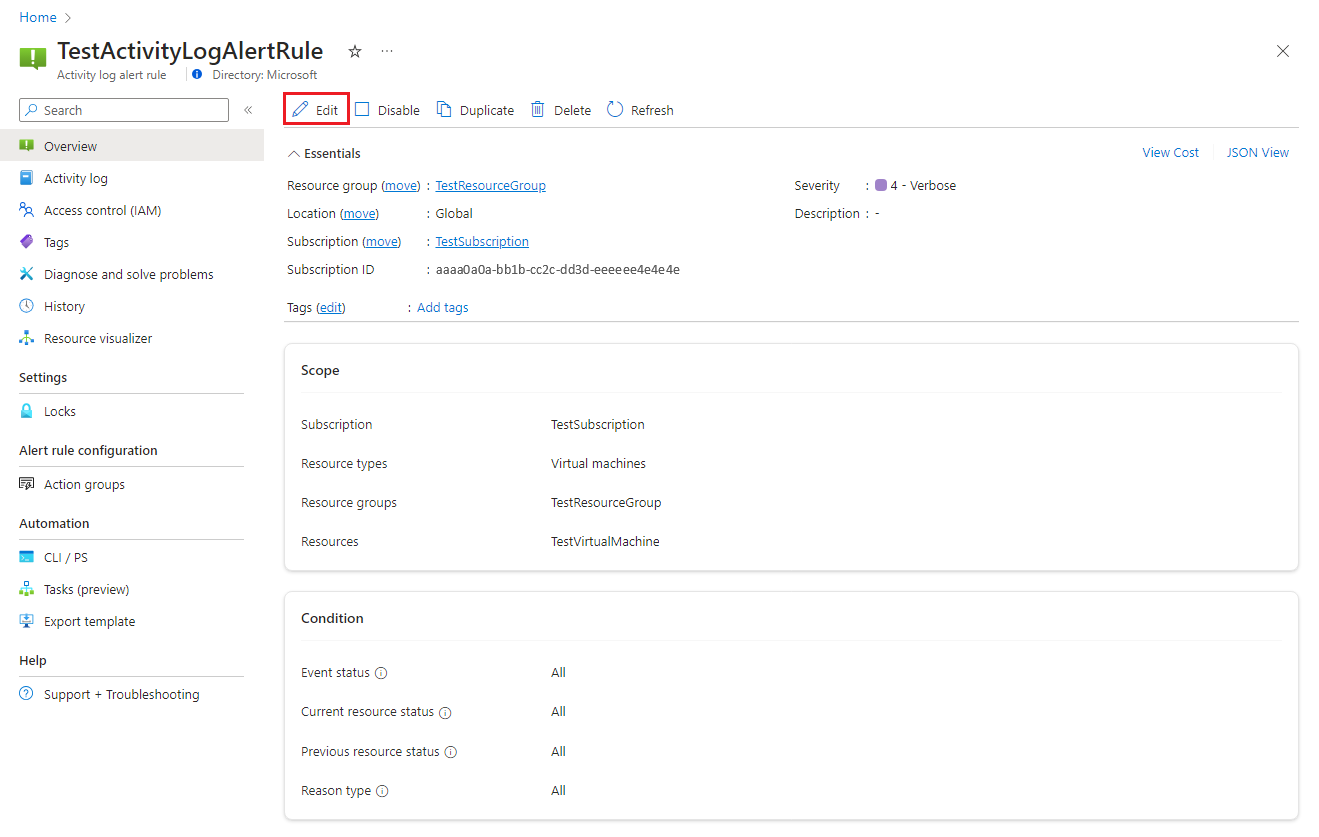
选择警报规则的任一选项卡以编辑设置。
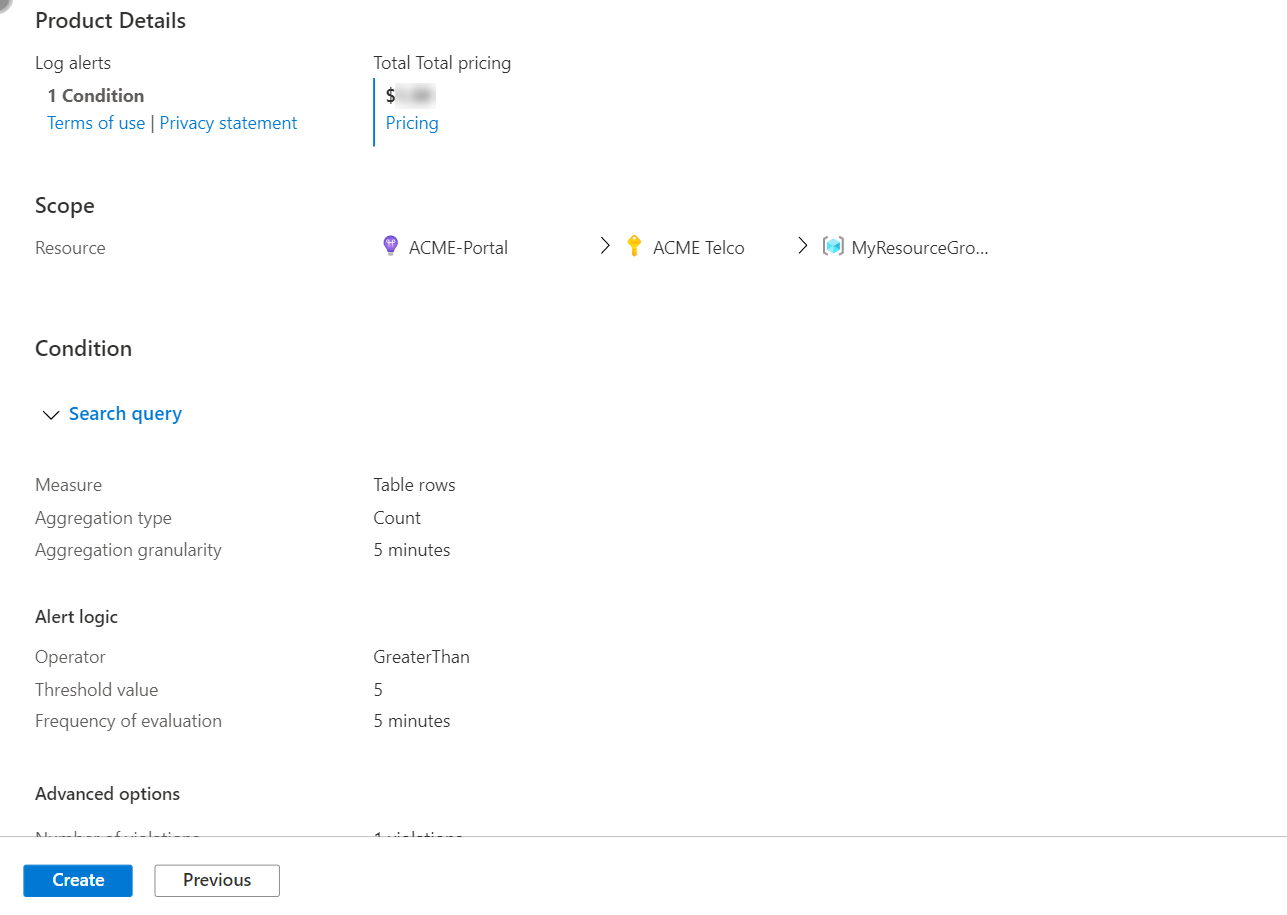
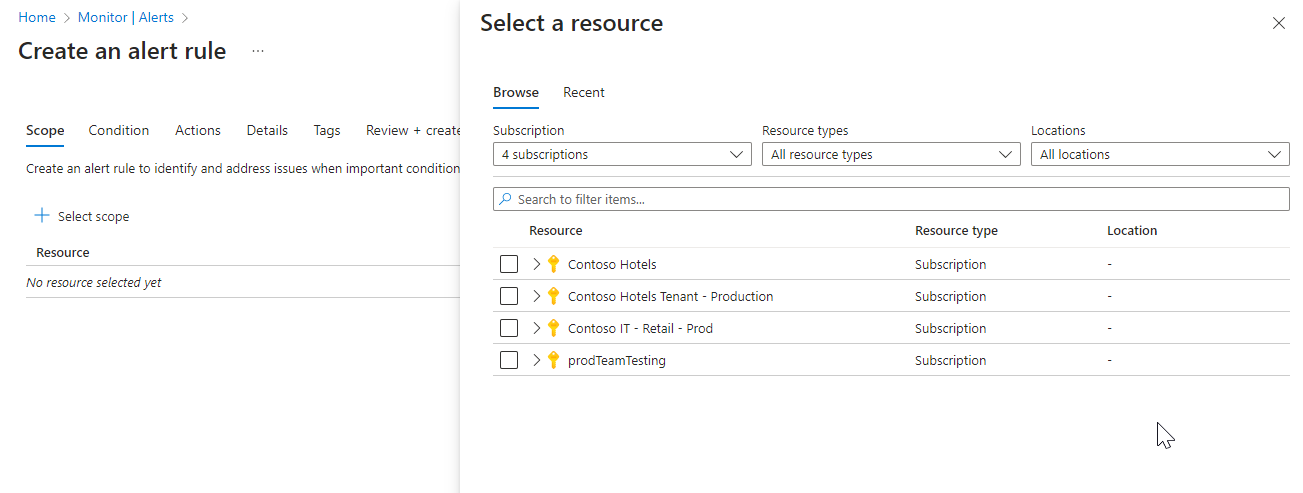
配置警报规则的范围
在“选择资源”窗格中,设置警报规则的范围。 可以按订阅、资源类型或资源位置进行筛选。
Select Apply.
配置警报规则条件
On the Condition tab, select Activity log, Resource health, or Service health. 或者,如果要为条件选择其他信号,请选择“查看所有信号”。
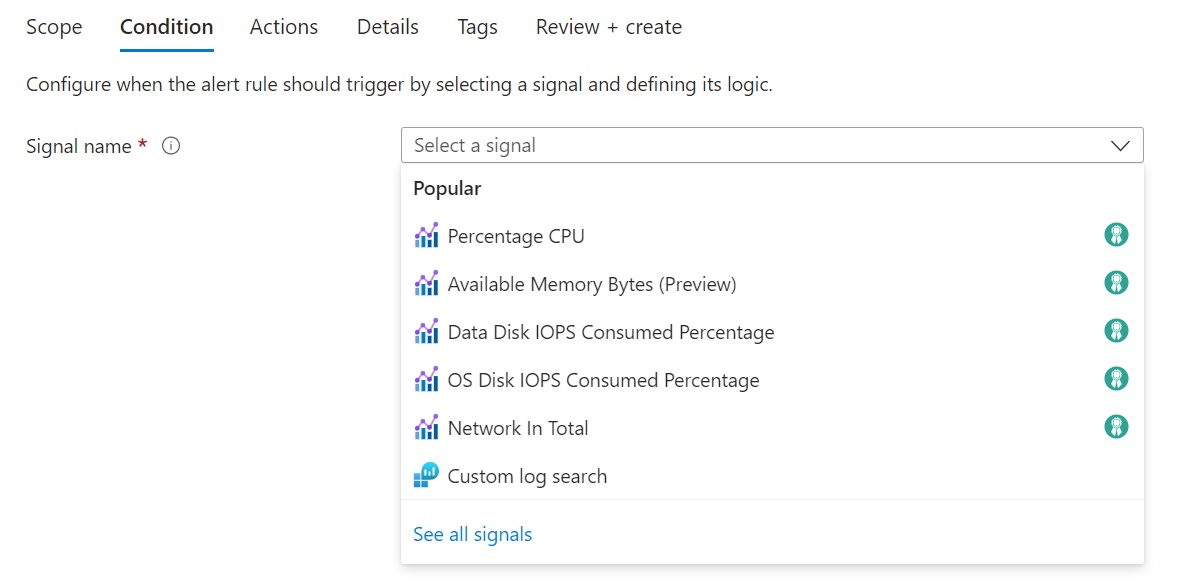
(可选)如果在上一步中选择了“查看所有信号”,请使用“选择信号”窗格搜索信号名称或筛选信号列表。 Filter by:
- Signal type: The type of alert rule that you're creating.
- Signal source: The service that sends the signal.
下表描述了可用于活动日志警报规则的服务:
Signal source Description 活动日志 - 策略 提供策略相关活动日志事件的服务。 活动日志 - 自动缩放 提供自动缩放相关活动日志事件的服务。 活动日志 - 安全 提供安全相关活动日志事件的服务。 Resource health 提供资源级运行状况的服务。 Service health 提供订阅级运行状况的服务。 Select the signal name, and then select Apply.
On the Conditions pane, select the Chart period value.
The Preview chart shows the results of your selection.
In the Alert logic section, select values for each of these fields:
Field Description Event level 选择此警报规则的事件级别。 Values are Critical, Error, Warning, Informational, Verbose, and All. Status 选择此警报的状态级别。 事件发起者 选择启动事件的用户主体或服务主体。
配置警报规则操作
On the Actions tab, you can optionally select or create action groups for your alert rule.
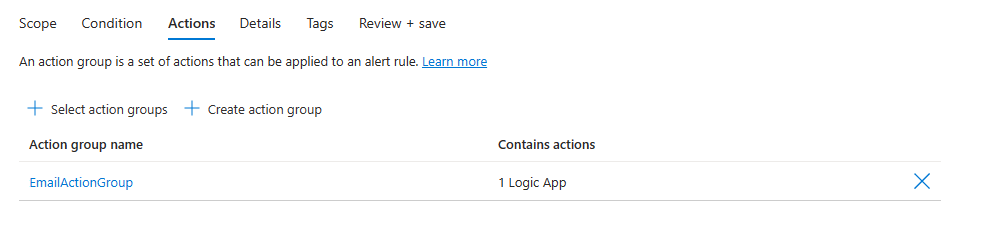
可以选择为通知设置自定义电子邮件主题。 有关详细信息,请参阅 自定义日志搜索警报电子邮件主题。
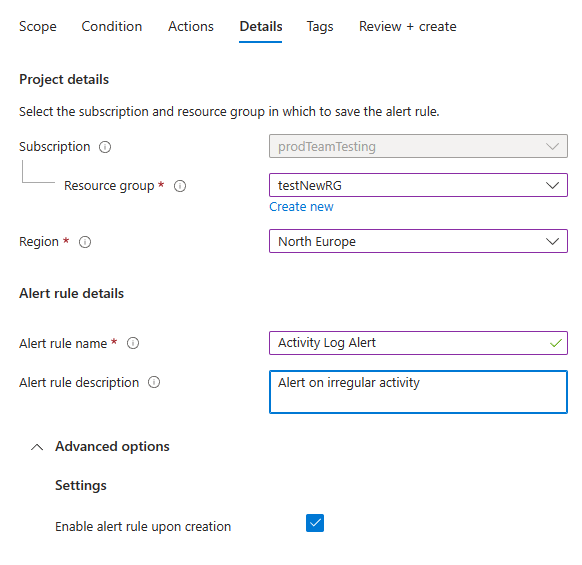
配置警报规则详细信息
On the Details tab, enter values for Alert rule name and Alert rule description.
为警报规则选择创建时启用警报规则,以便在完成创建后立即开始运行。
(Optional) For Region, select a region in which your alert rule will be processed. 如果需要确保在 EU 数据边界内处理规则,请选择北欧或西欧区域。 在所有其他情况下,可以选择“全球”区域(此为默认设置)。
Note
服务运行状况警报规则只能位于全球区域中。
-
(Optional) In the Custom properties section, if this alert rule contains action groups, you can add your own properties to include in the alert notification payload. 可以在操作组调用的操作(例如 Webhook、Azure 函数或逻辑应用操作)中使用这些属性。
使用静态文本、从警报有效负载中提取的动态值或两者的组合,将自定义属性指定为键/值对。
用于从警报有效负载中提取动态值的格式为:
${<path to schema field>}。 例如:${data.essentials.monitorCondition}。使用通用警报架构的格式指定有效负载中的字段,无论为警报规则配置的操作组是否使用通用架构。
Note
- 自定义属性会添加到警报的有效负载中,但它们不会显示在电子邮件模板或 Azure 门户中的警报详细信息中。
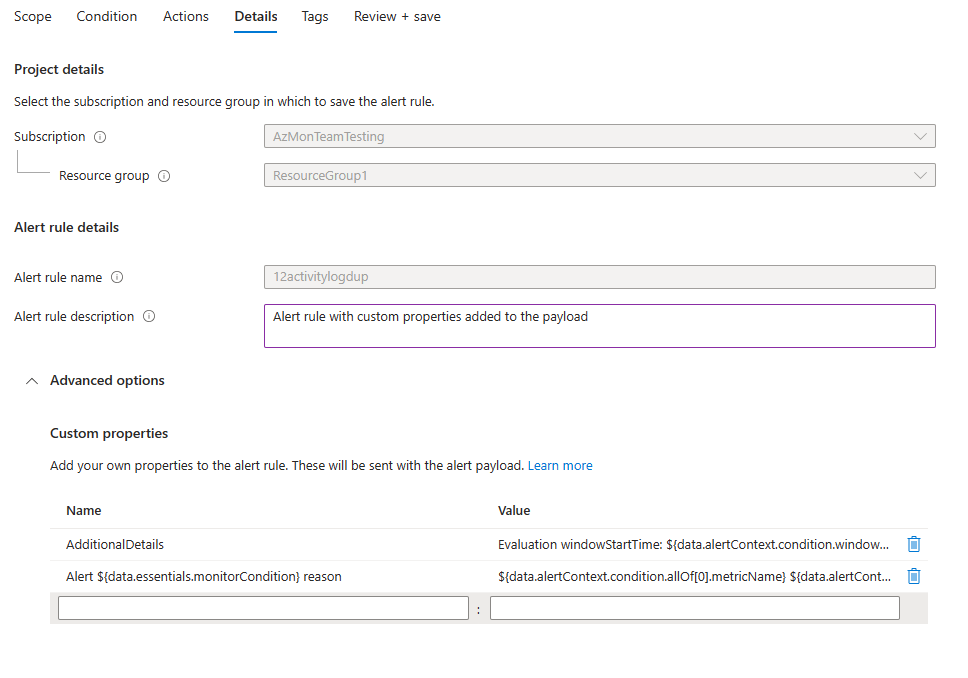
The following examples use values in Custom properties to utilize data from a payload that uses the common alert schema.
This example creates an Additional Details tag with data regarding the window start time and window end time:
- 名称:
Additional Details - 值:
Evaluation windowStartTime: ${data.alertContext.condition.windowStartTime}. windowEndTime: ${data.alertContext.condition.windowEndTime} - 结果:
AdditionalDetails:Evaluation windowStartTime: 2023-04-04T14:39:24.492Z. windowEndTime: 2023-04-04T14:44:24.492Z
此示例添加了有关解析或触发警报的原因的数据:
- 名称:
Alert ${data.essentials.monitorCondition} reason - 值:
${data.alertContext.condition.allOf[0].metricName} ${data.alertContext.condition.allOf[0].operator} ${data.alertContext.condition.allOf[0].threshold} ${data.essentials.monitorCondition}. The value is ${data.alertContext.condition.allOf[0].metricValue} - Potential results:
Alert Resolved reason: Percentage CPU GreaterThan5 Resolved. The value is 3.585Alert Fired reason": "Percentage CPU GreaterThan5 Fired. The value is 10.585
配置警报规则标签
On the Tags tab, you can optionally set any required tags on the alert rule resource.

查看并创建警报规则
在“查看 + 创建”选项卡上,规则得到了验证。 如果出现问题,请返回并进行修复。
When validation passes and you've reviewed the settings, select the Create button.