Note
Access to this page requires authorization. You can try signing in or changing directories.
Access to this page requires authorization. You can try changing directories.
This article explains how to install Windows Admin Center on a Windows PC or a Windows Server remote server so multiple users can use Windows Admin Center in a web browser.
Tip
New to Windows Admin Center? Learn more about Windows Admin Center or download now.
Determine your installation type
Review the installation options, which include the supported operating systems. To install Windows Admin Center on a virtual machine in Azure, see Deploy Windows Admin Center in Azure.
Download the Windows Admin Center installer
Download the Windows Admin Center installer from the Windows Admin Center Evaluation Center to a location on the machine where you want to install Windows Admin Center.
Prerequisites
To install Windows Admin Center, you need the following prerequisites:
A Windows PC or server to install Windows Admin Center on.
Admin privileges or equivalent permissions on the machine you're installing Windows Admin Center on.
Optional: An SSL certificate for Server Authentication (1.3.6.1.5.5.7.3.1). Use a self-signed certificate for testing, but always use a certificate from a trusted certificate authority for production environments. If you don't have a certificate, use the Windows Admin Center installer to generate a self-signed certificate. The certificate is valid for 60 days.
Install Windows Admin Center
To install Windows Admin Center, perform the following steps:
To install Windows Admin Center on your machine running the Windows Server Desktop Experience, follow these steps:
Sign in to the machine you want to install Windows Admin Center on.
Run the Windows Admin Center installer you previously downloaded.

On the Welcome to the Windows Admin Center setup wizard window, select Next to continue.
On the License Terms and Privacy Statement window, if you agree to the terms select I accept these terms and understand the privacy statement, then select Next to prepare your environment and start the installation process.
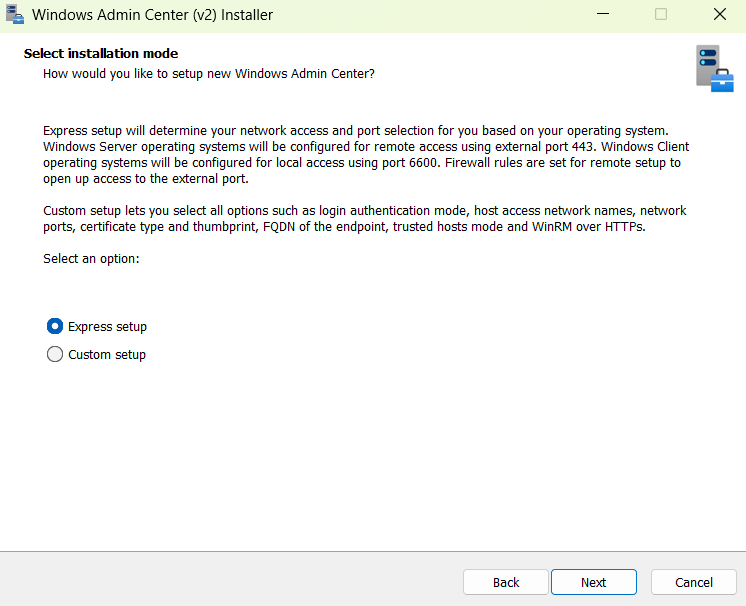
In the Select installation mode window, select either Express setup, or Custom setup.
Express setup determines your network access and port selection based on your operating system. Express setup doesn't allow for configuration of extra features.
Custom setup allows you to configure: network access, port numbers, TLS certificate type and thumbprint, fully qualified domain name of the endpoint, trusted hosts mode, and WinRM over HTTPS.
Select Next.
In the Select TLS certificate window, select the option that matches your needs, then select Next.
You must select which Transport Layer Security (TLS) certificate Windows Admin Center should use. If you already have a certificate, it must be installed in the
LocalMachine\Mycertificates store. If you're installing Windows Admin Center for testing purposes only, the installer can generate a self-signed certificate that expires after 60 days.
In the Automatic updates window, select your preferred update option. The recommended option to install updates automatically is selected by default. Then select Next.
In the Send diagnostic data to Microsoft window, select your preference, then select Next.
Review the Ready to install window, and then select Install to start the installation process.
After the installation process finishes, check the box to Start Windows Admin Center, then select Finish.
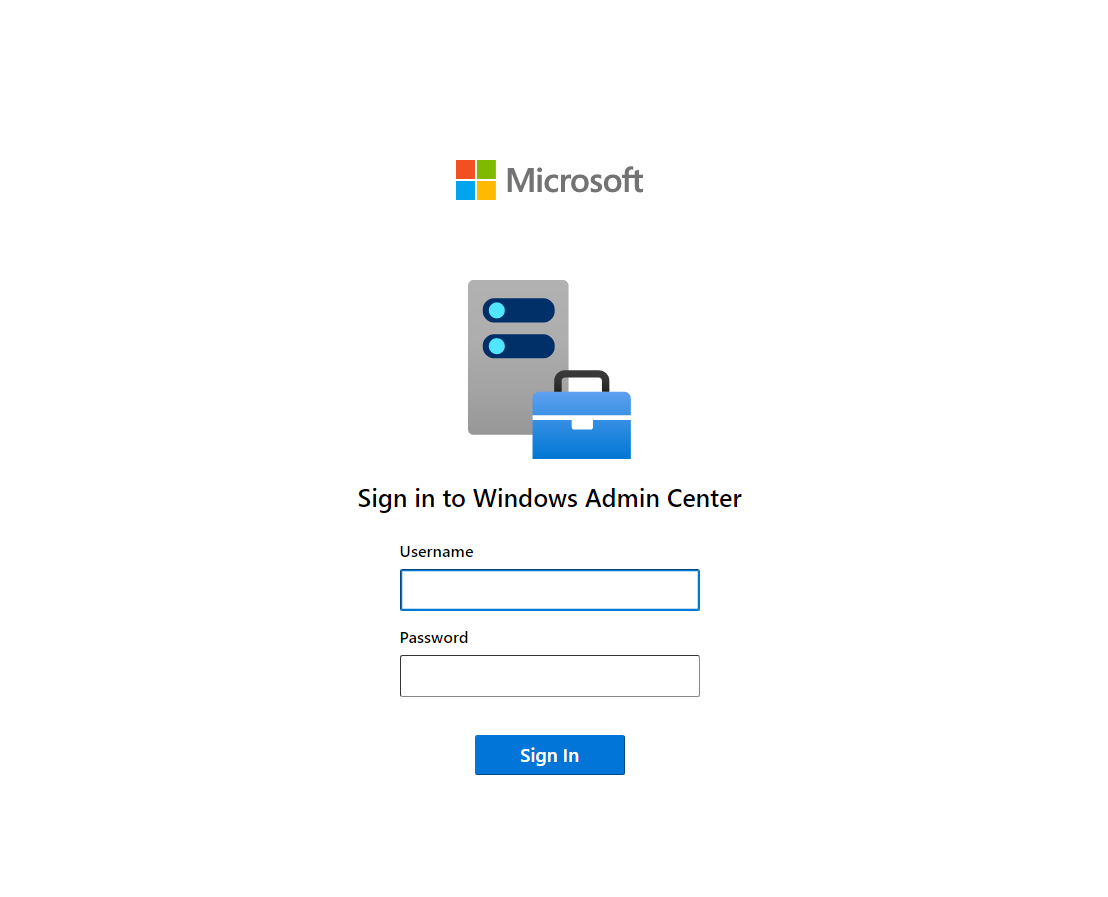
Sign in as an administrator to start using Windows Admin Center.
You've now installed Windows Admin Center on your machine.