Dev setup and project structure
This portion takes you through the steps needed to begin setting up your Windows app using the latest Windows development frameworks and tools: WinUI, Windows App SDK, and Community Toolkit.
Enable Developer Mode
Windows has a special mode for developers that adjusts security settings to let you run the apps you're working on. You need to enable Developer Mode before you can build, deploy, and test your app using Visual Studio.
To enable Developer Mode:
- Open Windows Settings and navigate to the System > For developers page.
- Toggle the Developer Mode switch to On and confirm your choice in the confirmation dialog.
Install Visual Studio
You use Visual Studio, Microsoft's comprehensive integrated development environment (IDE), to create your WinUI app. This IDE helps you write, debug, and deploy your apps. The project templates in Visual Studio get you started with projects for Windows and many other platforms.
Note
Before installing these tools, ensure your development computer meets the system requirements for Windows app development.
Go to the Visual Studio page to download and install the latest Visual Studio. You can use the free Visual Studio Community Edition.
Note
The installer guides you through the steps, but if you need detailed instructions, see Install Visual Studio.
While installing Visual Studio, you need to install the workloads and components required for developing with WinUI and the Windows App SDK.
Open the Visual Studio Installer app
Select Modify to add workloads and components.
On the Workloads tab of the Visual Studio Installer app, select the following workloads and components:
Visual Studio 2022 version 17.10 and later
- For C# app development using the Windows App SDK, select Windows application development.
Visual Studio 2022 version 17.1 - 17.9
For C# app development using the Windows App SDK, select .NET Desktop Development.
In the Installation details pane of the installation dialog box, select Windows App SDK C# Templates (near the bottom of the list).
Create base WinUI app
To create a new project using the WinUI C# Blank App project template:
Open Visual Studio and select Create a new project from the launch page. (If Visual Studio is already open to the editor, select File > New> Project)
Search for WinUI and select the Blank App, Packaged (WinUI 3 in Desktop) project template
Click Next
Name your project: SnowPal
Important
The Project Name and Solution Name must be SnowPal. Visual Studio creates namespaces using this information. If it's something different, the code you copy and paste from this tutorial can cause build errors.
Select Create.
Update & Install Packages
The Windows App SDK (including WinUI) and tools like the Community Toolkit are distributed as NuGet packages. This distribution method allows updates to be released independently of Windows and Visual Studio. As a result, the Visual Studio template you used to create your project might not reference the latest versions of these NuGet packages. To ensure you have the latest features and fixes, you should update your NuGet packages every time you create a new project in Visual Studio.
Note
NuGet packages are single ZIP files with a .nupkg extension that contains compiled code (Dynamic Link Library (DLLs)), related files, and a descriptive manifest. These packages serve as a mechanism for developers to create, share, and consume useful code in .NET applications.
To update the Windows App SDK NuGet package for your project:
In Visual Studio, with your project loaded, select Tools > NuGet Package Manager > Manage NuGet Packages for Solution....
Important
Projects must not be running in order to access the "Manage Nuget packages" option in the drop-down
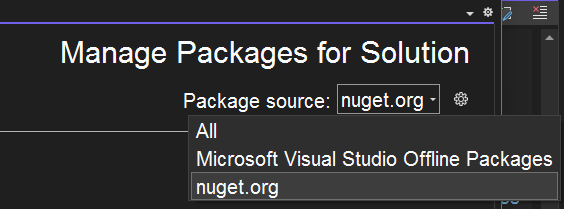
Confirm that it's set to
nuget.org- if it isn't, follow these instructions.
Click on the Installed tab.
Click on Microsoft.WindowsAppSDK
Select the Checkbox to Include prelease
On the right panel:
- select the checkbox of the Project
- Select from the dropdown 1.7.250401001
- Click install
- On the Preview Changes Popup, Click Apply.
- On the License Acceptance Popup, Click I Accept.
To install the CommunityToolkit NuGet package for your project:
- Still in the Manage NuGet Packages for Solution, Click on the Browse tab.
- Enter
CommunityToolkit.Mvvmin the search bar - Click to select
CommunityToolkit.Mvvm - On the right panel:
- Select the checkbox of the Project
- Select version
8.4.0 - Click Install.
- On the Preview Changes Popup, Click Apply.
- On the License Acceptance Popup, Click I Accept.
Close the NuGet Package Manager
The Community Toolkit.Mvvm uses features that are ahead of the standard C# language version that your project is configured to use by default. You need to update the project's configuration:
If Solution Explorer isn't already open, you can open it by selecting View > Solution Explorer from the top menu.
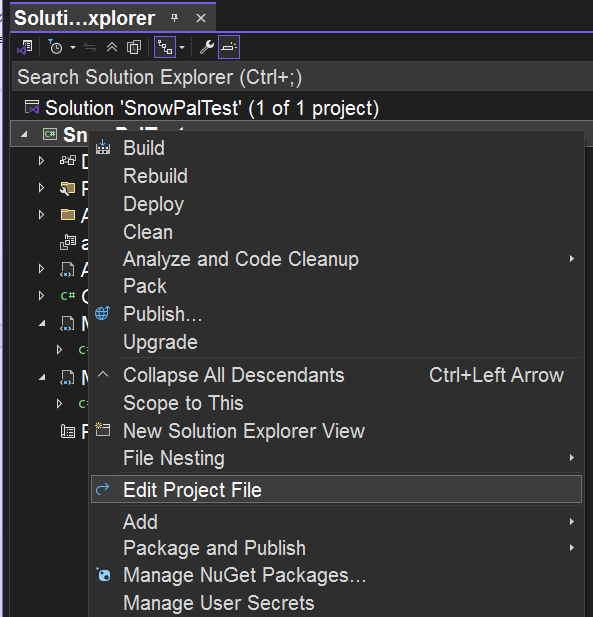
In the Solution Explorer, you see a tree structure representing your solution and its projects. Look for the project node named SnowPal. This node is usually a folder icon with the project name next to it.
Right-click on the project node (SnowPal) and select Edit Project File. This action opens the .csproj file in the editor.
Locate the first
PropertyGroupelement in the fileAdd
<LangVersion>preview</LangVersion>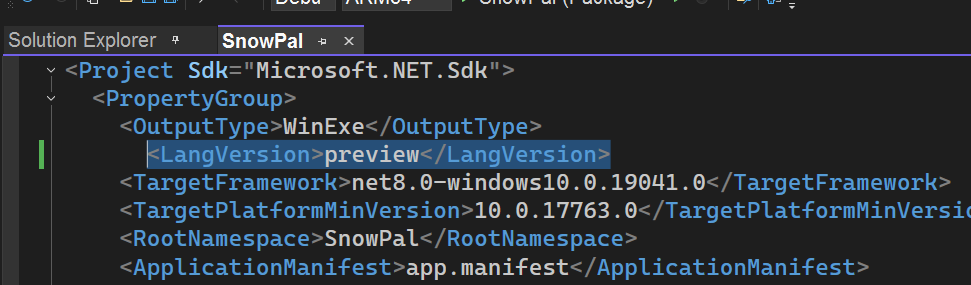
Save and Close the file
Adding Preview is a way to unlock experimental language features required by advanced tools like Community Toolkit.Mvvm, enabling developers to use cutting-edge capabilities in their projects.
Now your project is using the latest WinUI features that are available.
Run Project
You can run this blank project:
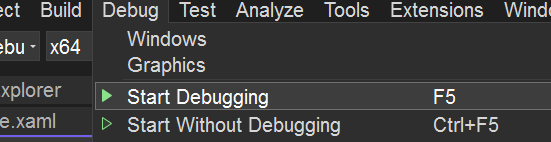
On the title bar, Click on Debug > Start Debugging OR on your keyboard press F5 key
To stop debugging, Close the app window, or Click the debug "Stop" button in Visual Studio.
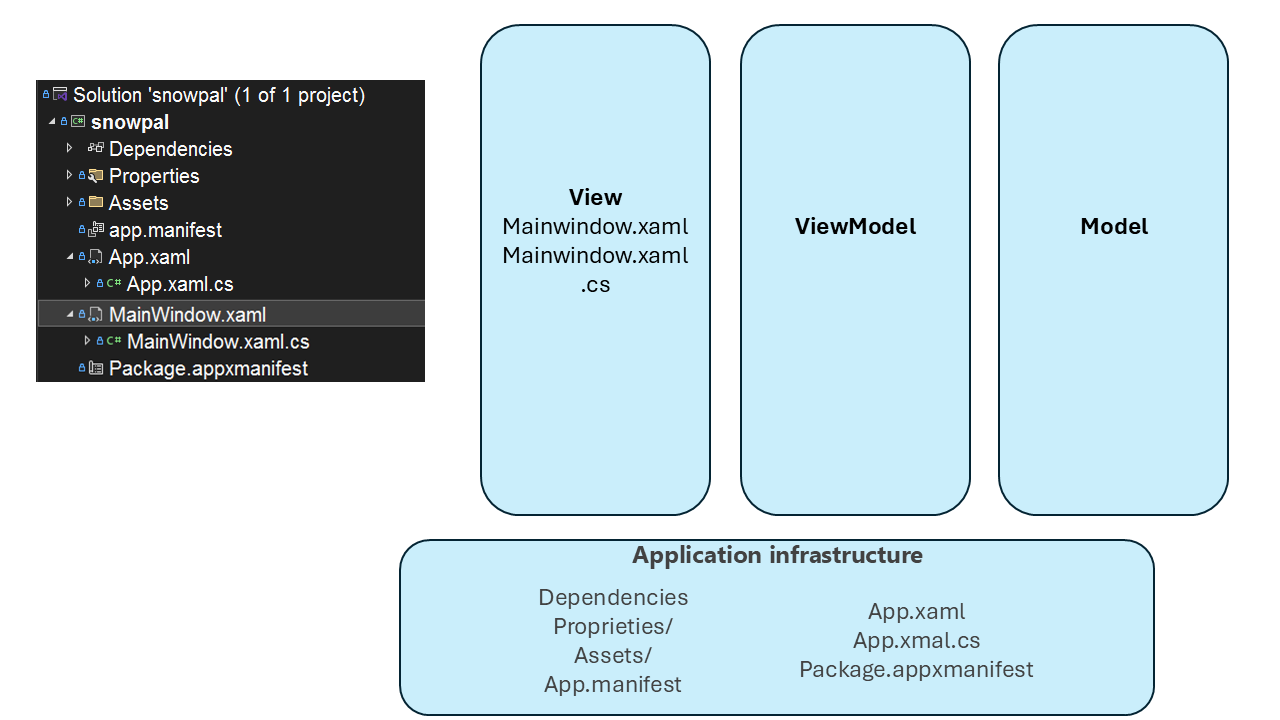
The project's file structure
To see the starting boilerplate code from the WinUI project template, you need to open the Solution Explorer. If Solution Explorer isn't already open, you can access it by selecting View > Solution Explorer from the top menu.
For this course, you modify only the MainWindow.xaml and MainWindow.xaml.cs files, leaving the rest of the files unchanged. More files will be added as we progress through the course. The MainWindow.xaml file defines what the UI looks like, while the MainWindow.xaml.cs file defines how the UI behaves. Within the framework of MVVM (Model-View-ViewModel), these two files are considered part of the View layer.
Note
Not all projects strictly follow the MVVM pattern. Some developers opt for a "code-behind approach," where logic is placed directly in the .xaml.cs file instead of implementing a separate ViewModel. This approach is often referred to as the "code-behind pattern."
Organizing Your Project Files
To improve maintainability, you create two new folders for organizing your project files: one for models and another for pages.
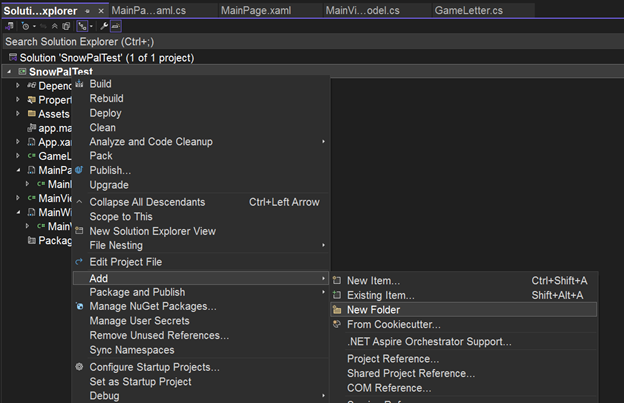
Steps to Create Folders
In Solution Explorer, right-click on your project.
Select Add > New Folder.
Name the new folder
Models.Repeat steps 1–3 and name the second folder
Pages.
Why Name It "Pages" Instead of "Views"?
The folder is named Pages instead of Views because it stores different pages of your app. For example, while MainWindow.xaml is part of the View layer, it remains in the root directory because most developers expect to find it there. Moving it into a folder named "Views" would break this convention and could cause confusion.
In the next section, we’ll explore how MainWindow.xaml and how pages work.