Describe and refine your app
Copilot in Microsoft Power Apps enables makers to create an app by describing it in natural language. The maker and agent exchange prompts to define the data model first, after which the system generates the initial app. Makers can then continue enhancing the app to meet full requirements.
This approach offers an alternative to starting from a template. Unlike templates, which are limited to predefined options, Copilot lets you create a broader variety of apps based on a custom description.
Apps created with this method store data in Microsoft Dataverse. To use this feature, makers must have access to an environment where Dataverse is already set up. You can start with one or more Dataverse tables, and Copilot recommends relationships between them—these can be customized.
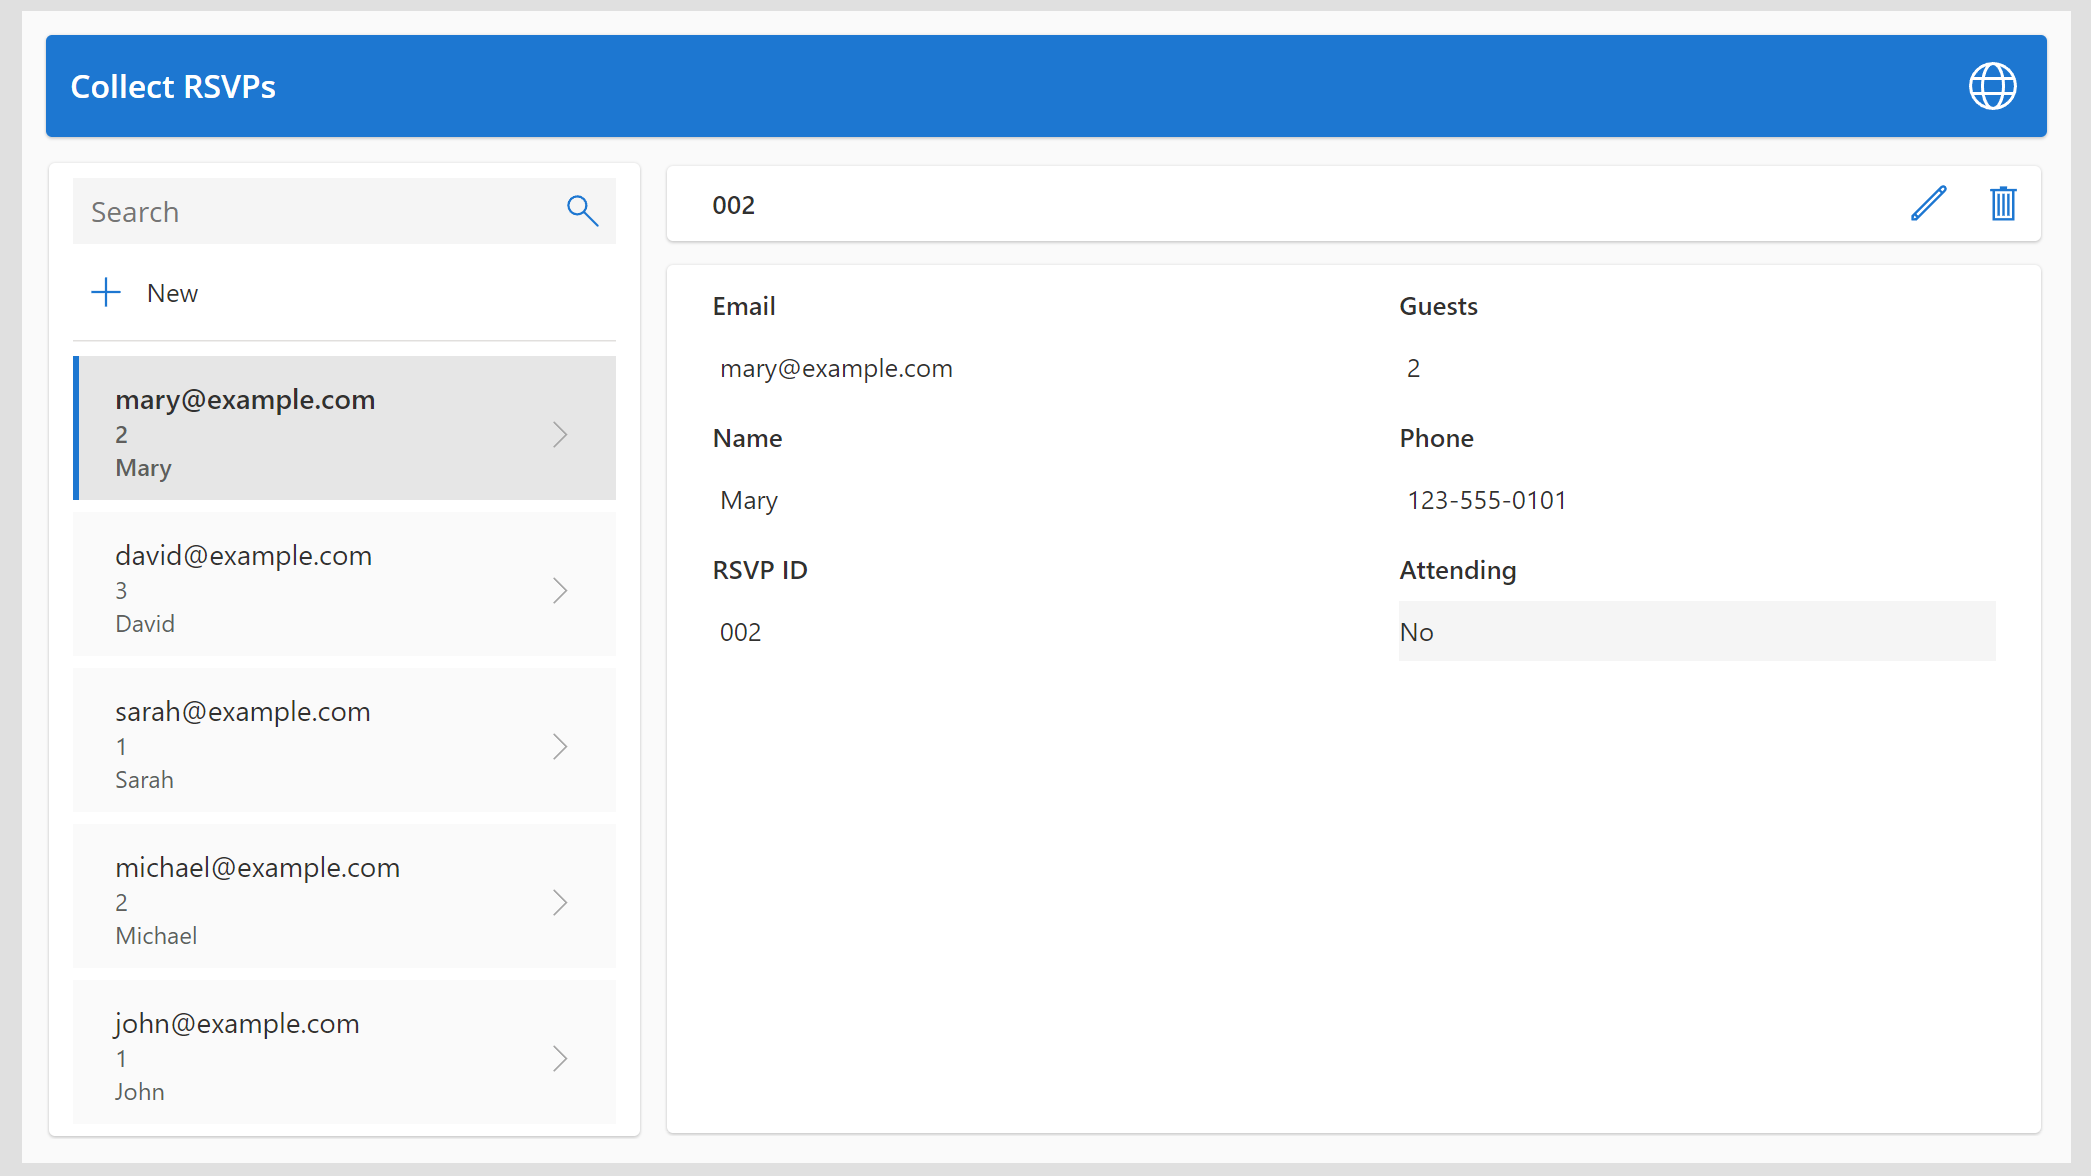
After generation, the app allows users to create, edit, view, and delete data in the tables derived from the prompt. In some scenarios, the generated app may meet all requirements. In others, makers can continue editing to add screens and tables as needed. The following image shows an example app created from the "Collect RSVPs" prompt.
As with any agent interaction, clearly defining the desired outcome is important. Makers can use up to 250 characters to describe the app goal initially, and continue refining their input beyond the first screen if needed.
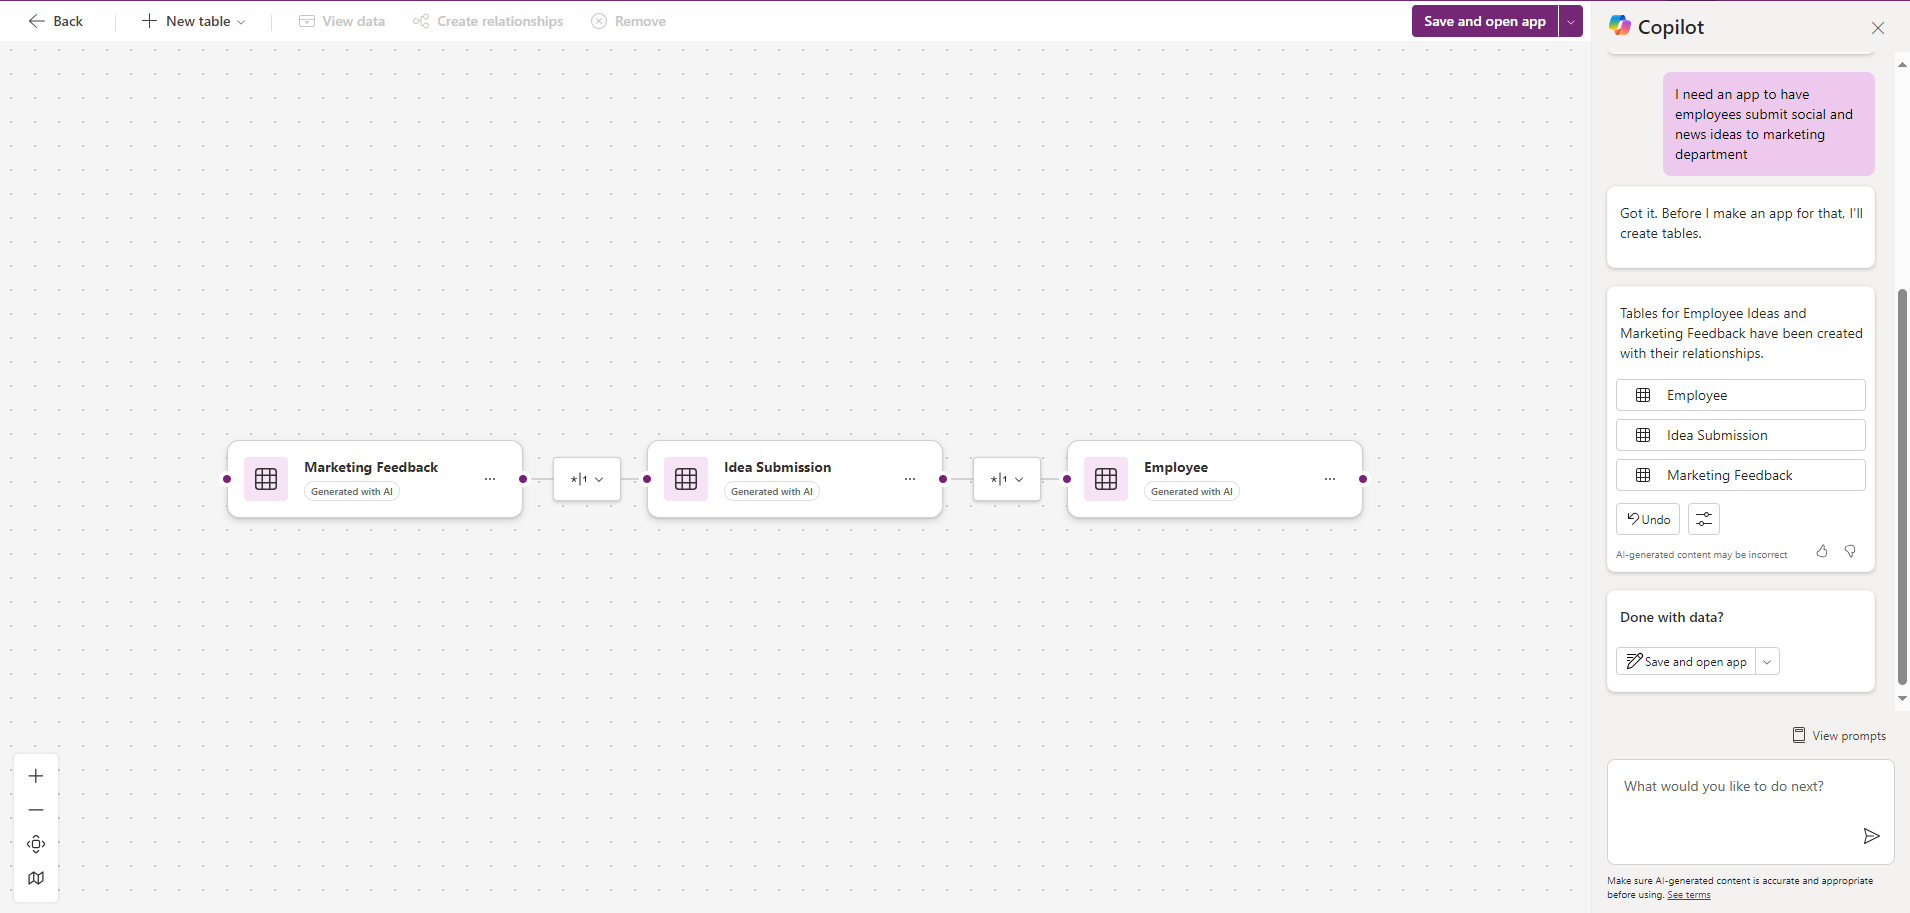
The following screenshot shows an example prompt to create an app for employees to submit marketing ideas. This screen appears after selecting Create in the Power Apps maker portal, and then selecting Start with Copilot.
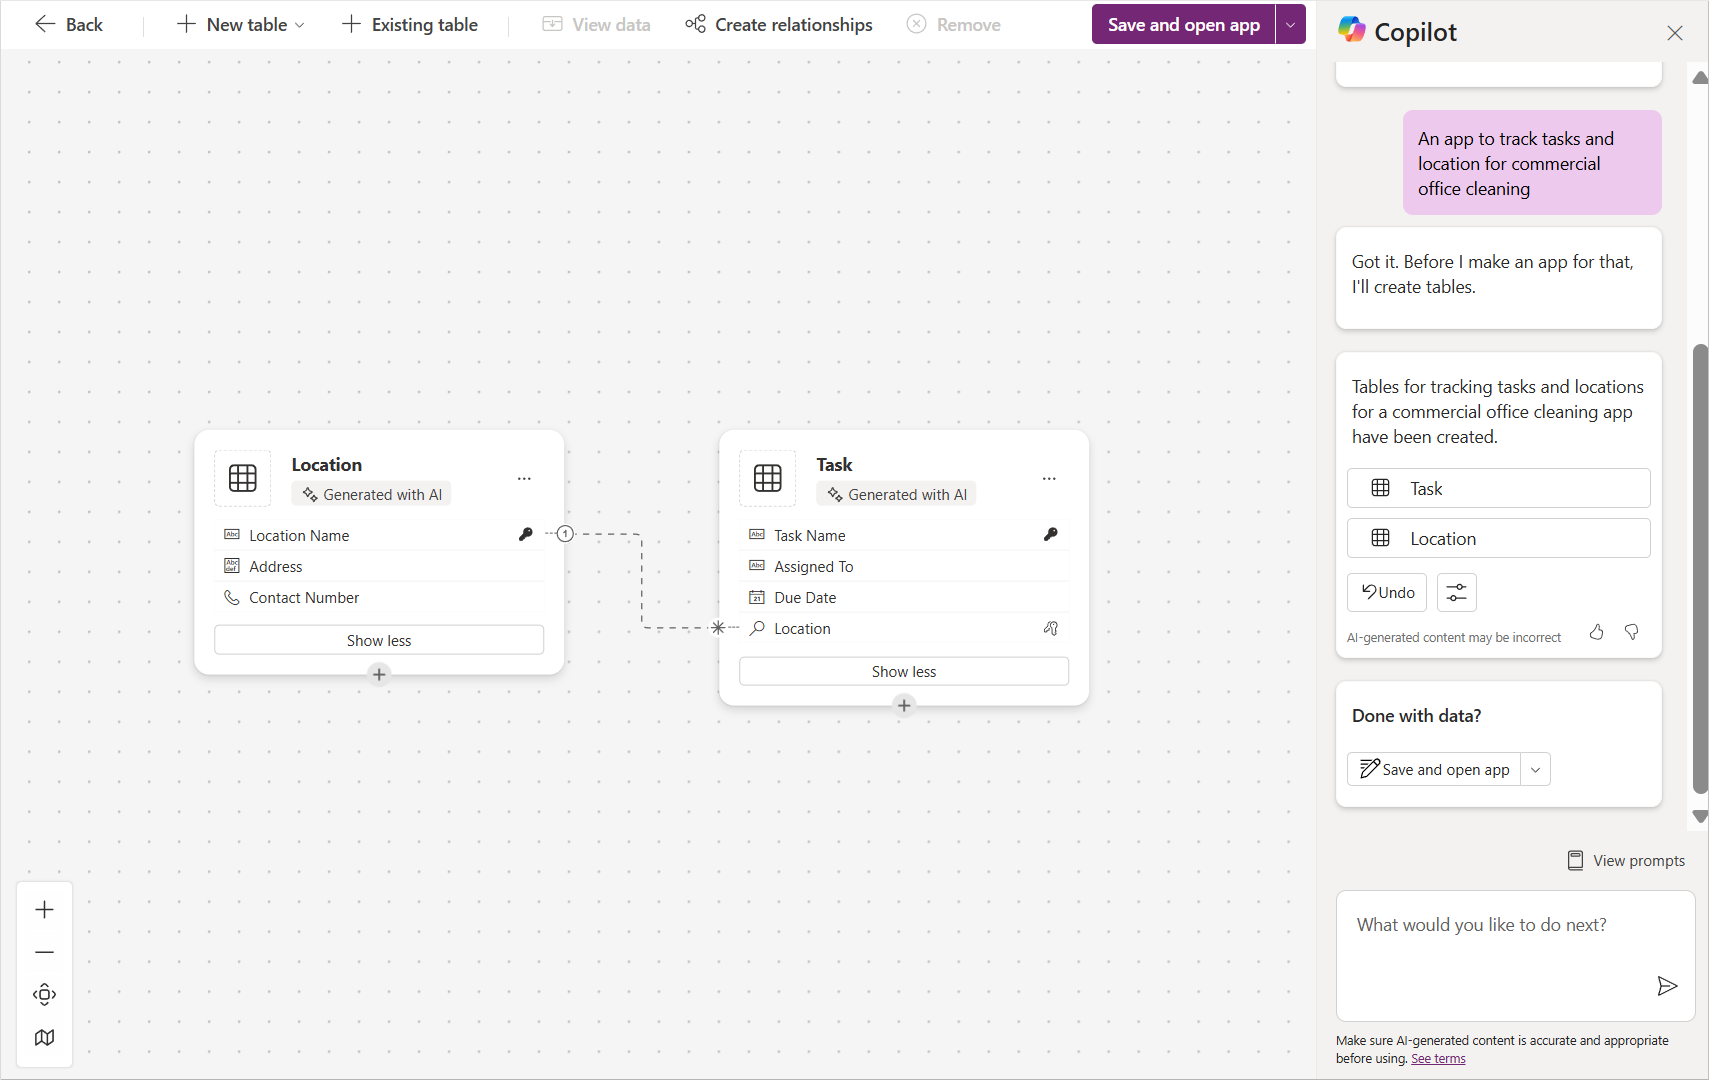
After submitting a prompt, Copilot generates a draft data model with table relationships and sample data. Select any table and choose View data to inspect the structure.
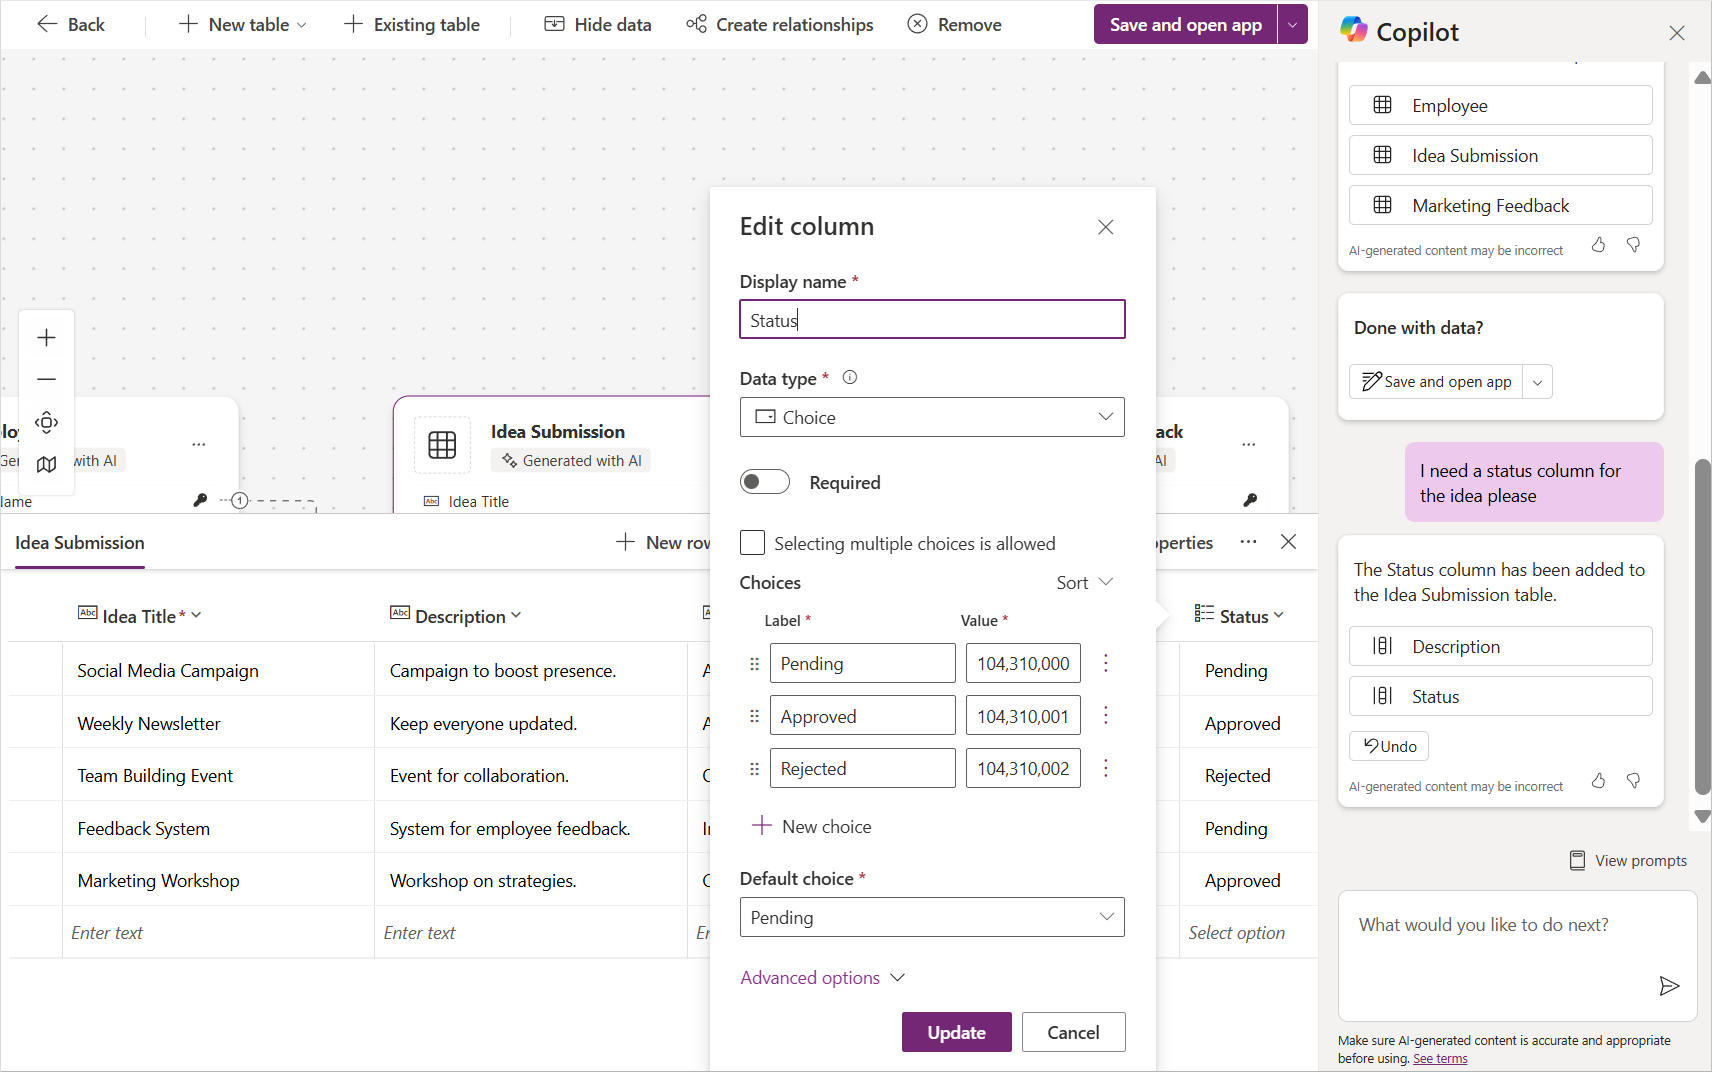
Refine the tables to suit your scenario. For example, you can request that Copilot add a status column or include first and last name fields. You can also edit column properties, such as adding choice options.
Once the table design is complete, select Save and open app to generate the initial canvas app.
How to describe what you need
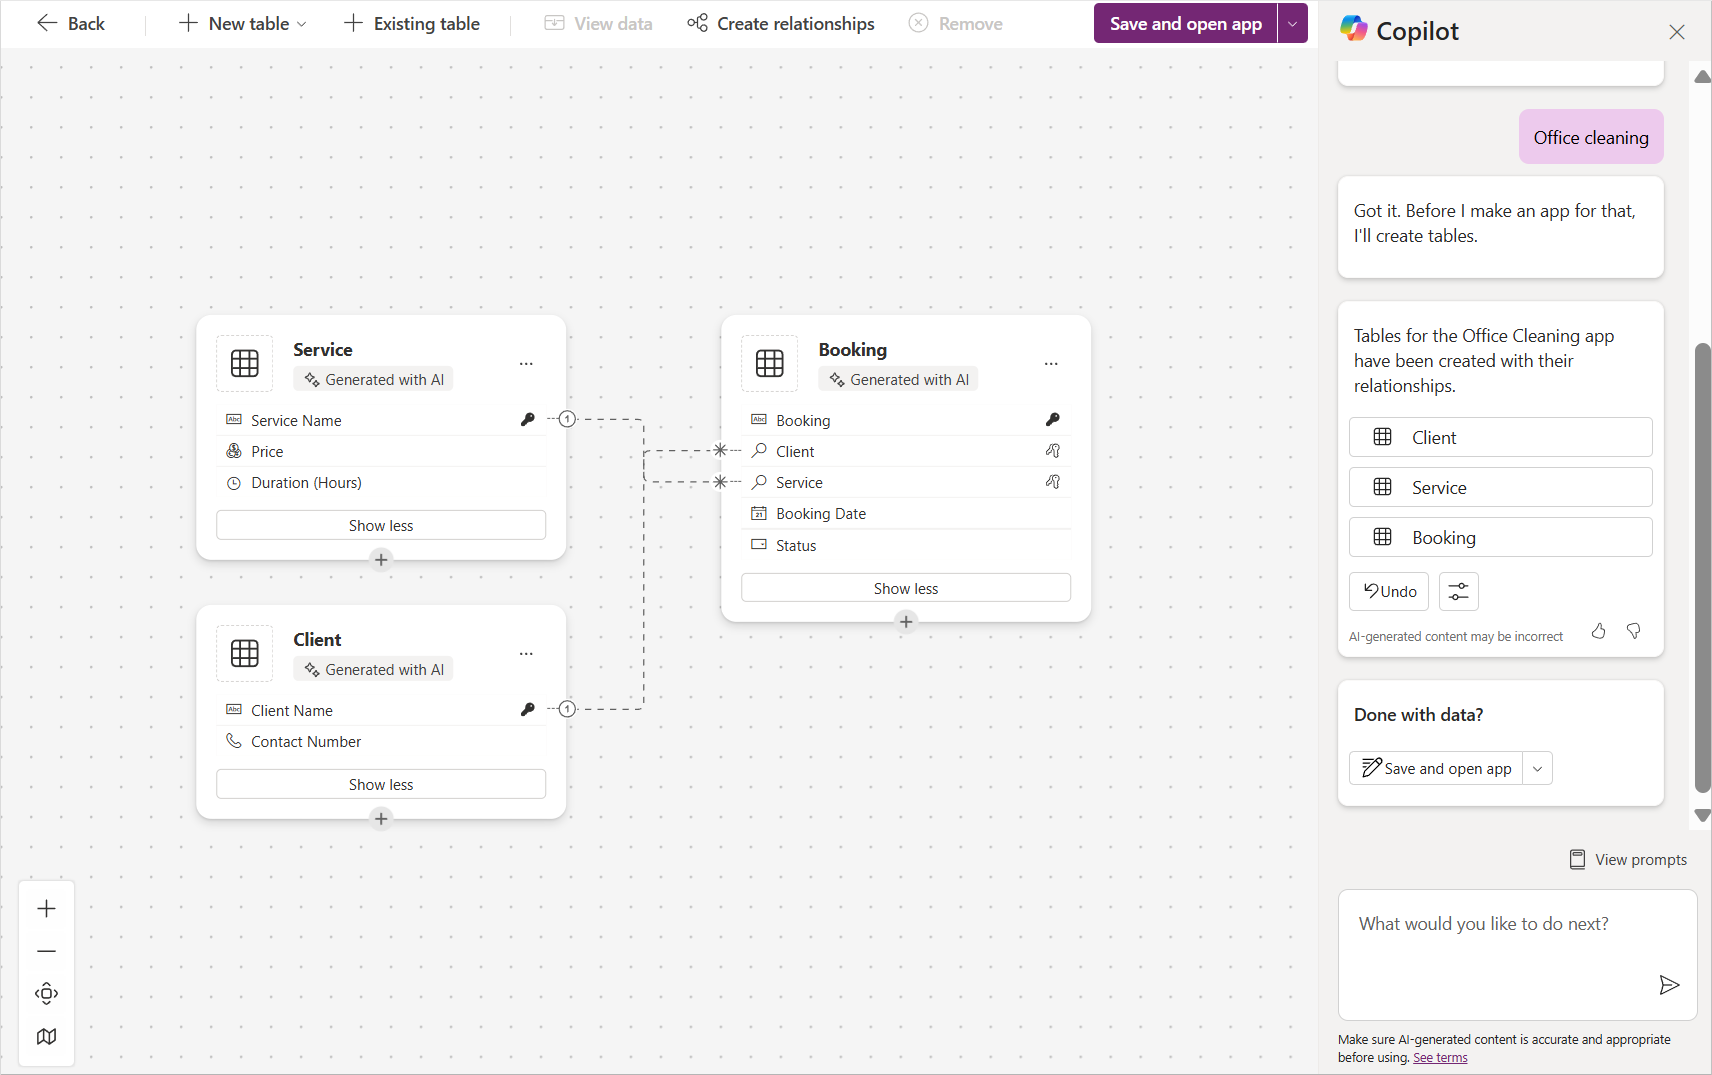
Be specific in your initial prompt. For example, if you're building an app to track tasks for a commercial cleaning business, you might start with Office cleaning.
Although this prompt is vague, Copilot will still attempt to create a relevant data model, which can be refined iteratively.
Providing more detail at the start results in more accurate data structures. Changing the prompt to Create an app to track tasks and location for commercial office cleaning leads to better initial results.
How to refine the initial data table design
After Copilot presents the draft data model, refine it before generating the app.
Actions to take now:
- Simplify the design and verify that relationships are correct.
- Check table names and revise as needed.
- Ensure columns align with your scenario; remove or modify any that don’t.
- Review column icons to match expected data types.
- Select Edit column to view details, including choice options.
- Confirm that yes/no fields are not misidentified as multi-choice columns.
Optional actions:
- Add existing tables and confirm relationships.
- Add new columns that you want in the application.
- Ask the agent for suggestions.
- Use Add a row to include more sample data. For example, add a row with no email.
- Ask Copilot to generate additional rows.
Limitations at this point:
- You can’t change the app scenario; select Back and revise your prompt to start over.
- Lookup columns between tables aren’t supported yet; you can add them later.
Common prompts include:
- Change table name to [new name]
- Add a column for [purpose]
- Change [column name] name to [new column name]
- Add [option name] to [choice column name] choice
- Change data type of [column name] to [data type]
- Remove column [column name]
- Add [column name 1] and [column name 2] to add multiple columns at once
- Change all email data to be contoso.com
In the next unit, you'll learn how to use an agent to iterate on a canvas app.
