What are pull requests?
We begin by:
- Reviewing branches and their importance to pull requests.
- Defining what a pull request is.
- Learning how to create a pull request, review pull request statuses, and merge a pull request.
Branches
First, let’s define what branches are, why they’re important to developers, and how they’re related to pull requests.
Branches are isolated workspaces where you can develop your work without affecting others in the repository. They allow you to develop features, fix bugs, and safely experiment with new ideas in a contained area of your repository.
Developers working on independent branches is a common concept in modern software development. By having their own branch, a developer can make any changes, called commits, without worrying about how their commits affect other developers working on their own branches.
Merging branches
Although having each developer work on a separate branch is great for individual productivity, it opens a new challenge. At some point, each developer's branch needs to be merged into a common branch, like main. As projects scale, there can be many merges that need to happen, and it becomes increasingly important to track and review each merge. Needing to keep track of multiple changes to a project is where pull requests come in.
What is a pull request?
A pull request is a way to document branch changes and communicate that the changes from the developer’s branch are ready to be merged into the base (main) branch. Pull requests enable stakeholders to review and discuss the proposed changes to ensure that the code quality in the base branch is kept as high as possible.
A pull request compares changes between two branches:
- The compare branch is the developer’s own branch, which contains the specific changes they made.
- The base branch, also referred to as the main branch, is the branch that the changes need to be merged into.
When starting a pull request, GitHub automatically shows the branch comparison view.
Create a pull request
Now let’s review how to create a pull request!
On
GitHub.com, navigate to the main page of the repository.In the Branch menu, select the branch that contains your commits.
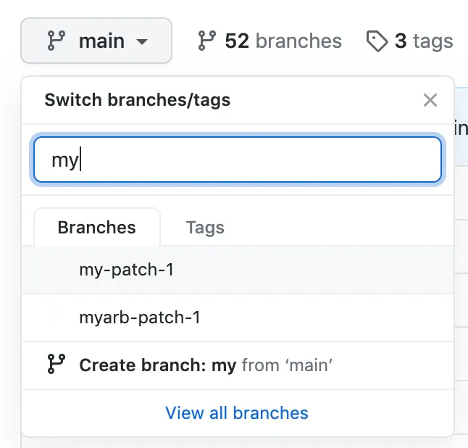
Above the list of files, in the yellow banner, select the Compare & pull request button to create a pull request for the associated branch.

In the base branch dropdown menu, select the branch you'd like to merge your changes into. Then select the compare branch dropdown menu to select the branch you made your changes in.
Enter a title and description for your pull request.
To create a pull request that’s ready for review, select the Create Pull Request button. To create a draft pull request, select the dropdown and select Create Draft Pull Request, then select Draft Pull Request.
Pull request statuses
Now let’s review the different statuses of a pull request.
Draft pull request - When you create a pull request, you can choose to either create a pull request that’s ready for review or a draft pull request. A pull request with a draft status can’t be merged, and code owners aren’t automatically requested to review draft pull requests.
Open pull request - An open status means the pull request is active and not yet merged to the base branch. You can still make commits and discuss and review potential changes with collaborators.
Closed pull request - You can choose to close a pull request without merging it into the base/main branch. This option is useful if the changes proposed in the branch are no longer needed, or if another solution is proposed in another branch.
Merged pull request - The merged pull request status means that the updates and commits from the compare branch were combined with the base branch. Anyone with push access to the repository can complete the merge.
Merge a pull request
Under your repository name, select Pull requests.

In the Pull requests list, select the pull request you'd like to merge.
Scroll down to the bottom of the pull request. Depending on the merge options enabled for your repository, you can:
Merge all of the commits into the base branch by selecting the Merge pull request button. If the Merge pull request option isn’t shown, select the merge dropdown menu, choose the Create a merge commit option, and then select the Create a merge commit button.
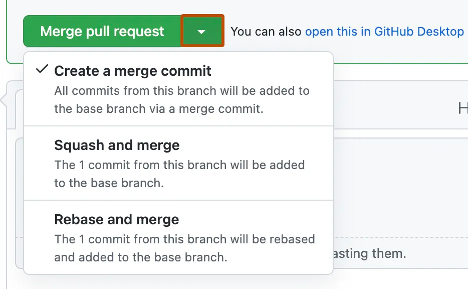
Squash and merge allows you to take all of your commits and combine them into one. This option helps keep your repository history more readable and organized. Select the Squash and merge option, and then select the Squash and merge button.
The Rebase and merge option allows you to make commits without a merge commit. This maintains a linear project history. Select the merge dropdown menu, then choose the Rebase and merge option, and then select the Rebase and merge button.
If prompted, enter a commit message, or accept the default message.
If you have more than one email address associated with your account on
GitHub.com, select the email address dropdown menu and select the email address to use as the Git author email address. Only verified email addresses appear in this dropdown menu. If you enabled email address privacy, a no-reply GitHub email is used as the default commit author email address.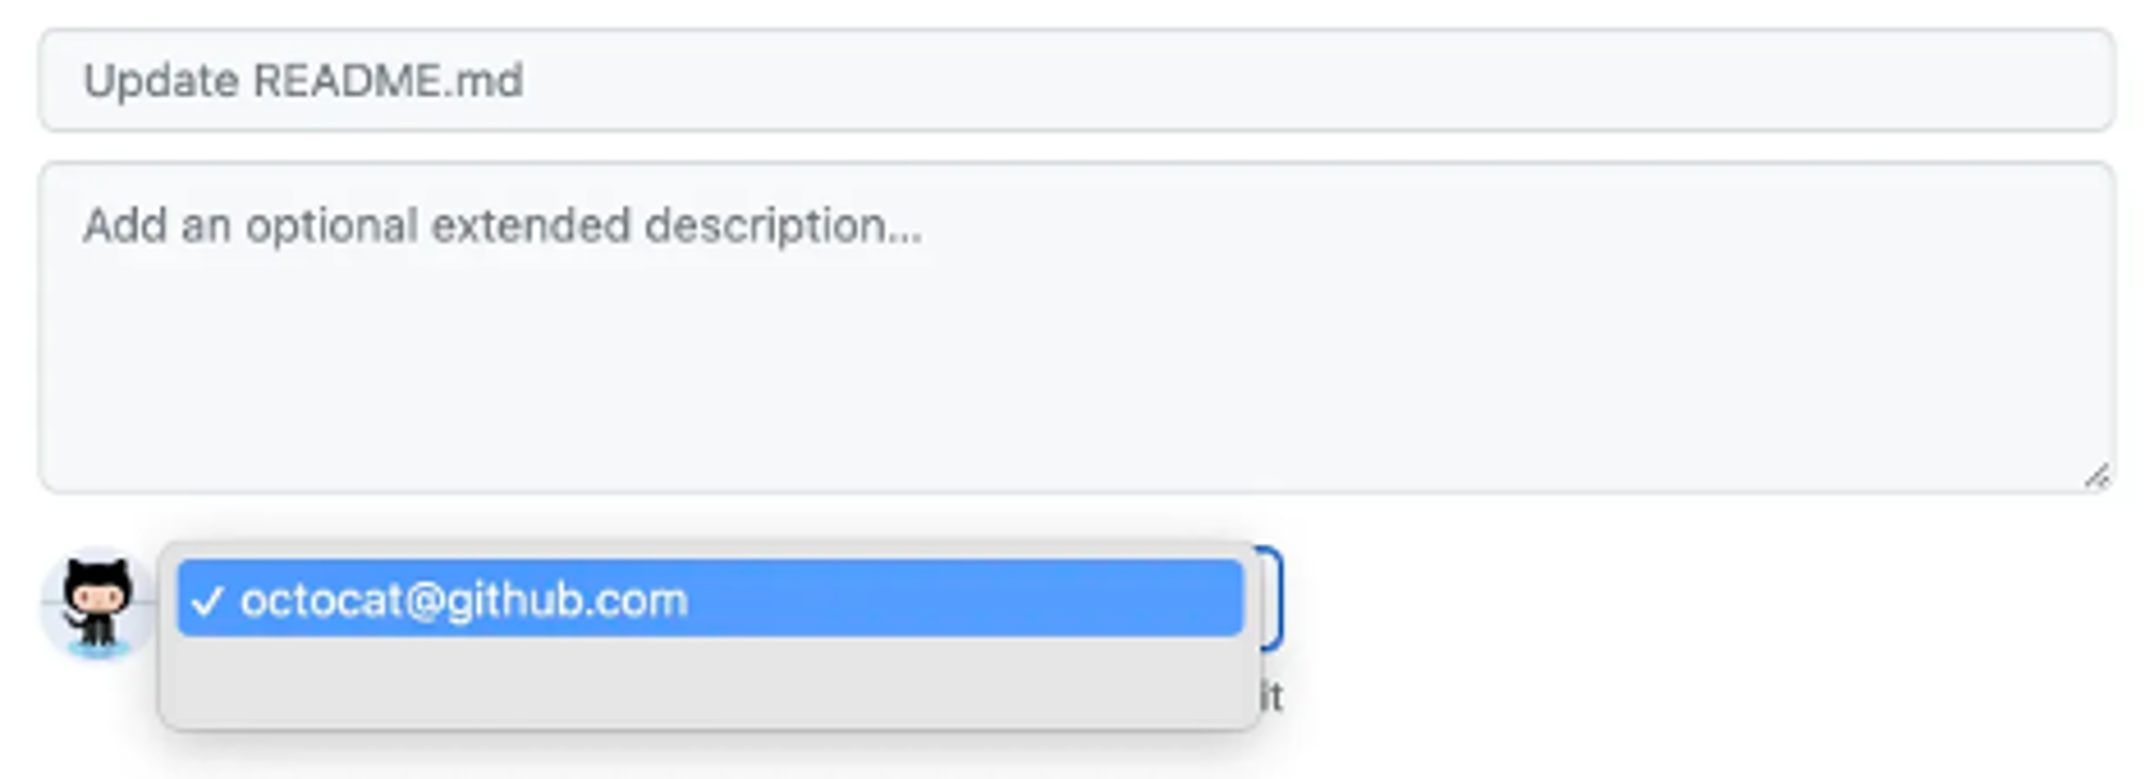
Select Confirm merge, Confirm squash and merge, or Confirm rebase and merge.
Optionally, you can delete the compare branch to keep the list of branches in your repository tidy.
Advanced pull request options
In addition to creating and merging pull requests, there are a few advanced options that help teams maintain high-quality code.
Requesting reviewers
You can request specific collaborators to review your pull request. Only collaborators with write access to the repository can be selected as reviewers. This helps make sure your changes are reviewed by the right people before merging.
- When creating or viewing a pull request, find the Reviewers section in the right-hand sidebar.
- Search for and select the GitHub usernames of collaborators who have write access to the repository.
- The selected reviewers will receive a notification to review your pull request.
Required reviews and branch protection rules
Some repositories use branch protection rules that require pull requests to meet certain conditions before they can be merged. Common requirements include:
- At least one approving review from another collaborator.
- Passing all required status checks, such as continuous integration (CI) workflows.
If a pull request doesn't meet these requirements, the merge button will be disabled until all conditions are satisfied.
You can see the required rules for a repository at the bottom of the pull request page, under the Merge section.
These rules are typically configured by repository administrators in the branch protection settings.
Status checks and continuous integration (CI)
If your repository uses GitHub Actions or another CI system, pull requests may automatically run status checks when changes are made. Examples include:
- Running unit tests
- Checking code formatting
- Verifying security scans
Pull requests usually must pass all required status checks before they can be merged into the base branch. Failed checks are shown directly on the pull request page.
Saving Repositories with Stars
When you find a repository you'd like to easily revisit later, you can star it on GitHub. Starring a repository saves it to your personal list of favorites and shows your appreciation to the repository maintainers.
To star a repository:
- Navigate to the repository page on
GitHub.com. - In the top-right corner, select the ⭐ Star button.
You can view all repositories you've starred by selecting your profile picture, then Your stars.
Keyboard Shortcuts
GitHub offers many keyboard shortcuts to help you move faster through your work.
To view all available shortcuts:
- Press
?anywhere on GitHub.com.
You'll see a list of shortcuts for navigating issues, pull requests, repositories, and more.
Using the Command Palette
The Command Palette on GitHub helps you quickly jump to pages, run common actions, or search repositories without taking your hands off the keyboard.
To open the Command Palette:
- Press
Ctrl+K(Windows/Linux) or⌘+K(Mac).
You can start typing actions like “Create pull request,” “View issues,” or “Switch branch” to instantly go where you need.
Apply what you've learned
Next, you complete an exercise that takes what you reviewed and applies it to a real-life example.