Implement deployment pipelines
Pipelines enable a continuous integration/continuous deployment (CI/CD) approach that ensures content is updated, tested, and regularly refreshed. Pipelines are a way to automate the movement of content through the development, test, and production stages of the content development lifecycle.
What are deployment pipelines?
Fabric deployment pipelines help you deploy your Fabric items across different environments like development, test, and production. They let you develop and test content in Fabric before it reaches end users.
Create a deployment pipeline
Deployment pipelines can be created using two different methods:
- Using the Workspaces icon on the left navigation pane in Fabric.
- Using the Create deployment pipeline icon at the top of a workspace
Follow these steps to create a deployment pipeline:
Select the Workspaces icon on the left navigation pane, then Deployment pipelines.
Select New pipeline. Then name the pipeline and select Next.
Define, and name the stages in your pipeline. Then select Create and continue.
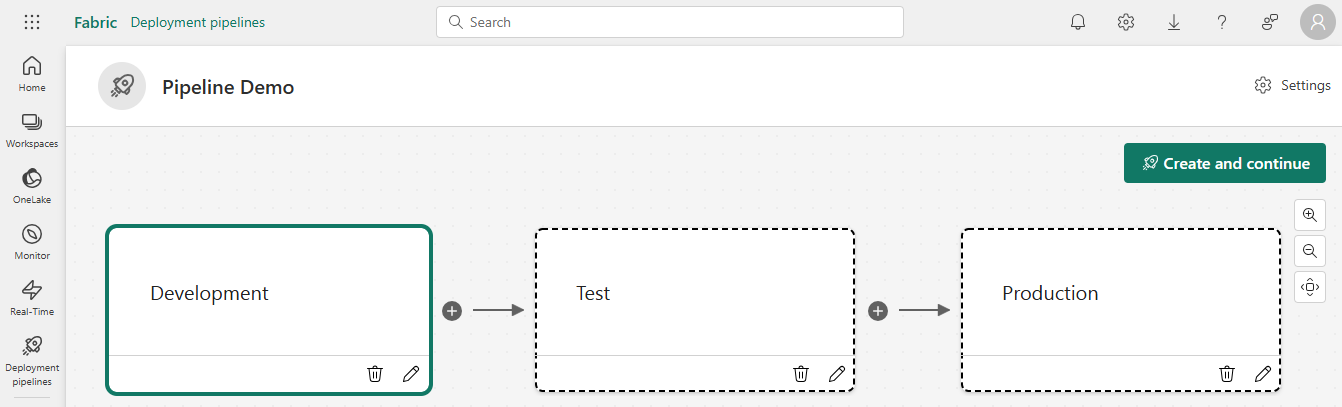
Assign a workspace to a stage. Then select the green check mark next to the stage. Then you're ready to deploy content to the pipeline.
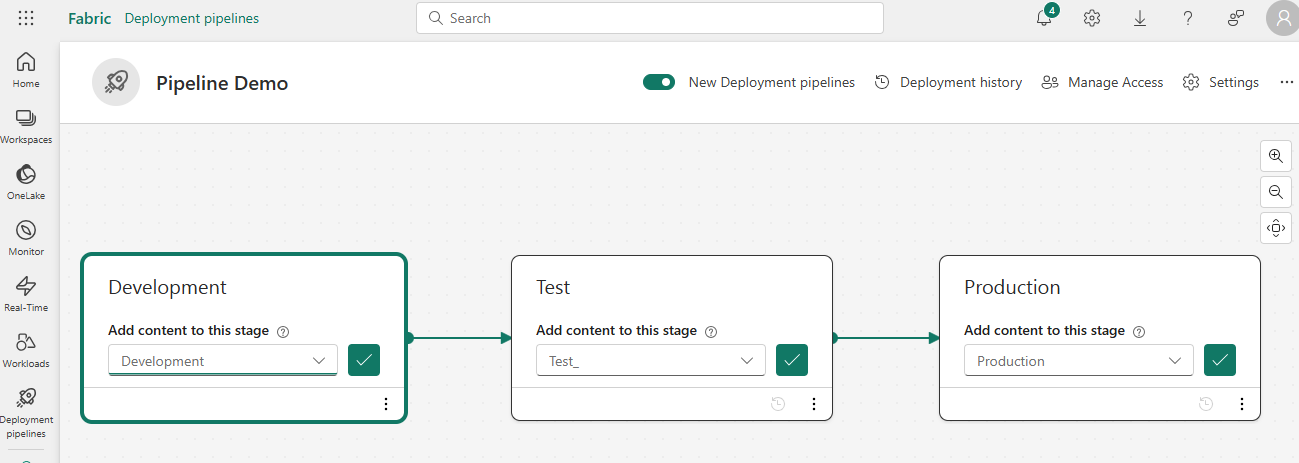
Deploy content to a pipeline stage
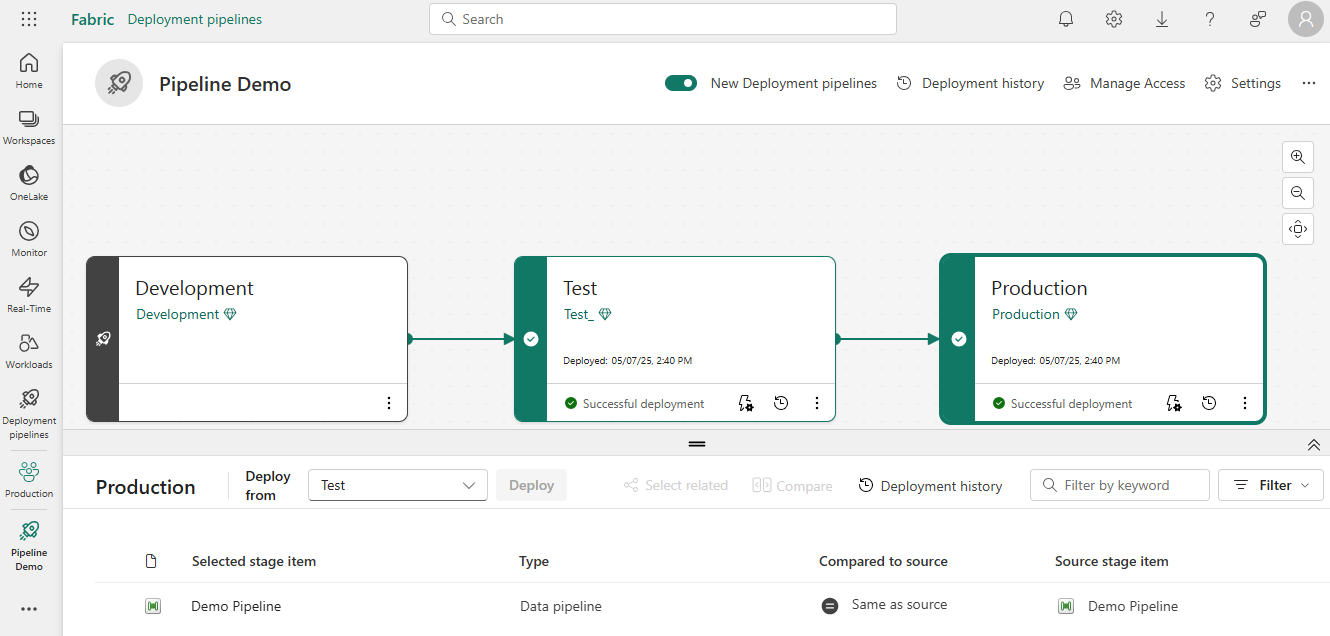
The deployment process lets you clone content from one stage in the pipeline to another, typically from development to test, and from test to production.
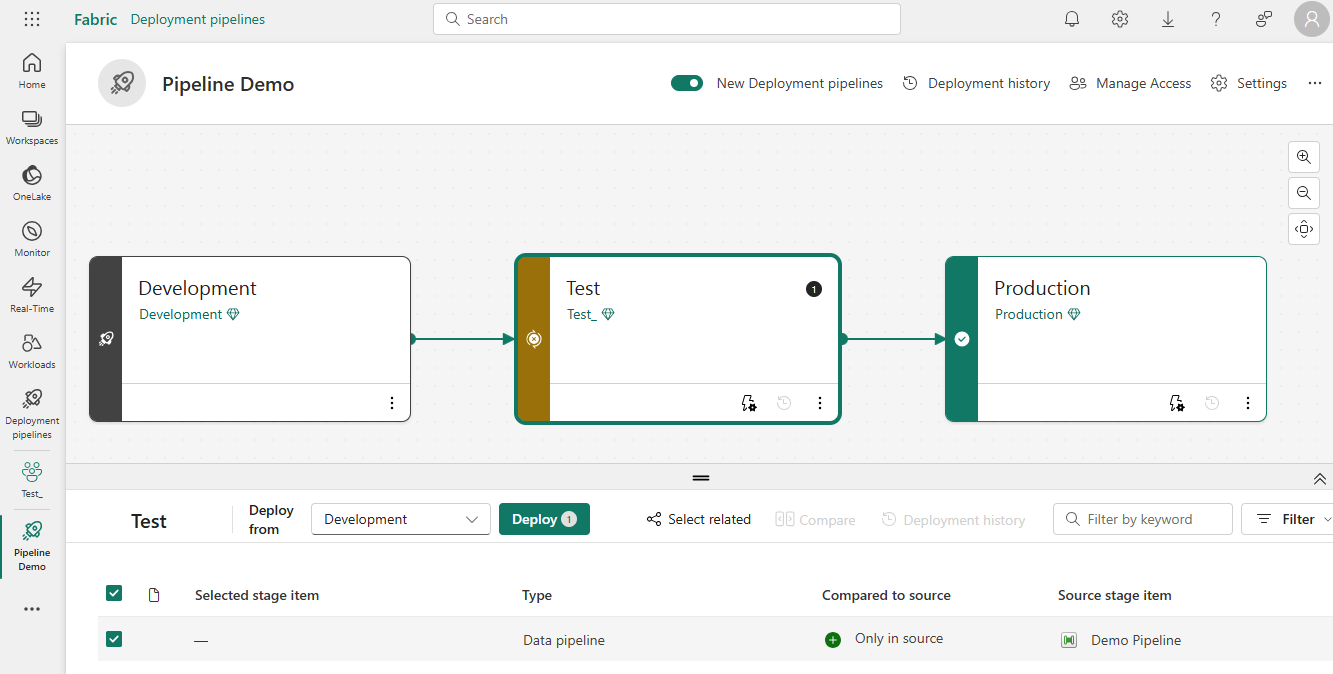
To deploy content between stages, select the stage to deploy to, and then select the stage in the Deploy from drop-down box, and then select the Deploy button. The deployment process copies all of the workspace content into the target stage. In the following image, there's a data pipeline that only exists in the development stage that will be moved to the test stage when Deploy is selected in the development stage.
Use deployment pipelines with Git
Deployment pipelines can be used with Git branches. This would be used to promote content between development, test, and production environments when content for each environment resides in different Git repositories or branches.
To use deployment pipelines with Git branches:
Follow the instructions in the section on this page entitled "Create a deployment pipeline" to create a deployment pipeline and assign each stage to a workspace.
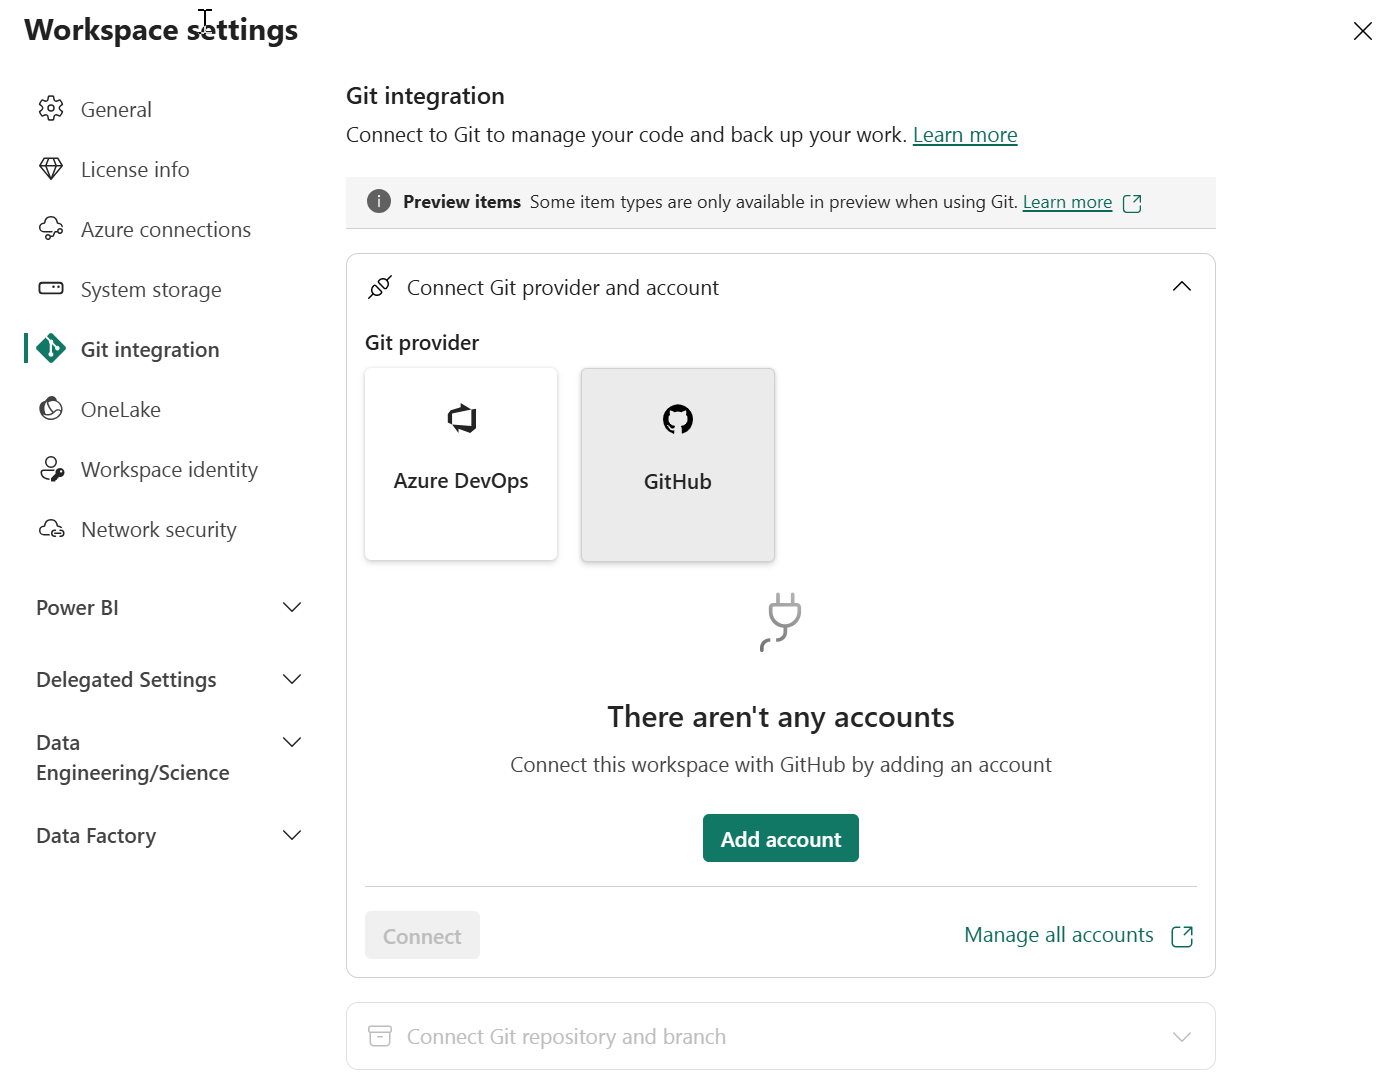
Assign each workspace in the deployment pipeline to a Git repository and branch in Git integration in Workspace settings.
Promote content between staging environments using the deploy button in the pipeline as described in the Deploy content to a pipeline stage section on this page. This moves content between environments in Fabric but the Git repository won't be updated until you manually update from the workspace.
In the image below, the checkmark in the deployment stage box indicates that a data pipeline item exists in all three staging environments of the deployment pipeline in Fabric and that the Fabric stages are synchronized.
When we select Source control from either the Test or Production workspaces that are part of the deployment pipeline, we see that the pipeline hasn't been synchronized with the Git repository.
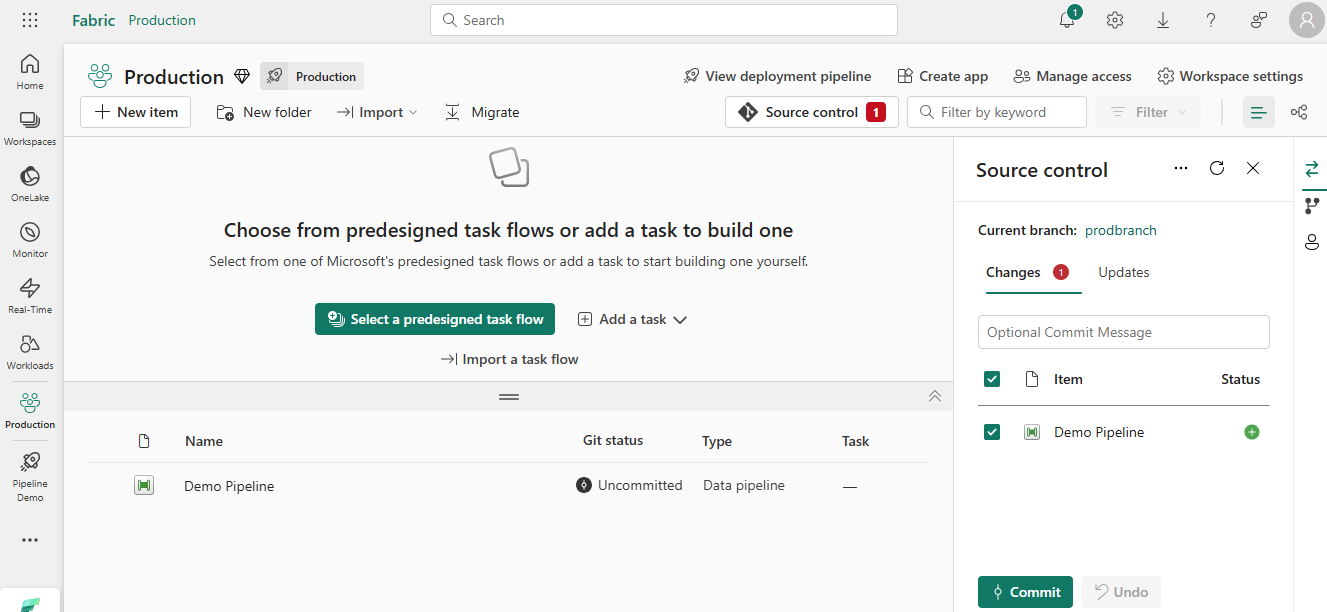
To synchronize the repository with the Test workspace, select the Commit button in the Source control window shown in the preceding image.