Exercise - Create and modify tables and columns by using conversations
Learning objective
In this exercise, learners are using Copilot to build a data model. You provide a description of the type of tables you want to build and use the designer to make changes as needed such as adding more columns.
Scenario
Contoso College gets many different grants and donations throughout the year. It can become challenging to manage all these items as they come in. Contoso wants to build some canvas and model-driven applications to manage these grants and donations. Before they can build the apps, they need to create a data model in Dataverse to store the data they want to capture.
Upon successful completion of this exercise, you will:
- Build a table using Copilot.
- Add and modify columns though natural language.
Important
This hands-on lab assumes that you have a Dataverse instance that you can work with. If you don't have an instance you can work with, you can obtain a 30-day Power Apps trial plan here.
Important
If you sign up for a Power Apps trial using your company email address, and your company is already using Power Apps, your trial will be added to your organization's current tenant. If your current Microsoft account doesn't already have the necessary permissions, you may not be able to add tables to your trial. In these instances, you can sign up for a new trial account that doesn't use your work or school account.
Task 1: Create a data model
Contoso currently stores donor contact information in their Dataverse instance. They would like to use Dataverse to track the grants they're applying for and donations that they're receiving. You need to create the necessary tables to support the future application needs of Contoso.
Open a web browser and navigate to the Power Apps maker portal, and sign in using your Microsoft account credentials.
Using the navigation on the left, select Tables.
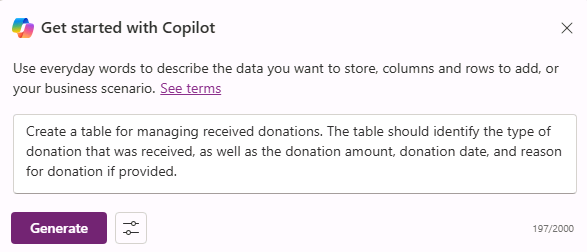
Under tables. Select Get Started with Copilot.
In the Describe the tables that you want copilot to build screen, Enter: "Create a table for managing received donations. The table should identify the type of donation that was received, and the donation amount, donation date, and reason for the donation if provided."
Next to the Generate button, select Table Settings, and configure as follows:
- Table Options: One table
- Table Size: Small
- Do NOT include relationships.
Select the Generate button.
Important
Copilot should only create one table called Donation. If more were created, you can delete them, by telling Copilot the name of the table to delete.
Donations are typically made by contacts. We want to add the existing Contact table to the data model and associate it with Donations.
In the Command bar at the top, select + Existing Table.
In the Select Table screen, change from Recommended to All Tables.
In the Search field, enter Contact, and choose Add selected.
On the Command bar, select Create relationships.
Configure the relationship as follows:
- Relationship Type: One-to-many
- One: Contact
- Many: Donation
- Display name: Donor
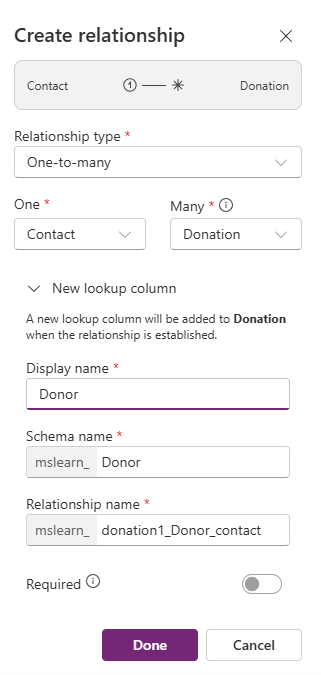
Select Done.
Grants are treated differently Donations, so we want to create an additional table form managing grants.
- In the What would you like to do next field, Enter: "Add a new table called Grants."
Copilot will likely create two tables, Grants and Recipient. If yours don't match exactly, that is OK. For now, we're going to remove the Recipient table.
- In the What would you like to do next field, Enter: "Remove the Recipient table."
Next, we add some columns to the Grants table.
In the What would you like to do next field, Enter: "Add a new choice column to the Grants Table called Grant Type."
Use the following individual prompts to add more columns:
- "Add a new date column to the Grants Table called Application date."
- "Add a new choice column to the Grants Table called Application status."
- "Add a text column to the Grants Table called Description."
Your completed data model should resemble the image:
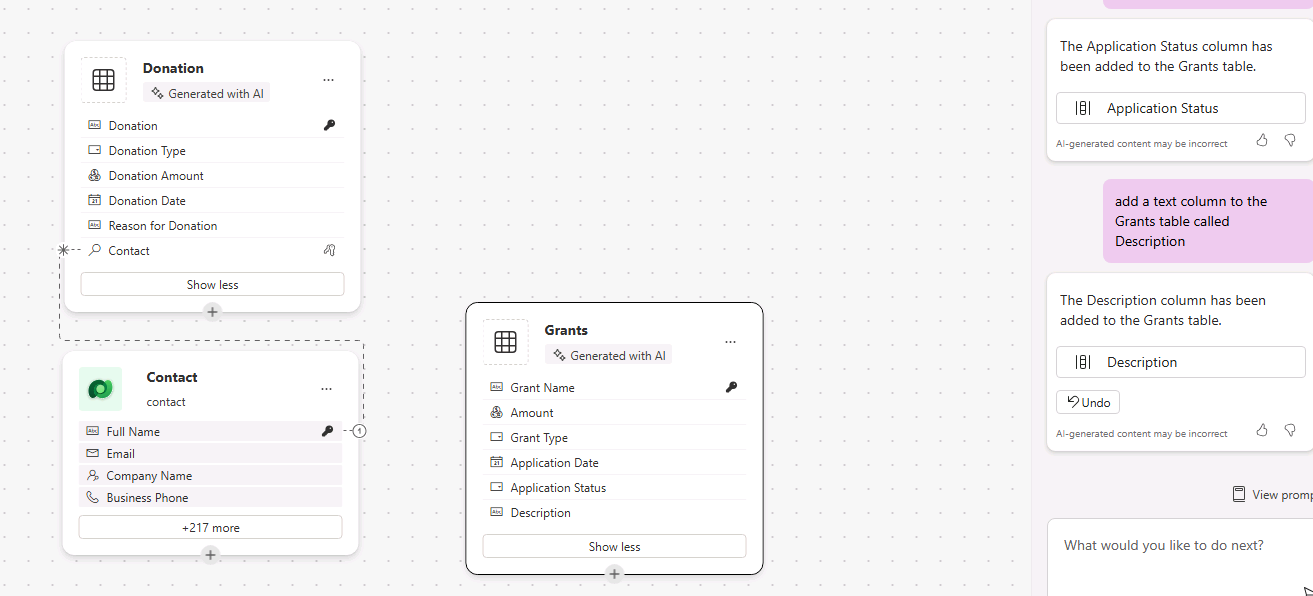
Select the Save and Exit button to create your data model.

Task 2: Edit tables and columns directly
Copilot is a great way to create tables and columns quickly. However, there may be times when you need to make modifications to tables and columns directly. For example, in this task we're going to make modifications to the donation choice column that was created when the table was made.
Open a web browser and navigate to the Power Apps maker portal, and sign in using your Microsoft account credentials.
Using the navigation on the left, select Tables.
Switch from Recommended to All tables.
Select in the Search field in the upper right corner, enter Donation.
Select the Donation table.
Under the Schema heading select Columns.
In the Search field at the top right, enter Donation.
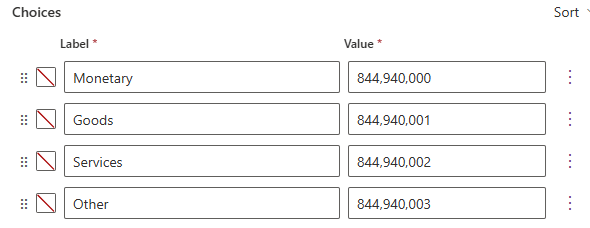
Open the Donation Type choice column.
Under the Choices, select + New Choice.
Enter Other, select Save.
Next we're going to create a choice column to keep track of which department the donation is going to.
On the Command bar, select New Column.
Complete the new column as follows:
Display Name: Department
Data Type: Choice (Choice)
Under Sync with global choice, select No.
In the Label field, enter Math.
Select New Choice.
- Add Science and History as choices.
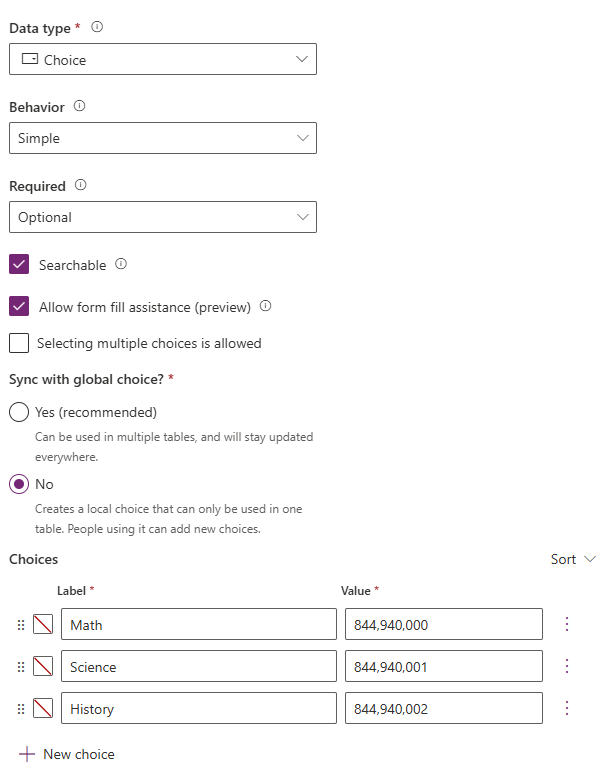
Select the Save button.
You now successfully created tables and columns in Dataverse using Copilot.