Exercise - Share the pipeline with a teammate
In this exercise, you apply your learned knowledge to share the pipeline that you created in the Exercise – Create and run a pipeline unit.
Scenario
You're working with a colleague on a canvas app from Power Apps in which you have set up a pipeline to deploy from your common development environment to a testing environment. You plan to be away from the office for the next few weeks, and you want to ensure that your colleague can use the pipeline to deploy the solution that contains this app in your absence.
Preparation
Create or identify a user who has access to the source and target environments with permissions to export and import solutions in them.
Exercise
Before beginning this exercise, sign in to Power Apps Studio and select the source environment where you created the pipeline.
Go to the solution that you want to deploy, and then follow these steps:
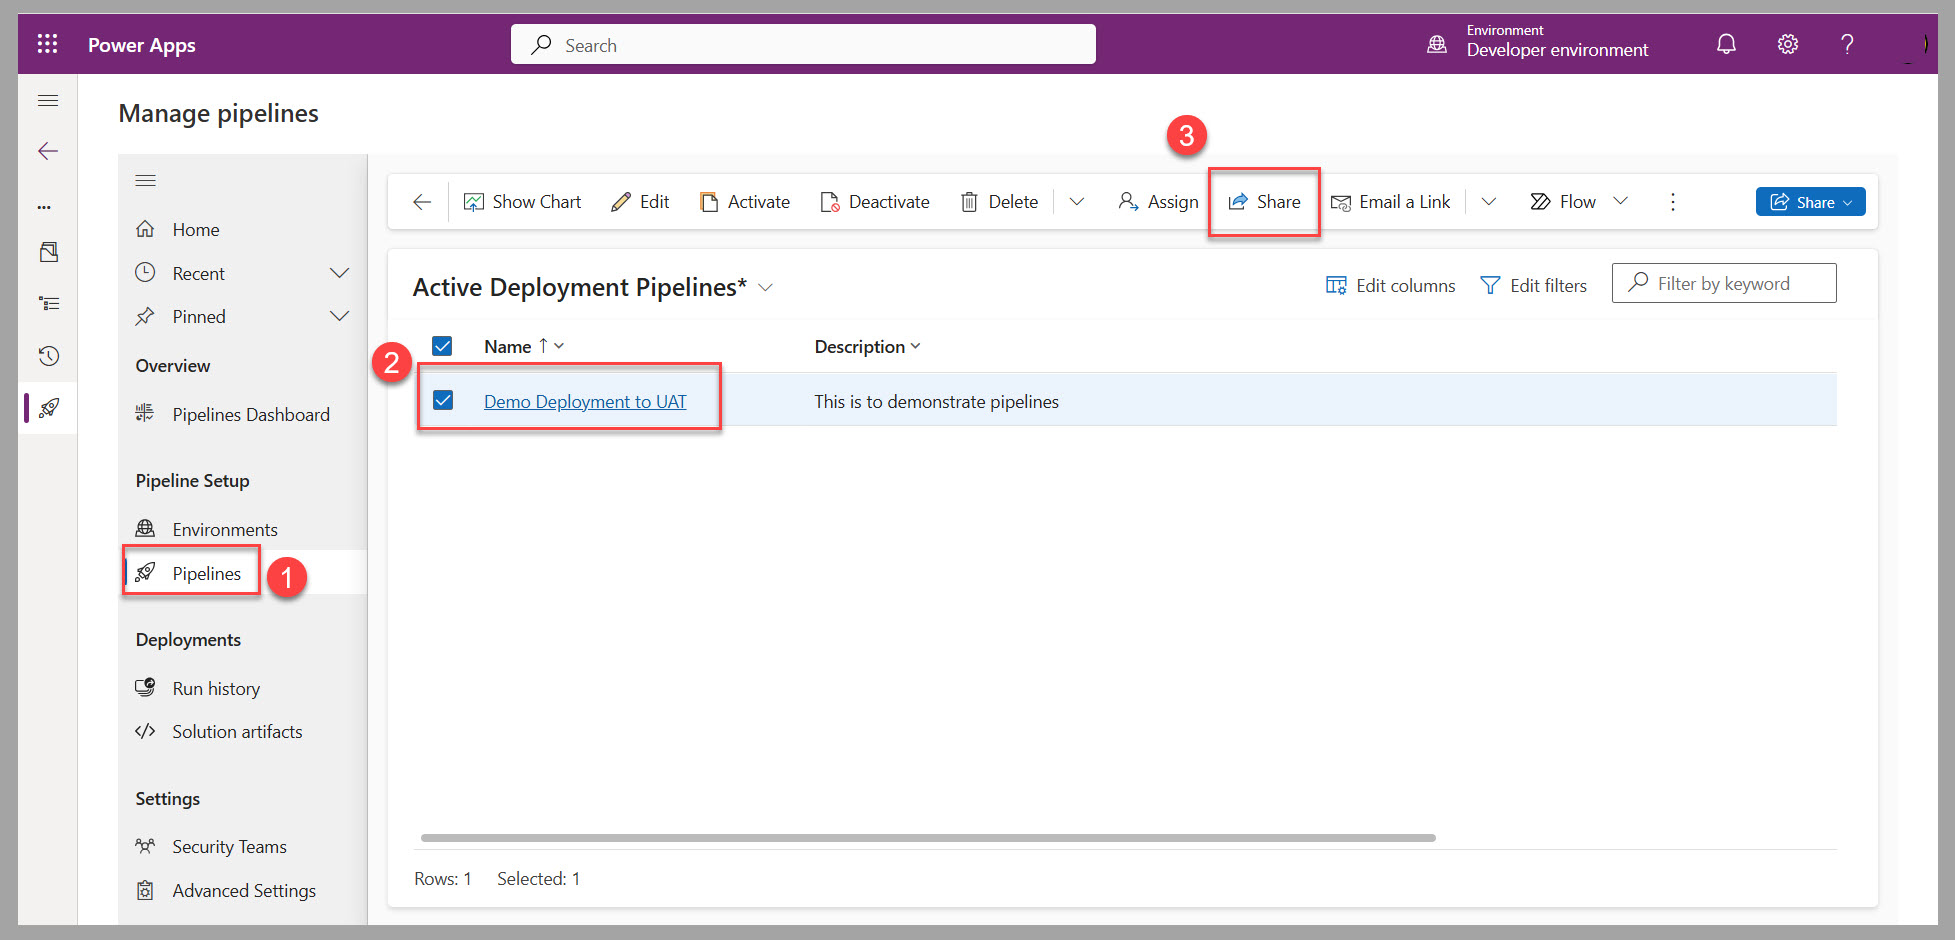
Select Pipelines from the left navigation pane.
Select the Demo Deployment to UAT pipeline or the one that you created previously.
Select Manage pipelines to access the platform-hosted app.


To share the pipeline with your colleague, follow these steps:
Select Pipelines from the left navigation pane of the app.
Select the pipeline to share in the list.
Select Share from the upper navigation bar of the app.
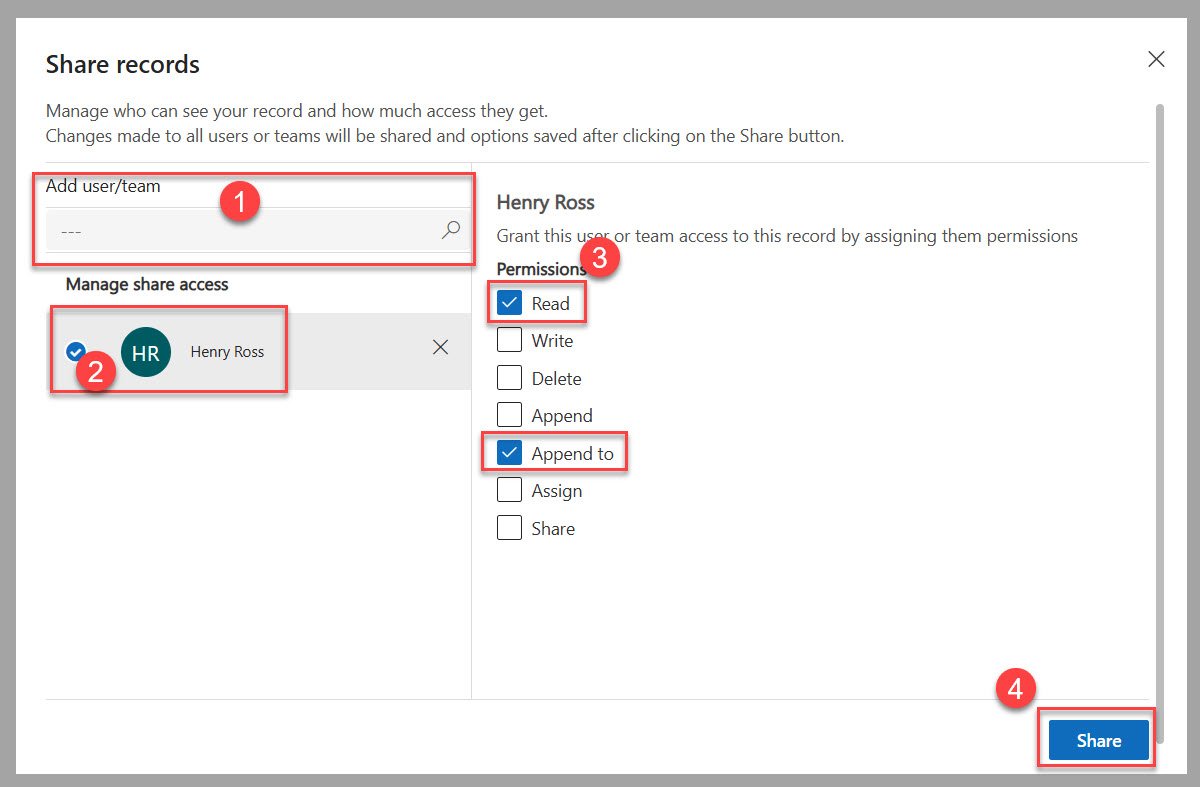
Search for your colleague's name in the Add user/team field.
Select your colleague's name from the list of users in the Manage share access section.
To provide view and deploy capabilities, select Read and Append to permissions.
Select Share to complete this process.


This user now has access to the pipeline and deployment solutions from the source environment to the target environment.
Next steps
You now learned how to share a pipeline in Microsoft Power Platform. Next, you have the opportunity to validate the learned concepts for this module.