Exercise - Create and manage topics
Here, you create the conversational flow for your agent.
Create a topic using Microsoft 365 Copilot
Topics can be created and edited using natural language.
Navigate to Microsoft Copilot Studio.
Important
Make sure that you're in the correct environment.
Select your agent in the Agents pane on the left-hand side of the screen.
Select the Topics tab.
Select Add a topic and select Create from description with Copilot.
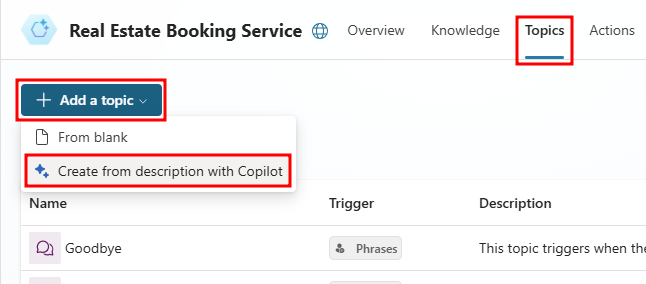
A new window appears asking you to Name your topic and provide a description in the Create a topic to... text field.
In the Name your topic field, enter the following text:
Customer DetailsIn the Create a topic to... field, enter the following text:
Ask the customer for their name and email addressSelect Create.
A new topic displays with the generated trigger phrases and question nodes.
Note
Remember, your generated content might appear differently than what's shown in this lab.
Select Save.

Update nodes with natural language
If the Edit with copilot pane isn't shown on the right-hand side of the screen, select the Microsoft 365 Copilot icon in the upper part of the authoring canvas.
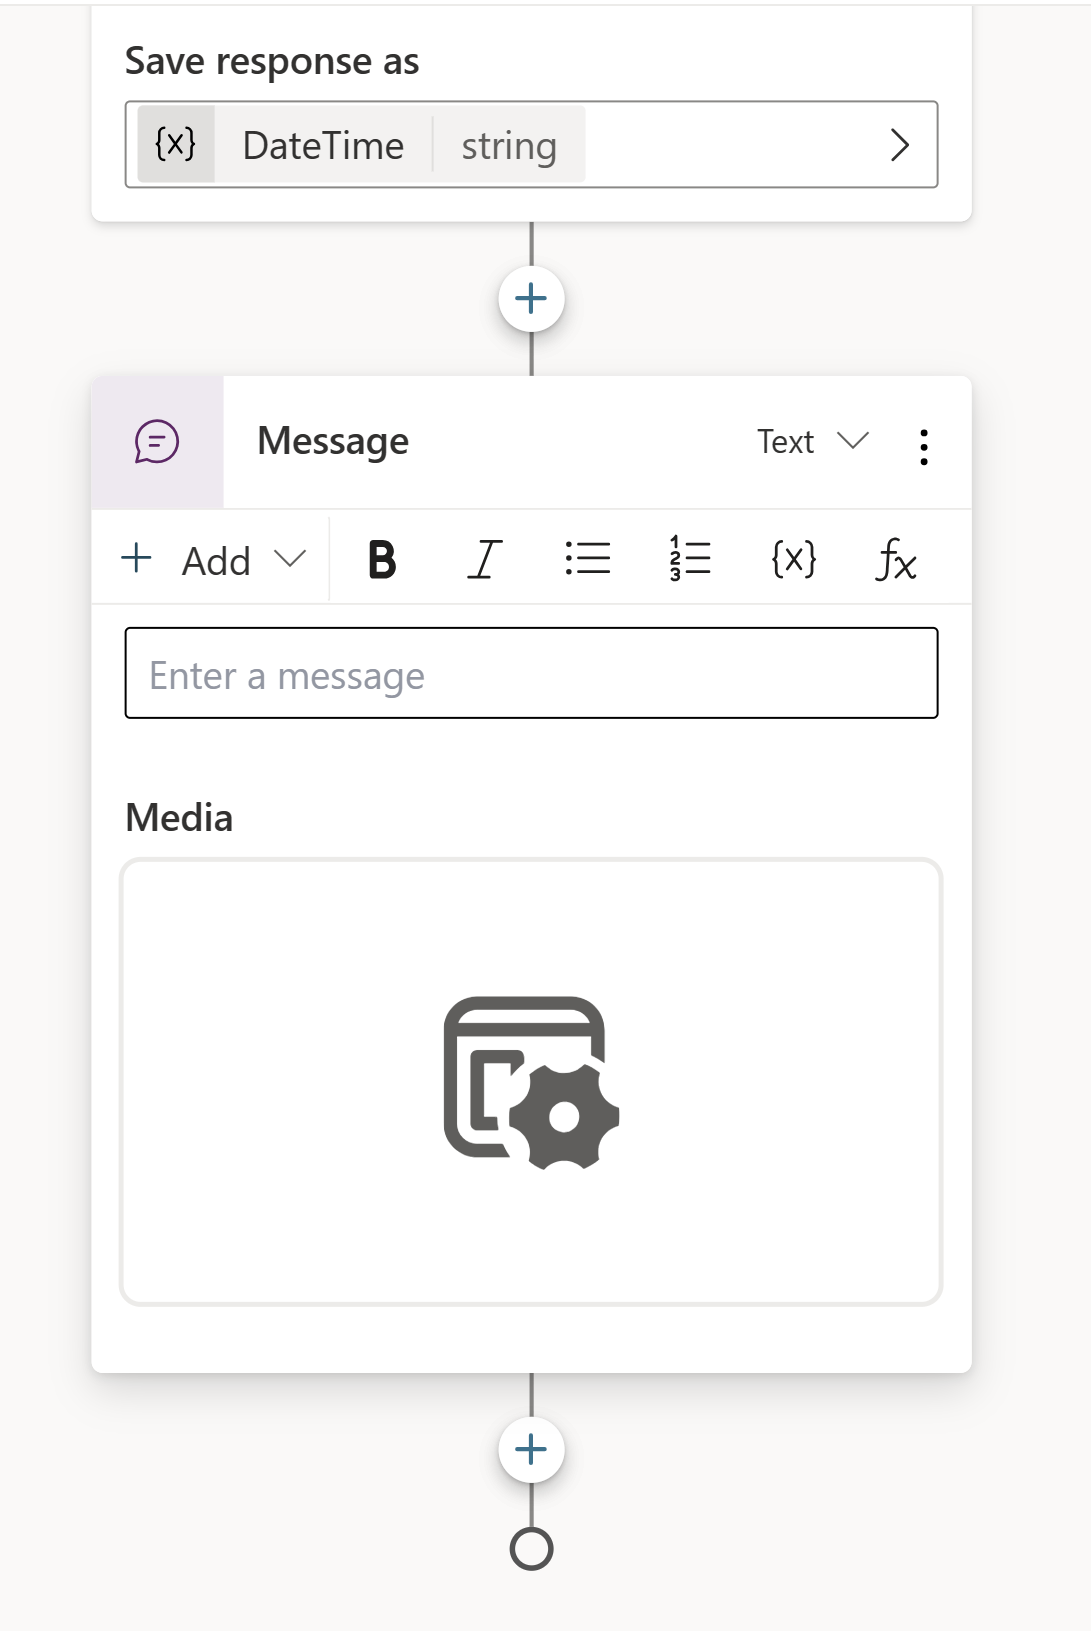
Select the second question node, What is your email address?
In the Edit with Copilot panel, in the What do you want to do? field, enter the following text:
Update the message in this question node to say thank you to the Name variable from the previous node and then proceed to ask the email address questionSelect Update.
Note
The message should be updated to include the Name variable from the message node before it.
Select Save.
Add nodes with natural language
In addition to updating existing nodes, you can use Microsoft 365 Copilot to add new ones.
Make sure that no node is selected by clicking in the empty space around the nodes.
In the Edit with Copilot panel, in the What do you want to do? field, enter the following text:
Summarize the information collected in an adaptive cardSelect Update.
A message node with an Adaptive Card is added to the end of the topic.
Select the Adaptive Card. The Adaptive Card properties should appear on the right of the screen.
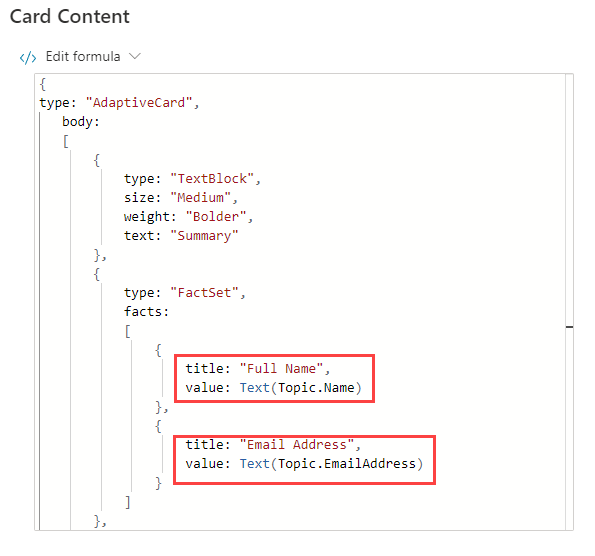
Your Adaptive Card formula should look similar to the one in the previous image. If it doesn't, then you can copy and paste in the following formula:
{
type: "AdaptiveCard",
    body:
    [
        {
            type: "TextBlock",
            size: "Medium",
            weight: "Bolder",
            text: "Summary"
        },
        {
            type: "FactSet",
            facts:
            [
                {
                    title: "Name",
                    value: Text(Topic.Name)
                },
                {
                    title: "Email address",
                    value: Text(Topic.EmailAddress)
                }
            ]
        }
    ],
    '$schema': "http://adaptivecards.io/schemas/adaptive-card.json",
    version: "1.5"
}
Opening the Adaptive Card properties closes the Edit with Copilot panel; therefore, you need to select the icon to reopen it.
Make sure that no node is selected by clicking in the empty space around the nodes.
In the What do you want to do? field, enter the following text:
Add a new multiple choice question to prompt the user if the details are correct with two options Yes or NoSelect Update.
A new question node is added to the end of the topic with options for the user to select.
Select Save.


Configure the scope of the variables
Select Variables to open the Variables pane.
Select each of the variables and set their Usage values to Global (any topic can access).
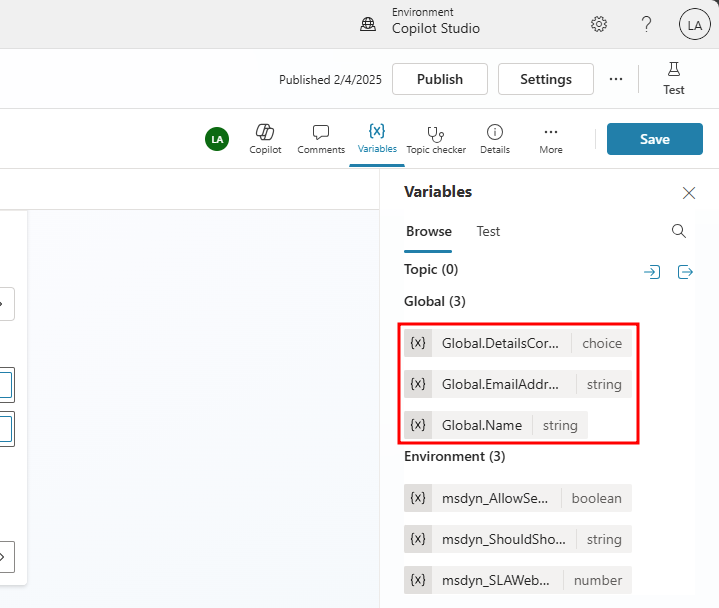
Each variable should now show under the Global group in the Variables pane.
Select Save to save the completed topic.

Author topics manually
Topics can also be created manually with highly customizable nodes.
Create a topic from blank
Select the Topics tab.
Select Add a topic and select From blank.
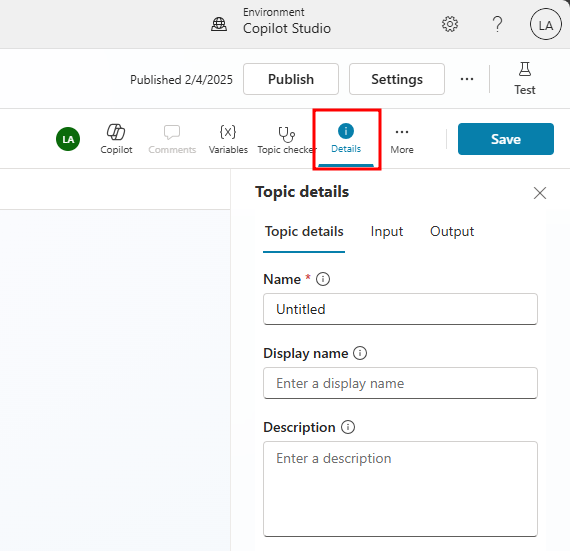
Select Details to open the Topic details dialog.
In the Name field, enter the following text:
Book a Real Estate ShowingIn the Display Name field, enter the following text:
BookIn the Description field, enter the following text:
Select the property and requested date and create a booking requestSelect Save.
Select Details to close the Topic details dialog.

Add trigger phrases
Select Edit under Phrases in the Trigger node.
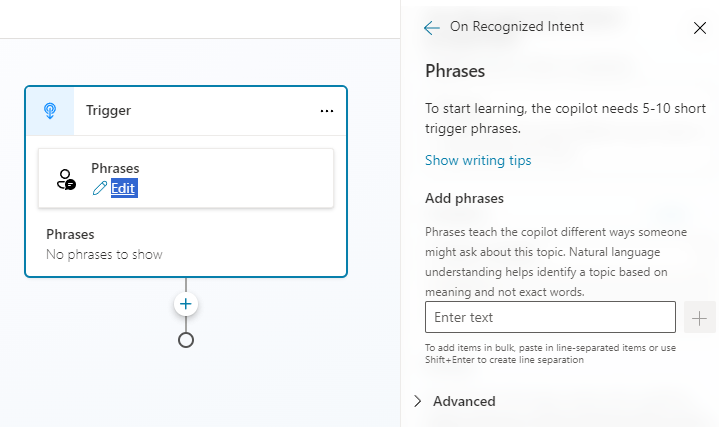
Enter the following phrases under Add Phrases. Select the + icon or press enter to move on to the next phrase.
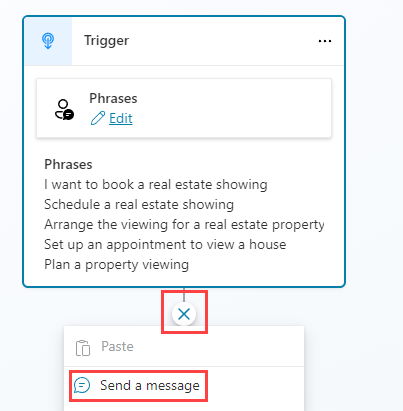
I want to book a real estate showingSchedule a real estate showingArrange the viewing for a real estate propertySet up an appointment to view a housePlan a property viewing
Select Save.

Add a message node
Select the + icon under the Trigger node and select Send a message.
In the Enter a message field, enter the following text:
Hi, I can help you with booking a real estate property showing.Select Save.

Add a Topic management node
Select the the + icon under the send a message node and select Add a condition.
Select the DetailsCorrect variable for the Condition node.
Under is equal to, set the value to No.
Add a node under the condition and select the Topic Management > Go to another topic node and choose the Customer Details topic.
Select Save.
Add condition node
Select the the + icon under the message node and add another condition by selecting Add a condition.
Select DetailsCorrect for variable.
Under is equal to, set the value to Yes.
Add question nodes
Select the the + icon under the DetailsCorrect is equal to Yes condition node and select Ask a question.
In the Enter a message field, enter the following text:
Which property do you want to see?Select User's entire response for Identify.
Select the variable in Save user response as and enter
PropertyNamefor Variable nameSelect the the + icon under the question node and select Ask a question.
In the Enter a message field, enter the following text:
What date and time do you want to see the property?Select Date and Time for Identify.
Select the variable in Save user response as and enter
DateTimefor Variable nameSelect Save to save the topic.
Navigate from Customer Details topic
From the Topics tab, open the Customer Details topic.
At the bottom of the topic, under the Are these details correct? Question node, add a topic redirect node to the Book a Real Estate Showing topic.
Save the topic.
Test the agent
Select the Test button in the top-right of the screen to open the testing panel.
Select the three dots at the top of the testing panel in the top-right of the screen.
Select Track between topics.
Select the Start a new conversation icon at the top of the testing panel.
When the Conversation Start message appears, your agent starts a conversation. In response, enter a trigger phrase for the topic that you created:
Customer infoThe agent responds with the "What is your name?" question, then enter your name.
The agent should now respond with "What is your email address?", then enter your email address.
After you supply the information, an Adaptive Card displays the information that you entered, a question asking if the information is correct, and options to select Yes or No.
Select Yes.
Enter
555 Oak Lane, Denver, CO 80203to the Which property to you want to see? prompt.Enter
Tomorrow 10:00 AMto the What date and time do you want to see the property? prompt.
Use entities to improve the agent
Microsoft Copilot Studio uses entities to understand user intent. There are many prebuilt entities included for commonly used information. You can create custom entities for your specific purpose.
View prebuilt entities
Select Settings in the top-right of the screen.
Select the Entities tab.
Create the property type entity
Select + Add an entity and select + New entity.
Select the Closed list tile.
Enter
Property Typein the Name field.Enter
Apartmentin the Enter item field and select Add.Enter
Housein the Enter item field and select Add.Enter
Condominiumin the Enter item field and select Add.Enter
Duplexin the Enter item field and select Add.Select + Synonyms for Apartment, enter
Flat, then select the + icon and select Done.Select + Synonyms for House, enter
Single-family home, then select the + icon and select Done.Select + Synonyms for Condominium, enter
Townhouse, then select the + icon and select Done.Select Save.
Select Close.
Create number of bedrooms entity
Select + Add an entity and select + New entity.
Select the Regular expression (Regex) tile.
Enter
Number of Bedroomsin the Name field.Enter
[1-5]in the Pattern field.Select Save.
Select Close and exit the entities menu to return back to your Book a Real Estate Showing topic.
Use entities
In the Book a Real Estate Showing topic, select the the + icon above the Which property do you want to see? question node and select Ask a question.
In the Enter a message field, enter the following text:
What type of property do you want to see?Select Property Type for Identify.
Select Select options for user and check the Display option for all list values.
Select the variable in Save user response as and enter
PropertyTypefor Variable nameSelect the the + icon below the new question node and select Ask a question.
In the Enter a message field, enter the following text:
How many bedrooms do you need?Select Number of Bedrooms for Identify.
Select the variable in Save user response as and enter
NumberofBedroomsfor Variable nameSelect Save to save the topic.
Create agent actions
Microsoft Copilot Studio can access data in Microsoft Dataverse using Power Automate cloud flows
Create Power Automate flow to retrieve a property
Navigate to the Actions tab for your agent.
Select + Add an action.
In the Add action window, select the + New action button and choose New Power Automate flow from the list.
Sign in to Power Automate if prompted.
Select Run a flow from Copilot in the top-left of the screen and enter
Get Propertyas the flow name.In the trigger step named Skills, select + Add an input to add an input variable from your agent.
Select Text.
Enter
Bedroomsfor Input andNumber of Bedroomsfor Please enter your input.Select the + icon between the two steps in the flow and select Add an action.
Enter
Dataversein the Search field and select See more for the Dataverse connector.Select the List rows action.
Sign in if prompted for authentication.
Select Real Estate Properties for table name.
Enter
contoso_bedrooms eqin the Filter Rows field.Use Dynamic content to select the Bedrooms parameter and select Add.
Select the Respond to Copilot action and select + Add an output.
Select Text.
Enter
PropertyIdfor Enter a name, select the Enter a value to respond with field, and select the Expression tab in the Dynamic content window.Enter the following expression:
first(outputs('List_rows')?['body/value'])['contoso_realestatepropertyid']Select Add.
Select + Add an output.
Select Text.
Enter
PropertyNamefor Enter a name, select into the Enter a value to respond with field, and select the Expression tab in the Dynamic content window.Enter the following expression:
first(outputs('List_rows')?['body/value'])['contoso_propertyname']Select Add.
Navigate to the Settings for the Respond to Copilot action.
Ensure that Asynchronous Response is set to Off.
Select Save to save the flow.
Close the Power Automate tab.
Add an agent action for retrieving a property
In the tab that still has your agent open, select Refresh.
Select the Get Property flow.
In the configure menu for the Get Property flow, select Add action to add it as an action to your agent.
Navigate to the Topics tab.
Select the Book a Real Estate Showing topic.
Select the the + icon below the How many bedrooms do you need question? node and select Call an action.
Select the Get Property flow.
Select the NumberofBedrooms variable for the Bedrooms input parameter.
Select the three dots in the Which property do you want to see? question node and select Delete.
Select the the + icon under the action node and select Send a message.
In the Enter a message field, enter the following text:
PropertySelect the Insert variable icon and select the PropertyName variable.
Save and Publish the topic.
Create Power Automate flow to make a booking
Navigate to the Actions tab in your agent.
Select + Add an action.
Select the + New action button and choose New Power Automate flow from the list.
Make sure the New designer toggle is set to On in the top-right corner of the Power Automate flow designer.
Select Run a flow from Copilot in the top-left of the screen and enter
Create Booking Requestas the flow name.Select the trigger step Run a flow from Copilot and select + Add an input.
Select Text.
Enter
PropertyIdfor Input andPropertyfor Please enter your input.Select + Add an input.
Select Text.
Enter
ViewerNamefor Input andViewer Namefor Please enter your input.Select + Add an input.
Select Text.
Enter
ViewerEmailfor Input andViewer Emailfor Please enter your input.Select the + icon between the two steps in the flow and select Add an action.
Enter
Dataversein the Search field and select See more for the Dataverse connector.Select the Add a new row action.
Select Booking Requests for table name.
Enter
Agent bookingin the Booking Name field.Select Show all next to Advanced parameters.
Enter
contoso_bookingrequests()in the Property (Real Estate Properties) field, move the cursor within the brackets, and use Dynamic content to select the PropertyId parameter.Use Dynamic content to select the ViewerName parameter for the Viewer Name field.
Use Dynamic content to select the ViewerEmail parameter for the Viewer Email field.
Select the Respond to Copilot action.
Select Settings.
Ensure that Asynchronous Response is set to Off.
Select Save draft.
Select Publish.
Close the Power Automate tab.
Add an agent action for creating a booking request
Navigate back to the browser tab with your agent open and select Refresh.
Select the Create Booking Request flow.
Select Add action at the bottom of the configure action window to add the action to your agent.
Select the Topics tab.
Select the Book a Real Estate Showing topic.
Select the the + icon below the What date and time do you want to see the property? node and select Call an action.
Select the Create Booking Request flow.
Select the PropertyId variable for the PropertyId input parameter.
Select the Name variable for the ViewerName input parameter.
Select the EmailAddress variable for the ViewerEmail input parameter.
Select the the + icon below the action node. Select Topic management, then select Go to another topic and select End of conversation.
Save the topic and Publish the agent.
Test the agent and make a booking request
Select the Test button in the top-right of the screen to open the testing panel.
Select the three dots at the top of the testing panel in the top-right of the screen.
Select Track between topics.
Select the Start a new conversation icon at the top of the testing panel.
When the Conversation Start message appears, your agent starts a conversation. In response, enter a trigger phrase for the topic that you created:
Customer infoEnter the following information:
Name: <Your name>
Email address: <Your email address>
After you supply the information, an Adaptive Card displays the information that you entered, a question asking if the information is correct, and options to select Yes or No.
Select Yes.
Select House for the type of property prompt.
Enter
2for the number of bedrooms prompts.Enter
Tomorrow 2:00 PMto the What date and time do you want to see the property? prompt.Select Yes to the Did that answer your question? prompt.
Select any rating.
Select No to the Can I help with anything else? prompt.
Verify booking request
Navigate to the Power Apps maker portal.
In the left navigation pane, select Tables and select Custom.
Select the Booking Request table.
Under Booking Request columns and data you should see that an agent booking request is now created.