Share a canvas app
Canvas apps in Power Apps enable users to create and share applications tailored to their business needs. Once your app is created and published, you need to determine who is able to use it. This learning unit explores how to manage app access, share apps with internal and external users, and use the new simplified sharing experience.
Managing App Access and Permissions
Managing app access is a critical step in ensuring that your canvas apps are secure and only accessible to the right people. By assigning appropriate permissions, you can control who can use, edit, or share your app, while also safeguarding the underlying data sources. Sharing in Power Apps is straightforward by allowing you to assign roles to individual users or security groups through Microsoft Entra ID (formerly Azure AD).
When sharing an app, you can assign one of two primary roles, each with distinct levels of access:
User:
Users with this role can only run the app. They can't make any changes to the app’s design, functionality, or settings. This role is ideal for end-users who simply need to interact with the app to perform their tasks.
For example: In a time-tracking app, employees who log their hours would be assigned the "User" role, as they only need to input data without modifying the app.Co-Owner:
Co-owners have broader permissions. They can use the app, make edits to its design or functionality, and share it with others. However, they can't delete the app or transfer ownership. This role is best suited for collaborators or team members responsible for maintaining or enhancing the app.
For example: A project manager using a task management app might be assigned the "Co-Owner" role to update workflows, add new features, or share the app with more team members.
In addition to managing app permissions, it’s essential to ensure that users have access to the app’s underlying data sources. Without proper access to resources like Dataverse tables, Excel files, or other connections, users may encounter errors when interacting with the app.
Granting data access:
When sharing an app, verify that all necessary data sources are also shared with the intended users. For example, if your app relies on a shared Excel file stored in OneDrive, you need to grant users access to that file separately.Maintaining data security:
Be mindful of sensitive data when sharing resources. To ensure that users only see the data they’re authorized to view, implement role-based security in Dataverse or restrict access to specific files. For example: In a sales dashboard app, you might restrict access to certain Dataverse tables so that regional managers only see data relevant to their territories.
Steps to manage app access
Sharing apps is done in Power Apps by using the provided app management tools. To share, identify the app you want to share, and select Share. This step opens the sharing interface where you can specify who should have access to the app.
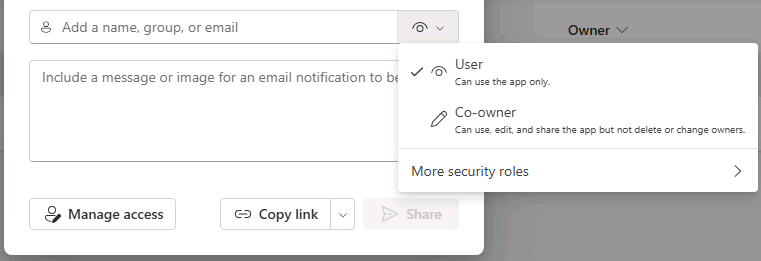
In the sharing interface, type the names, email addresses, or security groups of the individuals you want to grant access to. You can add multiple users or groups at once to streamline the process.
For each user or group, assign the appropriate role:
- User: Grants access to use the app without editing or sharing capabilities.
- Co-Owner: Allows users to edit, share, and collaborate on the app but restricts them from deleting or transferring ownership.
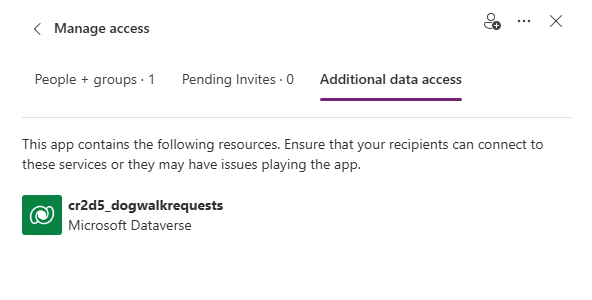
In addition to sharing the app, you need to verify that the app’s data sources, such as any Dataverse tables, Excel files, or other connections, are also shared. Ensure these data sources are shared with the selected users or groups. Without access to these resources, users likely encounter errors when interacting with the app.
Once you added users or groups and assigned permissions, select Share or Save to finalize the changes. The app is now accessible to the specified individuals based on the roles you assigned.
To review or modify permissions for users who already have access, use the Manage access option. This allows you to update roles, remove access, or audit permissions to ensure security and compliance.
By following these steps, you can effectively control who can use, edit, or collaborate on your canvas apps. This ensures that your app remains secure while providing the right level of access to each user or group.
Quickly share a canvas app using the new sharing experience
Power Apps is always evolving, creating different tools and features to make the process of building and delivering apps as easy as possible. Recently, a new sharing experience was created that simplifies the process, making it similar to sharing files in Microsoft Office apps. This intuitive interface saves time and enhances usability.
While you're editing an app in Power Apps studio, there's a share button. Access the Share button directly in Power Apps Studio while editing an app. From here, you can easily add users or co-owners and assign permissions.
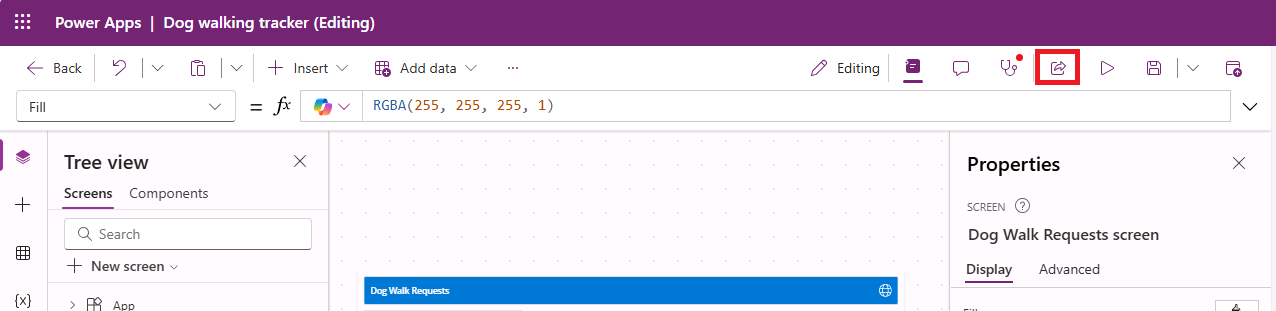
This streamlined approach enables faster collaboration and app distribution within your organization.
Tip
Use the new sharing experience to quickly onboard team members and ensure seamless app usage.