Note
Access to this page requires authorization. You can try signing in or changing directories.
Access to this page requires authorization. You can try changing directories.
Applies to: ![]() SQL Server - Linux
SQL Server - Linux
This tutorial provides instructions on setting up SQL Server configured with Always On availability groups (AGs) in an Azure Kubernetes Service (AKS) cluster. It utilizes the DH2i DxOperator and Rancher Prime from SUSE for deployment.
Microsoft supports data movement, AG, and SQL Server components. DH2i is responsible for support of the DxEnterprise product, which includes cluster and quorum management.
Note
DxOperator is a software extension to Kubernetes that uses custom resource definitions to automate the deployment of DxEnterprise clusters. DxEnterprise then provides all of the instrumentation to create, configure, manage, and provide automatic failover for SQL Server AG workloads in Kubernetes. You can register for a free DxEnterprise software license. For more information, see the DxOperator Quick Start Guide. For support issues, contact SUSE directly.
This tutorial consists of the following steps:
- Configure Rancher Prime on AKS
- Install DxOperator
- Deploy SQL Server containers and configure the always on availability groups using the DH2i DxOperator
- Connect and manage SQL Server containers using SQL Server Management Studio (SSMS).
Prerequisites
An Azure Kubernetes Service (AKS) or Kubernetes cluster.
A valid DxEnterprise license with AG features and tunnels enabled. For more information, see the developer edition for nonproduction usage, or DxEnterprise software for production workloads.
Configure Rancher Prime on Azure Kubernetes Service
Follow the instructions provided in the Quickstart: Deploy an Azure Kubernetes Service (AKS) cluster using Azure CLI article.
After you install your Kubernetes cluster, follow the instructions in Installing Rancher on Azure Kubernetes Service from Step 4, where you access the credentials of the Kubernetes cluster and install Rancher.
Install DxOperator
Sign in to the Rancher portal via the web UI.
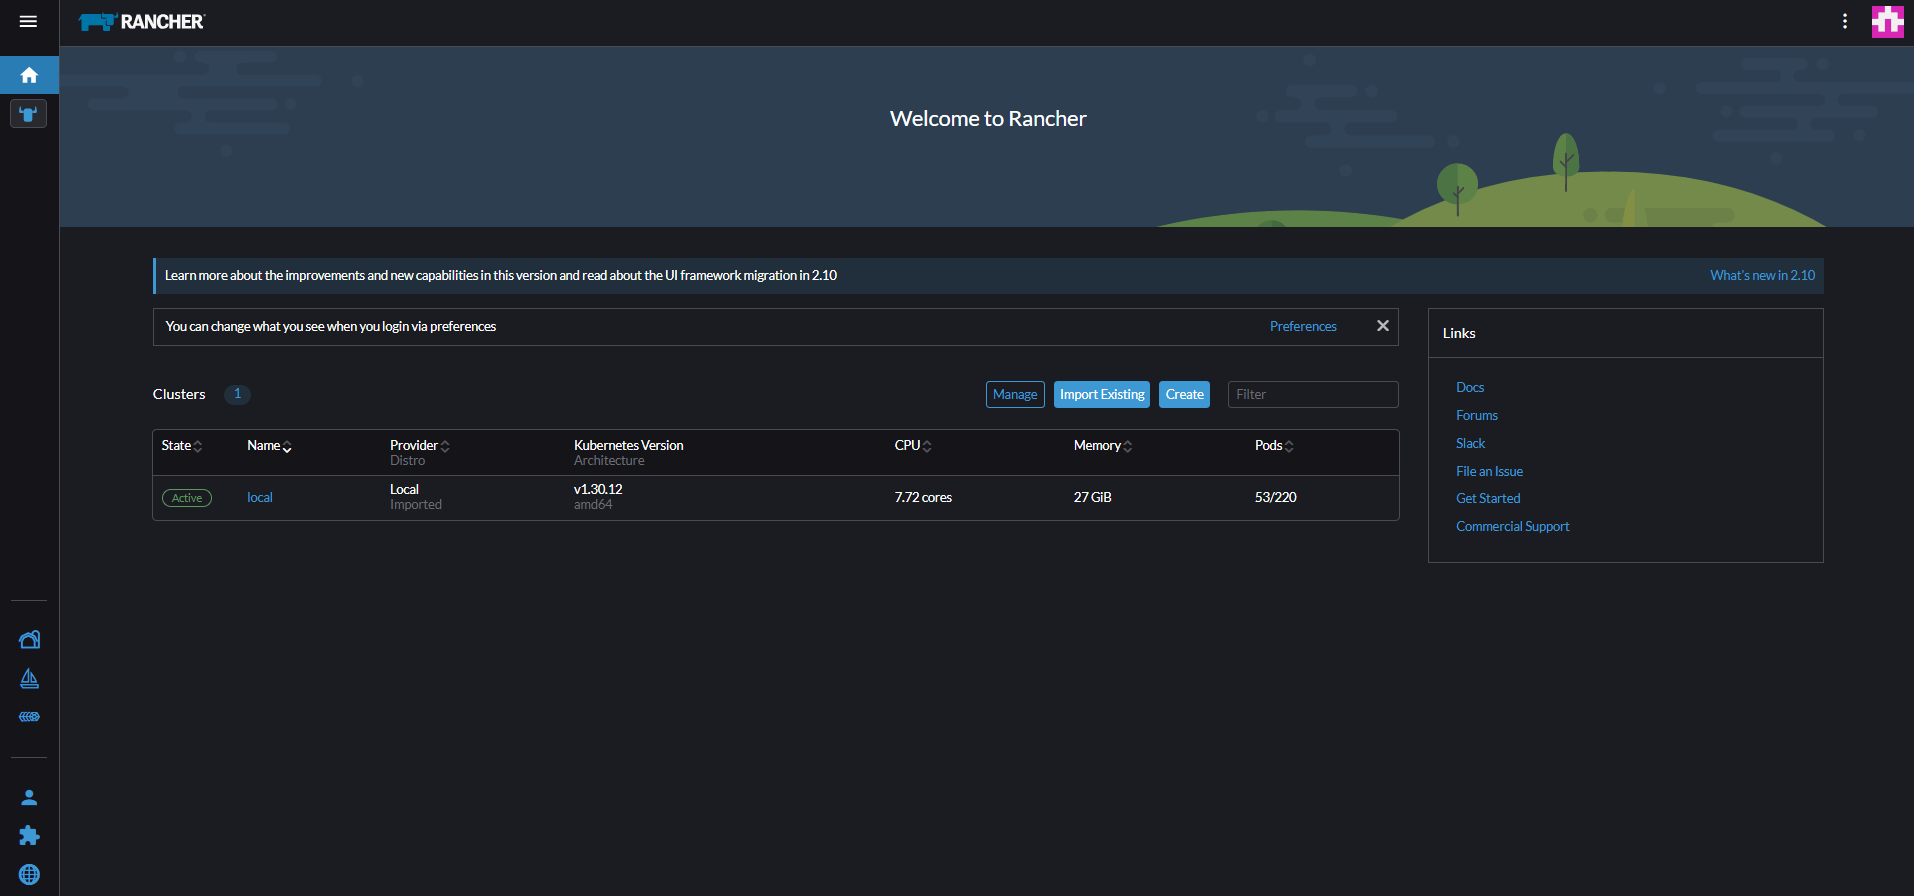
To proceed, select the Kubernetes cluster where you want to install DxOperator. In this example, choose a local cluster that also has Rancher deployed. However, you should import or add another Kubernetes cluster and use that cluster for deploying SQL Server, to avoid Rancher and SQL Server pods running on same Kubernetes cluster.
From the left hand menu, Select App > Charts.
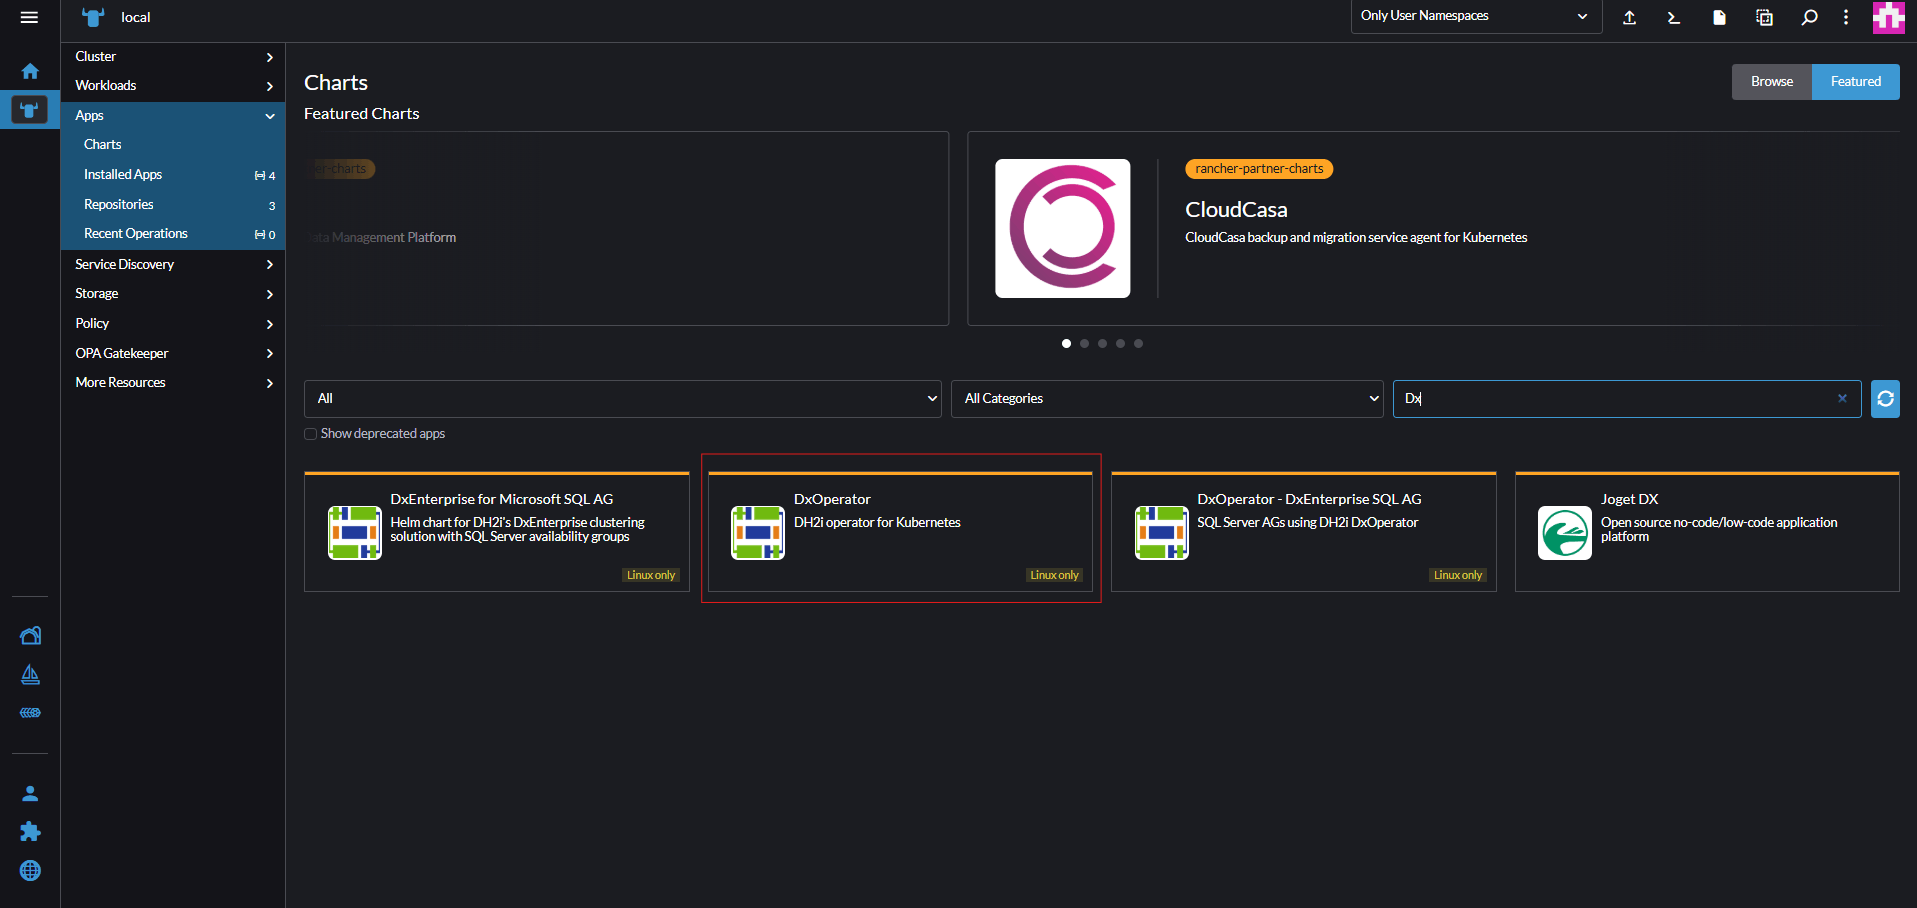
Search for DxOperator and select Install.
- Select Next and then Install.
- Wait for the installation to complete before proceeding.


Install SQL Server AGs using DxEnterprise DxOperator
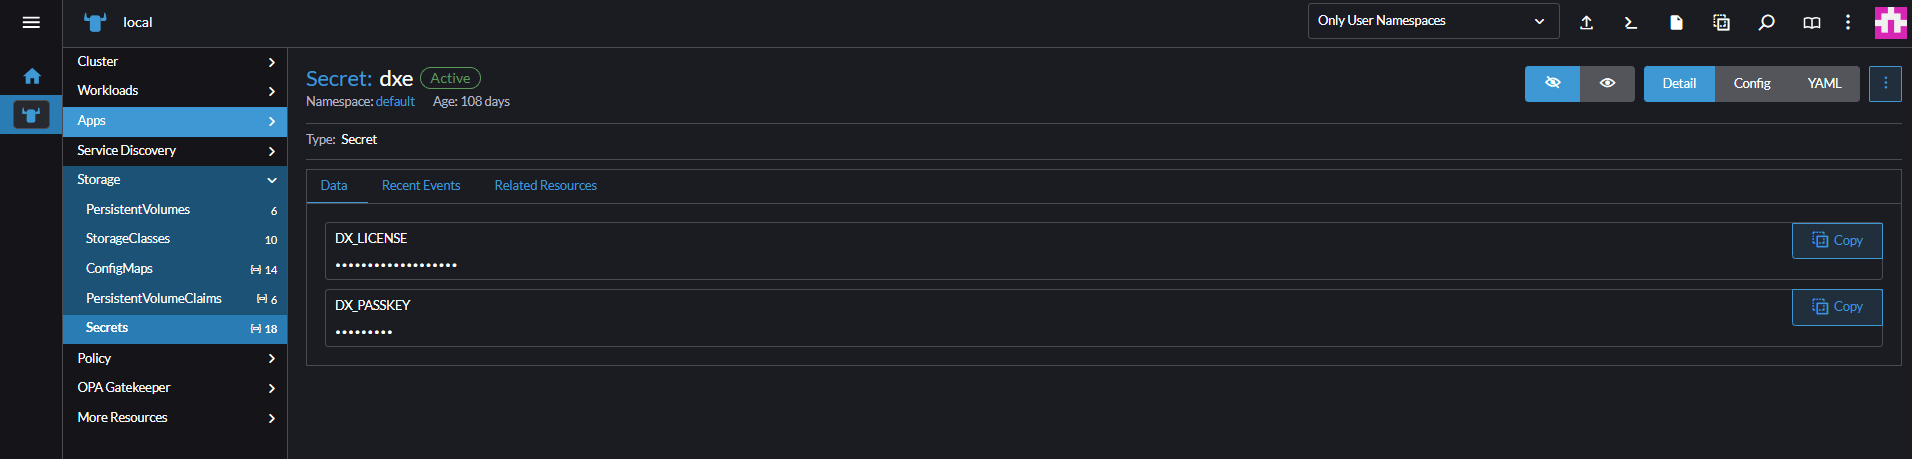
Add secrets for SQL Server and the DxEnterprise cluster passkeys.
Navigate to Storage > Secrets > Create.
Choose Opaque as your secret option, and enter the secret name
dxe.Provide the key name as
DX_PASSKEY, and value of the DxEnterprise cluster passkey.Select Add.
Add the key name as
DX_LICENSE, with value of the DxEnterprise license key.Select Create to finish creating the license key.
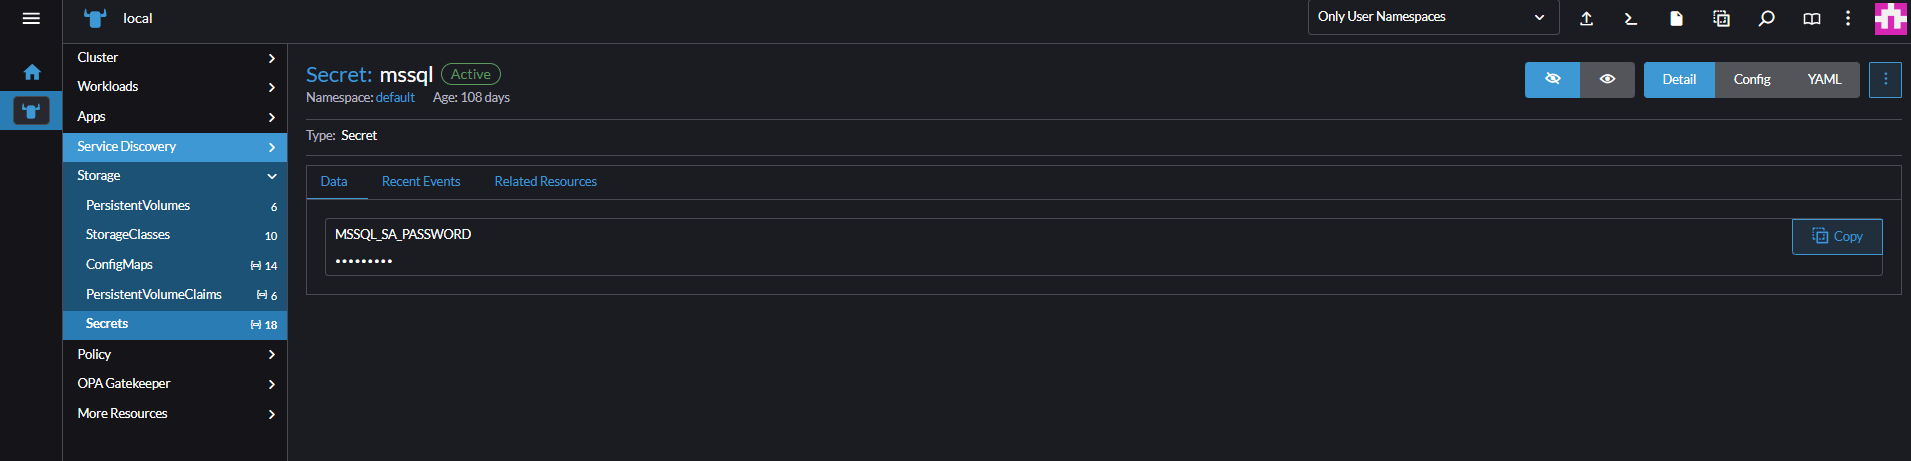
Select Create to create a new secret, and then Opaque.
Enter name of secret as
mssql, set the key name asMSSQL_SA_PASSWORDwith a value of a strongsapassword.Select Create to finish creating the secret.
Select Apps > Charts.
From the list of available charts, search for DxOperator - DxE + SQL Server AG.

Install the chart.
Select Install.
Once you select Install, provide the AG details as shown.
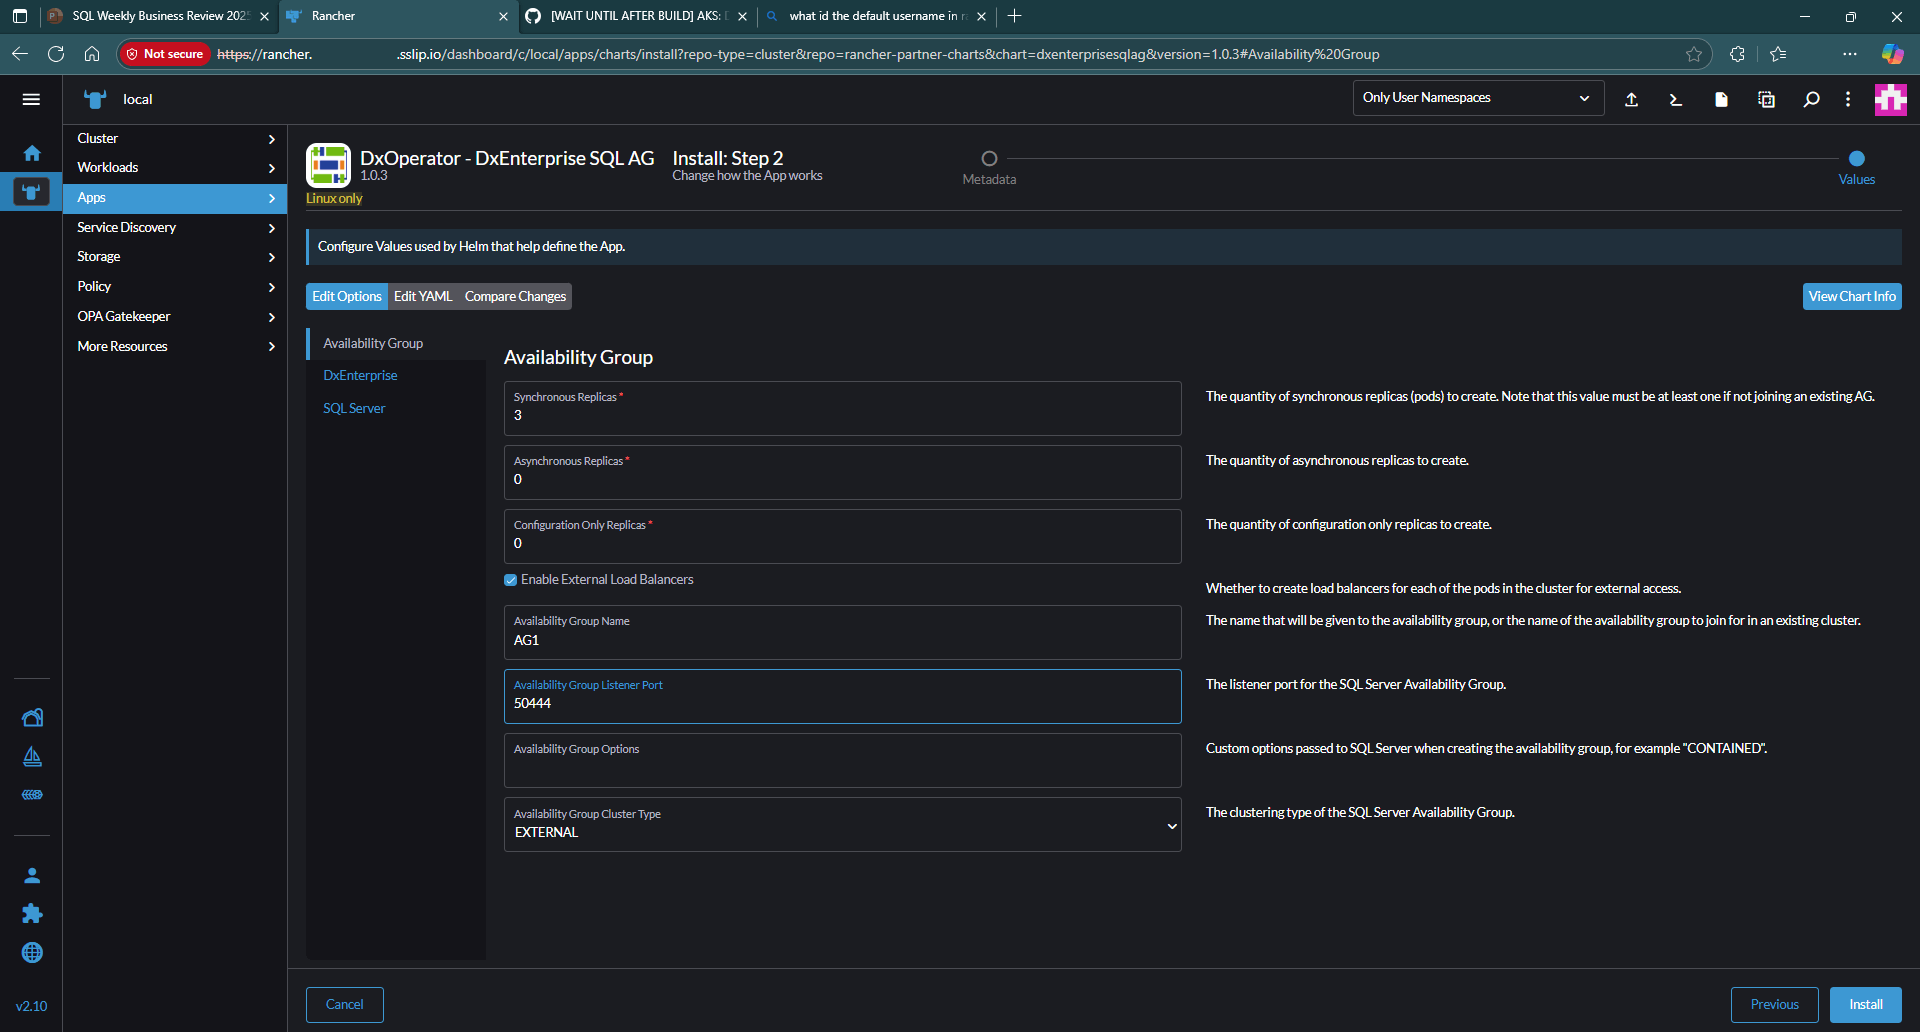
Select Next.
Check the Create Load Balancers option to allow external access.
On the DxEnterprise options, check the Accept EULA option.
Select
dxeas cluster secret.
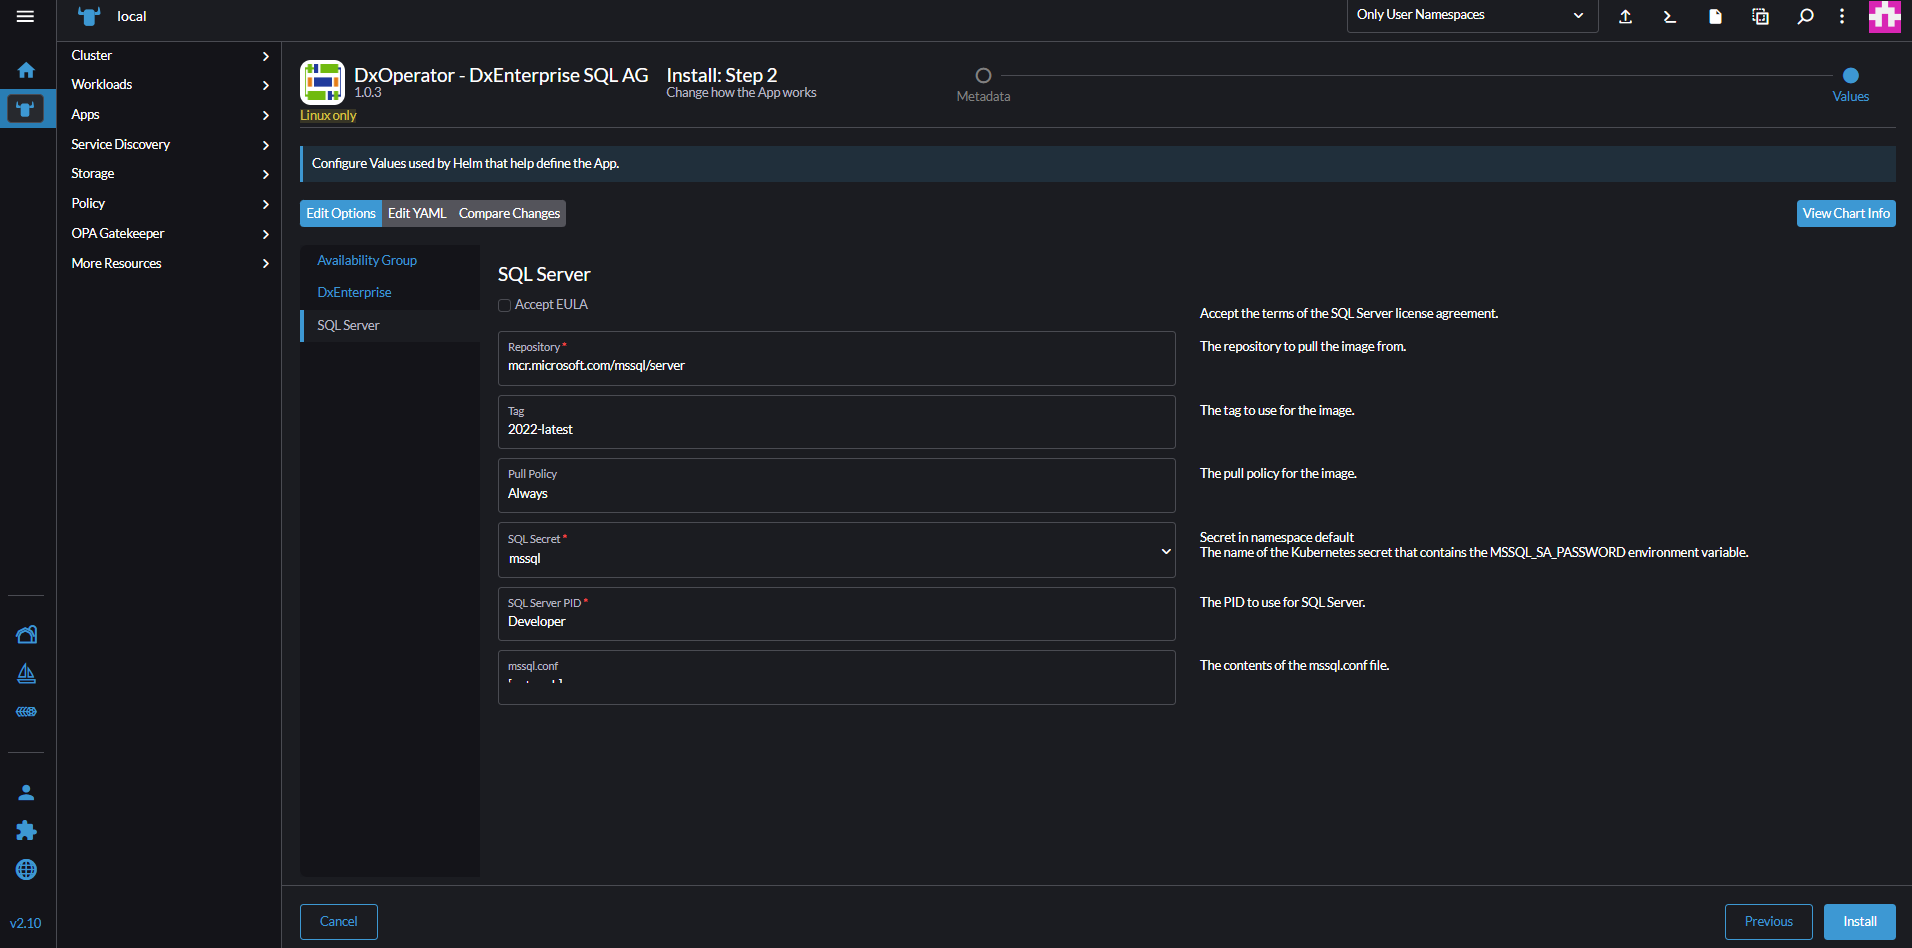
On the SQL Server options, check Accept EULA.
Select
mssqlas SQL Server secret.Select Next and Install.


Connect to SQL Server
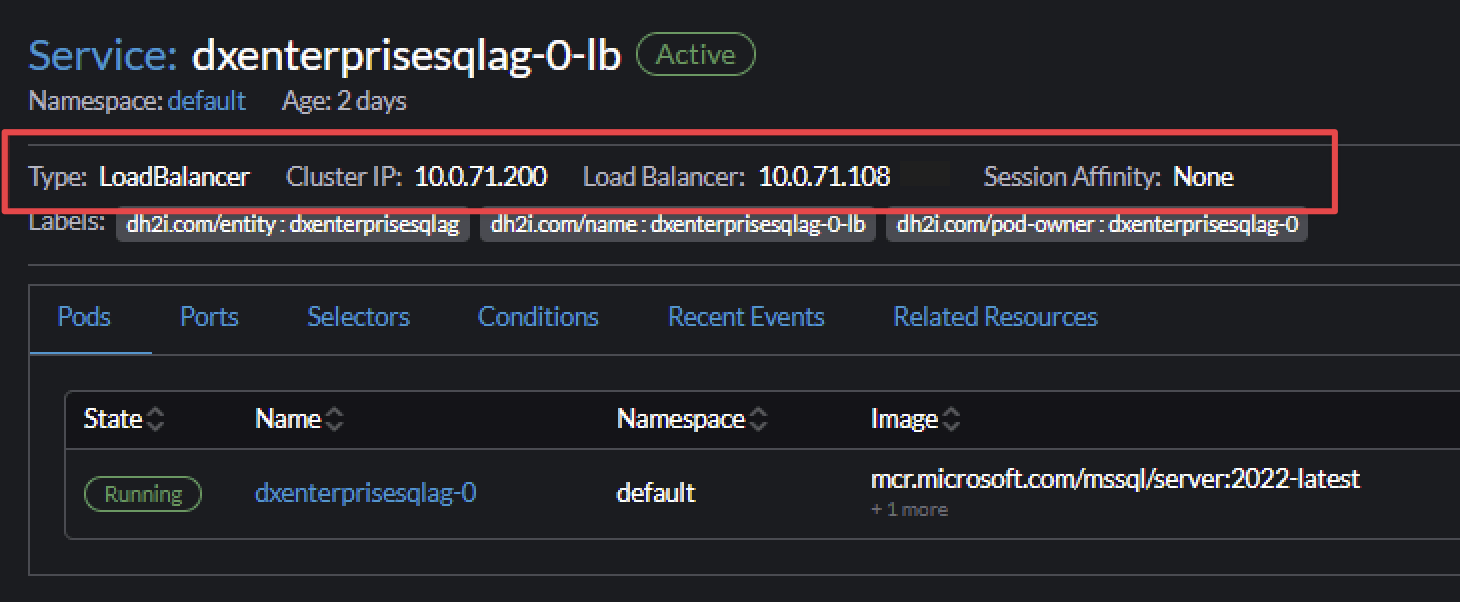
Once the installation is complete from the previous steps, get the external IP address to connect using SQL Server Management Studio (SSMS).
Navigate to Services, select
DxEnterprisesqlag-0-lb, and note the external IP (LB) address.Use the external IP address in SSMS to connect to the AG.
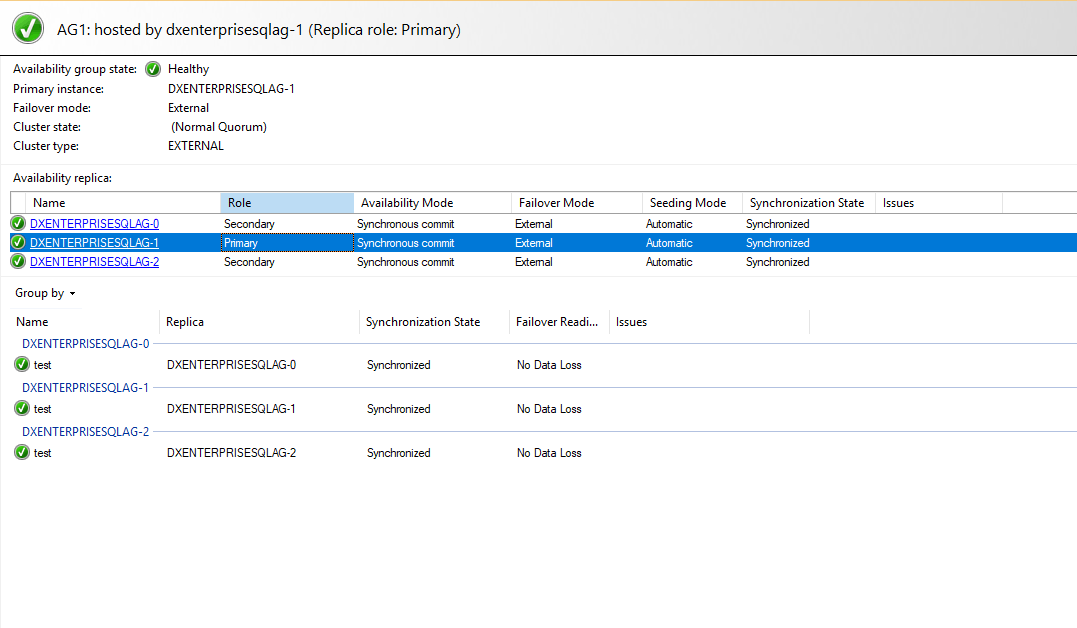
In SSMS Object Explorer, expand Always On High Availability > Availability Groups.
Select
AG1> Show dashboard.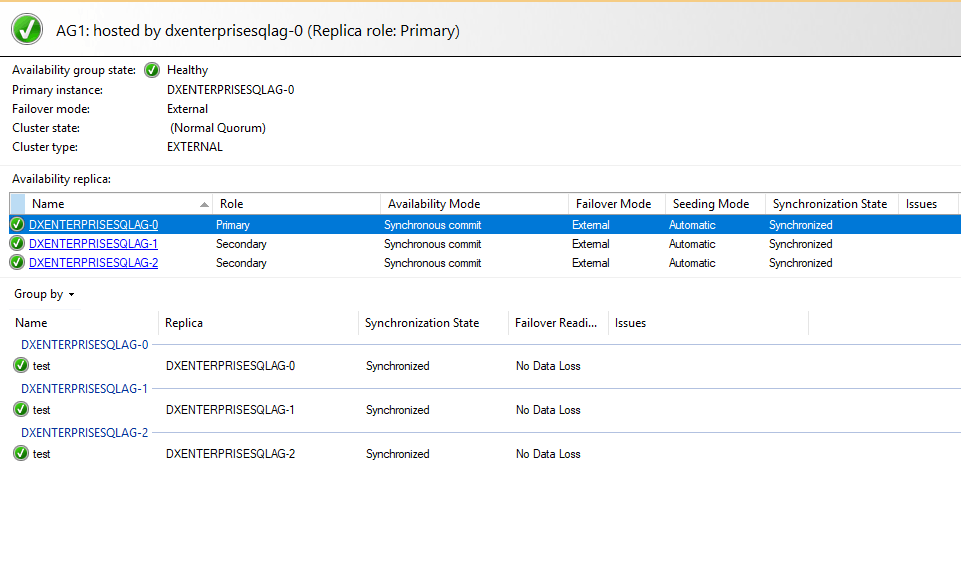


Simulate the failover to verify.
- From the Rancher web UI, select Workloads > Pods
- Select the
DxEnterprisesqlag-0pod - Select Delete, then select Delete again when prompted
Fetch the external IP address of the secondary pod.
Select Services on Rancher web UI
Select
DxEnterprisesqlag-1-lbFetch the external/load balancer IP address
Connect to SSMS and view the AG dashboard
Observe that the role changed to Primary for
DxEnterprisesqlag-1