Note
Access to this page requires authorization. You can try signing in or changing directories.
Access to this page requires authorization. You can try changing directories.
This article uses the process you learned in Design a data loss prevention policy to show you how to create a Microsoft Purview Data Loss Prevention (DLP) policy that helps protect files on supported Windows and macOS devices where the scanning process fails. Work through this scenario in your test environment to familiarize yourself with the policy creation UI.
Important
This article presents a hypothetical scenario with hypothetical values. It's only for illustrative purposes. Substitute your own sensitive information types, sensitivity labels, distribution groups, and users.
How you deploy a policy is as important policy design. This article shows you how to use the deployment options so that the policy achieves your intent while avoiding costly business disruptions.
Apply controls to supported files that fail scanning
Note
Apply controls to supported files that fail scanning is in preview.
Use this scenario when you want to apply Audit, Block, or Block with override controls on user activities for files that are on the Monitored files list but fail to be scanned by Endpoint DLP.
Prerequisites and assumptions
This scenario requires that you already have devices onboarded and reporting into activity explorer. If you haven't onboarded devices yet, see Get started with Endpoint data loss prevention.
Important
This feature only supports following action types:
- Upload to a restricted cloud service domain
- Copy to a removable USB device
- Copy to a network share
Policy intent statement and mapping
Sometimes scanning fails for files that endpoint DLP supports. There might be sensitive information in those files, but we don't know. When scanning fails for a file on any of our onboarded devices, we want to prevent users from copying that file to a USB device or to a network share.
| Statement | Configuration question answered and configuration mapping |
|---|---|
| “When scanning fails for a file on any of our onboarded devices ...” | - Administrative scope: Full directory - Where to monitor: Data stored in connected sources, Devices -Scope: Allusers, groups, devices, device groups - Conditions: Document could not be scanned |
| "...we want to prevent users from copying that file to a USB device or to a network share." | - Action : select audit or restrict activities on devices - clear Upload to a restriced cloud service domain or access from an unallowed browser - select Apply restrictions to specific activity - select Copy to a removable USB device, and Block with override - select Copy to a network share and Block with override clear Copy to clipboard, Print, Copy or move using unallowed Bluetooth app, and Copy or move using RDP |
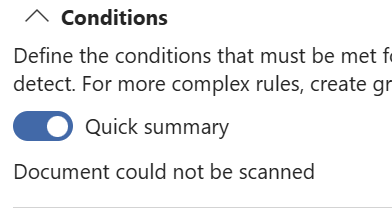
When you configure the conditions, the summary looks like this:
Configure policy actions
Important
For the purposes of this policy creation procedure, leave the policy turned off. Change these settings when you deploy the policy.
- Sign in to the Microsoft Purview portal.
- Open Data Loss Prevention > Policies.
- Select Create policy.
- Select Data stored in connected sources.
- Select the Custom from the Categories then Custom policy template from Regulations.
- Name your new policy and provide a description.
- Select Full directory under Admin units.
- Scope the location to Devices only.
- Create a rule where:
- In Conditions:
- Select Document could not be scanned
- In Actions:
- Select Audit or restrict activities on devices.
- Clear Upload to a restriced cloud service domain or access from an unallowed browser
- Select Apply restrictions to specific activity
- Select Copy to a removable USB device, and Block with override
- Select Copy to a network share, and Block with override
- Clear Copy to clipboard, Print, Copy or move using unallowed Bluetooth app, and Copy or move using RDP
- In Conditions:
- Save.
- Choose Turn on the policy immediately. Choose Next.
- Review your settings and choose Submit.