Note
Access to this page requires authorization. You can try signing in or changing directories.
Access to this page requires authorization. You can try changing directories.
[This article is prerelease documentation and is subject to change.]
Now that your agent is running locally, let's deploy it to Microsoft Teams for testing. This guide will walk you through the process.
Microsoft 365 Agents Toolkit
Microsoft 365 Agents Toolkit is a powerful tool that simplifies deploying and debugging Teams applications. It automates tasks like managing the Teams app manifest, configuring authentication, provisioning, and deployment. If you'd like to learn about these concepts, check out Teams core concepts.
Install Microsoft 365 Agents Toolkit
First, you'll need to install the Microsoft 365 Agents Toolkit IDE extension:
- Visit the Microsoft 365 Agents Toolkit installation guide to install on your preferred IDE.
Adding Teams configuration files via teams CLI
To configure your agent for Teams, run the following command in the terminal inside your quote-agent folder:
Tip
(if you have teams CLI installed globally, use teams instead of npx)
npx @microsoft/teams.cli config add atk.basic
Tip
The atk.basic configuration is a basic setup for Microsoft 365 Agents Toolkit. It includes the necessary files and configuration to get started with Teams development.
Explore more advanced configurations as needed with teams config --help.
This CLI command adds configuration files required by Microsoft 365 Agents Toolkit, including:
- Environment setup in the
envfolder and root.envfile - Teams app manifest in the
appPackagefolder (if not already present) - Debug instructions in
.vscode/launch.jsonand.vscode/tasks.json - Agents Toolkit automation files to your project (e.g.
teamsapp.local.yml)
| Cmd name | CLI name | Description |
|---|---|---|
teams |
Teams AI v2 | A tool for setting up and utilizing the Teams AI v2 library including integration with Agents Toolkit, if desired. |
atk |
Agents Toolkit | A tool for managing provisioning, deployment, and in-client debugging for Teams. |
Debugging in Teams
After installing Microsoft 365 Agents Toolkit and adding the configuration:
- Open your agent's project in your IDE.
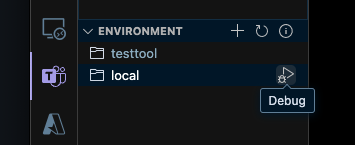
- Open the Microsoft 365 Agents Toolkit extension panel (usually on the left sidebar). The extension icon is the Teams logo.
- Log in to your Microsoft 365 and Azure accounts in the Agents Toolkit extension.
- Select "Local" under Environment Settings of the Agents Toolkit extension.
- Click on Debug (Chrome) or Debug (Edge) to start debugging via the 'play' button.
When debugging starts, the Microsoft 365 Agents Toolkit will:
- Build your application
- Start a devtunnel which will assign a temporary public URL to your local server
- Provision the Teams app for your tenant so that it can be installed and be authenticated on Teams
- Set up the local variables necessary for your agent to run in Teams in
env/.env.localandenv/env.local.user. This includes propagating the app manifest with your newly provisioned resources. - Start the local server.
- Package your app manifest into a Teams application zip package and the manifest json with variables inserted in
appPackage/build. - Launch Teams in an incognito window your browser.
- Upload the package to Teams and signal it to sideload the app (fancy word for installing this app just for your use)
If you set up Agents Toolkit via the Teams AI CLI, you should see something like the following in your terminal:
[nodemon] 3.1.9
[nodemon] to restart at any time, enter `rs`
[nodemon] watching path(s): src/**
[nodemon] watching extensions: ts
[nodemon] starting `node -r ts-node/register -r dotenv/config ./src/index.ts`
[WARN] @teams/app/devtools ⚠️  Devtools are not secure and should not be used production environments ⚠️
[INFO] @teams/app/http listening on port 3978 🚀
[INFO] @teams/app/devtools available at http://localhost:3979/devtools
Testing your agent
After the debugging session starts:
- Teams will open in your browser
- You'll be prompted to sign in (if not already)
- Teams will ask permission to install the app
- Once installed, you can start chatting with your agent!
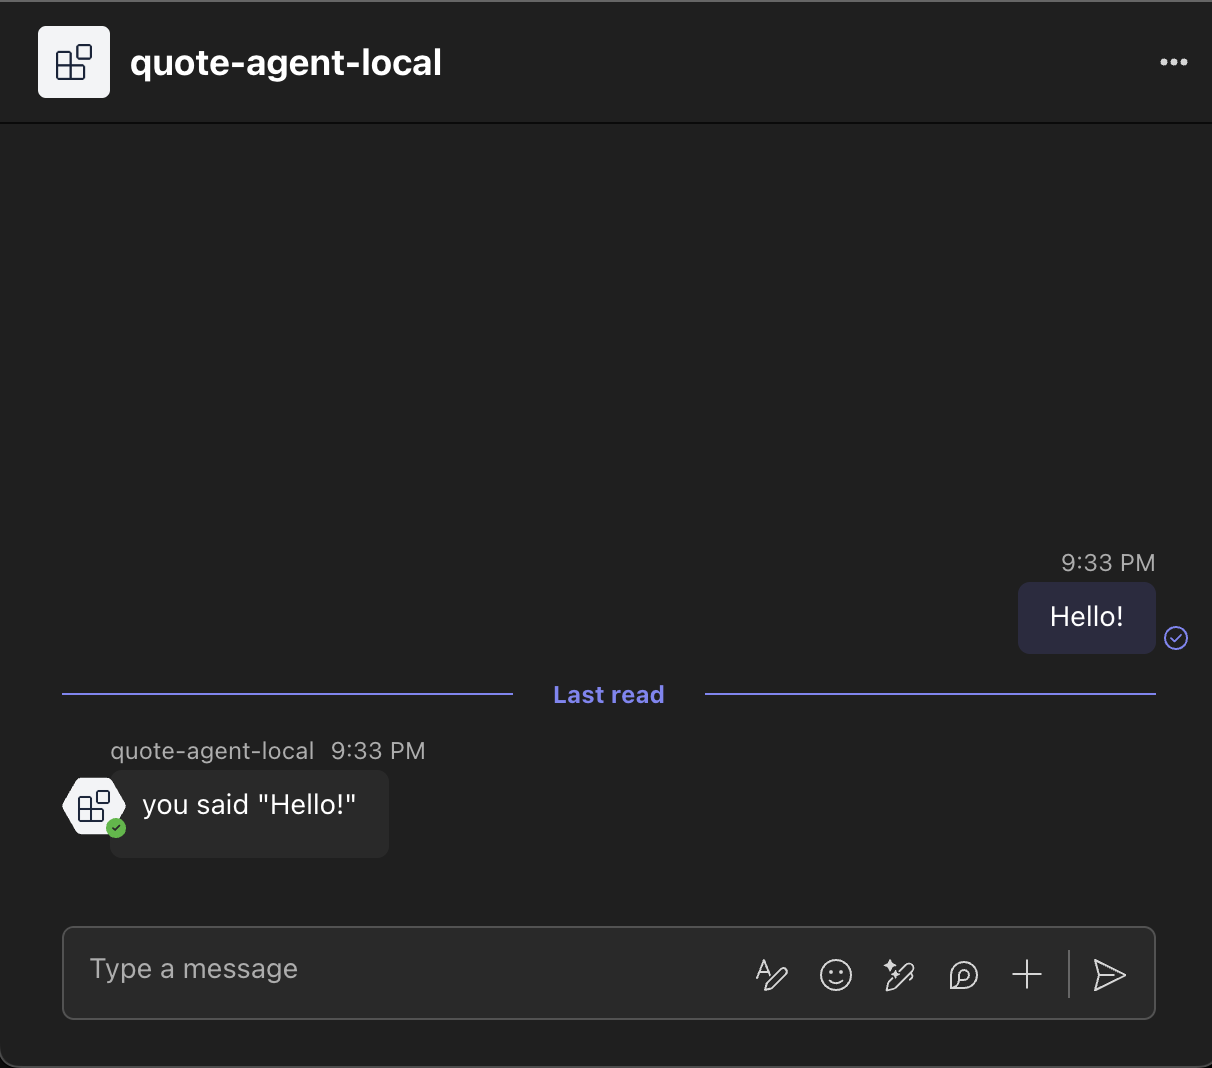
Congratulations! Now you have a fully functional agent running in Microsoft Teams. Interact with it just like any other Teams app and explore the rest of the documentation to build more complex agents.
Tip
If you want to monitor the activities and events in your app, you can still use the DevTools plugin! Note that the DevTools server is running on port 3979. You can open it in your browser to interact with your agent and monitor activities in real time.
Troubleshooting
For deployment and resource management we recommend the Microsoft 365 Agents Toolkit. If you prefer to set everything up by hand, follow the standard Teams app documentation. The Teams AI library itself doesn't handle deployment or Azure resources, so you'll need to rely on the general Microsoft Teams deployment documentation.
Next steps
Now that your agent is running in Teams, you can learn more essential concepts to understand how to build more complex agents. Explore the in-depth guides for advanced topics like authentication, message extensions, and more.