Note
Access to this page requires authorization. You can try signing in or changing directories.
Access to this page requires authorization. You can try changing directories.
The GitHub Cloud Issues Microsoft 365 Copilot connector allows your organization to index issues stored in GitHub. After you configure the connector and index GitHub content, users can search and retrieve information via Microsoft Search and Microsoft 365 Copilot. This article is intended for Microsoft 365 administrators or anyone who configures, runs, or monitors GitHub Cloud Issues Copilot connector.
Capabilities
- Index GitHub issues.
- Enable Microsoft Search and Microsoft 365 Copilot to retrieve GitHub data efficiently.
- Maintain GitHub ACLs and user permissions.
- Allow administrators to customize crawl frequency and indexing preferences.
Limitations
- The connector does not support indexing GitHub CI/CD pipelines beyond status indexing.
- On-premises/self-hosted GitHub instances aren't currently supported.
- The connector is designed to support GitHub Enterprise. Users on Free or Team plans may experience limited functionality or reduced support.
Prerequisites
- Make sure that your GitHub instance is accessible via API.
- Set up a GitHub App for authentication. You can specify which organizations and repositories a GitHub app is authorized to access, effectively determining what content the connector will crawl. Specify the following redirect URLs when configuring GitLab authentication:
- For Microsoft 365 Enterprise, use
https://gcs.office.com/v1.0/admin/oauth/callback - For Microsoft 365 Government, use
https://gcsgcc.office.com/v1.0/admin/oauth/callback
- For Microsoft 365 Enterprise, use
- Verify that the user account used for authentication has access to the repositories and issues to be indexed.
- Make sure that users who access indexed GitHub data have corresponding Microsoft Entra ID identities for permission mapping.
- For enterprise-managed users who authenticate via Single Sign-On (SSO), the account must be signed in before performing any actions, as the GitHub authentication flow does not currently support SSO login.
Set up a GitHub App for authentication
Follow the steps below to create a GitHub App for use with your Copilot connector:
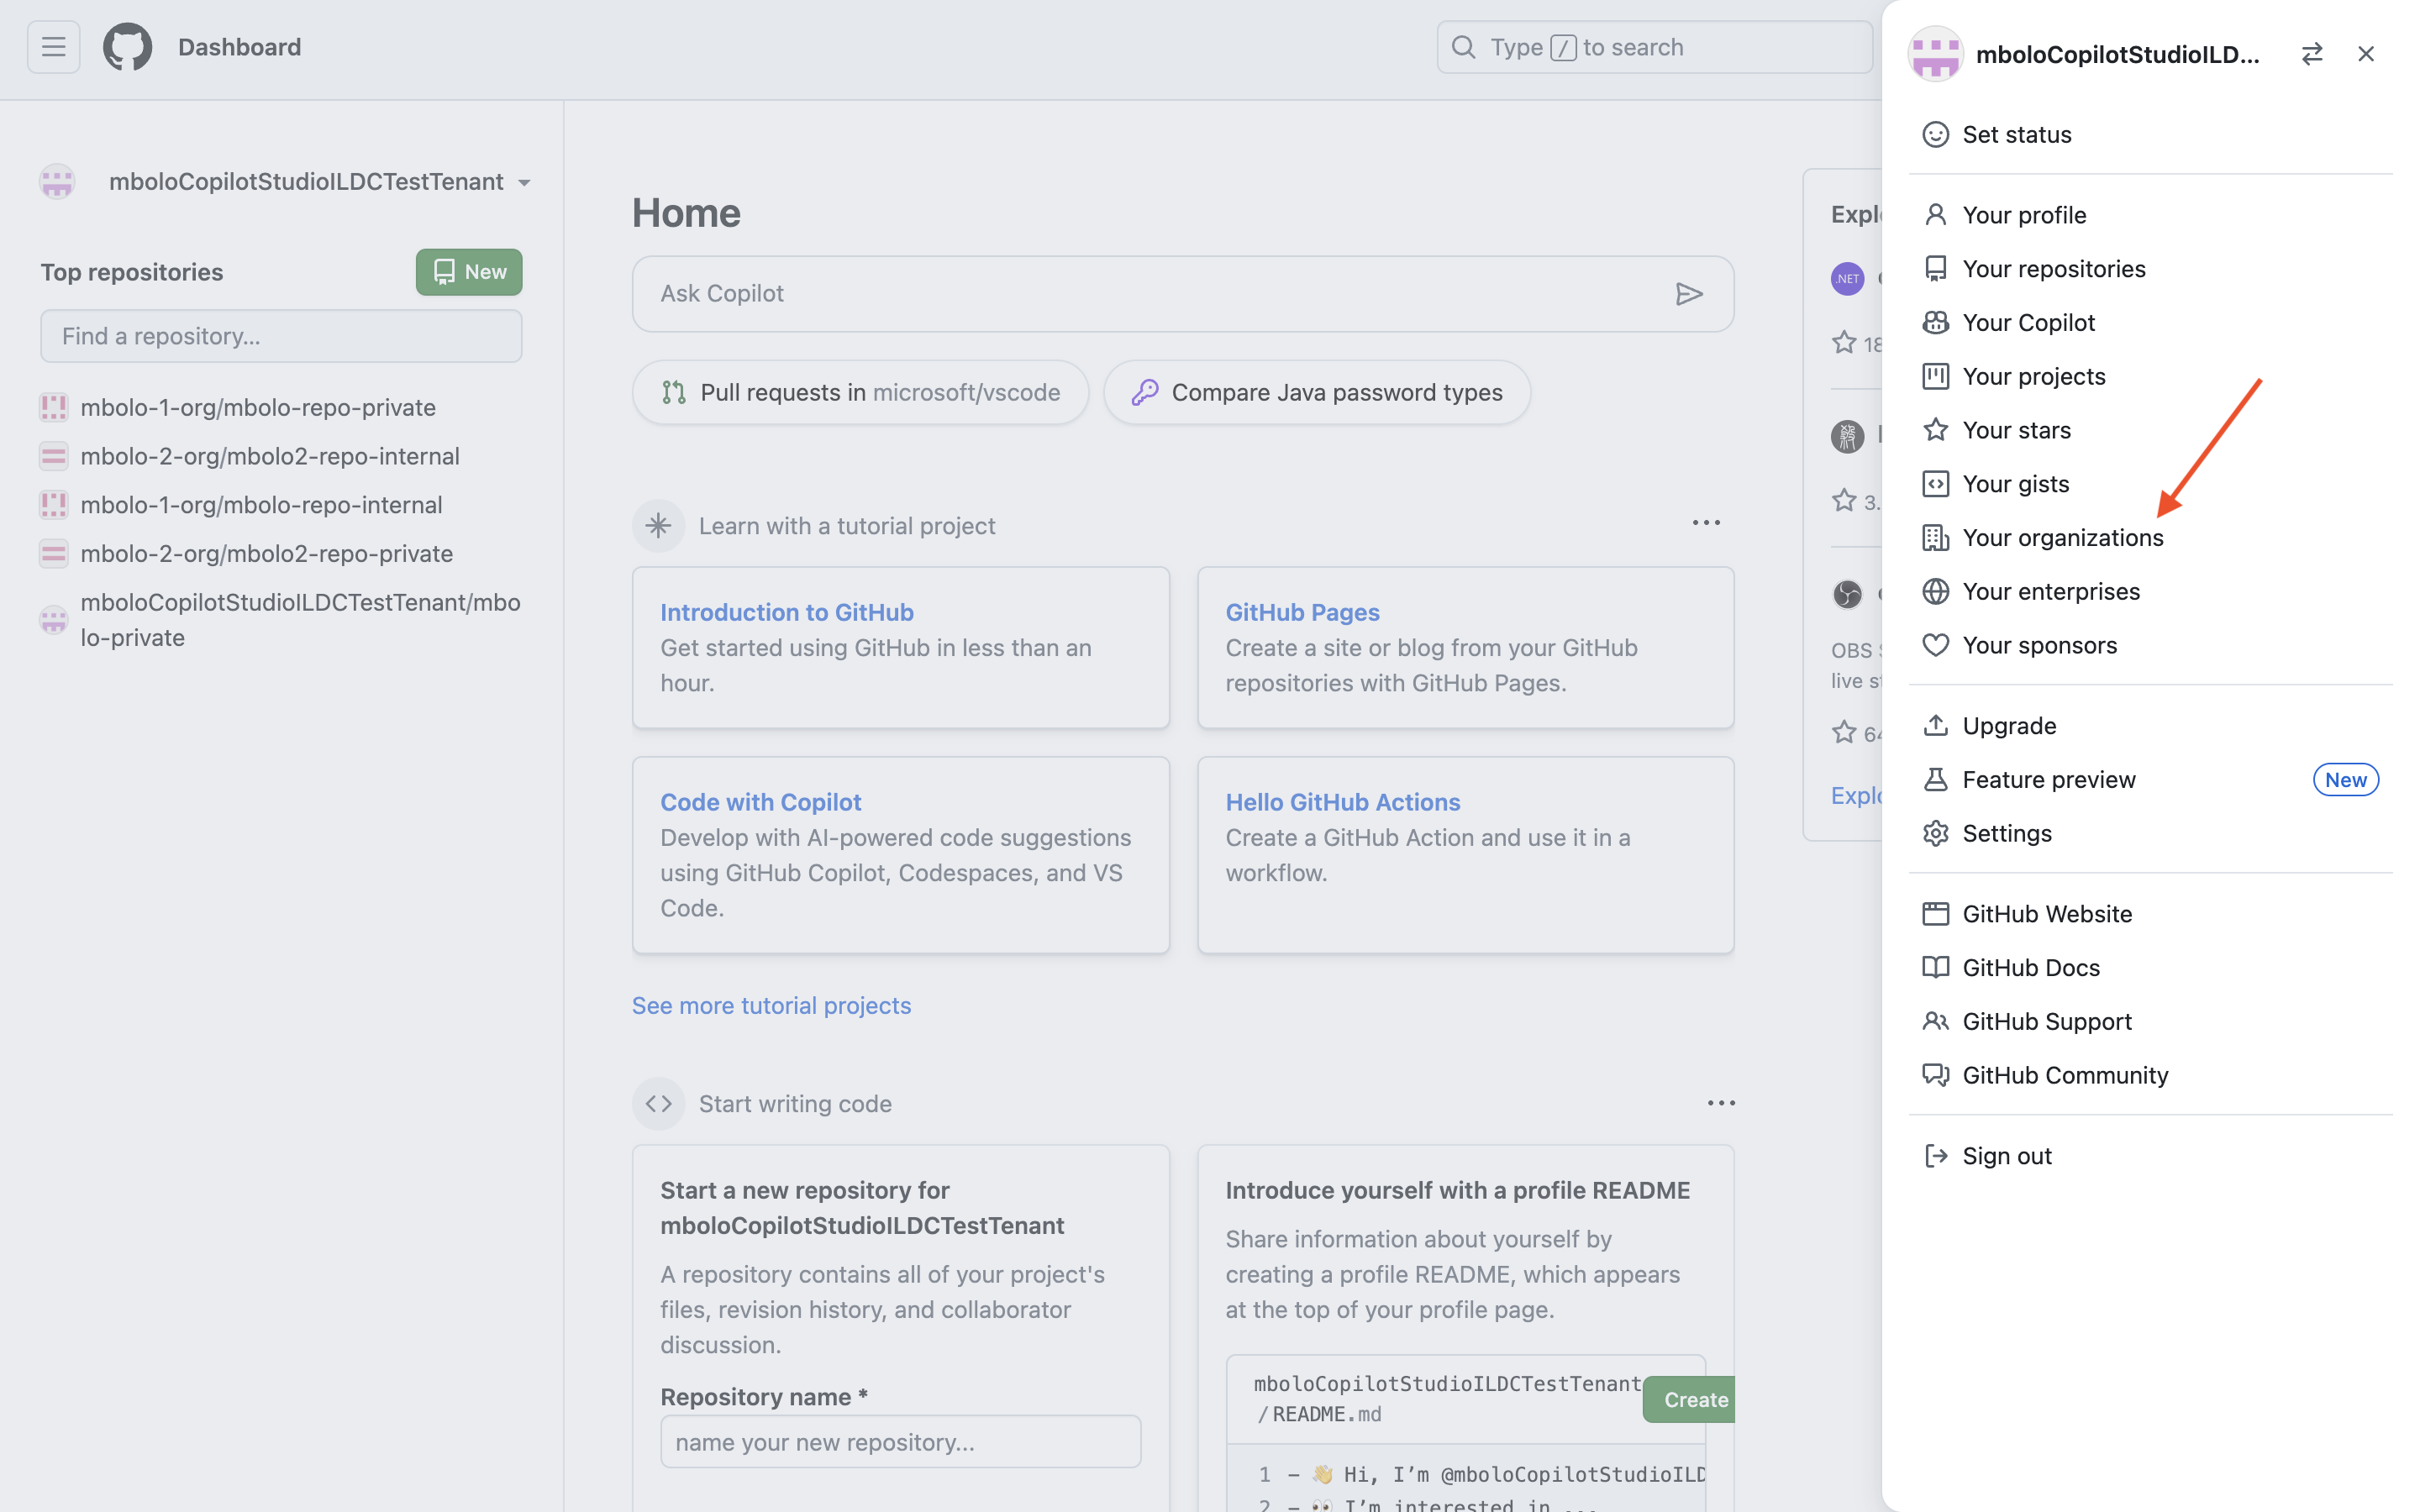
In GitHub, click your profile photo (top right), select Your organizations, and choose the organization where the Copilot connector should pull data from.
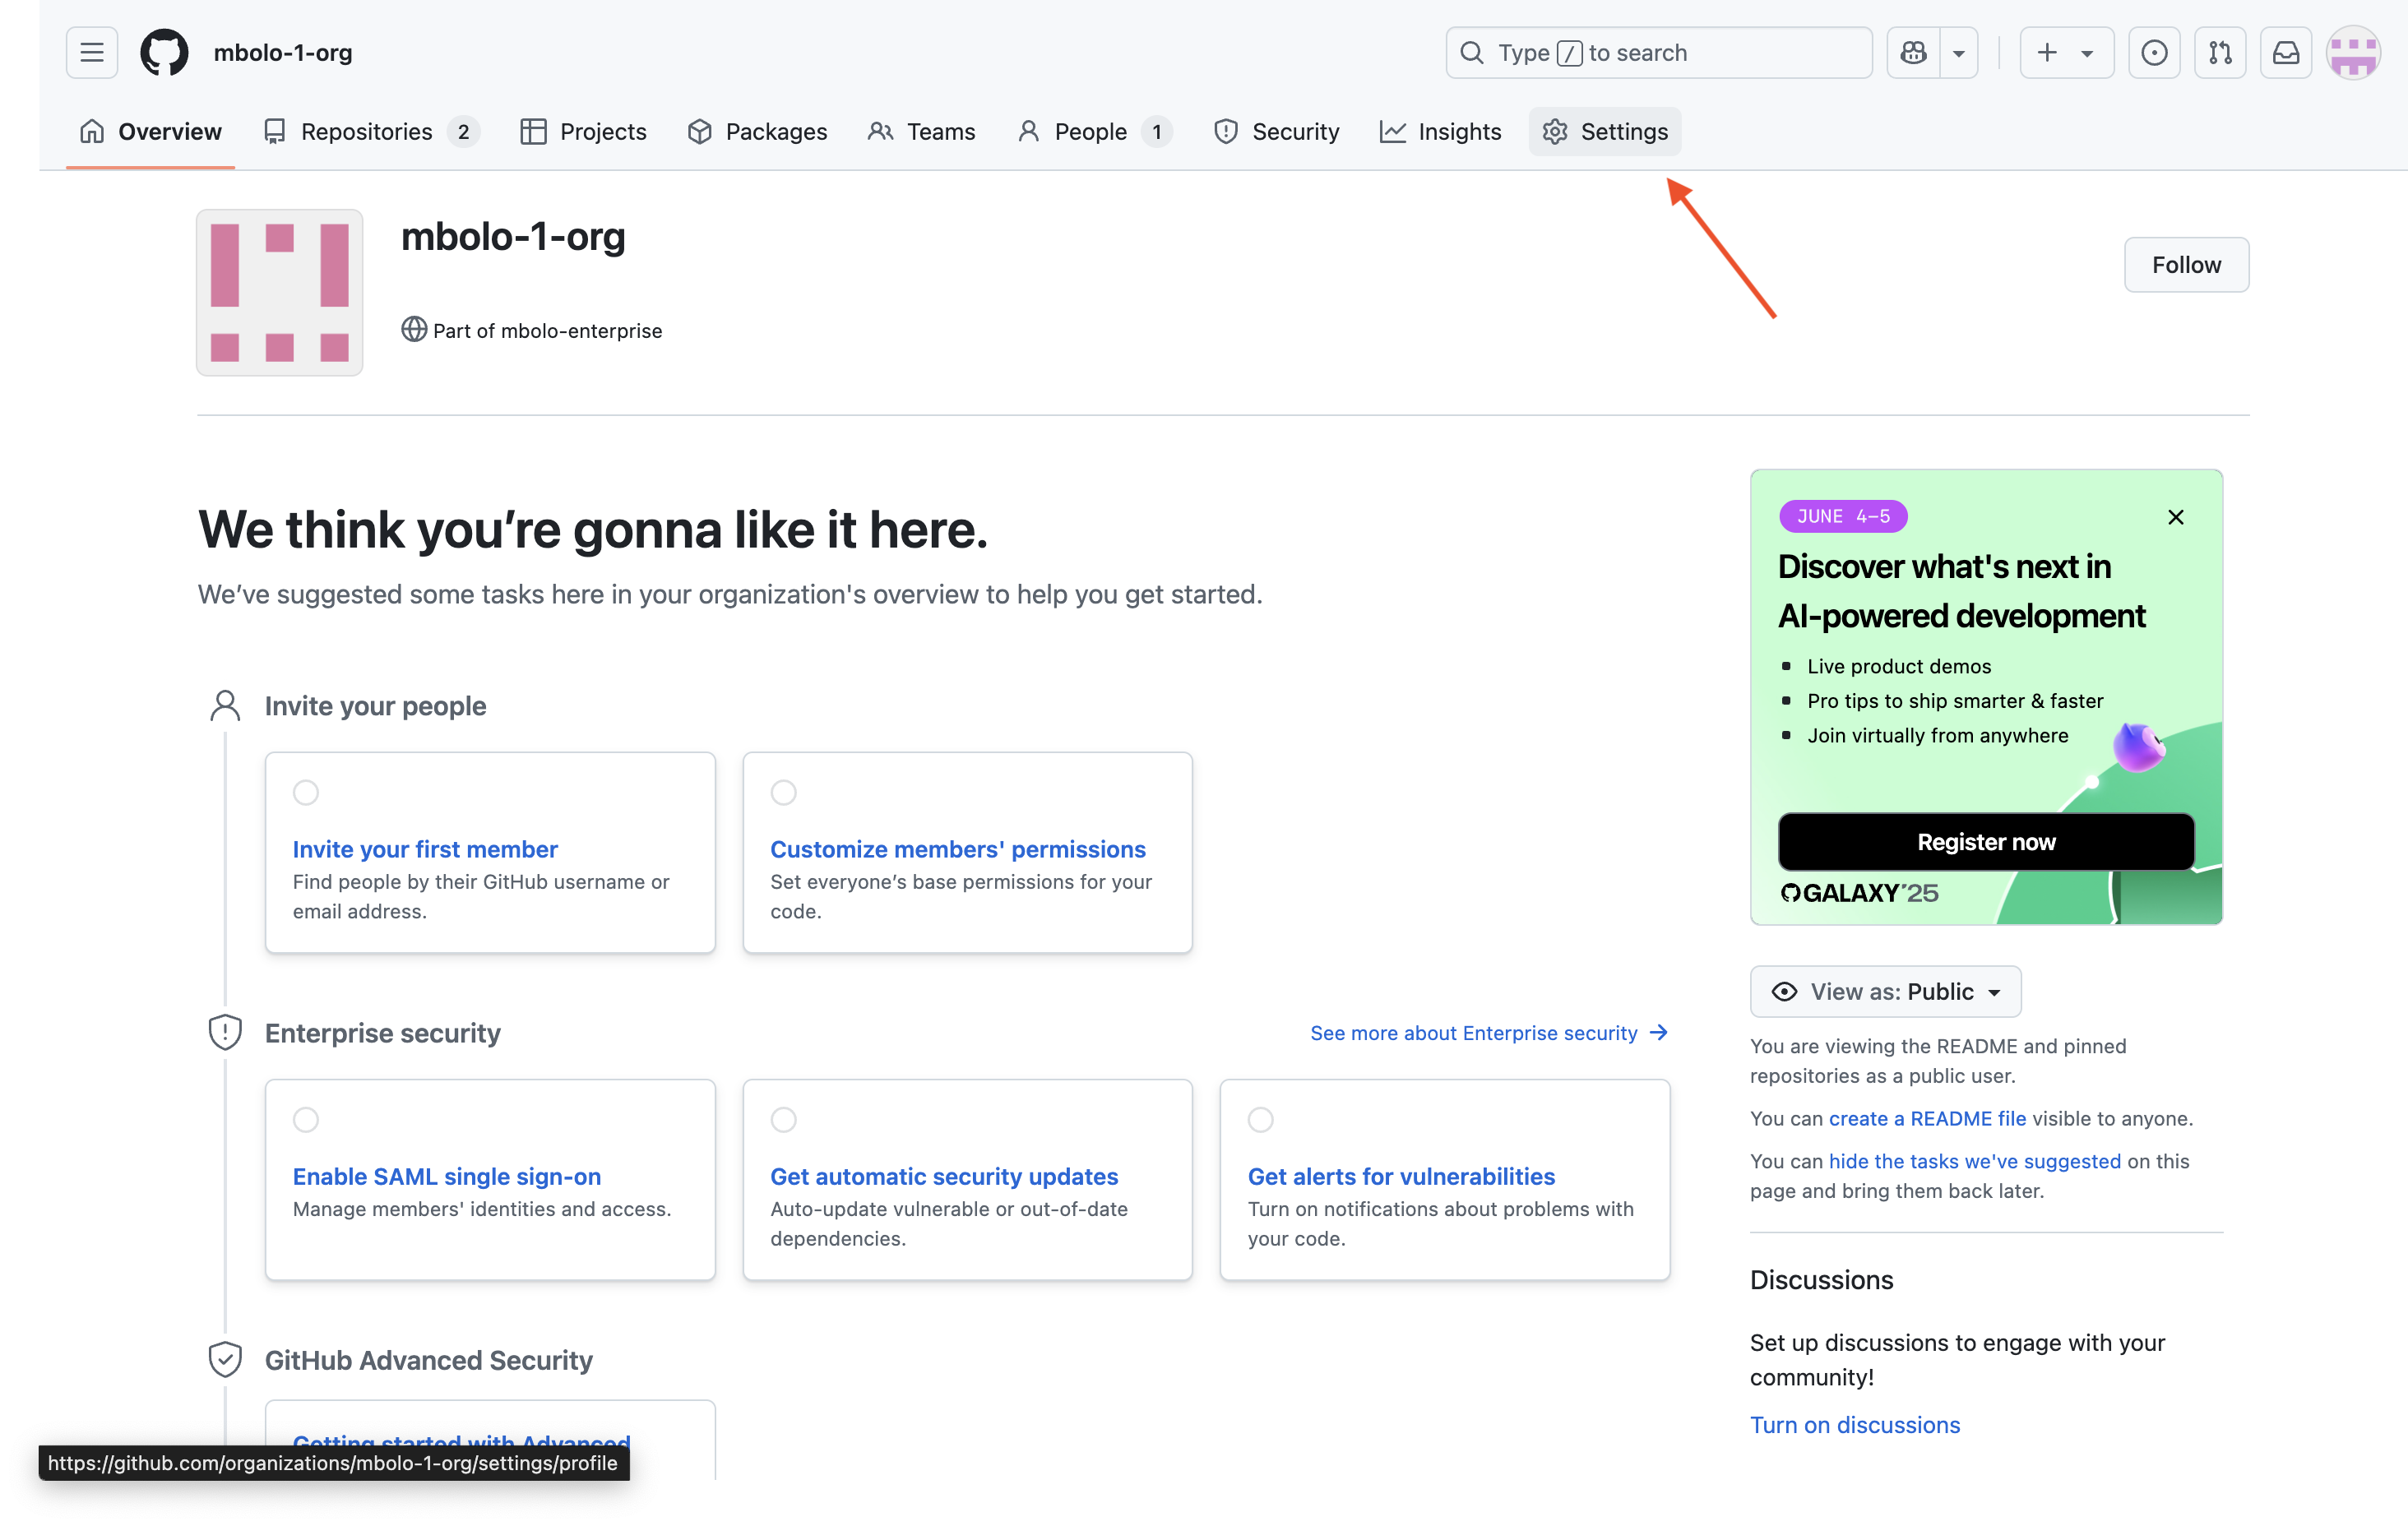
On the organization overview page, click Settings.
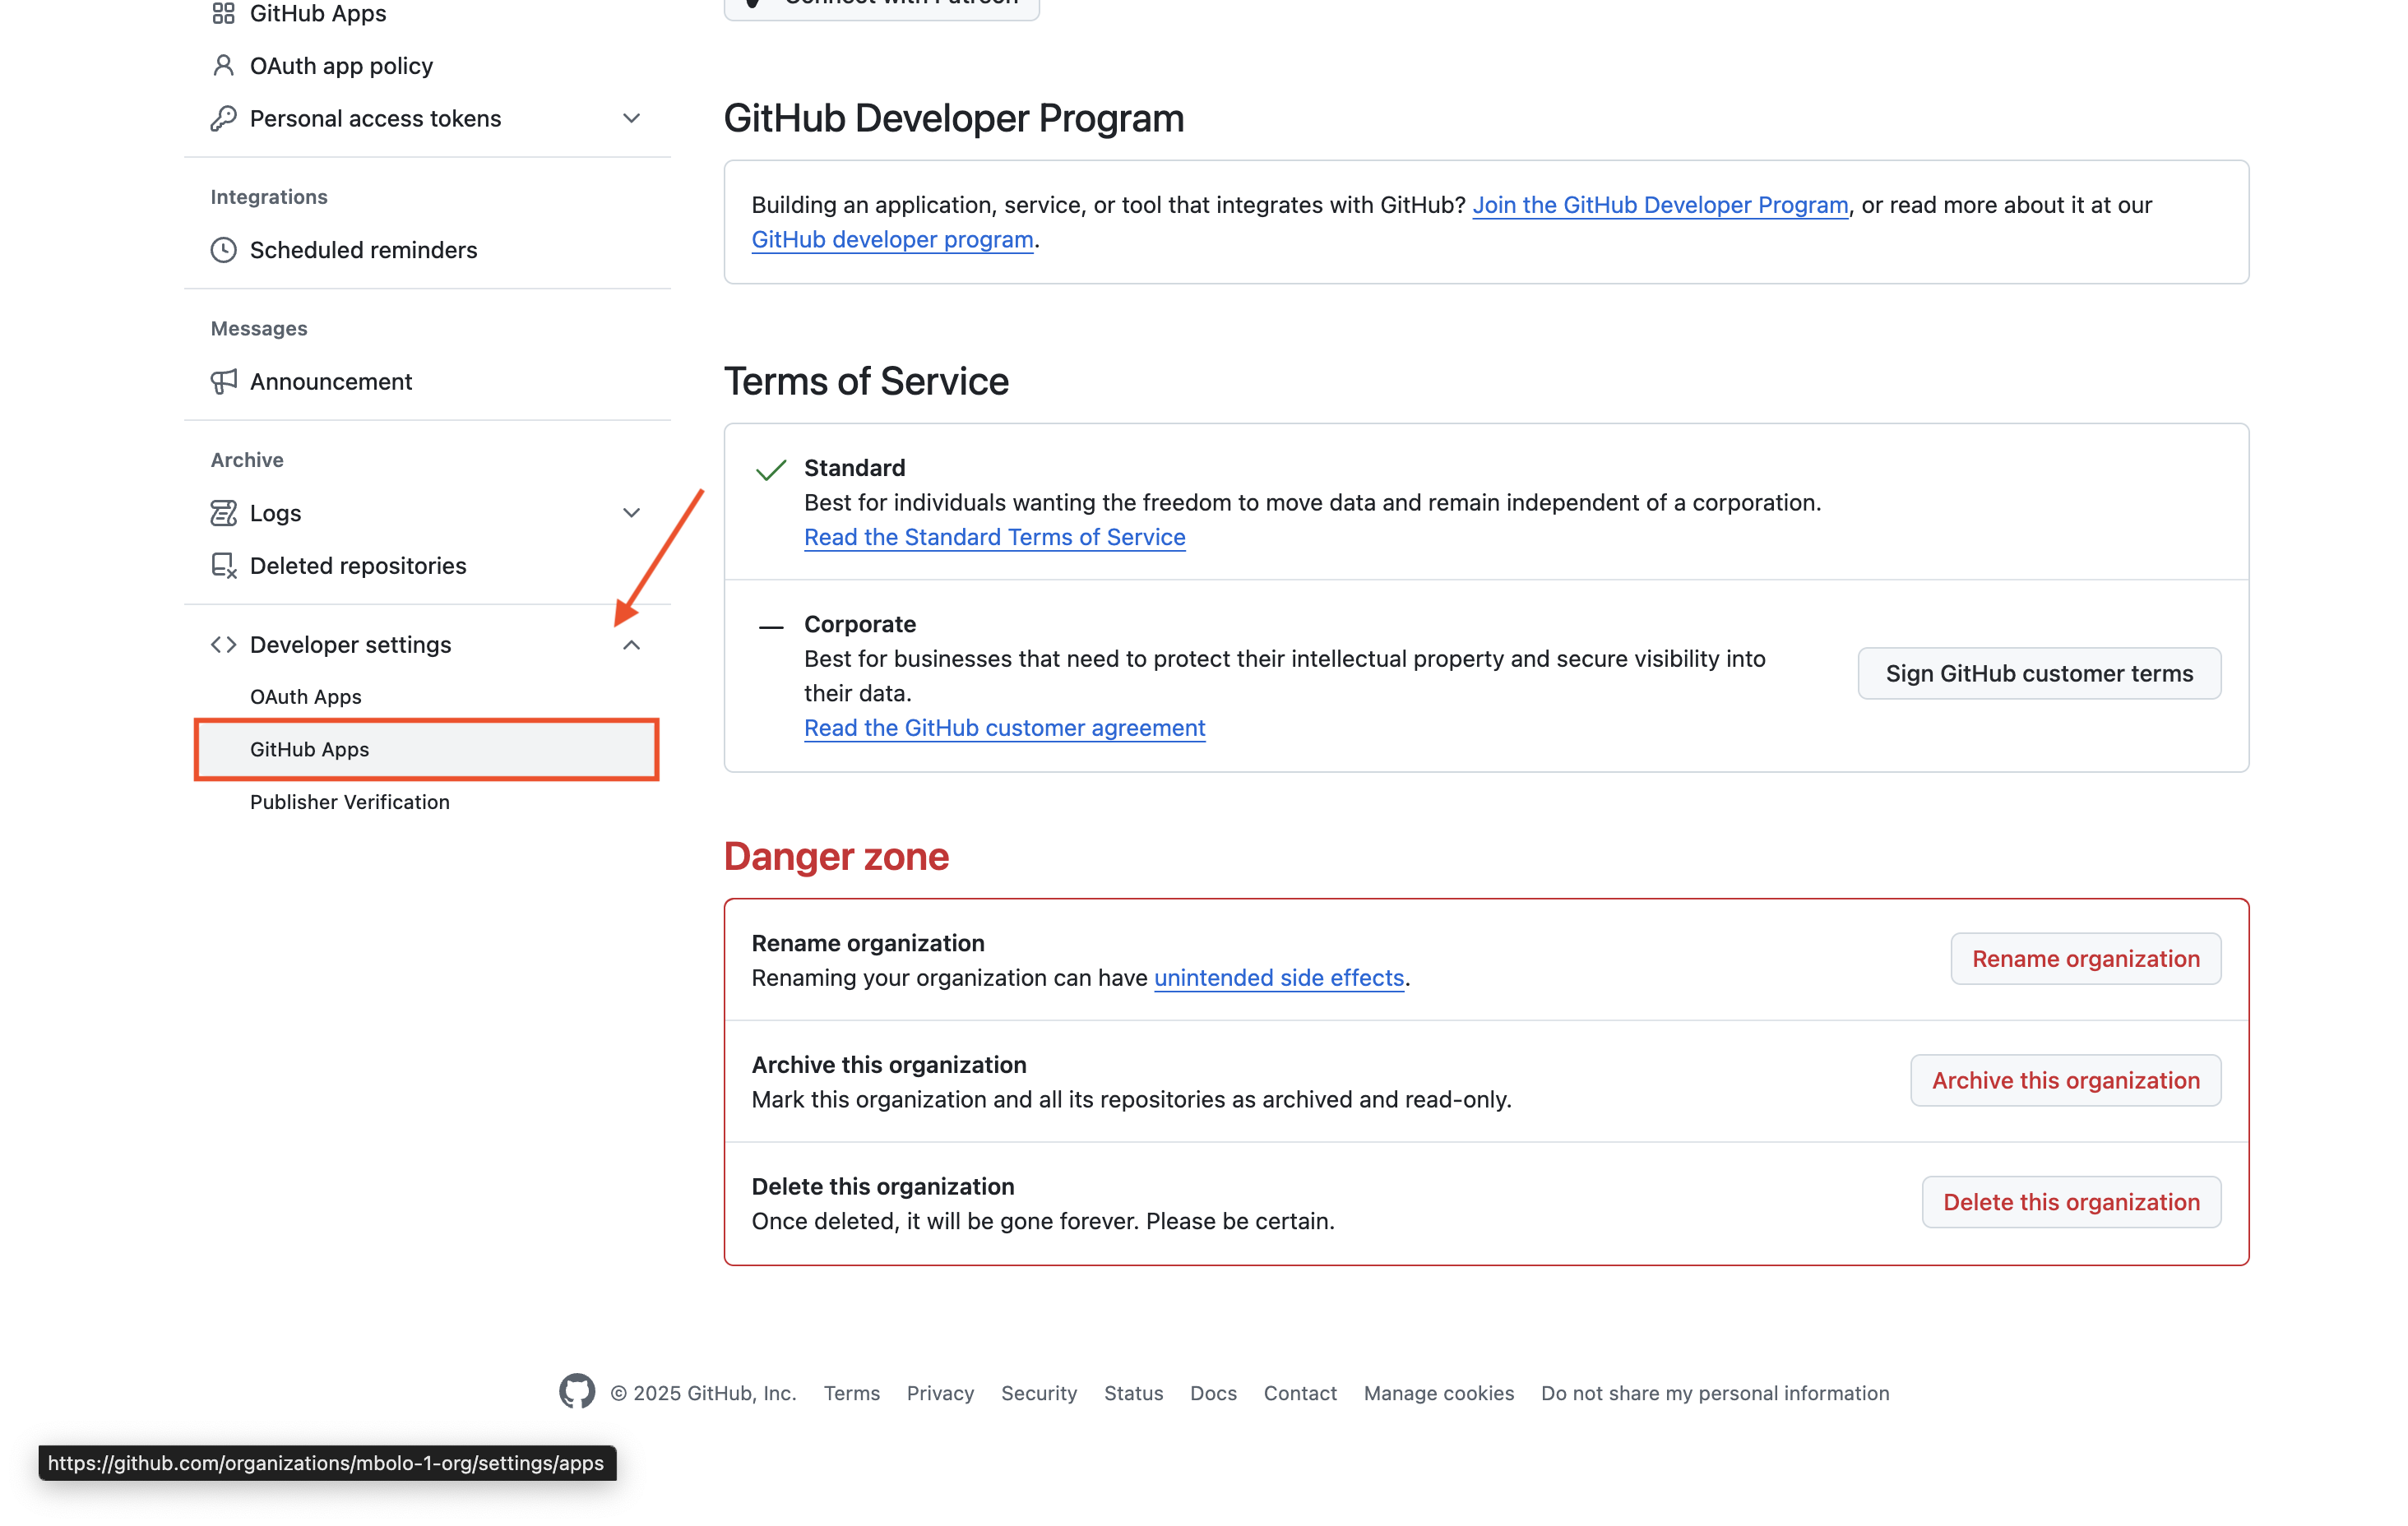
In the left sidebar, scroll down to Developer settings and click GitHub Apps.
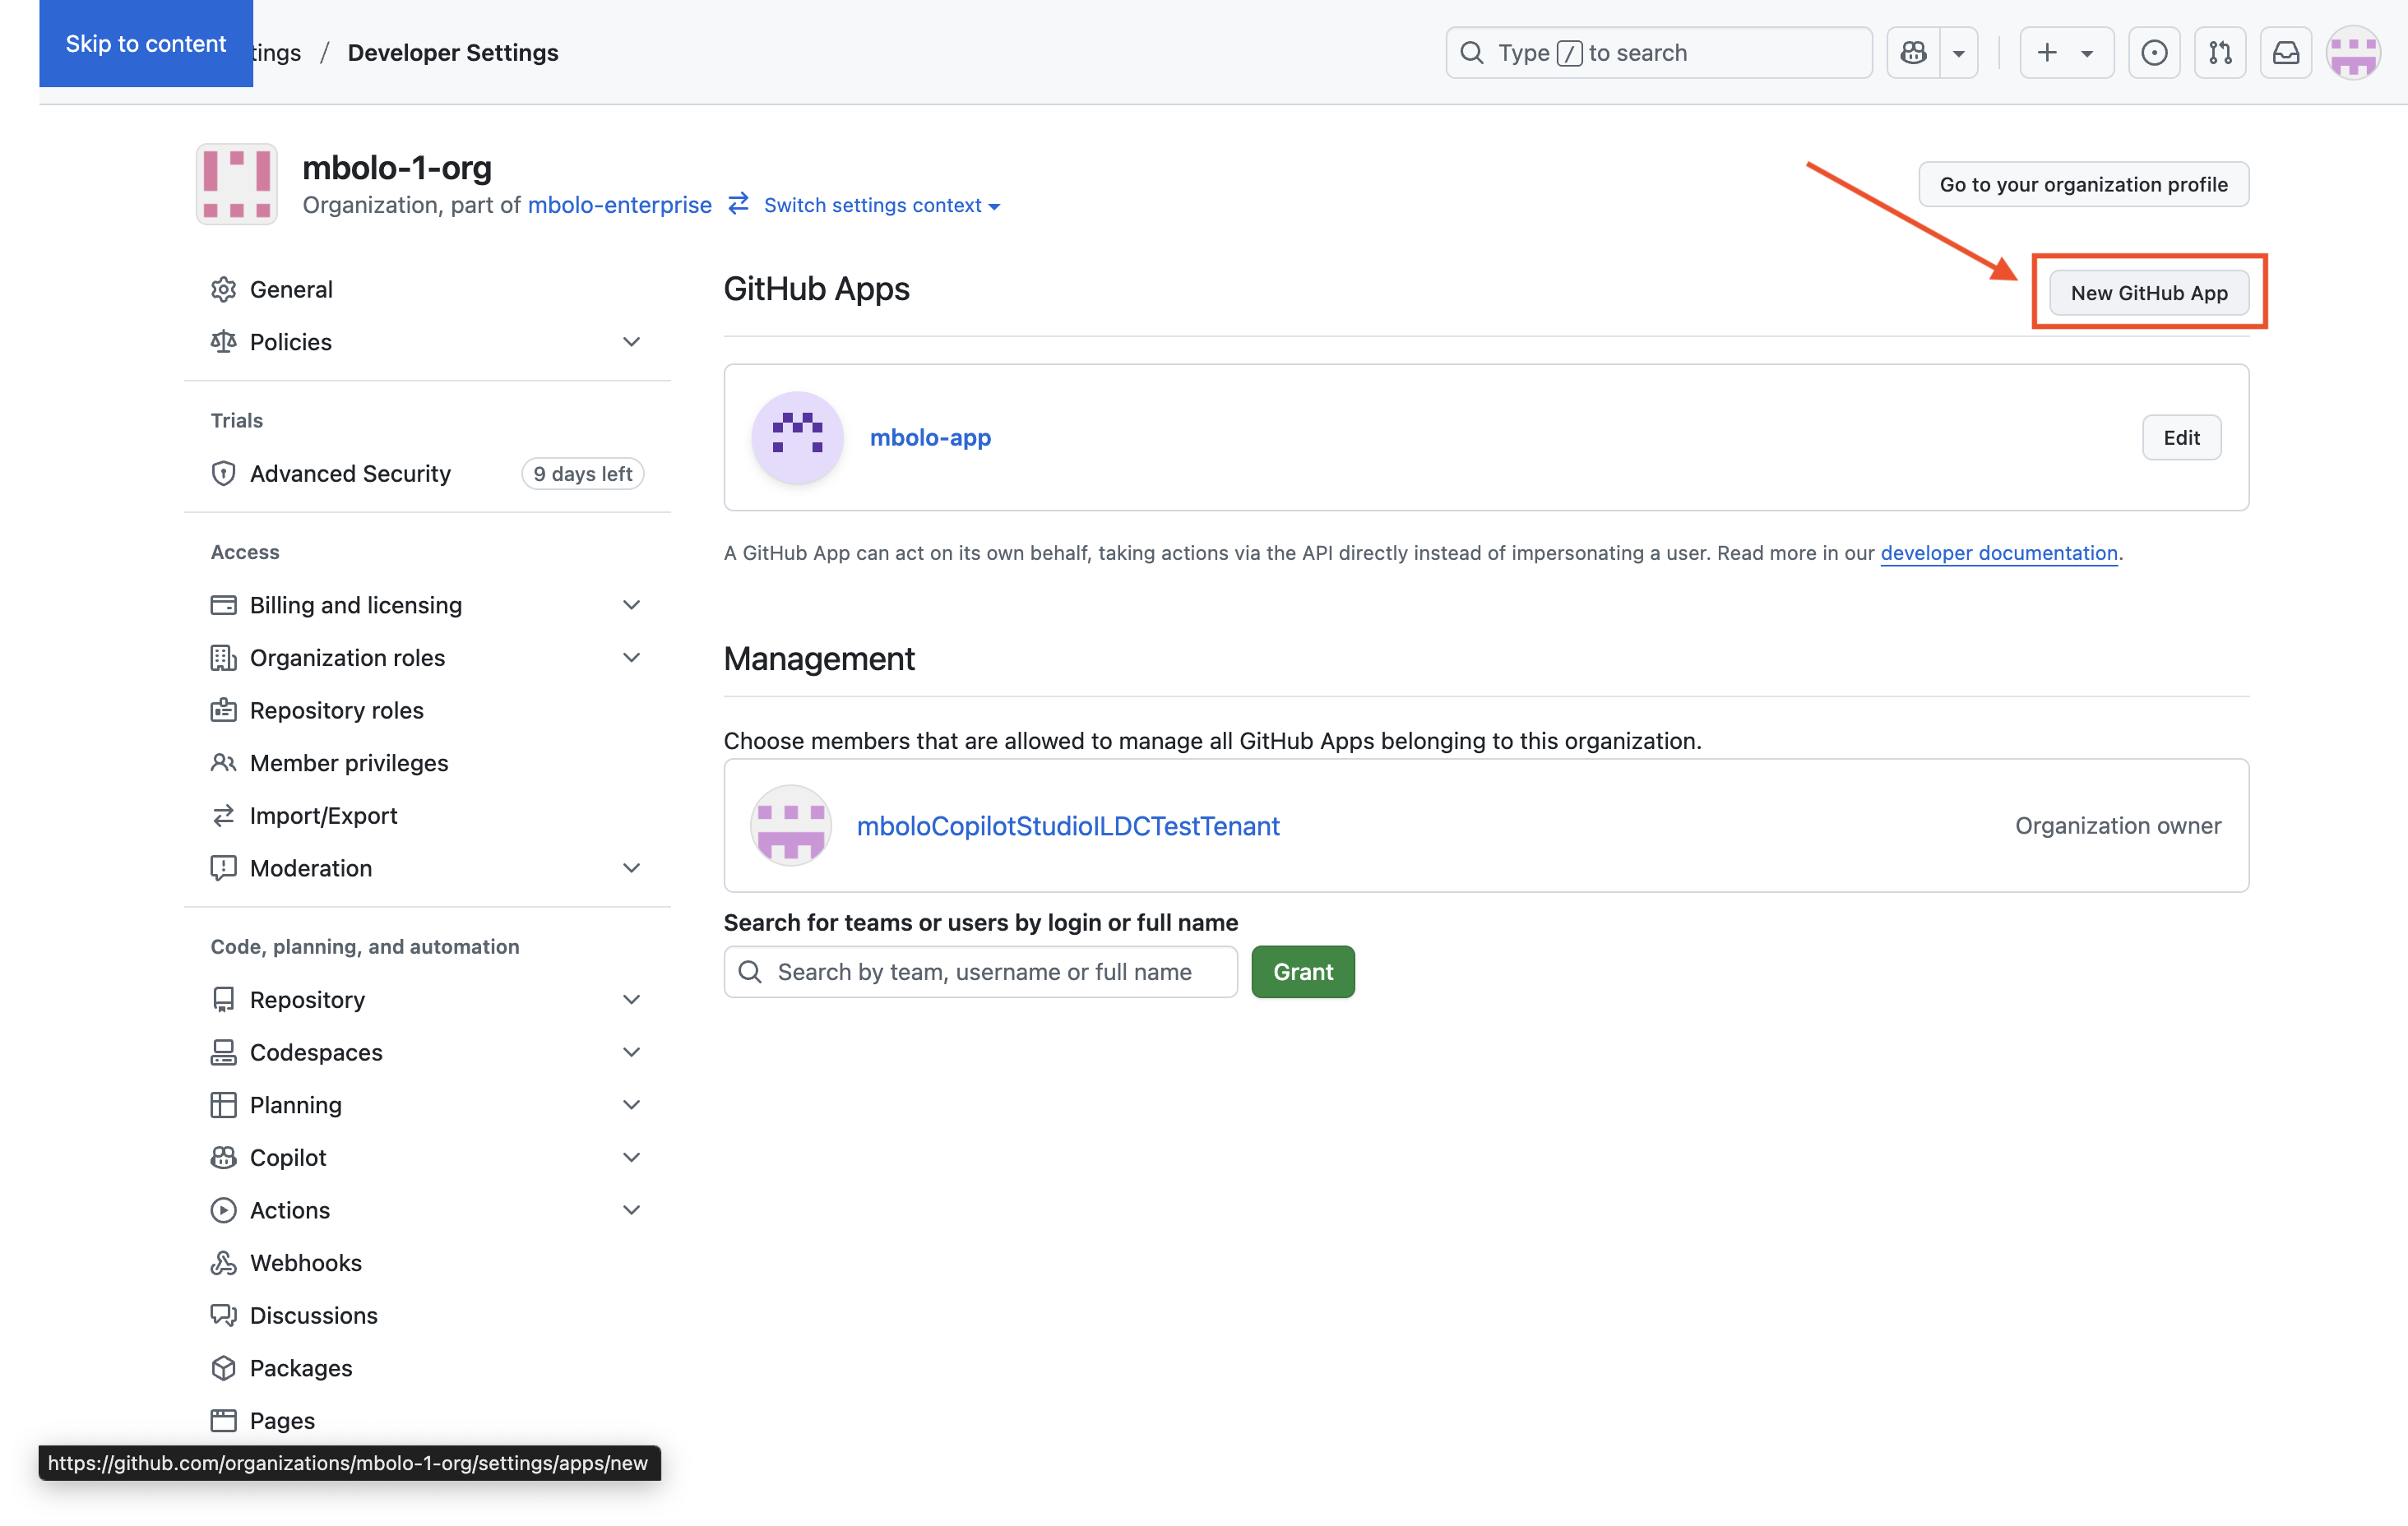
Click New GitHub App.
Configure the app:
- GitHub App name: Enter a name of your choice.
- Homepage URL: Copy the URL from your browser’s address bar (refer to the image if needed).
- Callback URL:
For Microsoft 365 Enterprise:
https://gcs.office.com/v1.0/admin/oauth/callbackFor Microsoft 365 Government:
https://gcsgcc.office.com/v1.0/admin/oauth/callback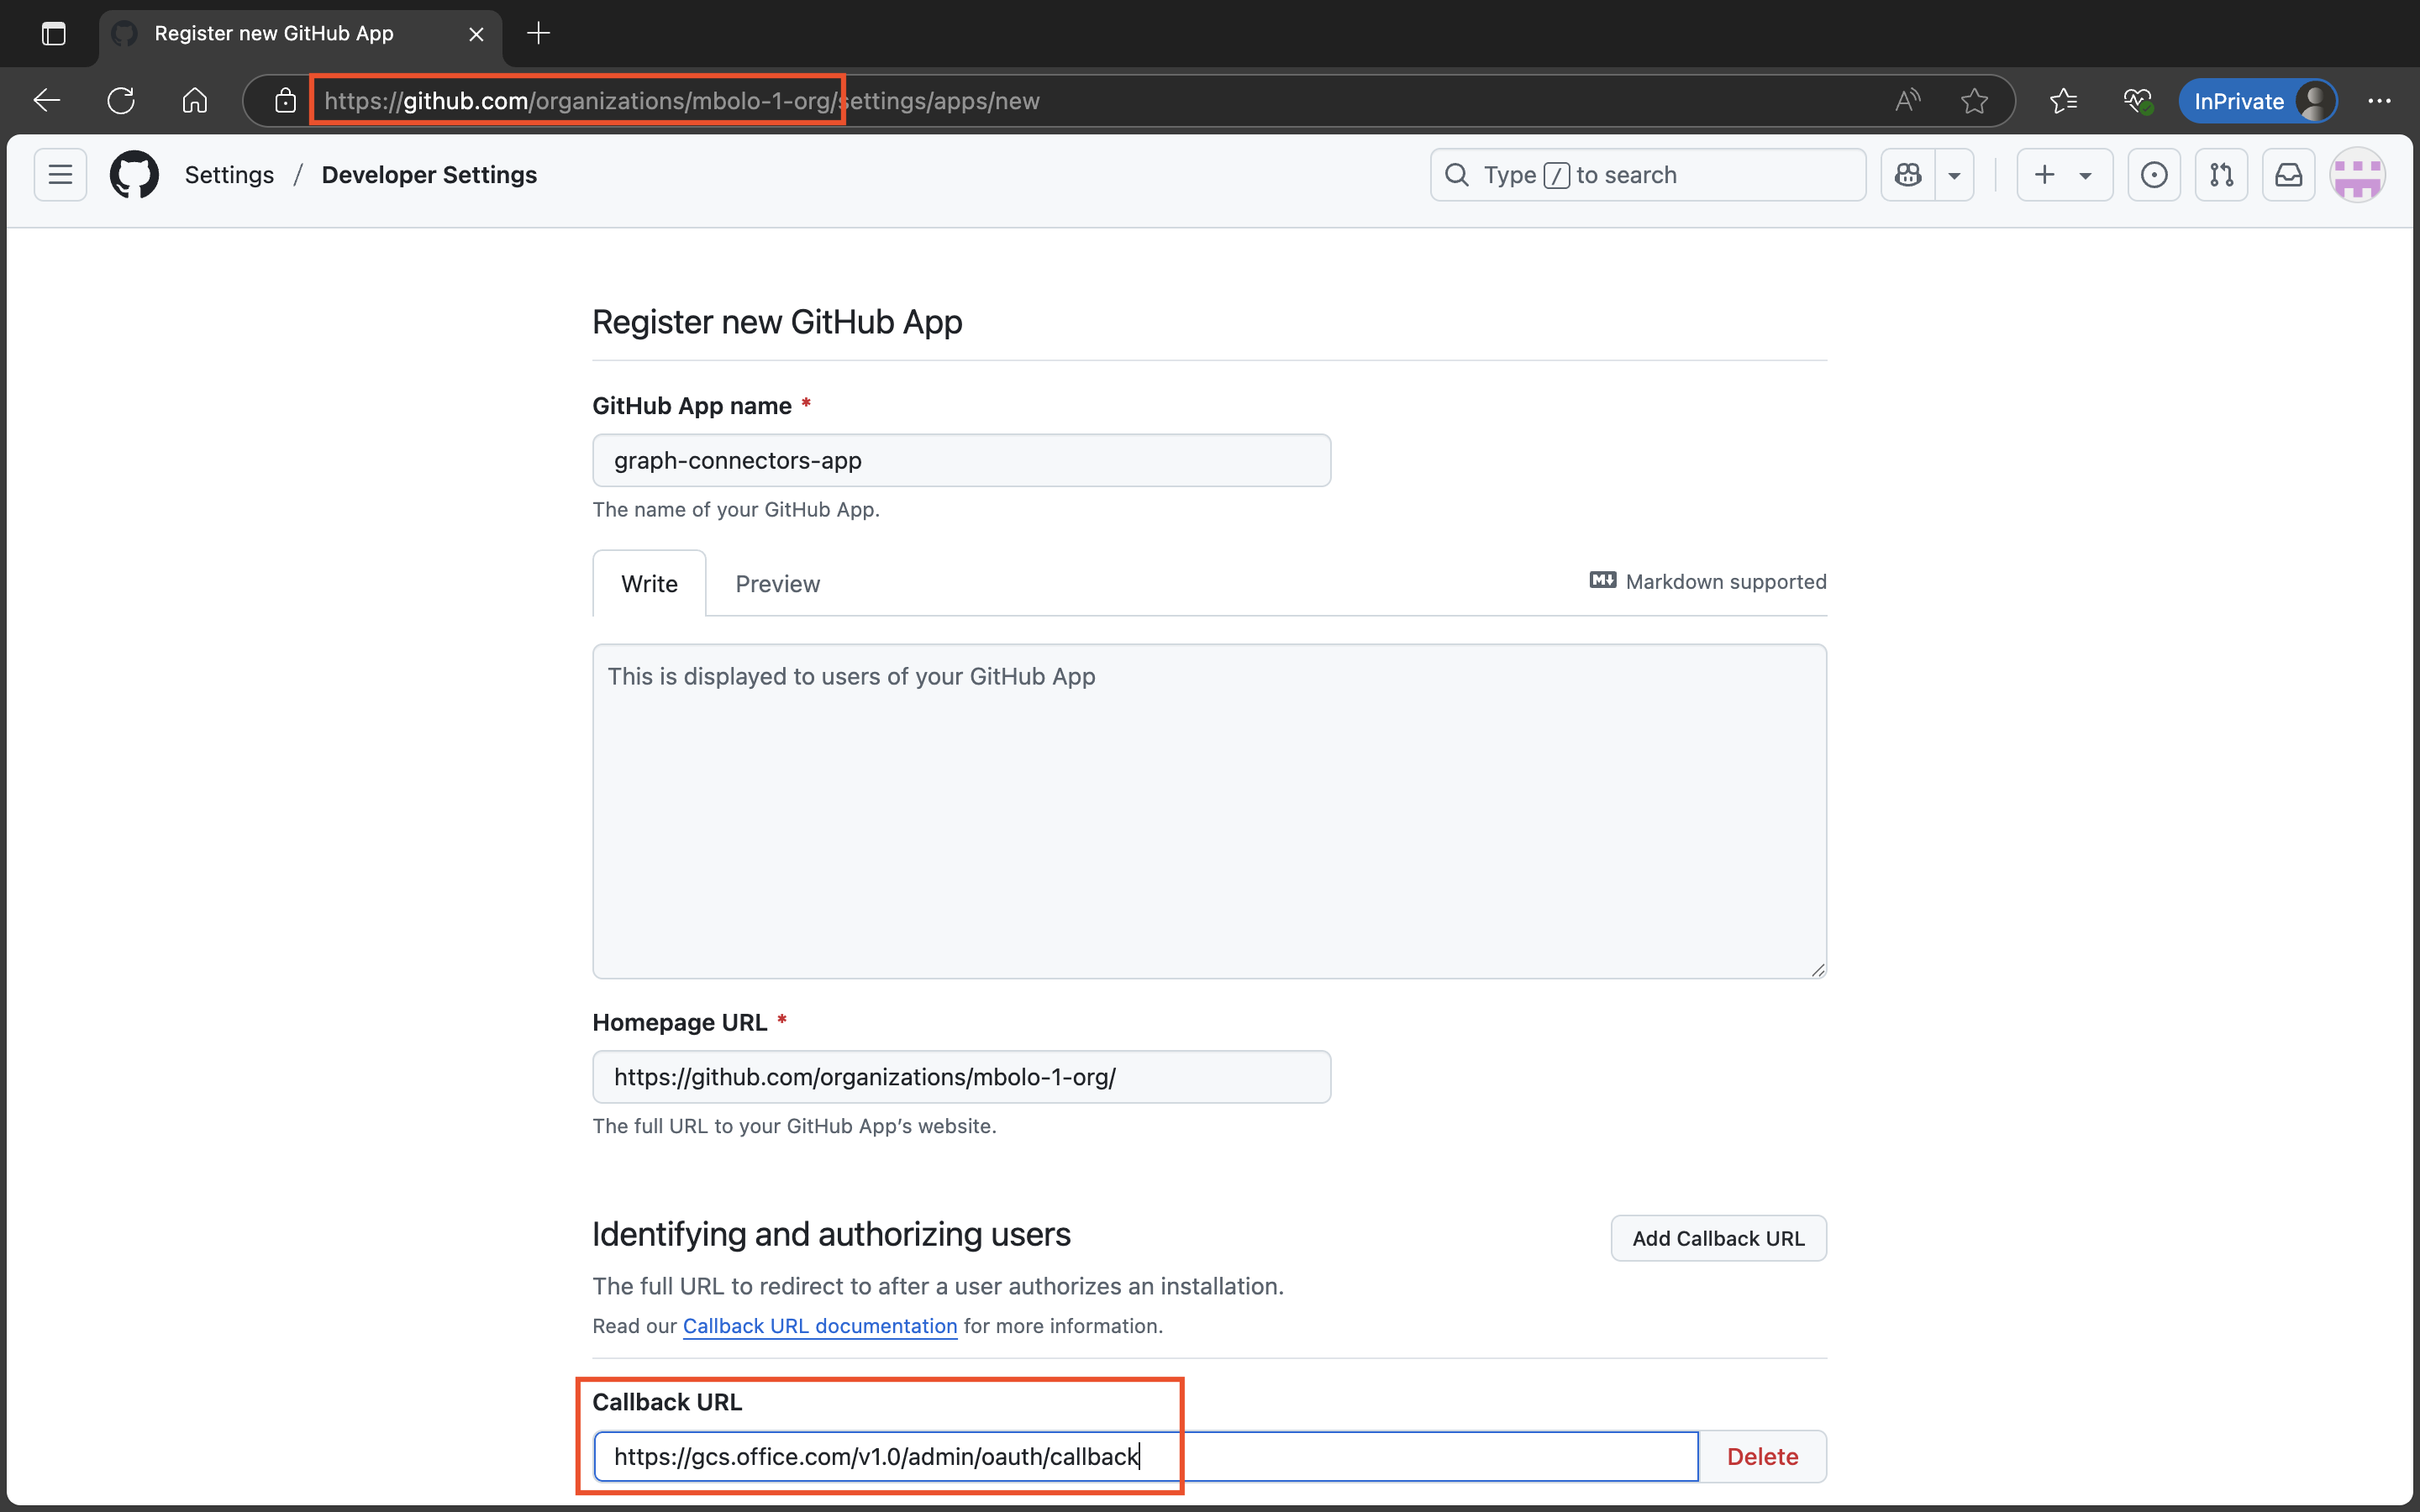
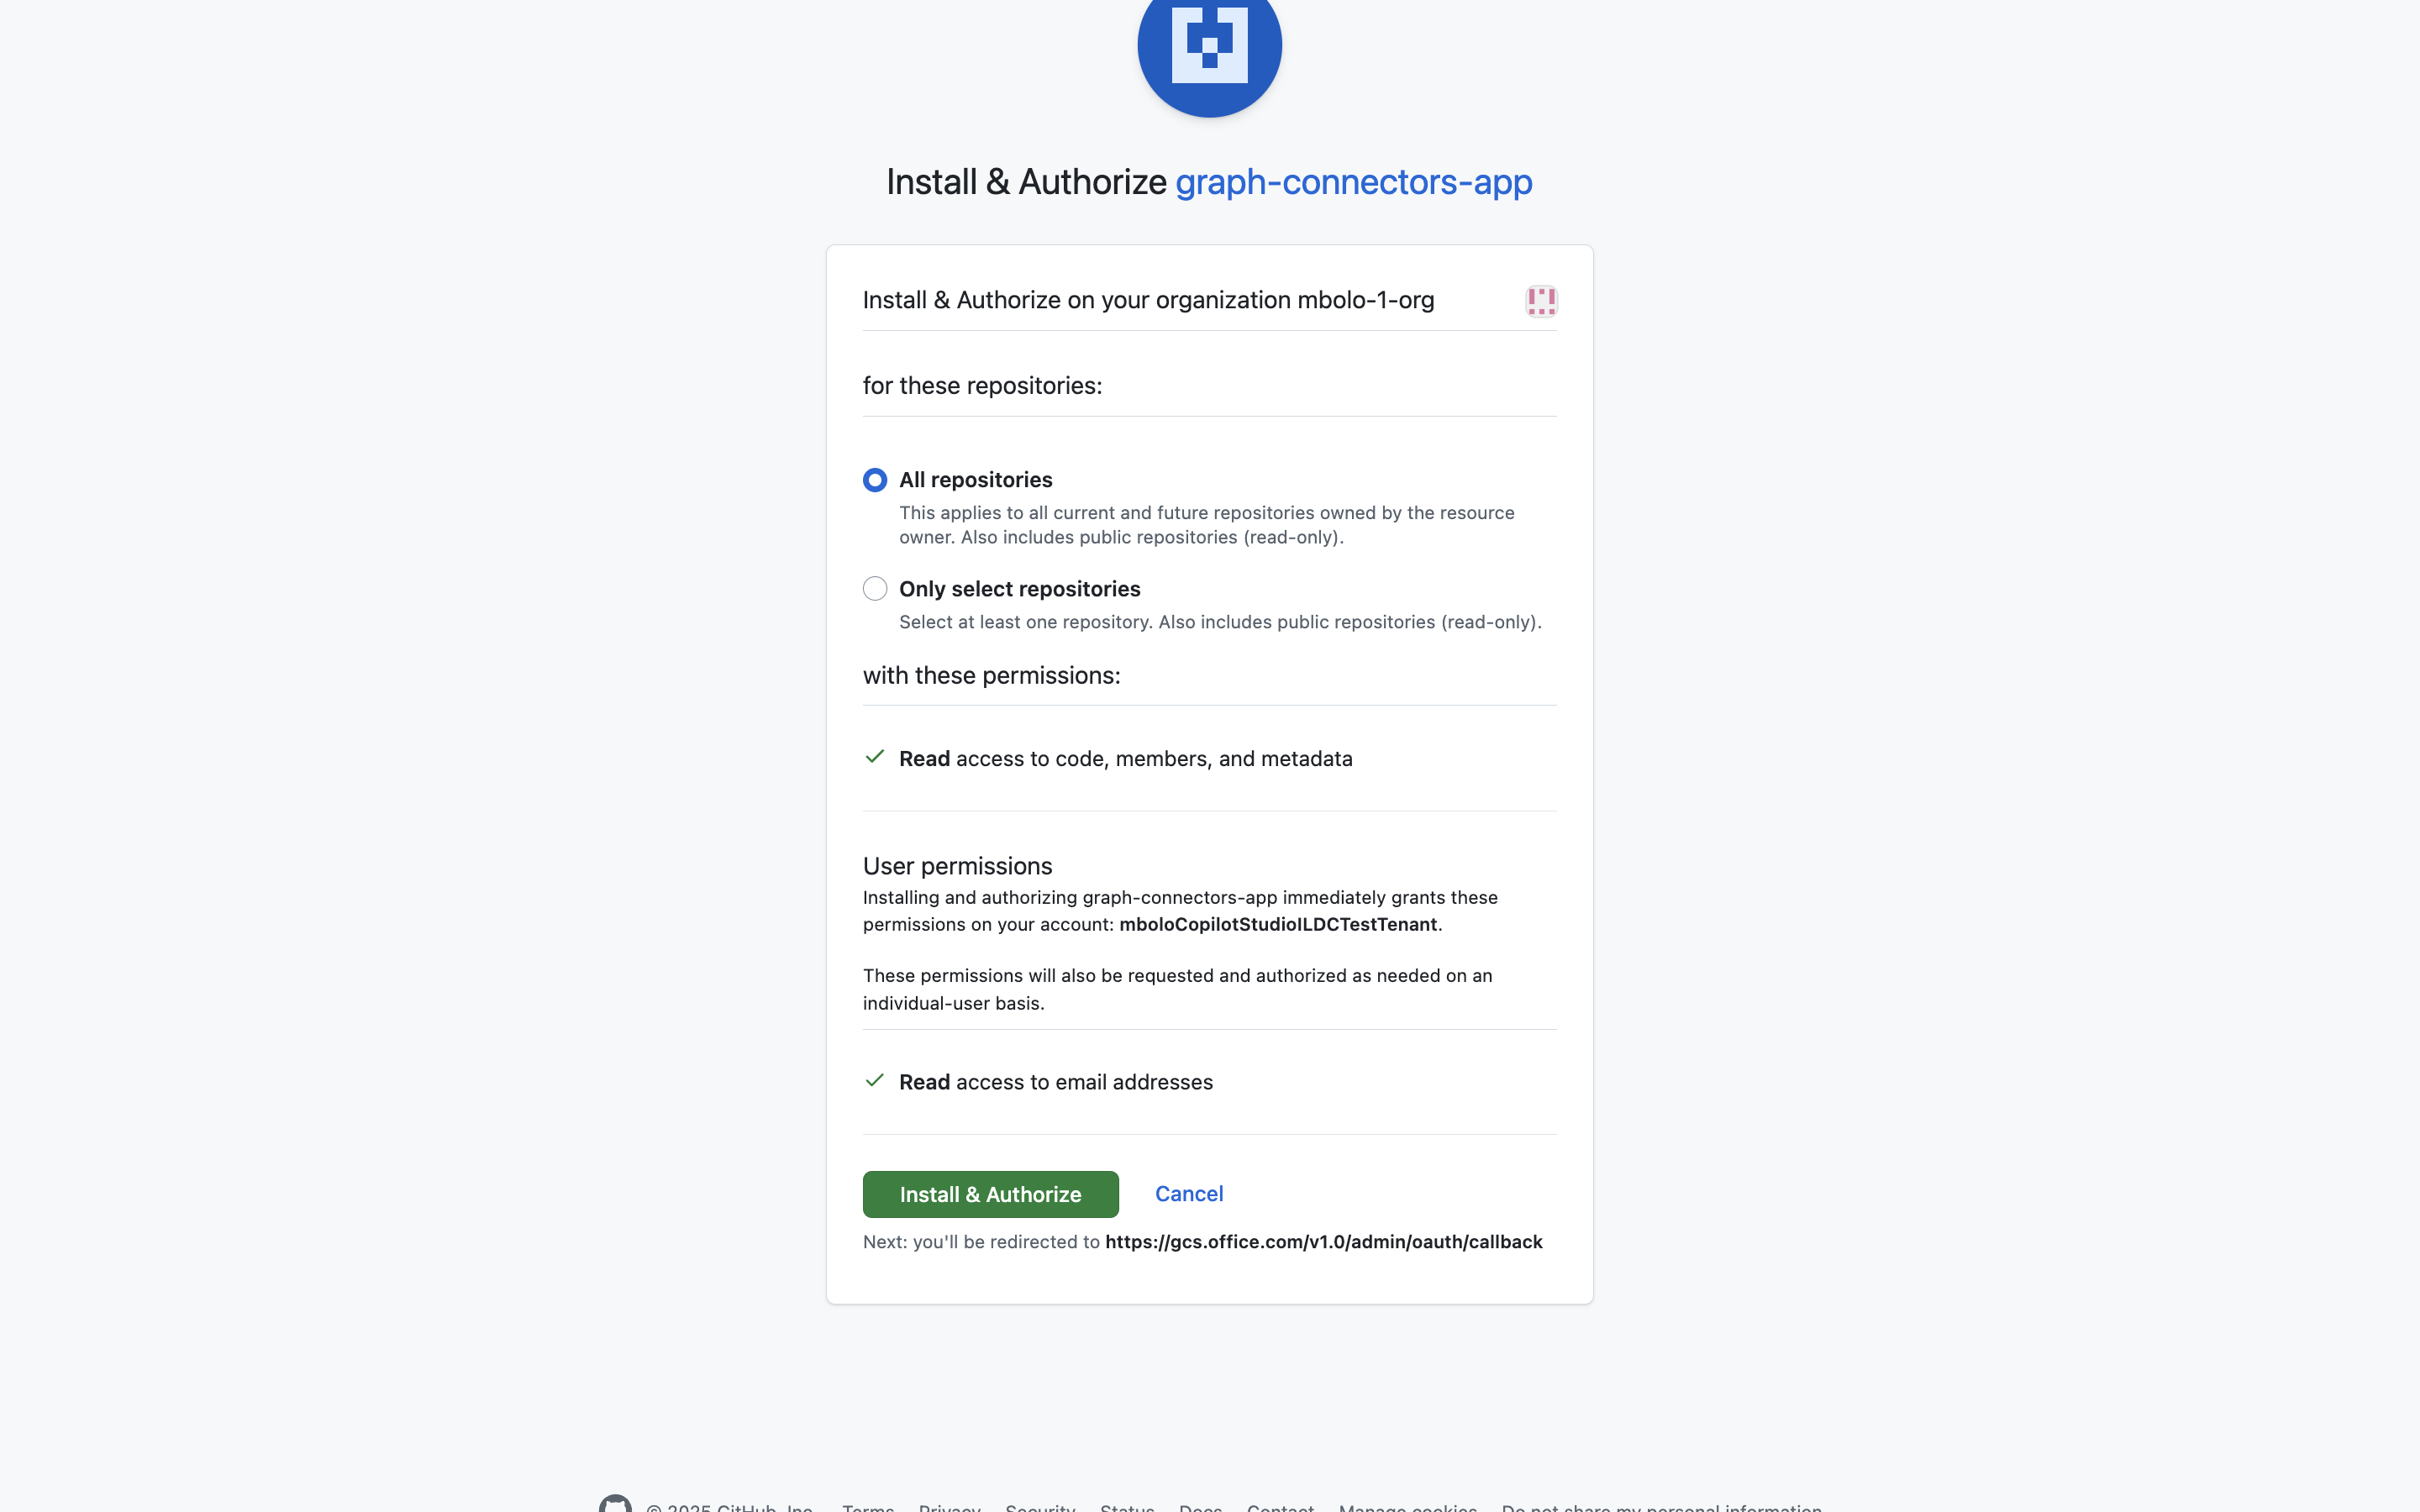
Check Request user authorization (OAuth) during installation and disable the Webhook option.
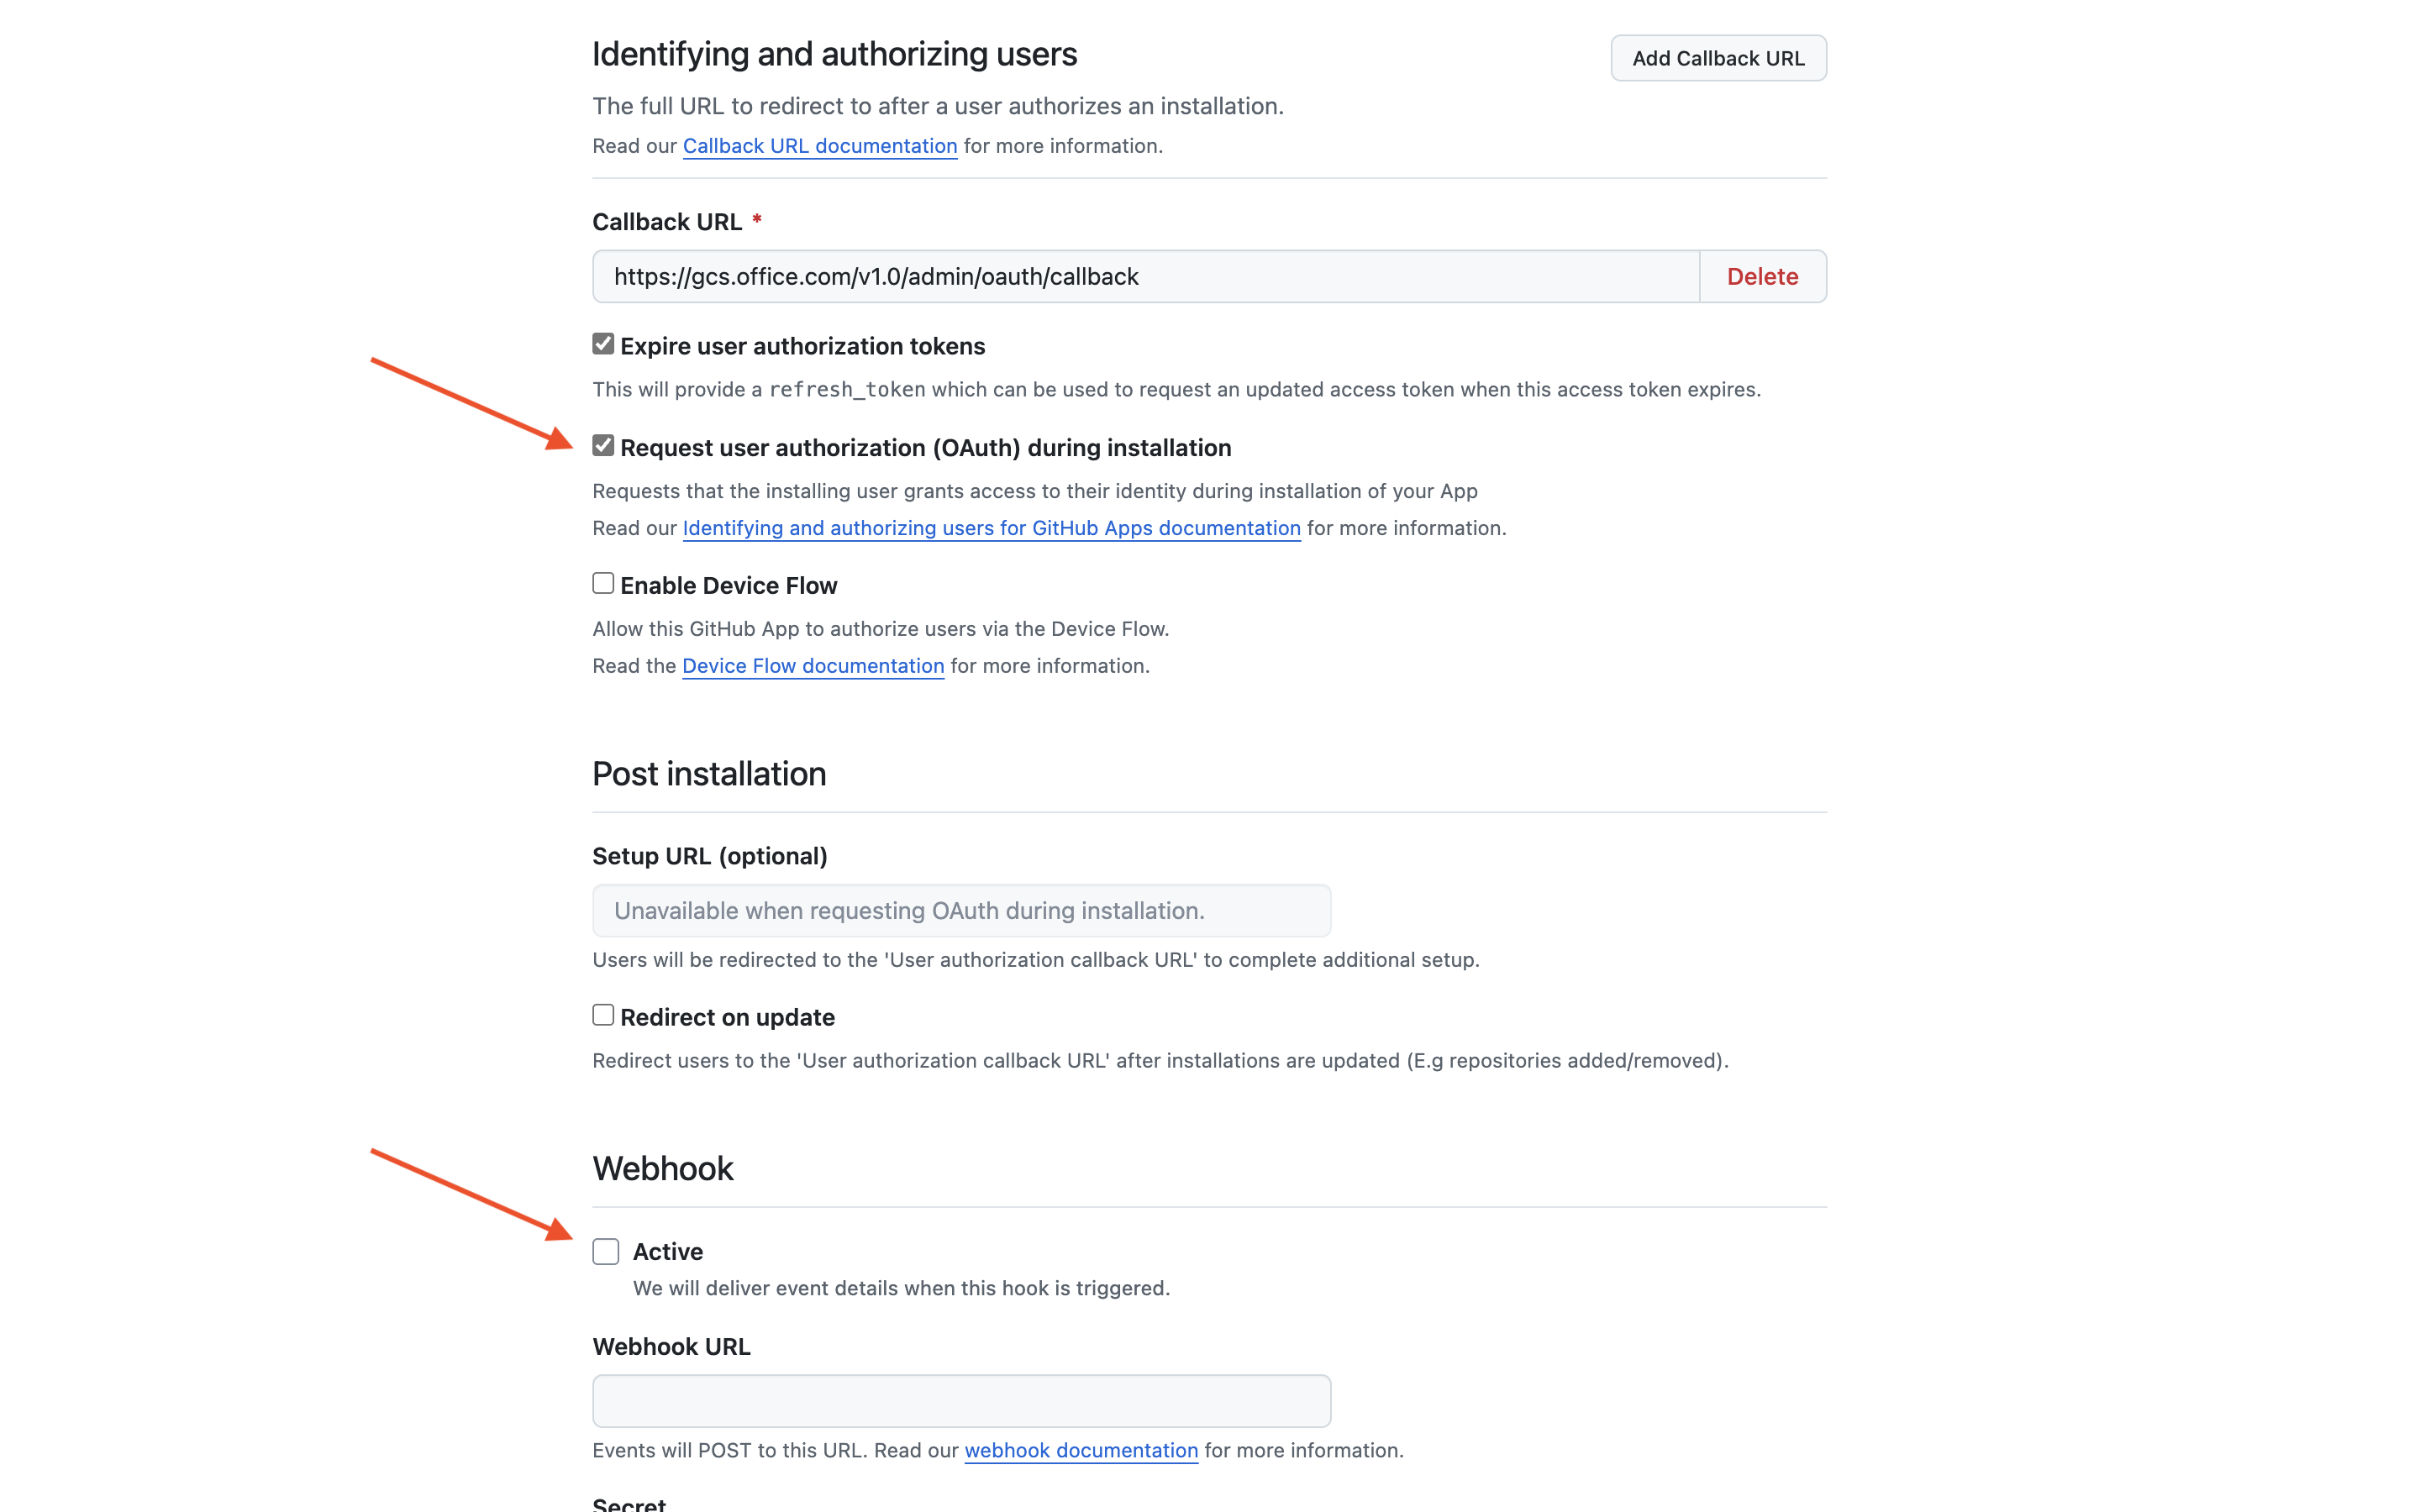
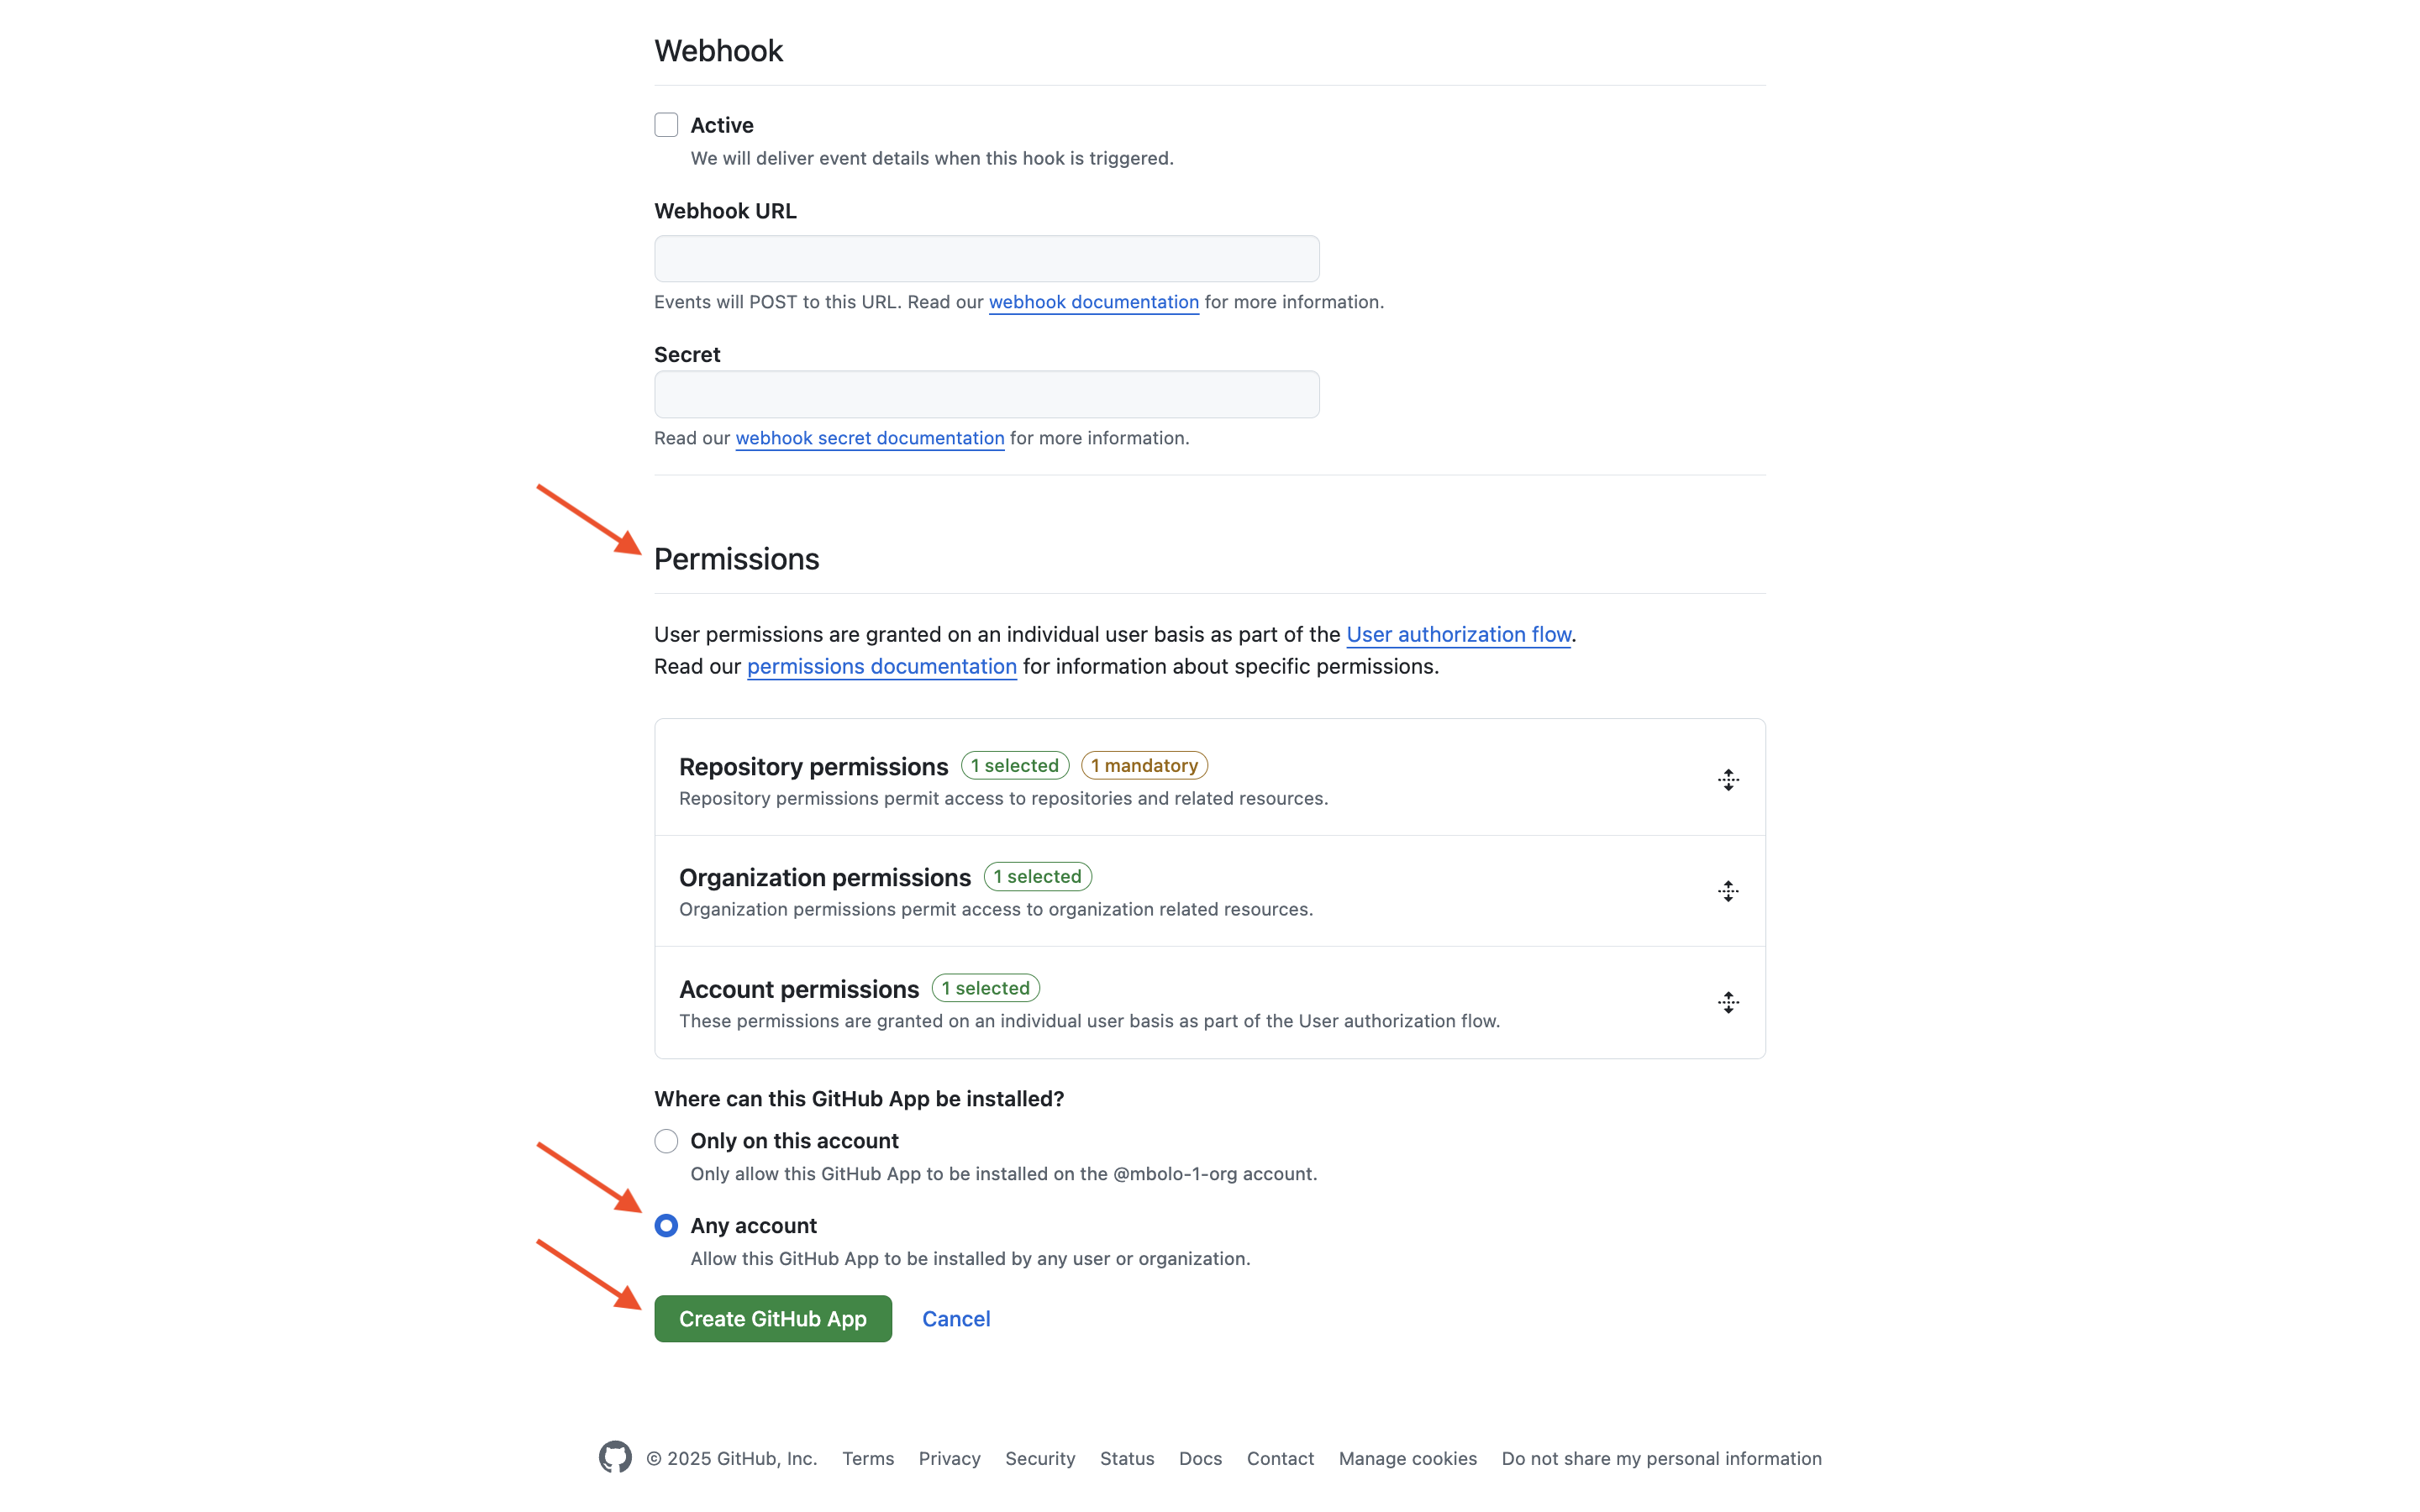
Set the following permissions:
- Repository permissions
- Administration - Read-only
- Metadata - Read-only
- Issues - Read-only
- Organization permissions
- Administration - Read-only
- Members - Read-only
- Account permissions
- Email addresses - Read-only
- Repository permissions
Under Where can this GitHub App be installed, select Any account, then click Create GitHub App.
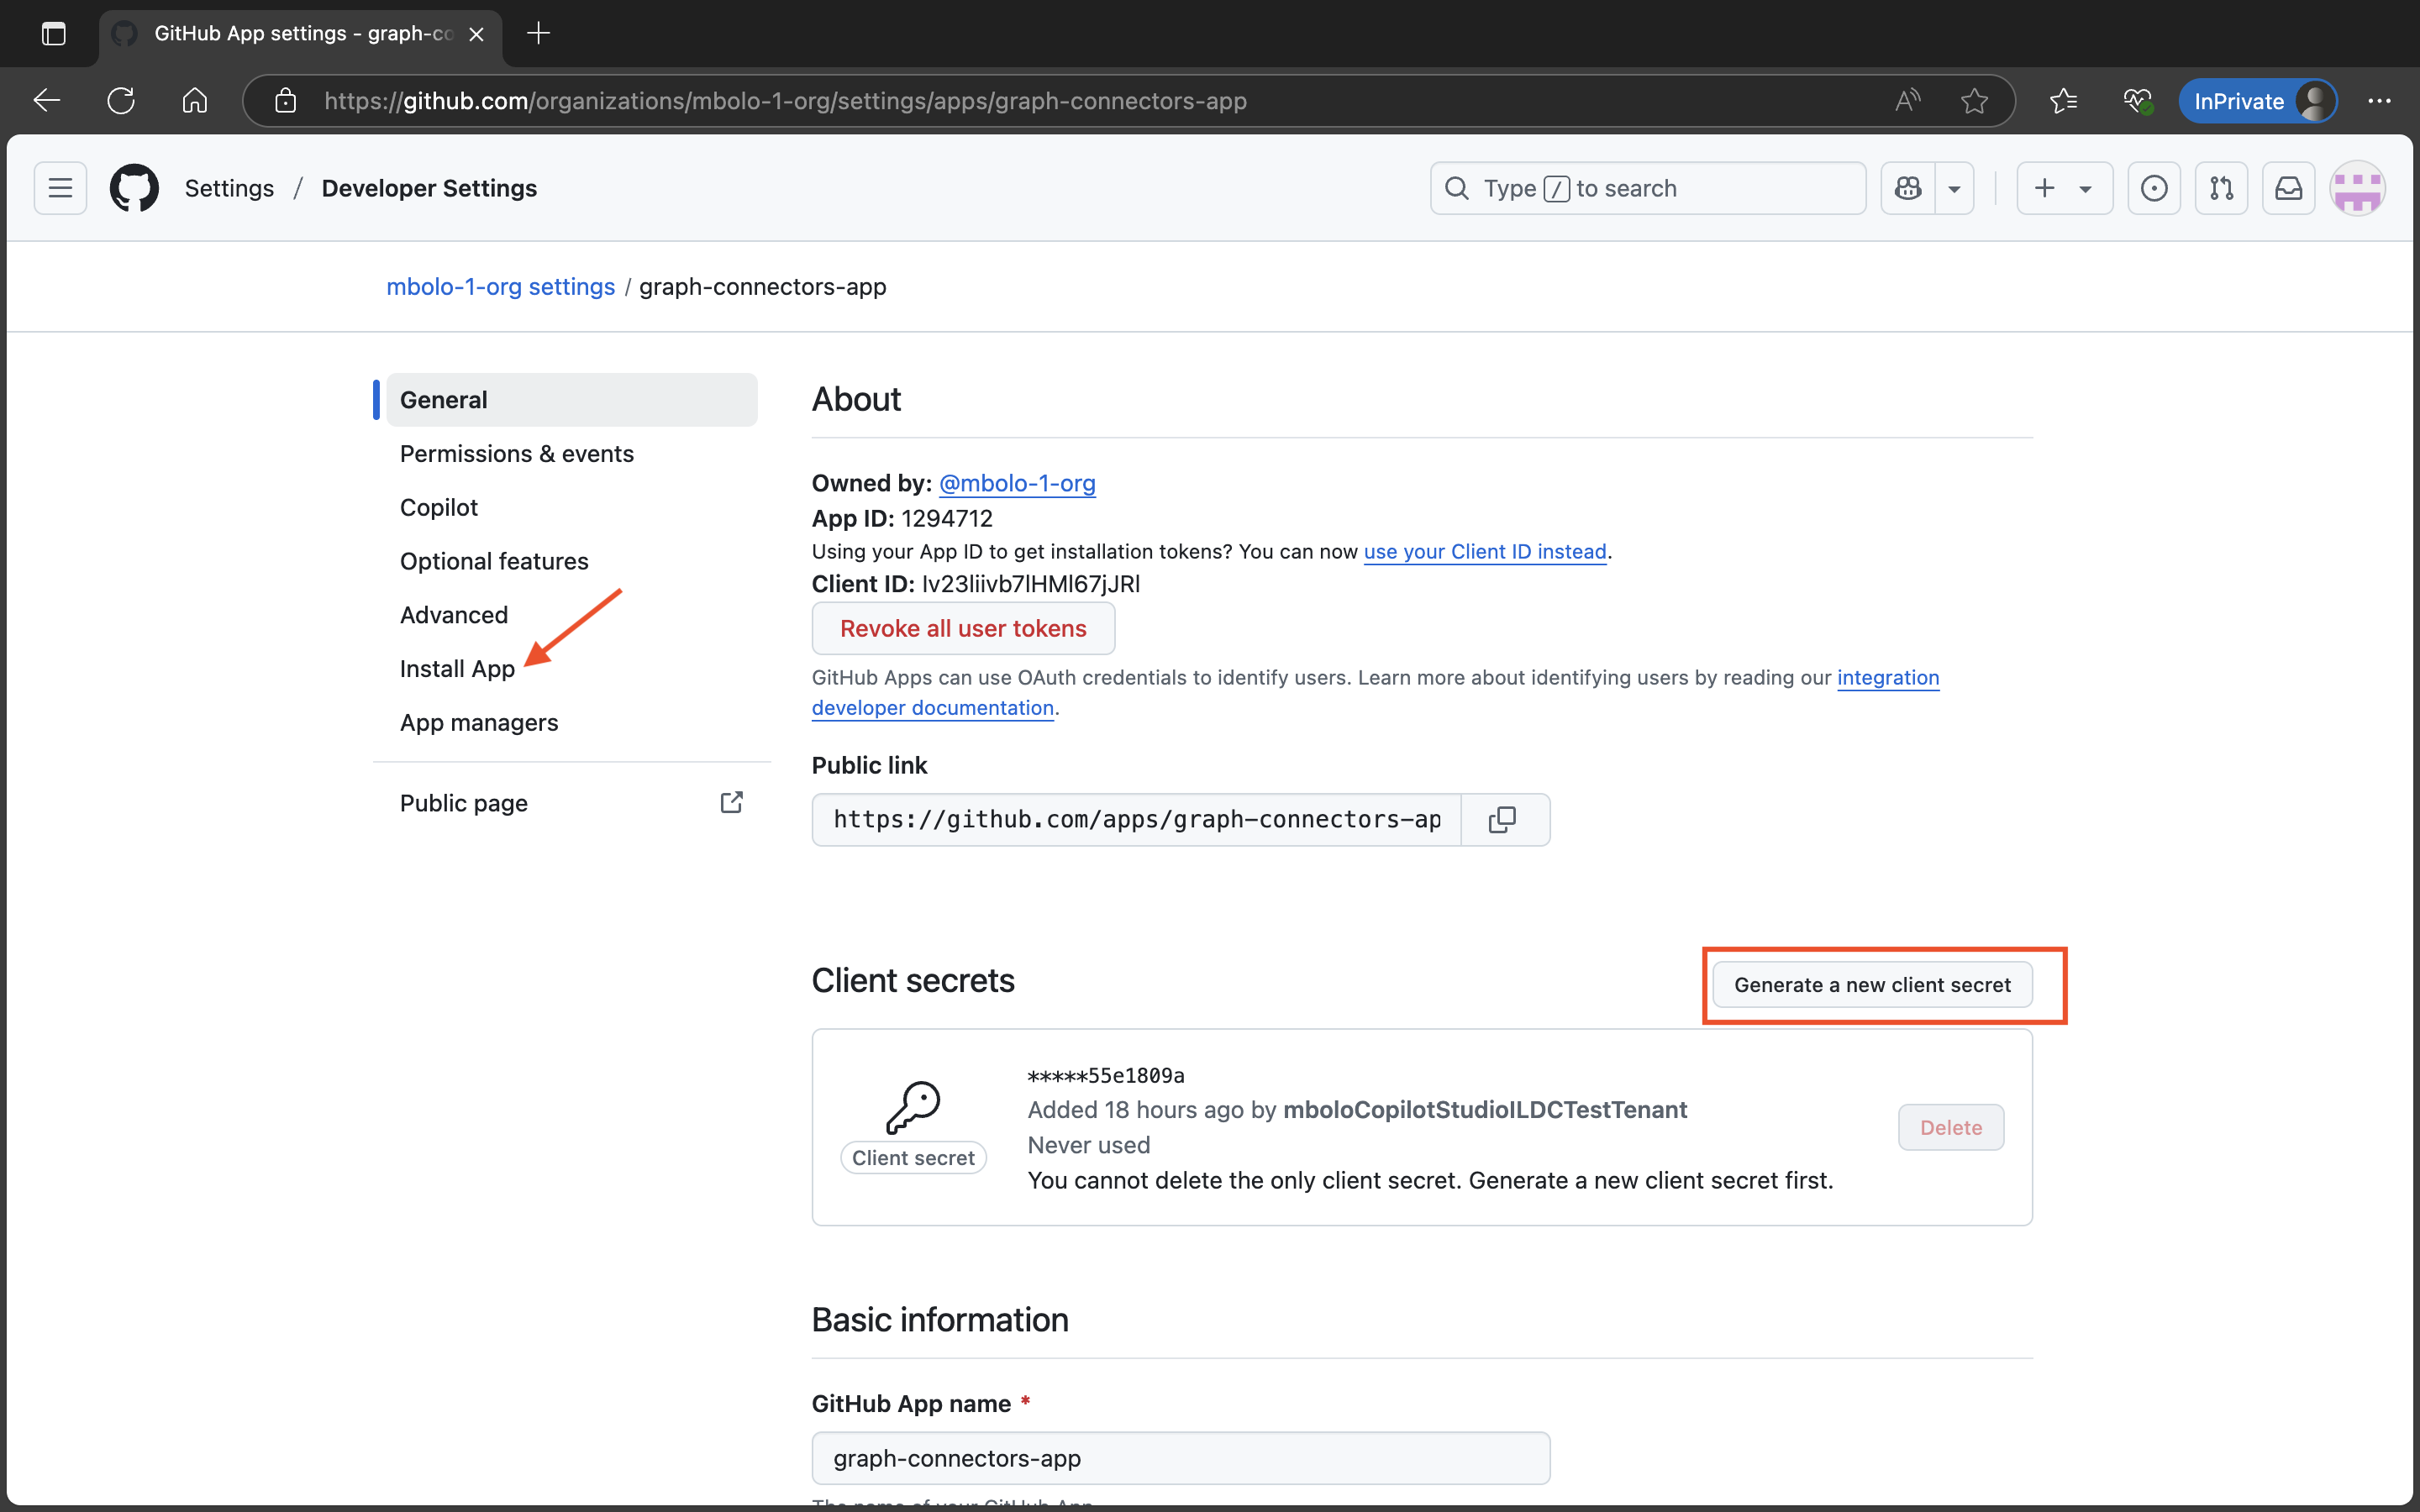
On the GitHub App’s General page, generate and copy the client secret by clicking Generate a new client secret. Then click Install App.
Select the organization where you want the app to be installed. After installation, you're ready to configure the connector.


Get started
1. Choose display name
Choose a display name that helps users recognize the connection in a Copilot response.
2. Provide authentication type
Authentication type: GitHub App (on behalf of user)
- Enter your Client ID and Client secret from your GitHub App.
- Choose Authorize to sign in and grant access. We recommend using separate user accounts for OAuth authentication with each connection, as GitHub's rate limit is calculated individually per user.
- Grant the required API scopes.
Authentication type: GitHub App (installation)
- Generate private key from your GitHub App following the GitHub documentation.
- Enter your Client ID from your GitHub App, your organization name, and upload the private key generated from the last step.
3. Roll out to limited audience
Before you deploy the connector, test the connection with a limited user base in Copilot and Microsoft Search.
Custom setup
In custom setup you can edit any of the default values for users, content, and sync.
Users
Identity mapping
To ensure correct permission enforcement, map GitHub user identities to Microsoft Entra ID. The following are the options:
- Email: Maps GitHub email to Microsoft Entra ID user properties.
- Login: Maps GitHub logins with Microsoft Entra ID user properties.
- Name: Maps GitHub name with Microsoft Entra ID user properties.
If direct mapping fails, use regular expressions (regex) to transform the data. For example: [a-zA-Z0-9]+
For personal accounts, mapping accuracy may be impacted due to variations in email domains and individual email visibility settings.
Content
On the Content tab, you can verify property mappings in the sample data for metadata such as content, labels, description, and timestamps.
Time-range filter
You can configure a time-range filter in the content tab. The default setting is 365 days.
Sync
You can configure incremental and full crawls. The following are the default values:
- Incremental crawl runs every 15 minutes by default.
- Full crawl runs daily to ensure up-to-date indexing.
Firewall settings
For added security, you may configure IP firewall rules for your Azure SQL Server or database. For more information, see IP firewall rules. Add the following client IP ranges in the firewall settings.
| Region | Microsoft 365 Enterprise | Microsoft 365 Government |
|---|---|---|
| NAM | 52.250.92.252/30, 52.224.250.216/30 | 52.245.230.216/30, 20.141.117.64/30 |
| EUR | 20.54.41.208/30, 51.105.159.88/30 | NA |
| APC | 52.139.188.212/30, 20.43.146.44/30 | NA |
Setting up an IP restriction could cause the connector to stop working and lead to crawl failures. Administrators can resolve this issue and resume crawling by adding the connector's IP address to the allowlist according to the above table.
Next steps
- Click Auto generation to quickly populate your connection description with recommended defaults. It saves time and ensures consistency in your setup.
- Review the connection status in the Microsoft 365 Admin Center.
- For configuration about GitHub Apps and authentication, please check out below documentations
| Topic | Documentation link |
|---|---|
| How to create/register a GitHub App | Registering a GitHub App |
| How to install a GitHub App into organizations | Installing your own GitHub App |
| How to authenticate a GitHub App on behalf of a user | About creating GitHub Apps (acting on behalf of a user) Authenticating with a GitHub App on behalf of a user |
If you have issues or want to provide feedback, contact Microsoft Graph support.