Note
Access to this page requires authorization. You can try signing in or changing directories.
Access to this page requires authorization. You can try changing directories.
This article shows you how to configure OpenID Connect (OIDC) Single sign-on (SSO) in Microsoft Entra ID for both gallery applications and custom (non-gallery) applications. With OIDC SSO, your users can sign in to applications using their Microsoft Entra credentials, providing a seamless authentication experience.
OIDC is an authentication protocol built on top of OAuth 2.0 that enables secure user authentication and single sign-on. For detailed information about the OIDC protocol, see OIDC authentication with the Microsoft identity platform.
We recommend you use a nonproduction environment to test the steps in this article.
Before configuring OIDC SSO, it's helpful to understand the following core concepts:
- App registrations vs. Enterprise applications: App registrations define your application's identity and configuration, while enterprise applications represent instances of those apps in your tenant. To learn more, see Application and service principal objects in Microsoft Entra ID.
- Permissions and consent: Applications request permissions to access resources, and users or administrators grant consent. For details on the consent framework, see Permissions and consent in the Microsoft identity platform.
- Multi-tenant applications: Applications that can be used by multiple organizations. For guidance on multi-tenancy, see How to: Convert your app to be multitenant.
- Authentication flows: Different methods for authenticating users, such as the Authorization Code flow with PKCE for single-page applications. For more information, see Microsoft identity platform authentication flows.
- OIDC SSO: A method of single sign-on that uses the OIDC protocol to authenticate users across applications. It allows users to sign in once and access multiple applications without needing to reenter credentials.
Prerequisites
To configure OIDC-based SSO, you need:
- A Microsoft Entra user account. If you don't already have one, you can Create an account for free.
- One of the following roles:
- Cloud Application Administrator
- Application Administrator
- Owner of the service principal
- For custom applications: Details about your application including its redirect URIs and authentication requirements
Configure OIDC SSO for Microsoft Entra app gallery apps
Gallery applications in Microsoft Entra ID come preconfigured with OIDC support, making setup straightforward through a consent-based process.
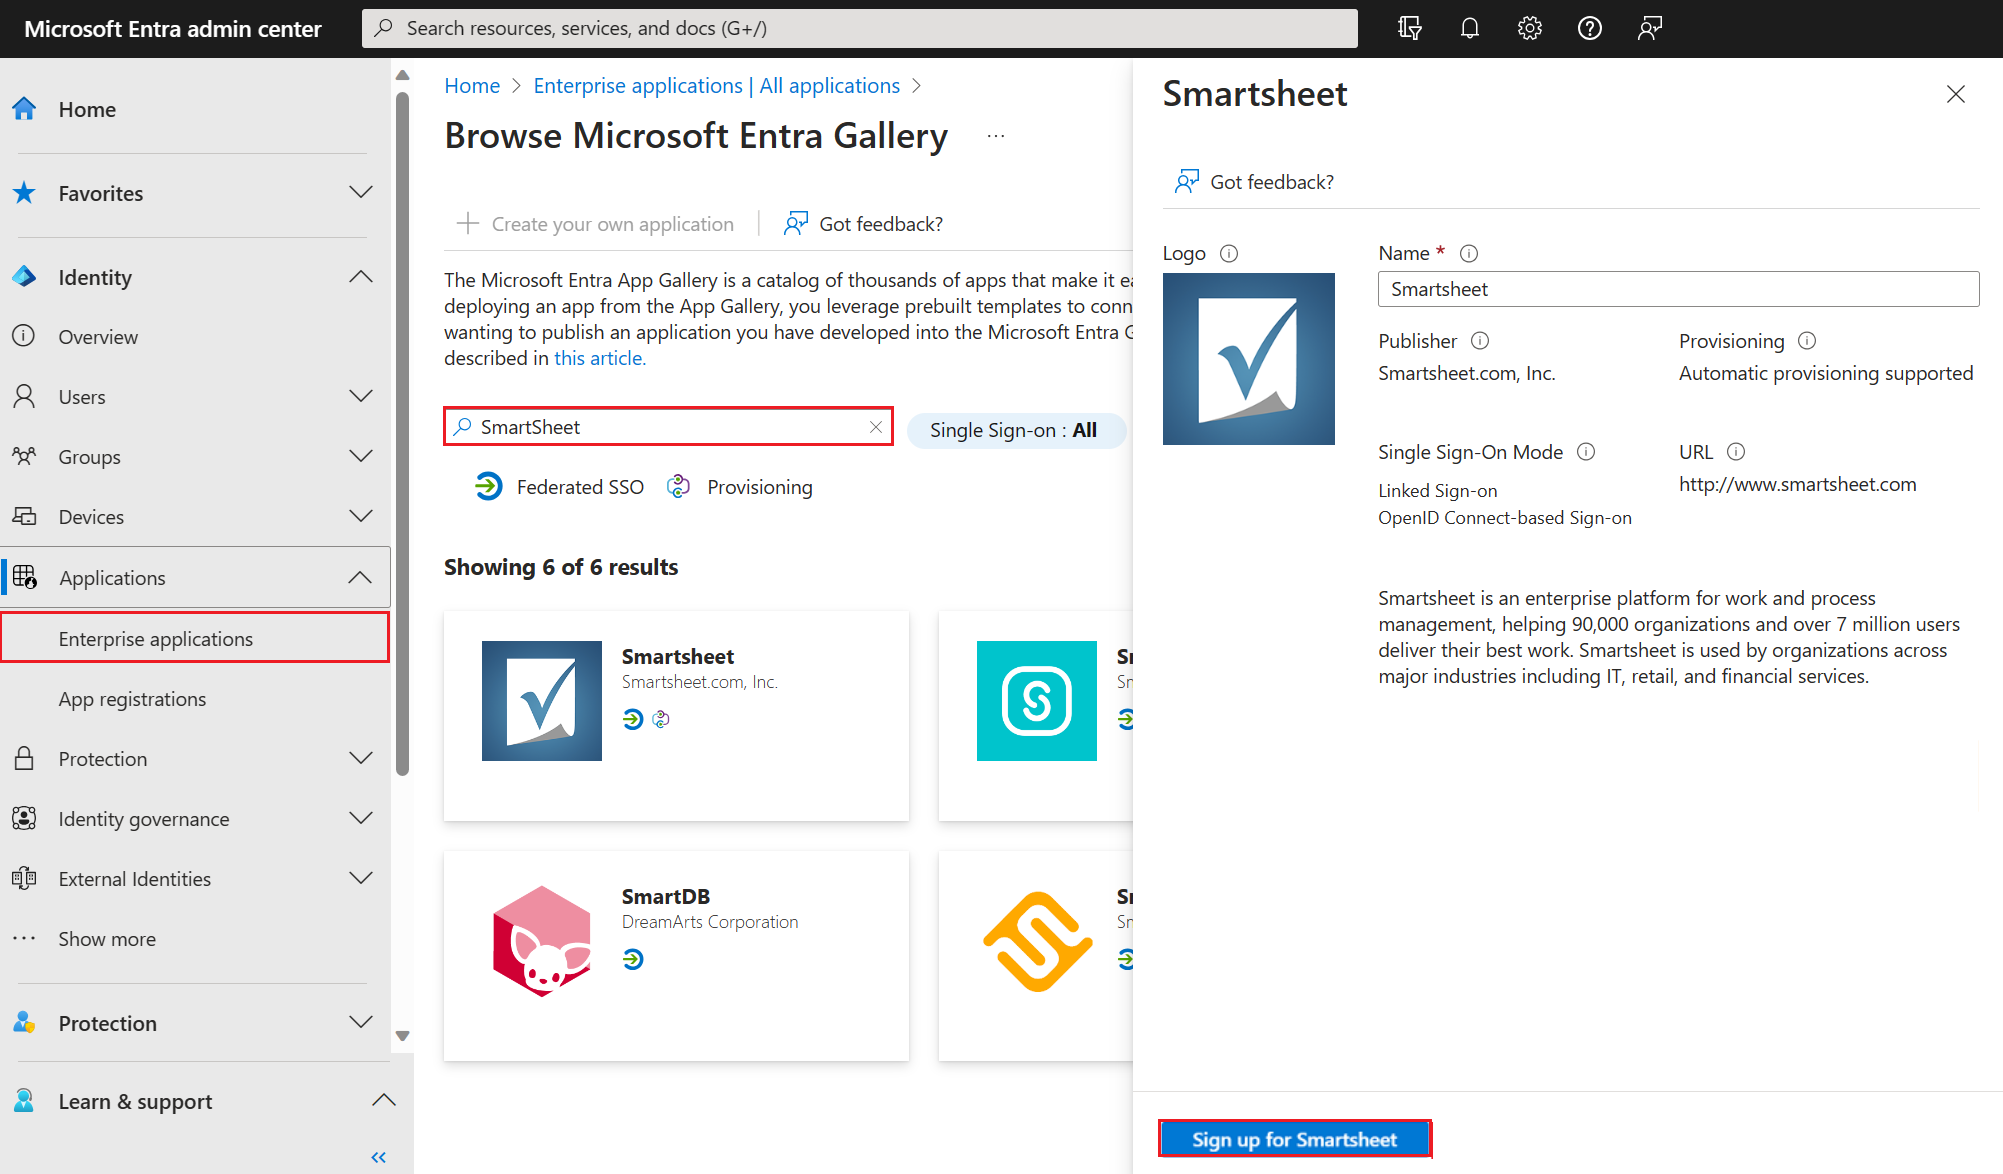
When you add an enterprise application that uses the OIDC standard for SSO, you select the Sign Up button. The button is on the right hand side pane when you select the app from the app gallery. When you select the button, you complete the sign-up process for the application.
To configure OIDC-based SSO for a gallery application:
Sign in to the Microsoft Entra admin center as at least a Cloud Application Administrator.
Browse to Entra ID > Enterprise apps > All applications.
In the All applications pane, select New application.
The Browse Microsoft Entra Gallery pane opens. In this example, we use SmartSheet.
Select Sign-up for SmartSheet. Sign in with the user account credentials from Microsoft Entra ID. If you already have a subscription to the application, then user details and tenant information is validated. If the application isn't able to verify the user, then it redirects you to sign up for the application service.
After entering the sign-in credentials, the consent screen appears. The consent screen provides information about the application and the permissions it requires.
Select Consent on behalf of your organization and then select Accept. The application is added to your tenant and the application home page appears.

Contact the application vendor to learn about any additional configuration steps required for the application.
Note
You can add only one instance of a gallery application. Once you add an application and try to provide consent again, you can't add it again to the tenant.
For more information about user and admin consent, see Understand user and admin consent. For comprehensive information about the consent framework, see Permissions and consent in the Microsoft identity platform.
Configure OIDC SSO for custom (non-gallery) applications
For applications not available in the Microsoft Entra gallery, you need to manually register and configure the application. This section provides step-by-step guidance for setting up OIDC SSO with a custom application.
Step 1: Register your application
- Sign in to the Microsoft Entra admin center as at least a Cloud Application Administrator.
- Browse to Entra ID > App registrations > New registration.
- Enter a Name for your application (for example, "My Custom Web App").
- Under Supported account types, select the appropriate option:
- Accounts in this organizational directory only for single-tenant applications
- Accounts in any organizational directory for more information on multitenant applications, see multitenant applications
- Accounts in any organizational directory and personal Microsoft accounts if you want to support both work/school and personal accounts
- For Redirect URI, select the platform type and enter your application's redirect URI:
- Web: For server-side web applications (for example,
https://yourdomain.com/auth/callback) - Single-page application (SPA): For client-side applications using modern auth flows (for example,
https://yourdomain.comorhttp://localhost:3000for development) - Public client/native: For mobile and desktop applications
- Web: For server-side web applications (for example,
- Select Register.
Step 2: Configure authentication settings
In your app registration, navigate to Authentication.
Verify your redirect URIs are correctly configured for your platform type.
Configure authentication flows (important for security):
For Single-Page Applications (SPAs):
- Ensure your redirect URIs are listed under the Single-page application platform. This option automatically configures the secure Authorization Code flow with PKCE, which is the recommended approach for SPAs
- Do NOT enable the implicit grant option unless necessary for legacy applications
For Web Applications:
- Ensure your redirect URIs are listed under the Web platform. This option configures the standard Authorization Code flow.
Warning
The implicit grant flow is not recommended for new applications due to security vulnerabilities, including token leakage in browser history. Microsoft strongly recommends using the Authorization Code flow with PKCE for single-page applications instead. Only enable these options if you have a legacy application that can't be updated to support more secure flows and you understand the associated security risks.
For more information on authentication flows, see Microsoft identity platform authentication flows.
Step 3: Configure client credentials (for web applications)
If your application is a confidential client (server-side web application that can securely store secrets):
- Navigate to Certificates & secrets.
- Select New client secret.
- Add a description and select an expiration period.
- Select Add and copy the secret value immediately (it can't be shown again).
- Store the client secret securely in your application configuration.
Tip
For production applications, consider using certificates instead of client secrets for enhanced security. See Certificate credentials.
Step 4: Configure API permissions
- Navigate to API permissions.
- The
User.Readpermission for Microsoft Graph is added by default. - For OIDC authentication, you typically need these delegated permissions:
- openid: Required for OIDC authentication
- profile: To access user's profile information
- email: To access user's email address
- To add more permissions:
- Select Add a permission
- Choose Microsoft Graph
- Select Delegated permissions
- Search for and select the required permissions (for example, openid, profile, email)
- Select Add permissions
- If your application requires permissions that need admin consent, select Grant admin consent for [your tenant].
For an introduction to permissions and consent, see Permissions and consent in the Microsoft identity platform.
Step 5: Configure optional claims (if needed)
- Navigate to Token configuration.
- Select Add optional claim.
- Choose the optional claims you want to add (for example,
email,given_name,family_name). - Select Add to apply the changes.
Step 6: Gather application details
After registration and configuration, collect the following information needed for your application:
- From the Overview page, note:
- Application (client) ID: Your app's unique identifier
- Directory (tenant) ID: Your tenant's unique identifier
- Select Endpoints to view the OIDC metadata and endpoints:
- OIDC metadata document:
https://login.microsoftonline.com/{tenant}/v2.0/.well-known/openid_configuration - Authorization endpoint: For initiating sign-in flows
- Token endpoint: For exchanging authorization codes for tokens
- JWKS URI: For token signature validation
- OIDC metadata document:
These details are used in your application's OIDC library configuration.
Step 7: Configure your application code
Use the gathered information to configure your application's OIDC library with:
- Client ID: The Application (client) ID from step 5
- Client Secret: If applicable (for web applications)
- Redirect URI: The same URI configured in step 1
- Authority/Issuer:
https://login.microsoftonline.com/{tenant}/v2.0/(replace {tenant} with your tenant ID) - Scopes: Typically
openid profile emailfor basic OIDC authentication
For specific implementation guidance, see Authorization Code flow with PKCE for web applications.
Step 8: Test your OIDC SSO configuration
Using an online tool: You can test the basic authentication flow using https://jwt.ms:
- Construct a sign-in URL:
https://login.microsoftonline.com/{tenant}/oauth2/v2.0/authorize?client_id={client_id}&response_type=id_token&redirect_uri=https://jwt.ms&scope=openid&nonce={random_value} - Replace
{tenant}and{client_id}with your values - Navigate to this URL in a browser to test the authentication flow
- Construct a sign-in URL:
Within your application: Integrate the OIDC library in your application and test the complete sign-in experience.
Assign users: Navigate to Enterprise applications, find your app, and assign users or groups under Users and groups.
Multitenant app considerations
If your application needs to support users from multiple organizations:
- Configure the app registration with Accounts in any organizational directory
- Use the common endpoint:
https://login.microsoftonline.com/common/ - Implement proper tenant validation in your application logic
For detailed guidance, see How to: Convert your app to be multitenant.
Troubleshooting common issues
- Invalid redirect URI: Ensure the redirect URI in your app registration exactly matches what your application sends
- Consent issues: Check if admin consent is required for the requested permissions
- Token validation errors: Verify you're using the correct JWKS URI and validating the token signature
- Multi-tenant issues: Ensure you're using the correct endpoint (common vs. tenant-specific)
For comprehensive troubleshooting guidance, see Microsoft identity platform error codes.