Note
Access to this page requires authorization. You can try signing in or changing directories.
Access to this page requires authorization. You can try changing directories.
Application discovery lets administrators see which applications people use on their corporate network. By identifying which applications are accessed and by whom, administrators can create private applications with precise segmentation and least privilege access, so users only get the access they need.
With Quick Access, you can quickly onboard to Private Access by publishing wide IP ranges and wildcard FQDNs, like with traditional VPN solutions. You can then transition from Quick Access to per-application publishing for better control and granularity over each application. For example, you can create a Conditional Access policy and set user assignments per application.
This article walks through how to use Application discovery to detect which applications users access (through Quick Access) and create separate private applications.
Prerequisites
- A Microsoft Entra tenant onboarded to Microsoft Entra Private Access.
- A Microsoft Entra tenant configured with Quick Access.
- A device configured with the Global Secure Access client (Windows, macOS, Android, iOS).
Discover applications
To view a list of all the application segments in Quick Access that users accessed via the Global Secure Access client in the last 30 days:
- Sign in to the Microsoft Entra admin center as a Global Secure Access Administrator.
- Browse to Global Secure Access > Applications > Application discovery.
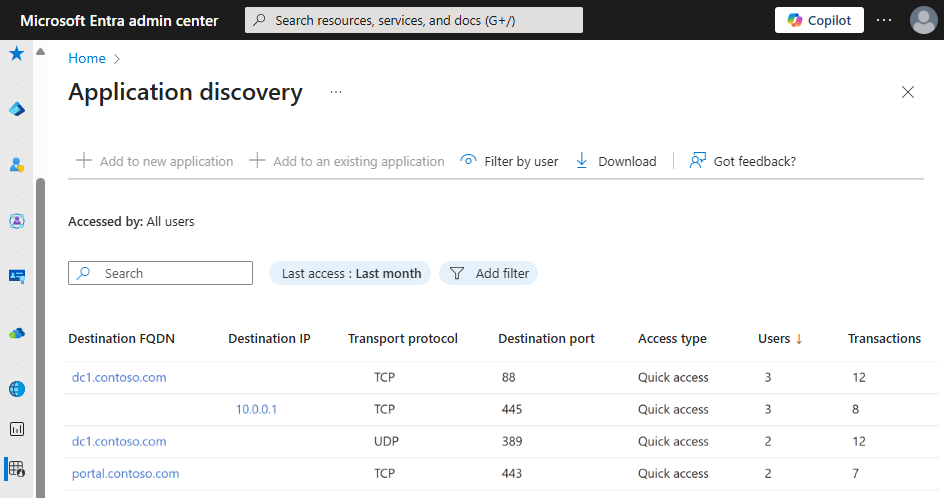
By default, the Application discovery view sorts application segments in descending order by number of users. The most used application segments appear at the top of the list, making them easier for the admin to find.
The administrator can adjust the time range, add other filters, and sort the application segments according to each of the columns. The administrator can also filter by user to see the list of the application segments accessed by a specific user. From the Search field, the administrator can filter by fully qualified domain name (FQDN), IP address, and port address.
Each application segment includes the following columns:
- Destination FQDN: The FQDN of the application segment.
- Destination IP: The IP of the application segment.
- Transport protocol: The transport protocol of the application segment. Private Access supports Transmission Control Protocol (TCP) and User Datagram Protocol (UDP).
- Destination port: The port of the application segment.
- Users: The number of users who accessed the application segment.
- Transactions: The number of transactions (connections) to the application segment.
- Devices - The number of devices used to access the application segment.
- Sent bytes: The total bytes of data the user device sent to the application segment.
- Received bytes: The total bytes of data the user device received from the application segment.
- Last access: The last time in the time range the application segment was accessed.
- First access: The first time in the time range the application segment was accessed.
Create a new application
Use Application discovery to create new Microsoft Entra ID applications based on the discovered application segments of the main table. To add an application segment to a new application:
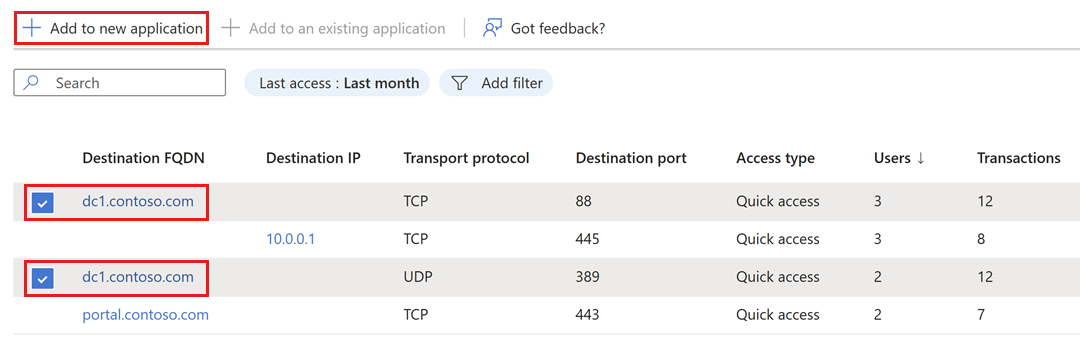
- From the Application discovery list, choose one or more application segments that correspond to an application that you would like to create.
- Often, one application uses one application segment. For example:
- A file server, such as:
filesrv.contoso.com, TCP, 445. - A portal, such as:
internalportal.contoso.com, TCP, 443.
- A file server, such as:
- However, sometimes a single application uses several ports, protocols, or spans across multiple servers (FQDNs/IPs). In this case, you can choose several application segments and even add others manually. For example:
- Publishing ADDS services in a specific AD site:
dc1.contoso.comanddc2.contoso.com, TCP, 88, 135, 137, 138, 389, 445, 464, 636, 3268, 3269 and a fixed high port for Netlogondc1.contoso.comanddc2.contoso.com, UDP, 88, 123, 389, 464.
- Publishing ADDS services in a specific AD site:
- For a list of ADDS ports, see How to configure a firewall for Active Directory domains and trusts.
- Often, one application uses one application segment. For example:
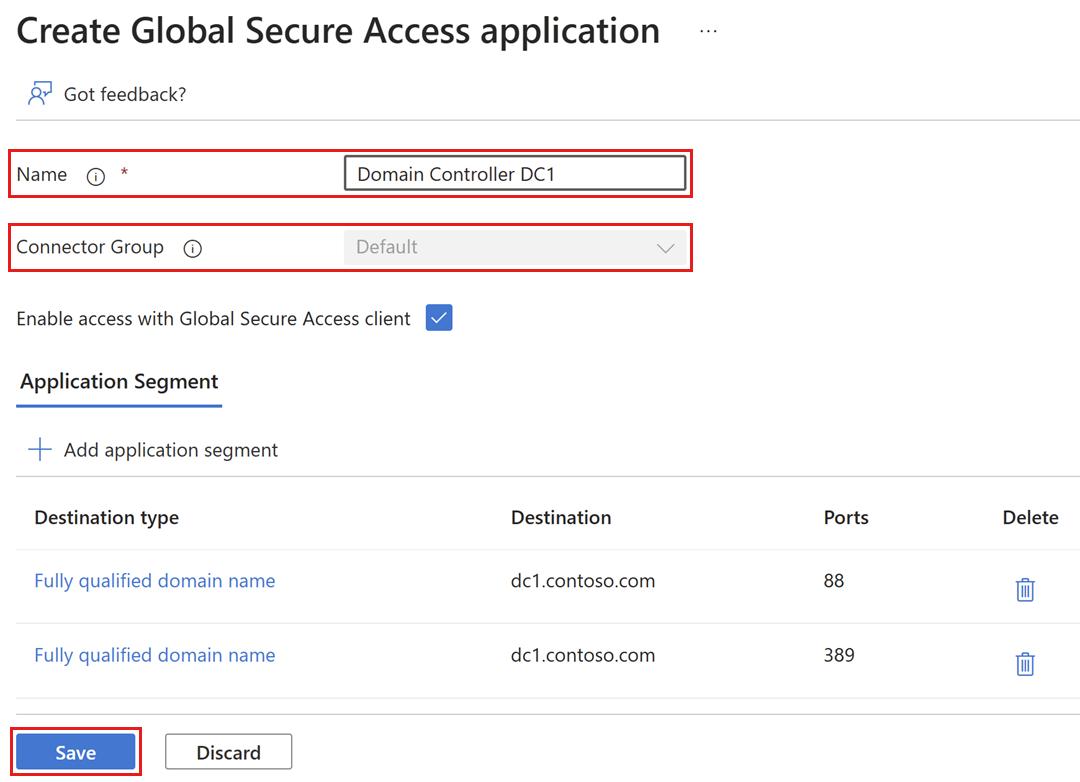
- Select Add to new application. The Create Global Secure Access application screen opens, showing the selected application segments.
- Enter a Name for the application and select the corresponding Connector Group
- Add or delete application segments manually if needed.
- Select Save to apply your changes.
- Enable access for the appropriate users by adjusting the users and groups assigned to the new application.
- You should fine-tune the assignments after creating the application. This way, the list contains only groups of users who require access to the new application, according to the principle of least privilege.
- For enterprise applications:
- Browse to Global Secure Access > Applications > Enterprise applications > Users and groups.
- Select the application you created.
- Modify the user and group assignments as needed.
Important
Global Secure Access prioritizes traffic for individually defined applications over Quick Access. When you move an application segment from Quick Access to a specific Global Secure Access app, all traffic to that segment follows your application configuration. No traffic to the new application goes through Quick Access, even if the segment stays within the ranges defined by Quick Access. To avoid service disruption, new applications you create through application discovery inherit all assigned users and groups from Quick Access at creation. After you validate the new application, rescope the application's permissions to only the users who need to connect to the defined segments.
- (Optional) For extra security, you can set Conditional Access policies according to your company's security policies. For example, you might want to require multifactor authentication (MFA) and device compliance when users access a critical application.
Note
Application segments persist in the Application discovery main table even after you create an application, until a user signs in to the new application and accesses the resource. In the future, the Application discovery main table will update regardless of user interaction.
Add to an existing application
You can use Application discovery to add application segments to an existing private application. To add an application segment to an existing application:
- From the Application discovery list, choose one or more application segments.
- Select Add to an existing application.
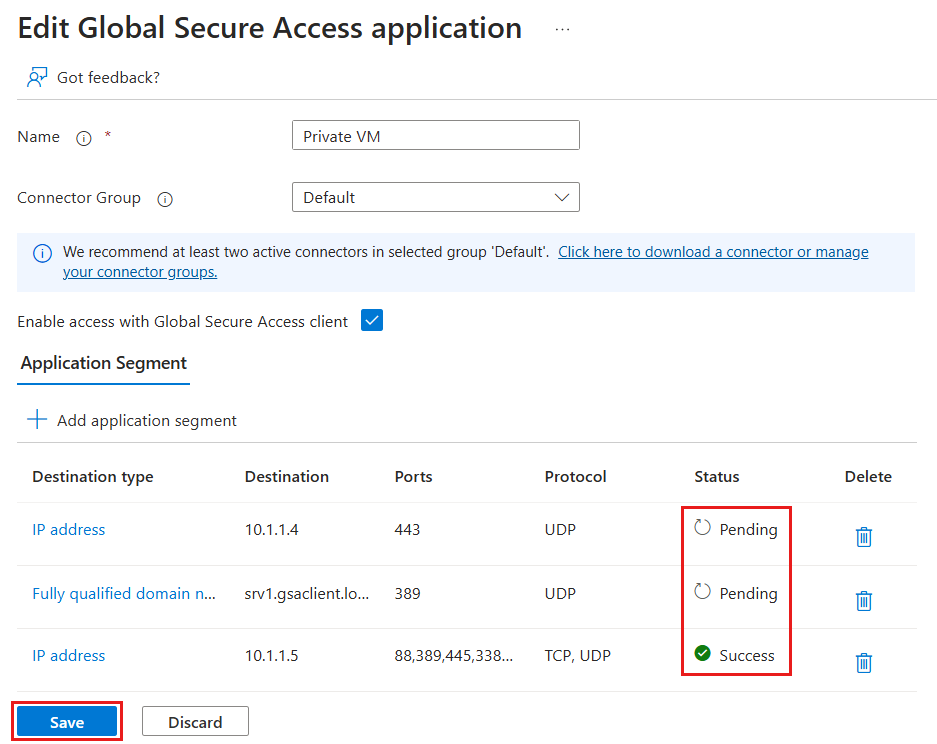
- Choose the existing private application to which you would like to add the segments. The Edit Global Secure Access application screen opens, showing the properties of the existing application, the selected application segments (with status Pending), and any previously configured application segments (with status Success).
- Review the configuration and revise the Name, Connector Group, and application segments, and make any necessary revisions.
- To apply your changes, select Save.
View the details of an application segment
Before you decide to create a private application, you might want to review other details of the application segment.
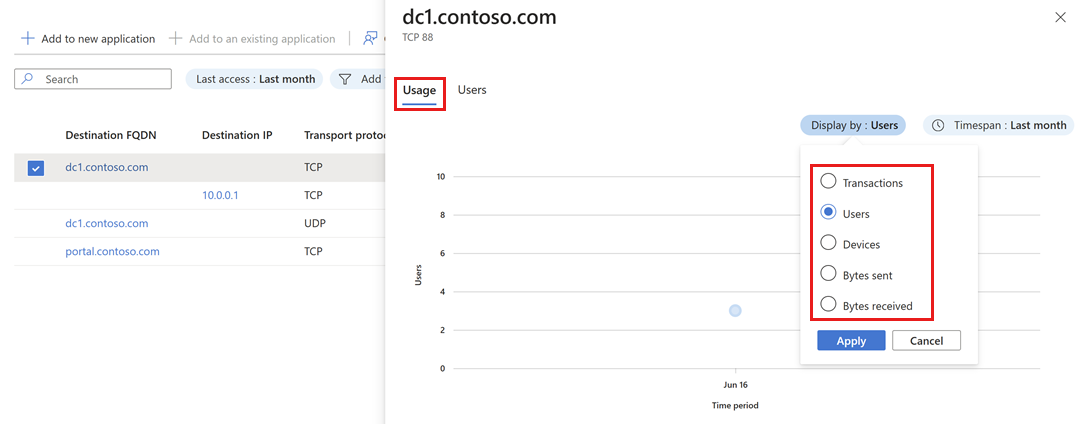
- On the Application discovery table, select the Destination FQDN or Destination IP for the application segment you wish to explore.
- The Usage tab defaults to a graph of Users over time. You can set the graph to show the distribution of Transactions, Devices, Bytes sent, and Bytes received over time. You can also change the time range by adjusting the Timespan setting.
- The Users tab shows the list of users who accessed the selected application segment in the last 30 days.
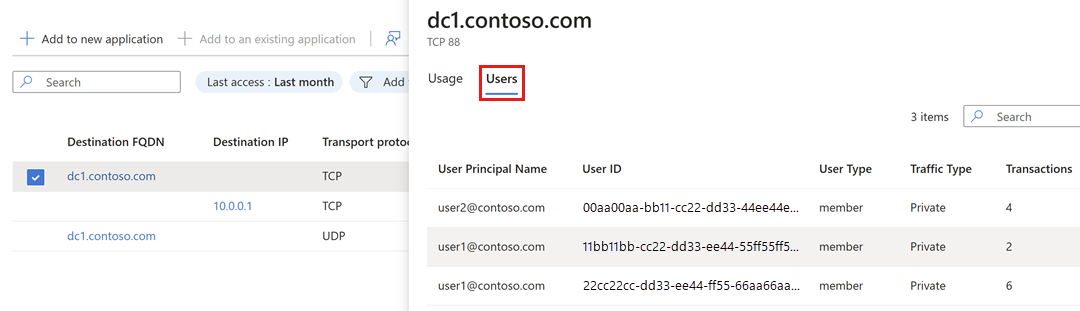
Important
Use the list of users to inform the decisions you make regarding the users and groups that you plan to assign to the Microsoft Entra application once you onboard the selected application segment.