Note
Access to this page requires authorization. You can try signing in or changing directories.
Access to this page requires authorization. You can try changing directories.
In this quickstart, you create a minimal Model Context Protocol (MCP) server using the C# SDK for MCP, connect to it using GitHub Copilot, and publish it to NuGet. MCP servers are services that expose capabilities to clients through the Model Context Protocol (MCP).
Note
The Microsoft.Extensions.AI.Templates experience is currently in preview. The template uses the ModelContextProtocol library and the MCP registry server.json schema, which are both in preview.
Prerequisites
- .NET 10.0 SDK (preview 6 or higher)
- Visual Studio Code
- GitHub Copilot extension for Visual Studio Code
- NuGet.org account
Create the project
In a terminal window, install the MCP Server template (version 9.7.0-preview.2.25356.2 or newer):
dotnet new install Microsoft.Extensions.AI.TemplatesCreate a new MCP server app with the
dotnet new mcpservercommand:dotnet new mcpserver -n SampleMcpServerNavigate to the
SampleMcpServerdirectory:cd SampleMcpServerBuild the project:
dotnet buildUpdate the
<PackageId>in the.csprojfile to be unique on NuGet.org, for example<NuGet.org username>.SampleMcpServer.
Configure the MCP server in Visual Studio Code
Configure GitHub Copilot for Visual Studio Code to use your custom MCP server:
If you haven't already, open your project folder in Visual Studio Code.
Create a
.vscodefolder at the root of your project.Add an
mcp.jsonfile in the.vscodefolder with the following content:{ "servers": { "SampleMcpServer": { "type": "stdio", "command": "dotnet", "args": [ "run", "--project", "<RELATIVE PATH TO PROJECT DIRECTORY>" ] } } }Save the file.
Test the MCP server
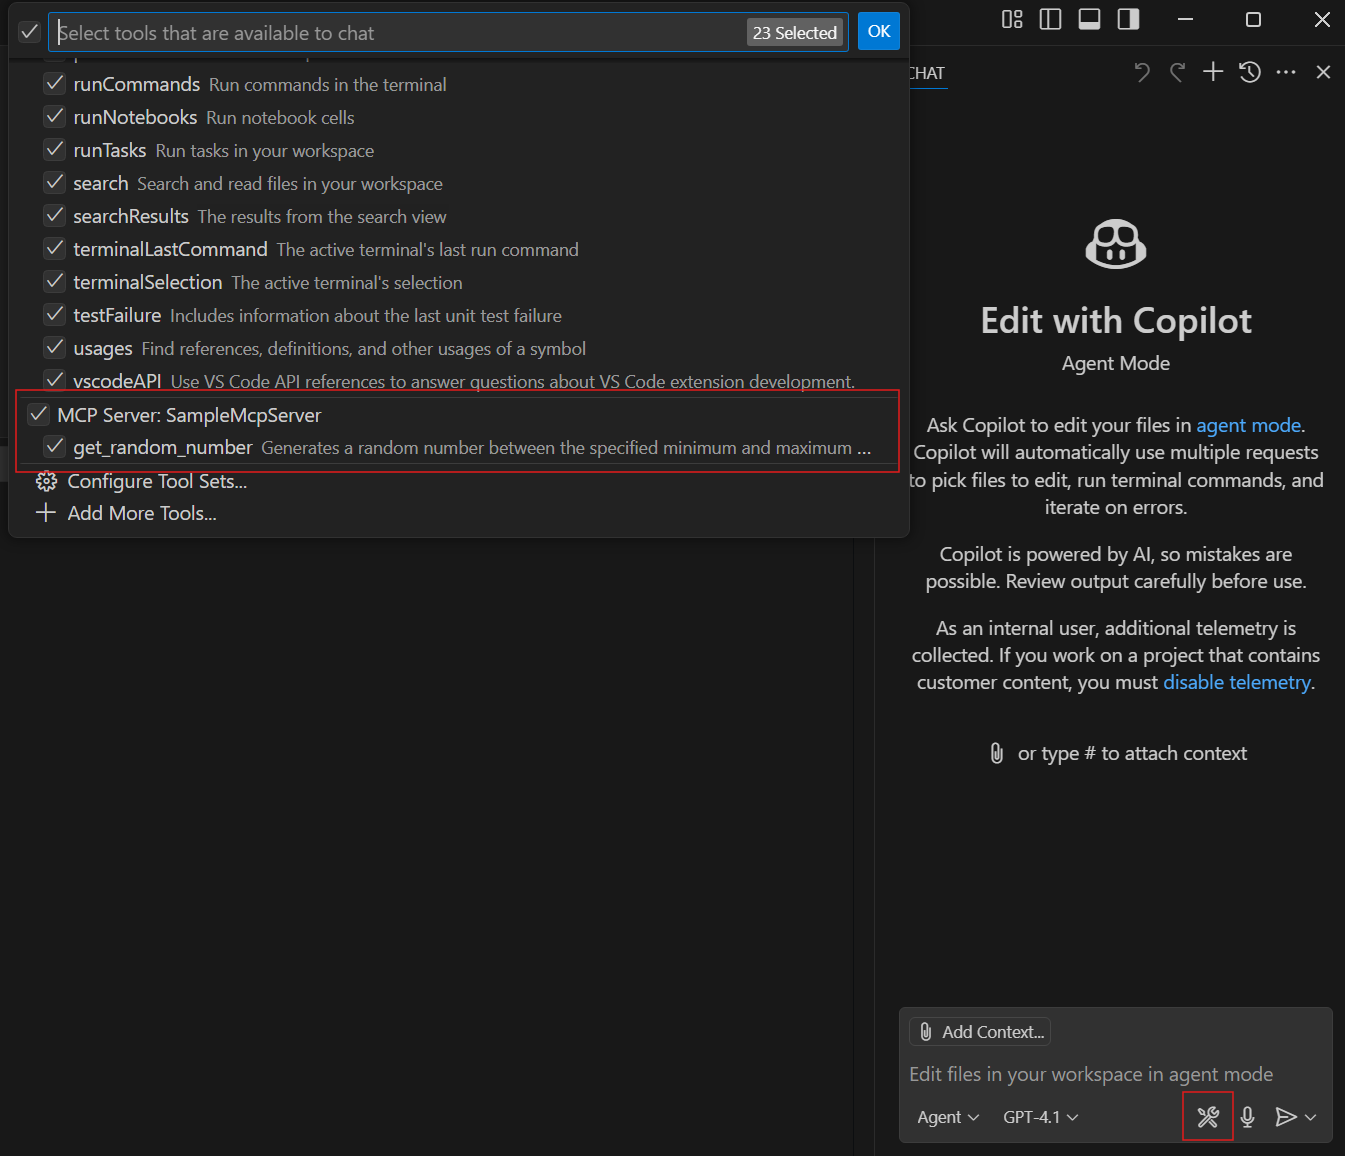
The MCP server template includes a tool called get_random_number you can use for testing and as a starting point for development.
Open GitHub Copilot in Visual Studio Code and switch to chat mode.
Select the Select tools icon to verify your SampleMcpServer is available with the sample tool listed.
Enter a prompt to run the get_random_number tool:
Give me a random number between 1 and 100.GitHub Copilot requests permission to run the get_random_number tool for your prompt. Select Continue or use the arrow to select a more specific behavior:
- Current session always runs the operation in the current GitHub Copilot Agent Mode session.
- Current workspace always runs the command for the current Visual Studio Code workspace.
- Always allow sets the operation to always run for any GitHub Copilot Agent Mode session or any Visual Studio Code workspace.
Verify that the server responds with a random number:
Your random number is 42.
Add inputs and configuration options
In this example, you enhance the MCP server to use a configuration value set in an environment variable. This could be configuration needed for the functioning of your MCP server, such as an API key, an endpoint to connect to, or a local directory path.
Add another tool method after the
GetRandomNumbermethod inTools/RandomNumberTools.cs. Update the tool code to use an environment variable.[McpServerTool] [Description("Describes random weather in the provided city.")] public string GetCityWeather( [Description("Name of the city to return weather for")] string city) { // Read the environment variable during tool execution. // Alternatively, this could be read during startup and passed via IOptions dependency injection var weather = Environment.GetEnvironmentVariable("WEATHER_CHOICES"); if (string.IsNullOrWhiteSpace(weather)) { weather = "balmy,rainy,stormy"; } var weatherChoices = weather.Split(","); var selectedWeatherIndex = Random.Shared.Next(0, weatherChoices.Length); return $"The weather in {city} is {weatherChoices[selectedWeatherIndex]}."; }Update the
.vscode/mcp.jsonto set theWEATHER_CHOICESenvironment variable for testing.{ "servers": { "SampleMcpServer": { "type": "stdio", "command": "dotnet", "args": [ "run", "--project", "<RELATIVE PATH TO PROJECT DIRECTORY>" ], "env": { "WEATHER_CHOICES": "sunny,humid,freezing" } } } }Try another prompt with Copilot in VS Code, such as:
What is the weather in Redmond, Washington?VS Code should return a random weather description.
Update the
.mcp/server.jsonto declare your environment variable input. Theserver.jsonfile schema is defined by the MCP Registry project and is used by NuGet.org to generate VS Code MCP configuration.Use the
environment_variablesproperty to declare environment variables used by your app that will be set by the client using the MCP server (for example, VS Code).Use the
package_argumentsproperty to define CLI arguments that will be passed to your app. For more examples, see the MCP Registry project.
{
  "$schema": "https://modelcontextprotocol.io/schemas/draft/2025-07-09/server.json",
  "description": "<your description here>",
  "name": "io.github.<your GitHub username here>/<your repo name>",
  "packages": [
    {
      "registry_name": "nuget",
      "name": "<your package ID here>",
      "version": "<your package version here>",
      "package_arguments": [],
      "environment_variables": [
        {
          "name": "WEATHER_CHOICES",
          "value": "{weather_choices}",
          "variables": {
            "weather_choices": {
              "description": "Comma separated list of weather descriptions to randomly select.",
              "is_required": true,
              "is_secret": false
            }
          }
        }
      ]
    }
  ],
  "repository": {
    "url": "https://github.com/<your GitHub username here>/<your repo name>",
    "source": "github"
  },
  "version_detail": {
    "version": "<your package version here>"
  }
}
The only information used by NuGet.org in the
server.jsonis the firstpackagesarray item with theregistry_namevalue matchingnuget. The other top-level properties aside from thepackagesproperty are currently unused and are intended for the upcoming central MCP Registry. You can leave the placeholder values until the MCP Registry is live and ready to accept MCP server entries.
You can test your MCP server again before moving forward.
Pack and publish to NuGet
Pack the project:
dotnet pack -c ReleasePublish the package to NuGet:
dotnet nuget push bin/Release/*.nupkg --api-key <your-api-key> --source https://api.nuget.org/v3/index.jsonIf you want to test the publishing flow before publishing to NuGet.org, you can register an account on the NuGet Gallery integration environment: https://int.nugettest.org. The
pushcommand would be modified to:dotnet nuget push bin/Release/*.nupkg --api-key <your-api-key> --source https://apiint.nugettest.org/v3/index.json
For more information, see Publish a package.
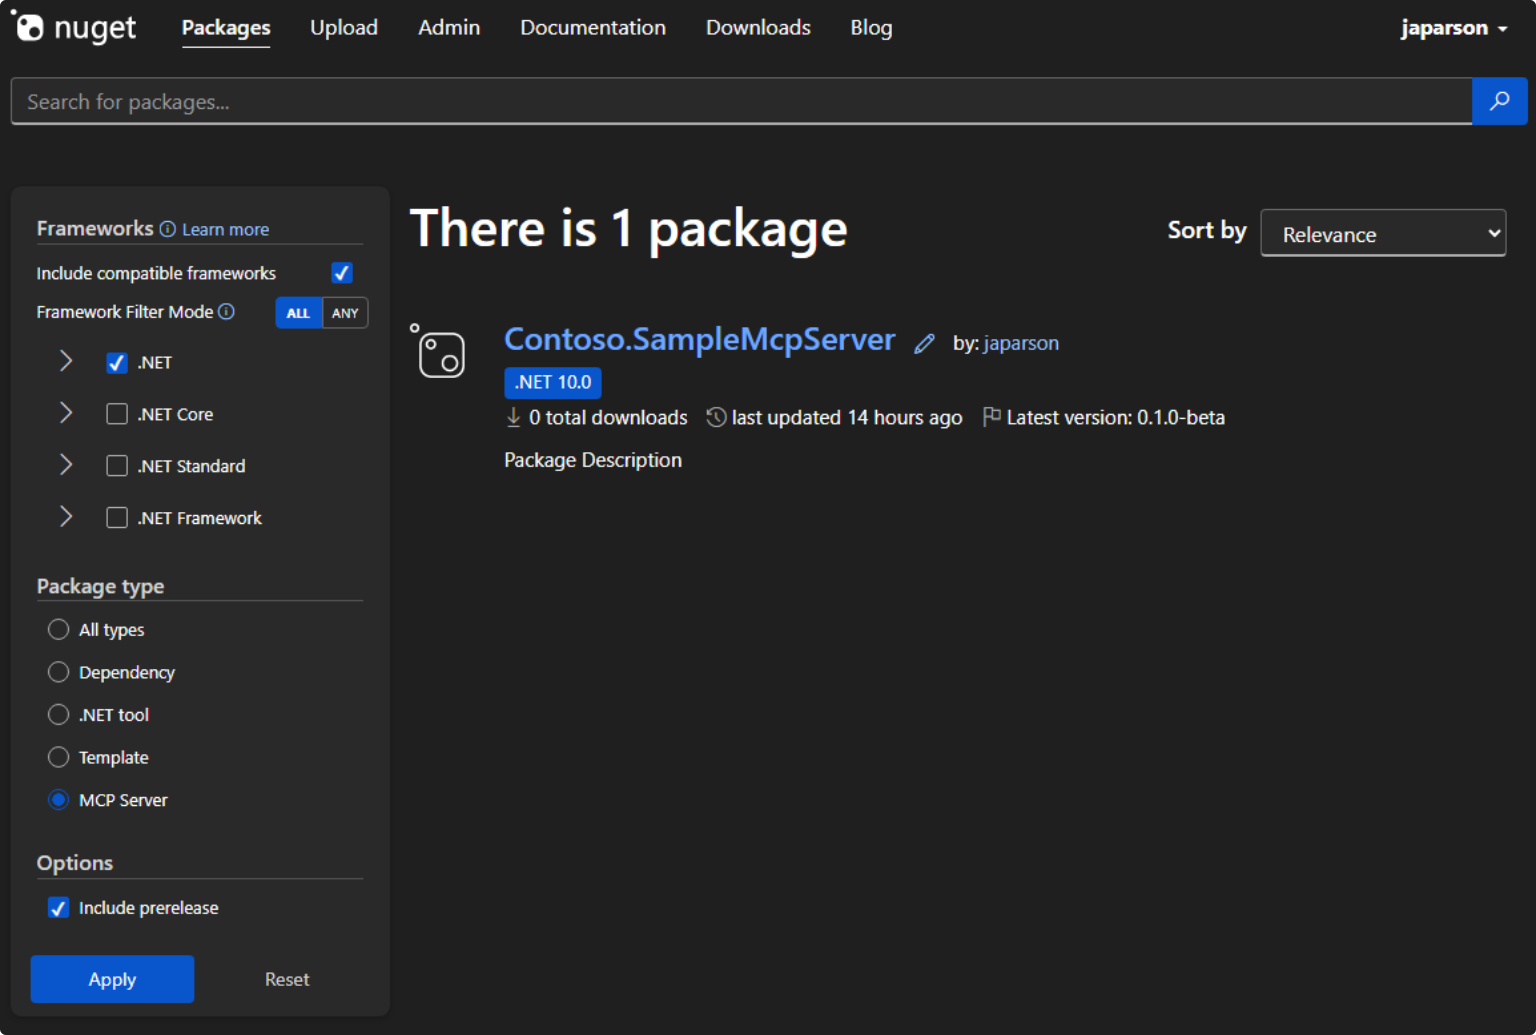
Discover MCP servers on NuGet.org
Search for your MCP server package on NuGet.org (or int.nugettest.org if you published to the integration environment) and select it from the list.
View the package details and copy the JSON from the "MCP Server" tab.
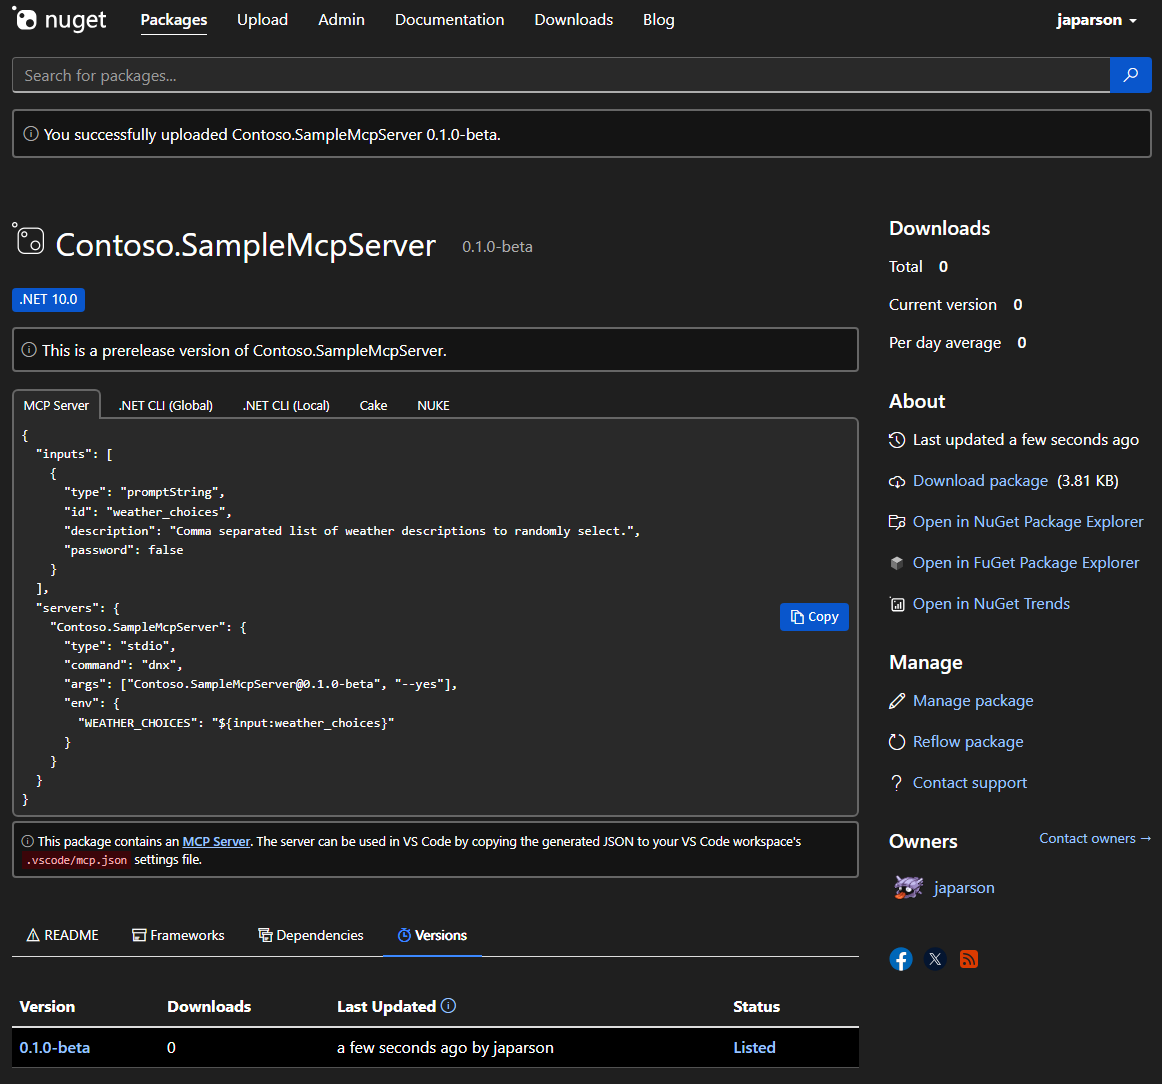
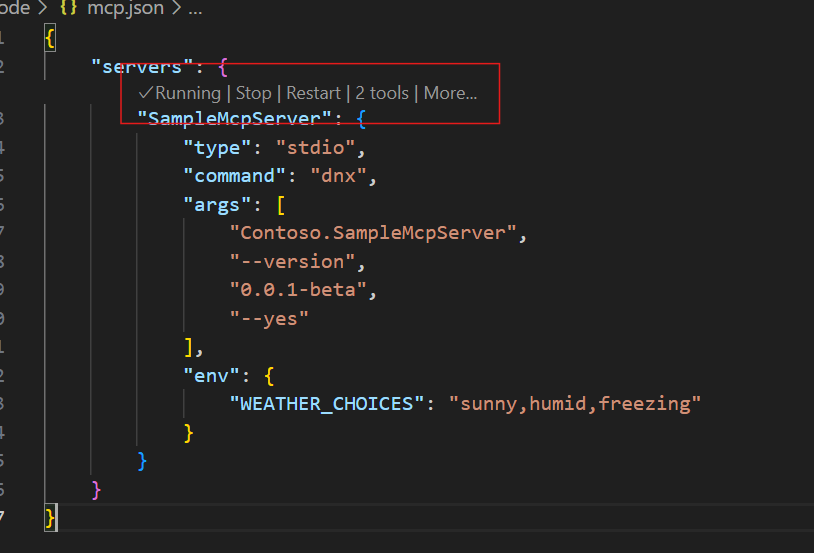
In your
mcp.jsonfile in the.vscodefolder, add the copied JSON, which looks like this:{ "inputs": [ { "type": "promptString", "id": "weather_choices", "description": "Comma separated list of weather descriptions to randomly select.", "password": false } ], "servers": { "Contoso.SampleMcpServer": { "type": "stdio", "command": "dnx", "args": ["Contoso.SampleMcpServer@0.0.1-beta", "--yes"], "env": { "WEATHER_CHOICES": "${input:weather_choices}" } } } }If you published to the NuGet Gallery integration environment, you need to add
"--add-source", "https://apiint.nugettest.org/v3/index.json"at the end of the"args"array.Save the file.
In GitHub Copilot, select the Select tools icon to verify your SampleMcpServer is available with the tools listed.
Enter a prompt to run the new get_city_weather tool:
What is the weather in Redmond?If you added inputs to your MCP server (for example,
WEATHER_CHOICES), you will be prompted to provide values.Verify that the server responds with the random weather:
The weather in Redmond is balmy.
Common issues
The command "dnx" needed to run SampleMcpServer was not found.
If VS Code shows this error when starting the MCP server, you need to install a compatible version of the .NET SDK.
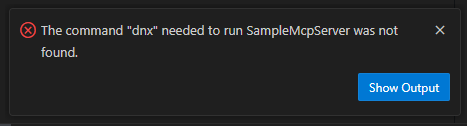
The dnx command is shipped as part of the .NET SDK, starting with version 10 preview 6. Install the .NET 10 SDK to resolve this issue.
GitHub Copilot does not use your tool (an answer is provided without invoking your tool).
Generally speaking, an AI agent like GitHub Copilot is informed that it has some tools available by the client application, such as VS Code. Some tools, such as the sample random number tool, might not be leveraged by the AI agent because it has similar functionality built in.
If your tool is not being used, check the following:
- Verify that your tool appears in the list of tools that VS Code has enabled. See the screenshot in Test the MCP server for how to check this.
- Explicitly reference the name of the tool in your prompt. In VS Code, you can reference your tool by name. For example,
Using #get_random_weather, what is the weather in Redmond?. - Verify your MCP server is able to start. You can check this by clicking the "Start" button visible above your MCP server configuration in the VS Code user or workspace settings.
Related content
Collaborate with us on GitHub
The source for this content can be found on GitHub, where you can also create and review issues and pull requests. For more information, see our contributor guide.