Note
Access to this page requires authorization. You can try signing in or changing directories.
Access to this page requires authorization. You can try changing directories.
Note
This article is part of a tutorial series on creating and using custom connectors in Azure Logic Apps, Microsoft Power Automate and Microsoft Power Apps, and using Copilot connectors and actions in Microsoft Copilot Studio. Make sure you read the custom connector overview to understand the process.
Go to Use Power Platform connectors in Copilot Studio to learn how you can call the connectors as connector actions in your Microsoft Copilot agent.
To create a custom connector, you must define the API you want to connect to so that the connector understands the API's operations and data structures. In this article, you create a custom connector from scratch, without using an OpenAPI Definition format to describe the Azure Cognitive Services Text Analytics API sentiment operation (our example for this series). Instead, you define the connector completely in the custom connector wizard.
For another way to describe an API, go to Create a custom connector from an OpenAPI definition.
Note
You can currently create a custom connector from scratch starting from Power Automate or Power Apps. For Logic Apps, you must start with at least a basic OpenAPI definition in OpenAPI 2.0 (formerly known as Swagger) format. OpenAPI definitions that are in OpenAPI 3.0 format are not supported.
The use of document, definition, and description are evolving in OpenAPI Specifications.. You may see the terms, definition and description, written interchangeably in this article.
Prerequisites
An API key for the Cognitive Services Text Analytics API
One of the following subscriptions:
Start the custom connector wizard
Sign in to Power Apps or Power Automate.
On the left pane, select Solutions.
Edit or create an unmanaged solution for your custom connector. Learn how to create a solution.
Select the New custom connector dropdown and select Create from blank.
Enter the Connector Name, such as
SentimentDemo. Select Continue to open your connector wizard where you complete these five sections in Power Automate:General
Security
Definition
Code (optional)
Test

Step 1: Update general details
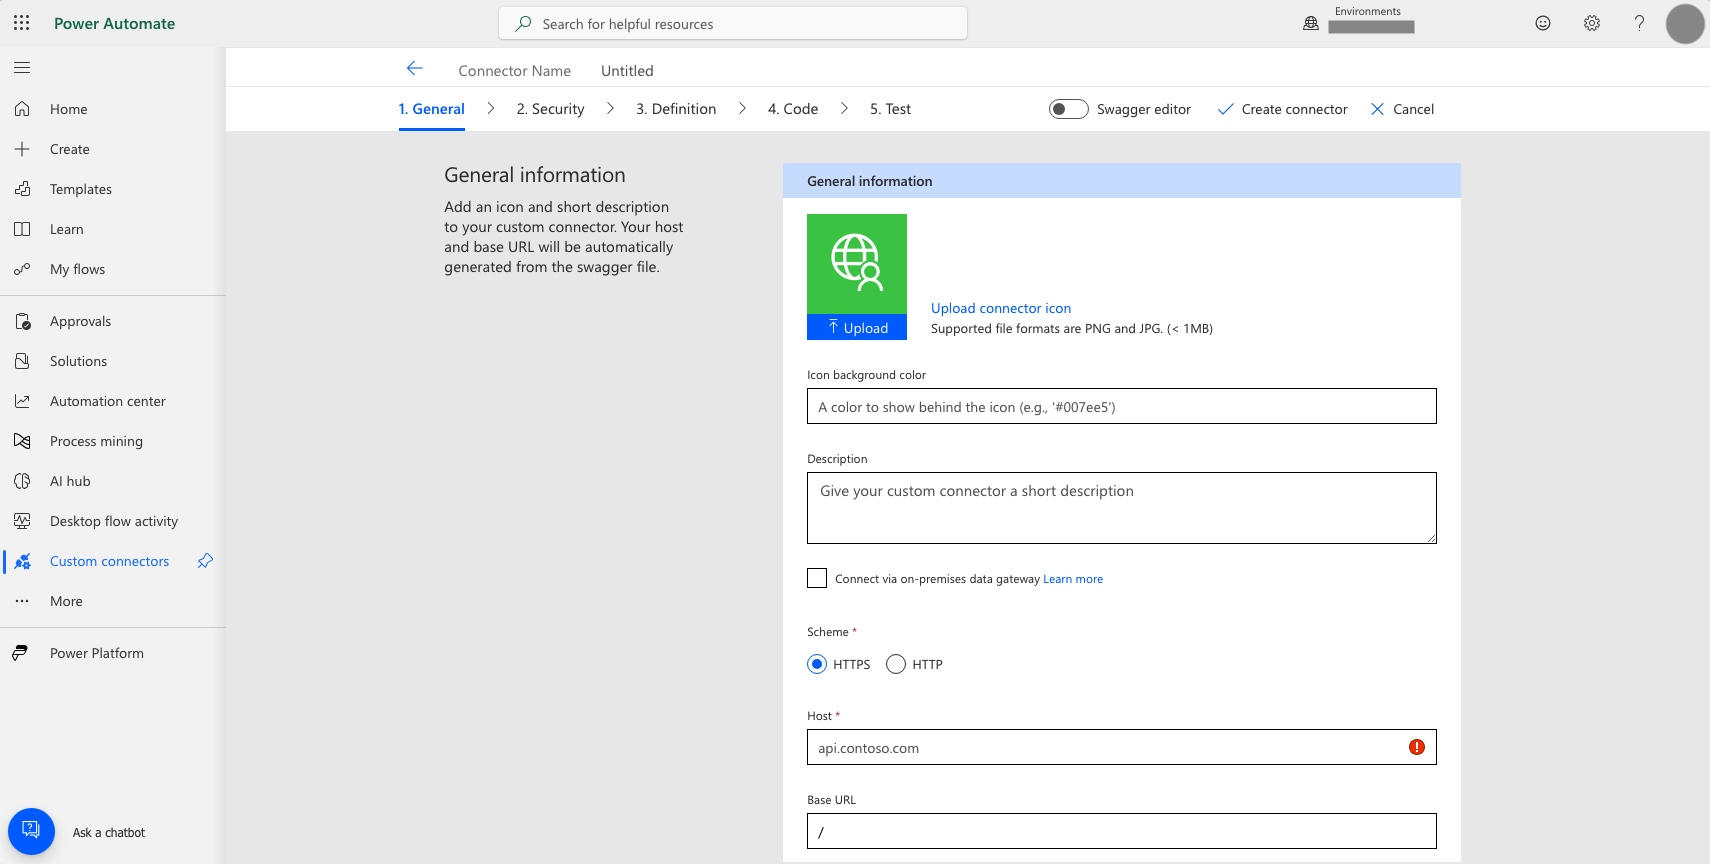
You give connector information such as the icon, description, scheme, host, and base URL in the General section. Take these steps:
Select Upload connector icon or Upload in the icon box to upload a PNG or JPG of your connector icon. Be sure that it's less than 1MB. You can also designate a background color for your icon.
In the Description field, enter a meaningful value. This description appears in the custom connector's details, and it can help others decide whether the connector might be useful to them.
Select your connector's URL scheme, HTTPs or HTTP.
Update the Host field to the address for the Text Analytics API. The connector uses the API host and the base URL to determine how to call the API.
Parameter Value Description Uses the Cognitive Services Text Analytics Sentiment API to determine whether text is positive or negative Host westus.api.cognitive.microsoft.com Update the Base URL, the starting point for all API calls to a specific service.
Select Security at the bottom to go to the next section.
Step 2: Specify authentication type
There are several options available for authentication in custom connectors. The Cognitive Services APIs use API key authentication, so that's what you specify for this tutorial.
In the Security section, under Authentication type, select API Key from the dropdown.
Under API Key, specify a parameter label, name, and location. Specify a meaningful label, because this displays when someone first makes a connection with the custom connector. The parameter name and location must match what the API expects.
Parameter Value Parameter label API key Parameter name Ocp-Apim-Subscription-Key Parameter location Header At the top of the wizard, make sure the name is set to
SentimentDemo, and then select Create connector.Select Definition at the bottom to go to the next section.
Step 3: Create the connector definition
The custom connector wizard gives you many options for describing how your connector functions, and how it's exposed in logic apps, flows, apps, and agents. You can define actions, triggers, references, and policies. We explain the UI and cover a few options in this section, but we also encourage you to explore on your own.
Create an action
The first thing to do is create an action that calls the Text Analytics API sentiment operation. On the Definition tab, the left pane displays any actions, triggers (for Logic Apps, Power Automate, and Copilot Studio), references, and policies that are defined for the connector.
Note
There are no triggers in this connector. To learn about triggers for custom connectors, go to Use a webhook as a trigger for Azure Logic Apps and Power Automate.
Select New action.
In the General area, add a summary, description, and operation ID for this action.
Parameter Value Summary Returns a numeric score representing the sentiment detected Description The API returns a numeric score between 0 and 1. Scores close to 1 indicate positive sentiment, while scores close to 0 indicate negative sentiment. Operation ID DetectSentiment Leave the Visibility property set to none. This property for operations and parameters in a logic app or flow has the following options:
- none: Displayed normally in the logic app or flow
- advanced: Hidden under another menu
- internal: Hidden from the user
- important: Always shown to the user first
In the Request area select Import from sample.
Specify the information necessary to connect to the API, specify the request body (provided after the table), and then select Import.
We provide this information for you, but for a public API, you typically get this information from documentation such as Text Analytics API (v2.0).
Parameter Value Verb POST URL https://westus.api.cognitive.microsoft.com/text/analytics/v2.0/sentimentBody Use the example JSON. Example:
{
  "documents": [
    {
      "language": "string",
      "id": "string",
      "text": "string"
    }
  ]
}
In the Response area, select Add default response.
Specify the response body, and then select Import. As we did for the request body, we provide this information for you, but it's typically provided in the API documentation.
Example:
{
 "documents": [
   {
     "score": 0.0,
     "id": "string"
   }
 ],
 "errors": [
   {
     "id": "string",
     "message": "string"
   }
 ]
}
The Validation area displays any issues that are detected in the API definition.
Fix any issues. You should see a green check mark when the definition validation succeeds.
In the upper-right corner of wizard, select Update connector.
Update the definition
Let's change a few things so that the connector is more friendly when someone uses it in Logic Apps, Power Automate, Power Apps or Copilot Studio.
In the Request area, select body, and then select Edit.
In the Parameter area, you now see the three parameters that the API expects:
id,language, andtext. Select id, and then select Edit.In the Schema Property area, update values for the parameter, and then select Back.
Parameter Value Title ID Description An identifier for each document that you submit Default value 1 Is required Yes In the Parameter area, select language > Edit, and then repeat the process that you used for
idto add the followinglanguagevalues:Parameter Value Title Language Description The two or four character language code for the text Default value en Is required Yes In the Parameter area, select text > Edit, and then repeat the process that you used for
idandlanguageto add the followingtextvalues:Parameter Value Title Text Description The text to analyze for sentiment Default value None Is required Yes In the Parameter area, select Back to return to the main Definition tab.
In the upper-right corner of the wizard, select Update connector.
Select Code at the bottom to go to the next section.
Step 4: (Optional) Use custom code support
Custom code transforms request and response payloads beyond the scope of existing policy templates. Transformations include sending external requests to fetch additional data. When code is used, it takes precedence over the codeless definition. This means that the code will execute, and we don't send the request to the back end.
Note
- This step is optional. You can complete the codeless experience for creating your connector by ignoring this step and going to Step 5: Test the connector.
You can either paste in your code or upload a file with your code. Your code must:
- Be written in C#.
- Have a maximum execution time of five seconds.
- Have a file size no larger than 1 MB.
For instructions and samples of writing code, go to Write code in custom connectors.
For frequently asked questions about custom code, go to Custom code FAQ.
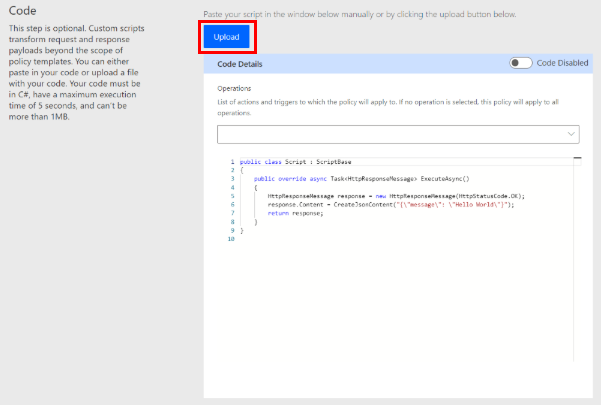
On the Code tab, insert your custom code by using one of the following options:
- Copy/paste
- Select the Upload button.
If you choose to upload your custom code, only files with a .cs or .csx extension are available.
Important
Currently, we only support syntax highlighting in the code editor. Make sure to test your code locally.
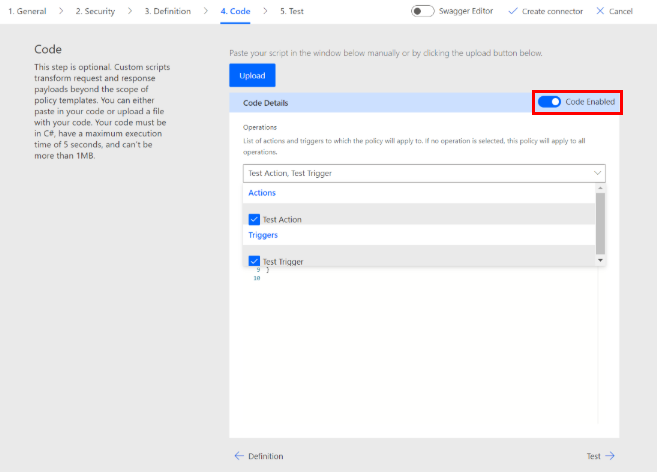
After you paste or upload your code, select the toggle next to Code Disabled to enable your code. The toggle name changes to Code Enabled.
You can enable or disable your code anytime. If the toggle is Code Disabled, your code is deleted.
Select the actions and triggers to apply to your custom code by selecting an option in the dropdown menu. If no operation is selected, the actions and triggers are applied to all operations.
Step 5: Test the connector
Now that you created the connector, test it to make sure it's working properly. Testing is currently available only in Power Automate and Power Apps.
Important
When using an API key, we recommend against testing the connector immediately after you create it. It can take a few minutes until the connector is ready to connect to the API.
On the Test tab, select New connection.
Enter the API key from the Text Analytics API, and then select Create connection.
Note
For APIs that require bearer authentication, add Bearer and one space before the API key.
Return to the Test tab, and do one of the following:
(In Power Automate) You're taken back to the Test tab. Select the refresh icon to make sure the connection information is updated.

(In Power Apps) You're taken to the list of connections available in the current environment. On the left pane, select Custom connectors. Choose the connector you created, and then go back to the Test tab.
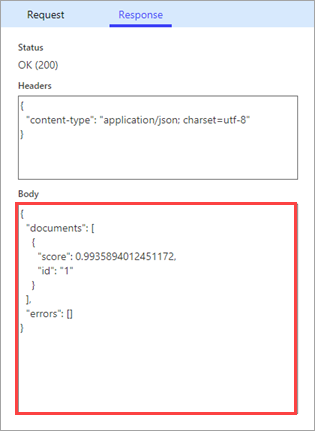
On the Test tab, enter a value for the text field (the other fields use the defaults that you set earlier), and then select Test operation.
The connector calls the API.
Review the response, which includes the sentiment score.
Best practices for CLI users
Download all your connectors, and use Git or any source code management system to save the files.
If there's an incorrect update, redeploy the connector by rerunning the update command with the correct set of files from the source code management system.
Test the custom connector and the settings file in a test environment before deploying in the production environment.
Always double-check that the environment and connector ID are correct.
Next steps
Now that you created a custom connector and defined its behaviors, you can use the connector from:
You can also share a connector within your organization, or get the connector certified so that people outside your organization can use it.
Provide feedback
We greatly appreciate feedback on issues with our connector platform, or new feature ideas. To provide feedback, go to Submit issues or get help with connectors and select your feedback type.