Note
Access to this page requires authorization. You can try signing in or changing directories.
Access to this page requires authorization. You can try changing directories.
You can create scheduled jobs to run at specific times or intervals using the Microsoft Sentinel extension for Visual Studio Code. Jobs allow you to automate data processing tasks to summarize, transform, or analyze data in the Microsoft Sentinel data lake. Jobs are also used to process data and write results to custom tables in the lake tier or analytics tier.
Permissions
Microsoft Entra ID roles provide broad access across all workspaces in the data lake. To create and schedule jobs, read tables across all workspaces, write to the analytics and lake tiers, you must have one of the supported Microsoft Entra ID roles. For more information on roles and permissions, see Roles and permissions in Microsoft Sentinel.
To create new custom tables in the analytics tier, the data lake managed identity must be assigned the Log Analytics Contributor role in the Log Analytics workspace.
To assign the role, follow the steps below:
- In the Azure portal, navigate to the Log Analytics workspace that you want to assign the role to.
- Select Access control (IAM) in the left navigation pane.
- Select Add role assignment.
- In the Role table, select Log Analytics Contributor, then select Next
- Select Managed identity, then select Select members.
- Your data lake managed identity is a system assigned managed identity named
msg-resources-<guid>. Select the managed identity, then select Select. - Select Review and assign.
For more information on assigning roles to managed identities, see Assign Azure roles using the Azure portal.
Create and schedule a job
To create schedule a job, you must save your notebook as a file.
Select File > Save As and save the notebook with a
.ipynbextension.Open the folder where you saved the notebook file using File > Open folder.
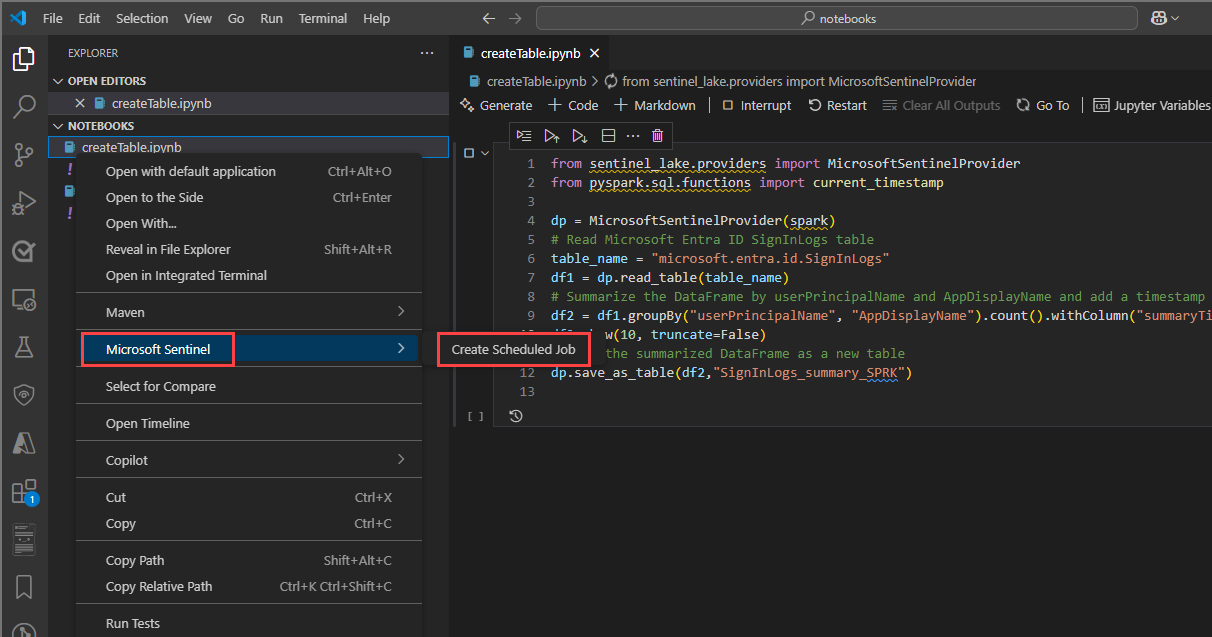
In the Explorer pane, right-click the notebook file and select Microsoft Sentinel, then select Create schedule Job.
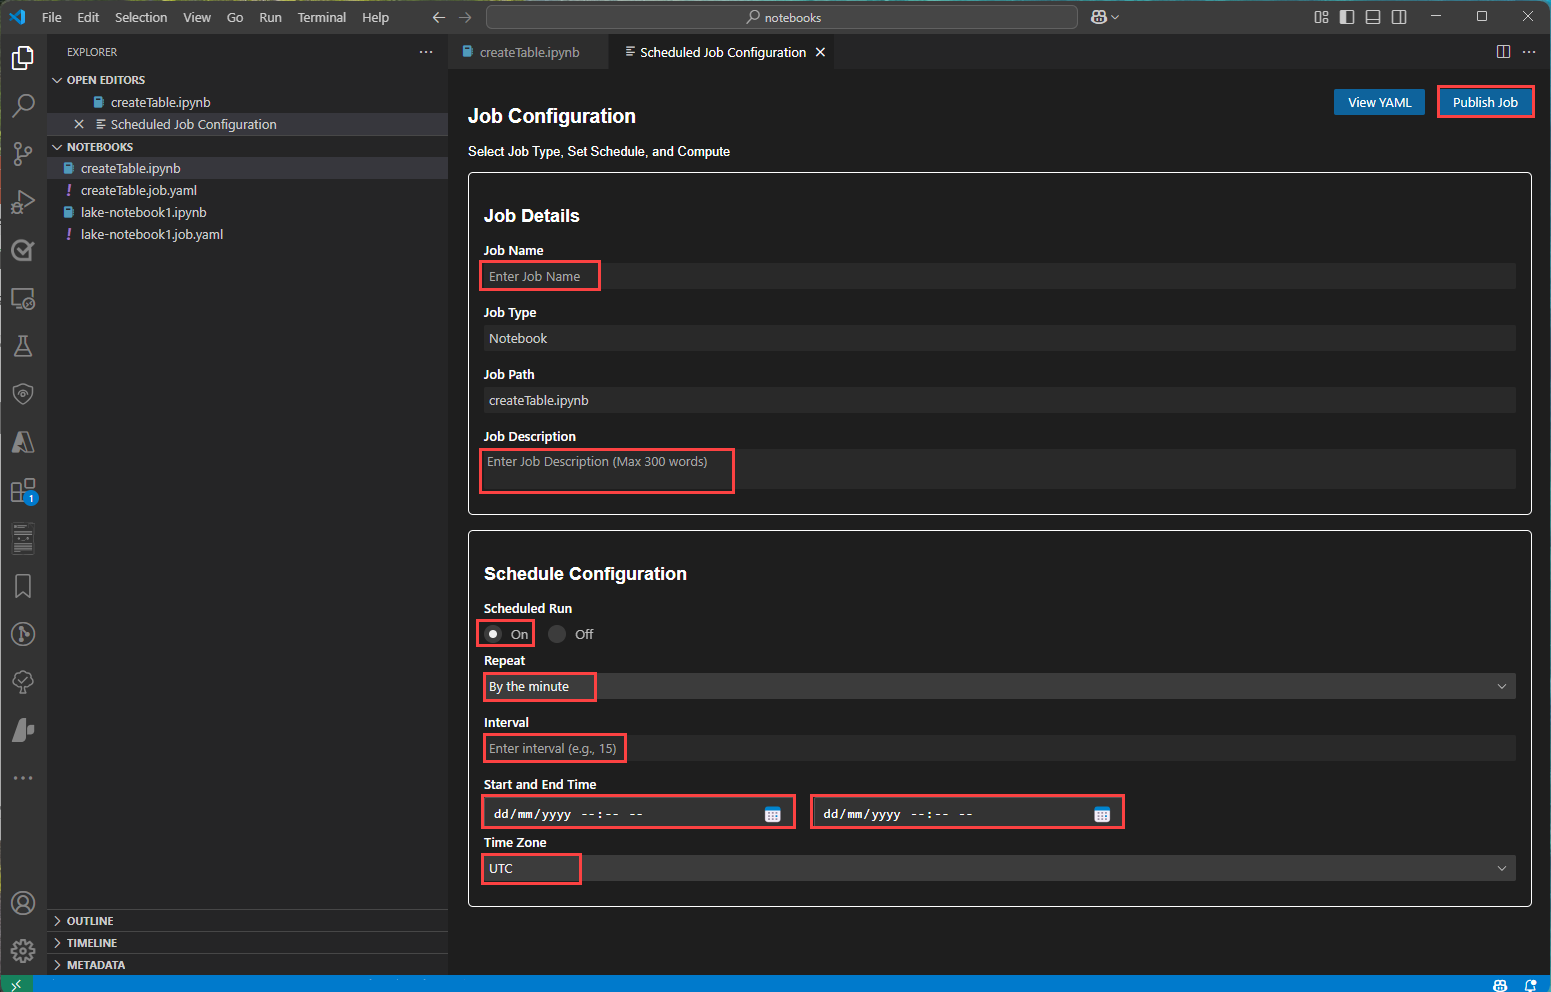
On the Job configuration page, in the Job details section enter a name and description for the job.
To run a job manually without a schedule, select Off under Scheduled Run in the Schedule Configuration section.
- Select Publish job to save the job configuration and publish the job.
To specify a schedule for the job, select On under Scheduled Run in the Schedule Configuration section.
Select a Repeat frequency for the job. You can choose from By the minute, By the hour, or By the day.
Select a Start and end time for the job to run.
Select a Time zone for the start and end times.
Select Publish job to save the job configuration and publish the job.
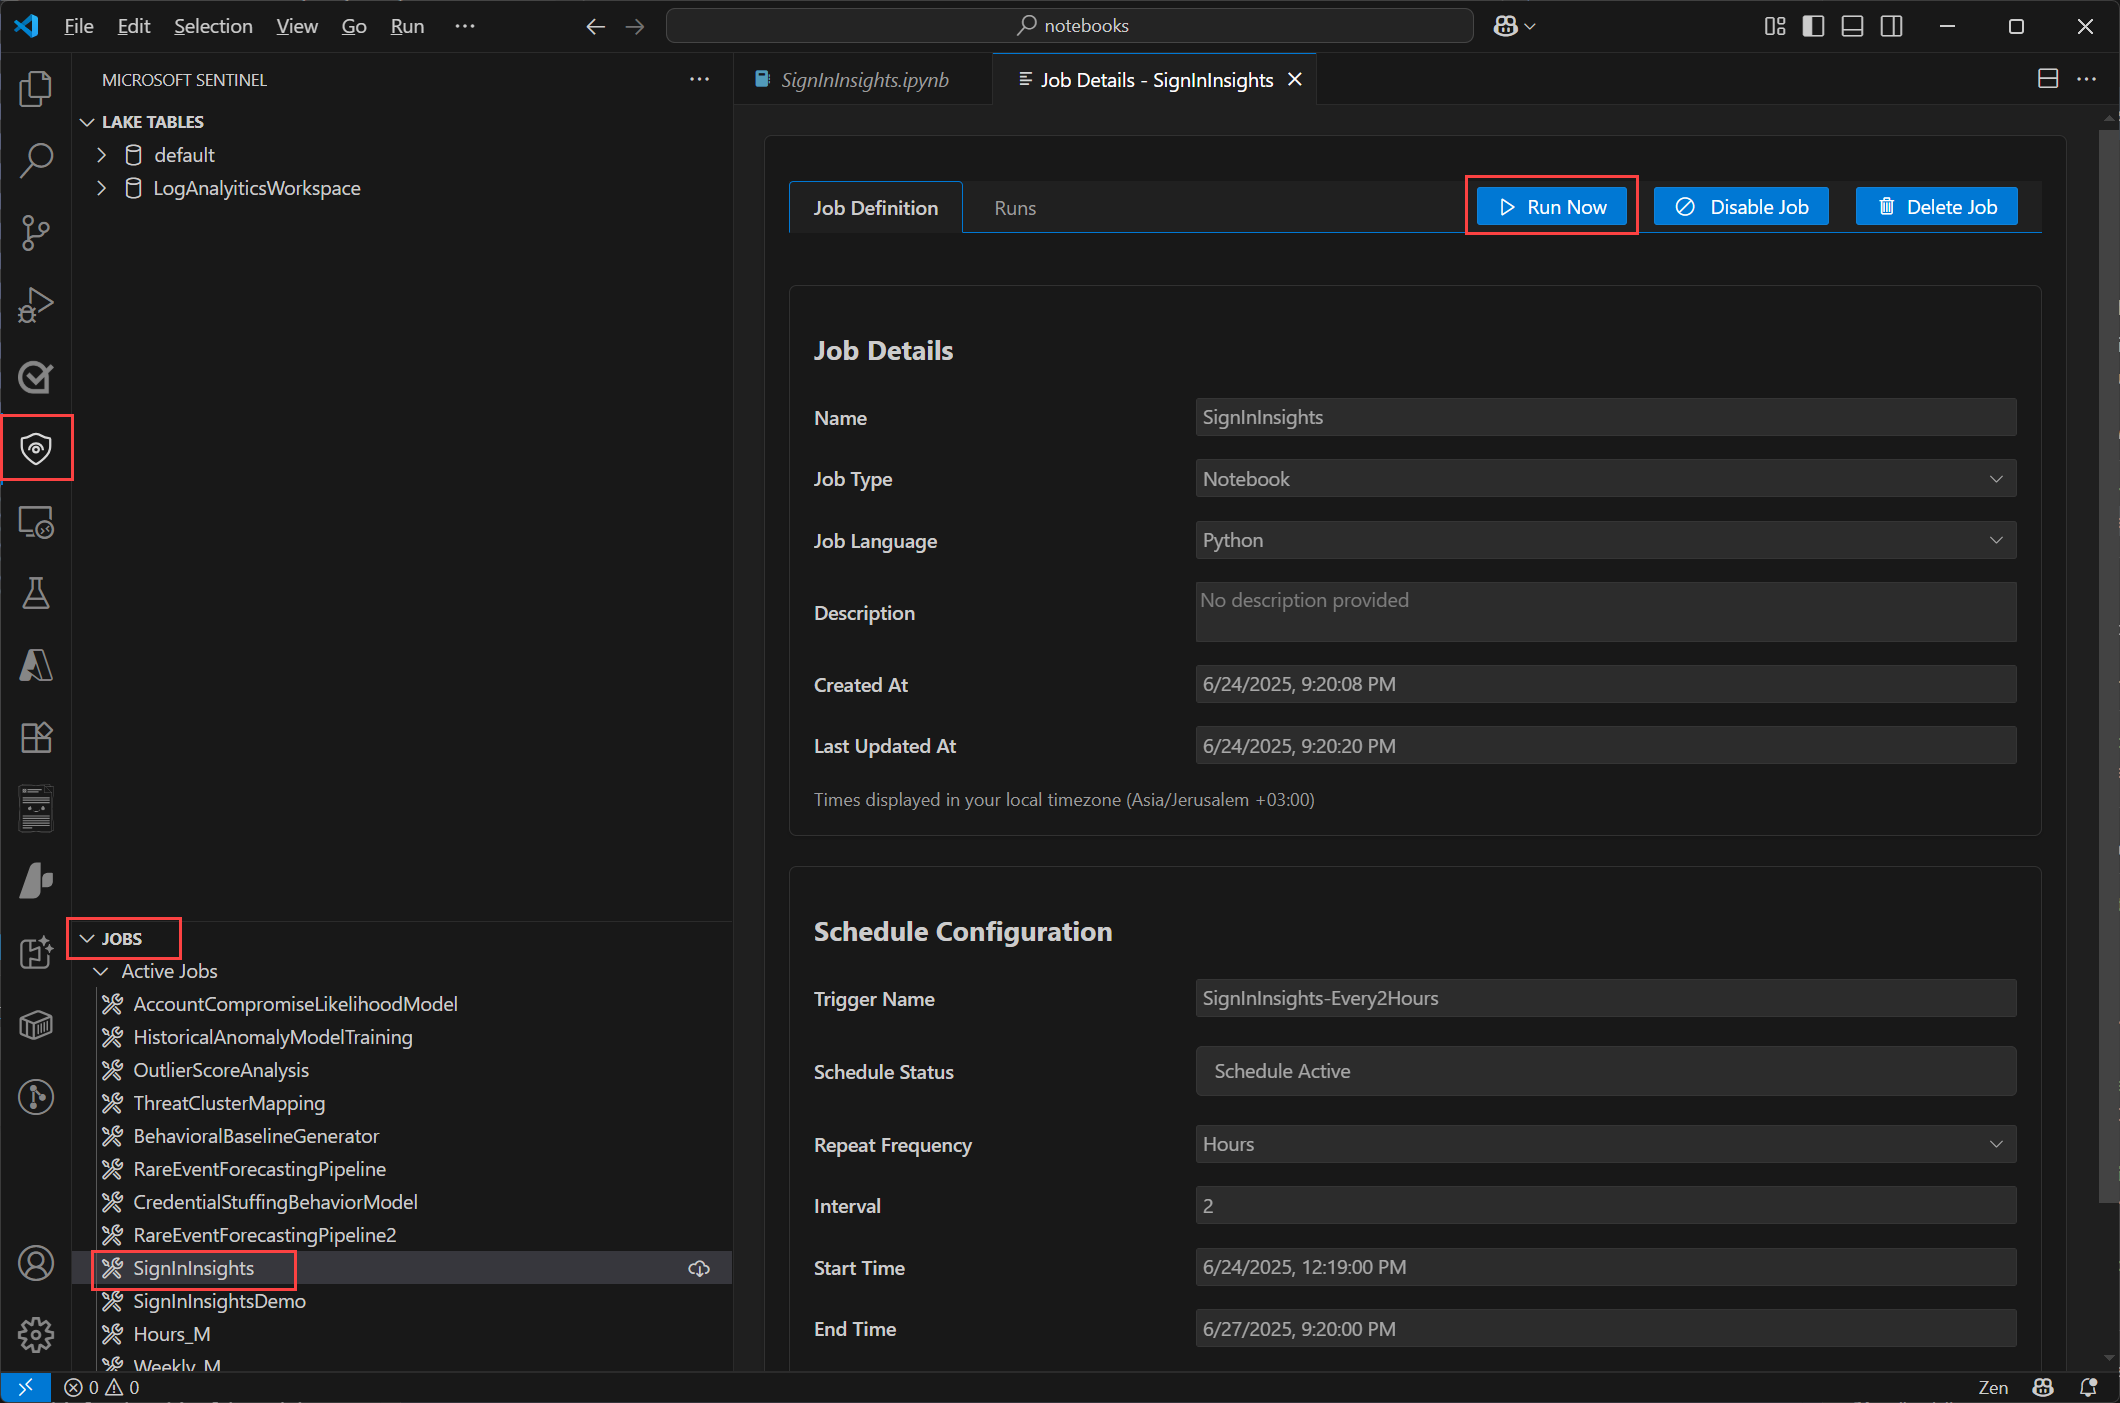
To view your jobs, select the Microsoft Sentinel shield icon in the left toolbar. Jobs are displayed on the Jobs panel.
Select the job then select Run now to run a job immediately. If your job is a scheduled job, it runs at the specified time and frequency.
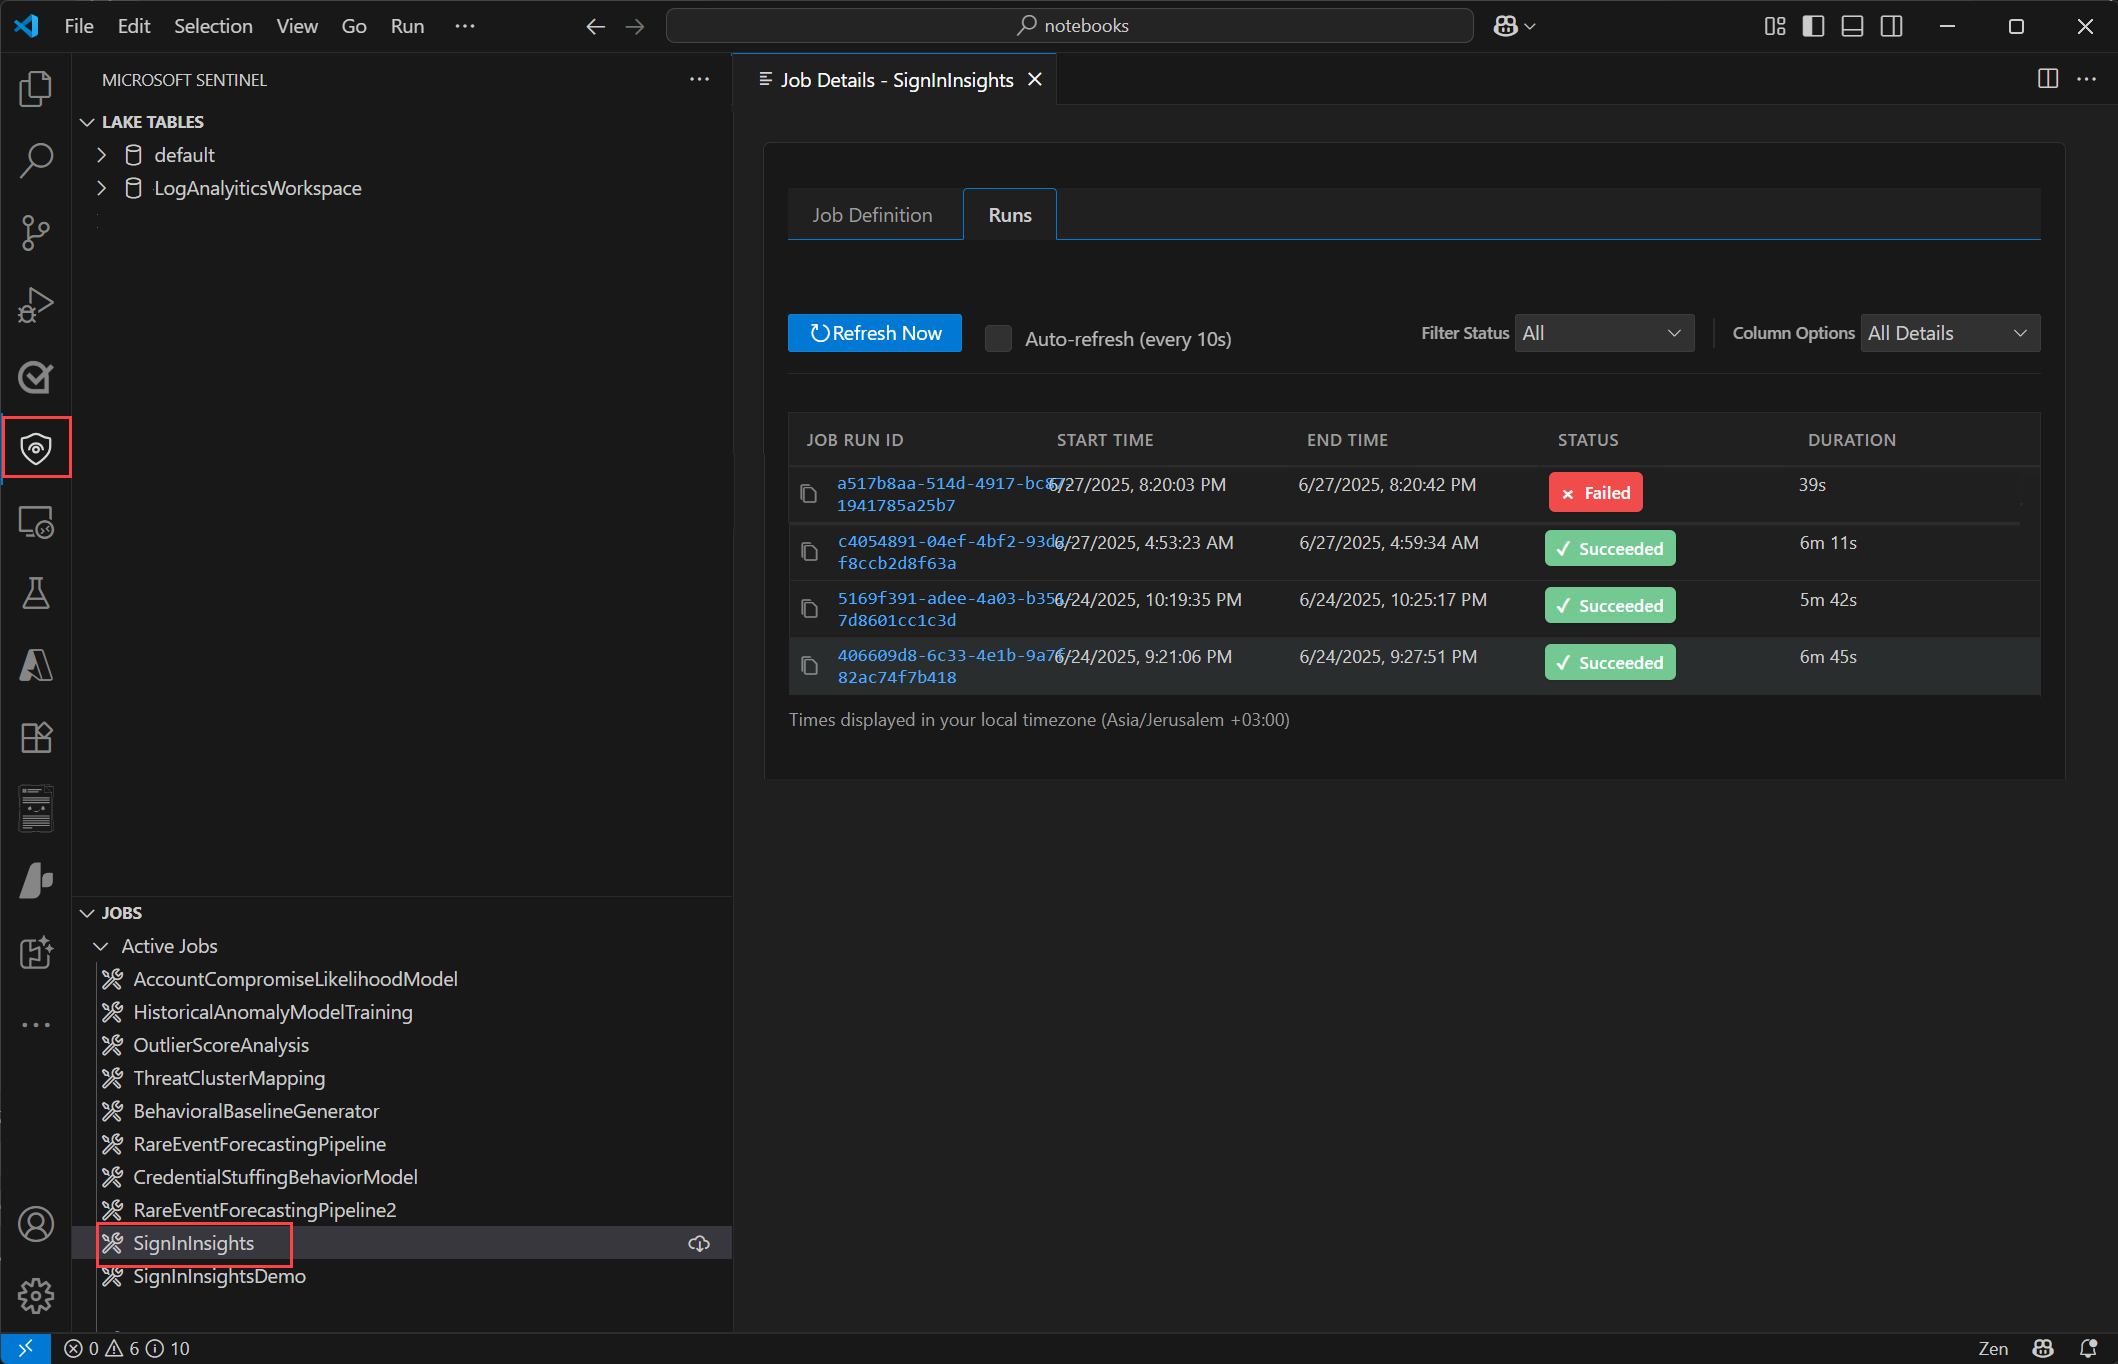
View the job status in the Runs tab.


Edit a published job
Publishing a job creates a job definition that includes the notebook file, the job configuration, and the schedule. The job definition is uploaded from your VS Code editor and stored in the Microsoft Sentinel data lake. Once published, the job is no longer connected to the notebook file on your local file system. If you want to edit the code in the notebook job, you must download the job definition, edit the notebook file, and then republish the job.
To edit a published job follow the steps below:
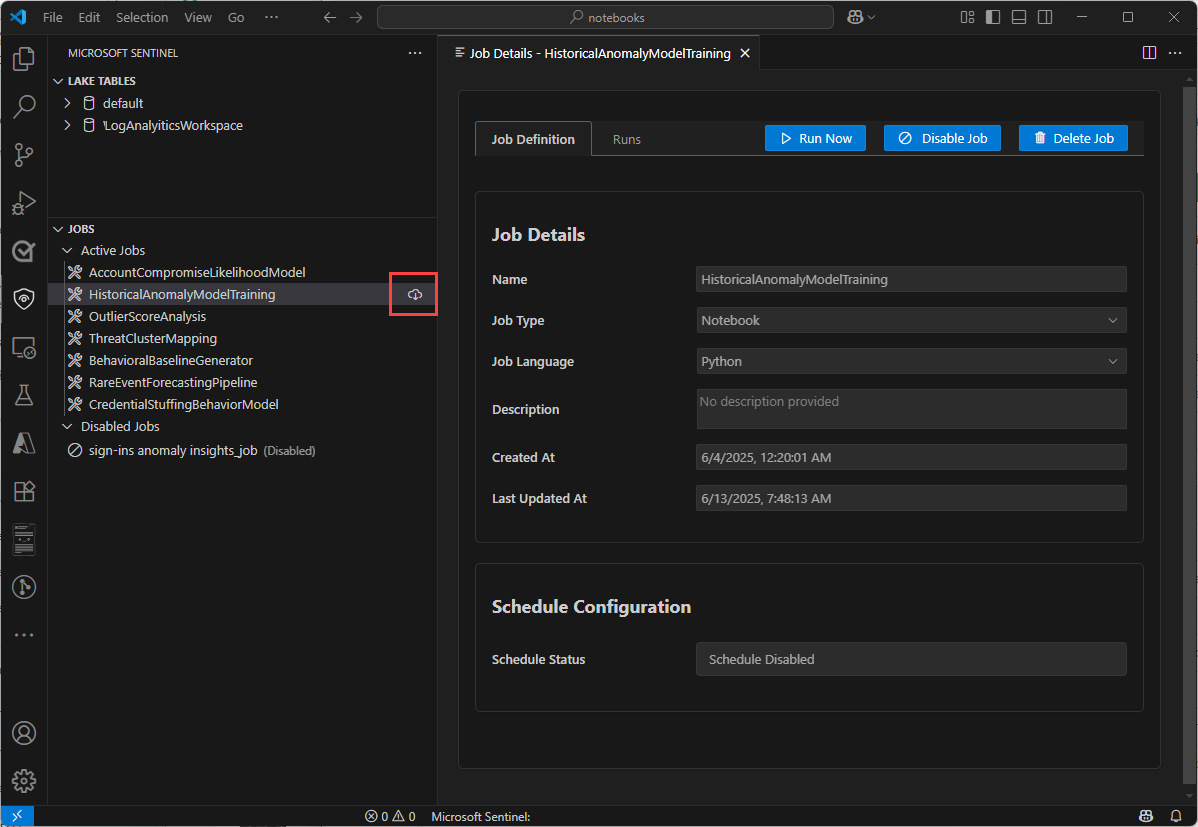
Download a published job to your local file system
- In the Jobs section, select the job you want to edit.
- Select the Download icon to download the job definition to your local file system.
- Save the workbook to your local file system.
- Edit the downloaded
ipynbworkbook file to make your changes. - Test the notebook file in your local environment to ensure it runs correctly.

Edit the configuration and republish
Right-click the yaml file for your notebook and select Open With...
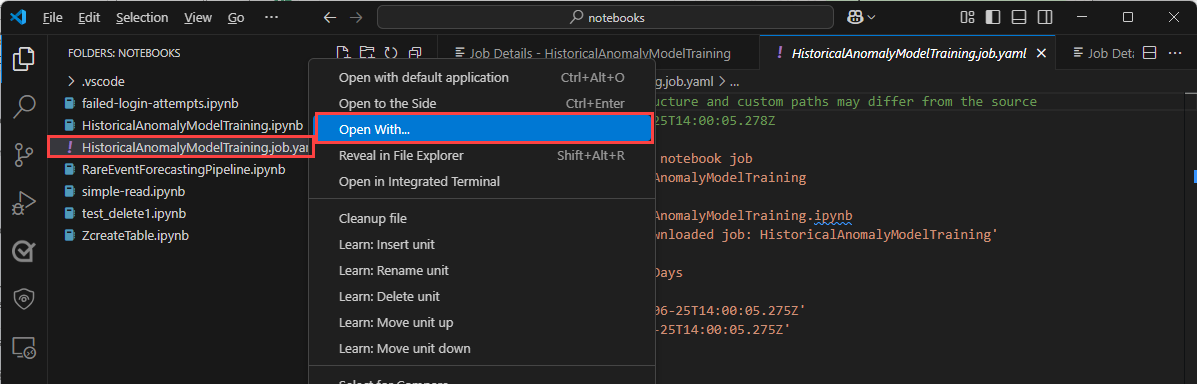
Select Scheduled job configuration editor to open the job configuration editor.

In the job configuration editor, you can edit the job name, description, and schedule. Changing the job name creates a new job definition when you publish the job.
Select Publish job to upload the updated notebook file and job configuration.


View jobs in the Microsoft Defender portal
In addition to viewing jobs in VS Code, you can also view your notebook jobs in the Defender portal. To view your jobs in the Defender portal, Select Microsoft Sentinel > Data lake exploration > Jobs .
The page shows a list of jobs and their types. Select a notebook job to view its details. You can enable and disable the job's schedule but you can't edit a notebook job in the Defender portal.

Service parameters and limits and troubleshooting
For a list of service limits for the Microsoft Sentinel data lake, see Microsoft Sentinel data lake service limits.
For information on troubleshooting, see Run notebooks on the Microsoft Sentinel data lake (preview).