Note
Access to this page requires authorization. You can try signing in or changing directories.
Access to this page requires authorization. You can try changing directories.
Applies to: ✔️ Front Door Premium
This article guides you through configuring Azure Front Door Premium to connect to your App Service (Web App or Function App) privately using Azure Private Link.
Prerequisites
- An Azure account with an active subscription. Create an account for free.
An Azure Front Door Premium profile with an origin group. For more information, see Create an Azure Front Door.
A Private Link. For more information, see Create a Private Link service.
Sign in to the Azure portal with your Azure account.
An Azure Front Door Premium profile with an origin group. For more information, see Create an Azure Front Door.
A Private Link. For more information, see Create a Private Link service.
Azure Cloud Shell or Azure CLI.
The steps in this article run the Azure CLI commands interactively in Azure Cloud Shell. To run the commands in the Cloud Shell, select Open Cloud Shell at the upper-right corner of a code block. Select Copy to copy the code, and paste it into Cloud Shell to run it. You can also run the Cloud Shell from within the Azure portal.
You can also install Azure CLI locally to run the commands. If you run Azure CLI locally, sign in to Azure using the az login command.
Note
Private endpoints require your App Service plan to meet specific requirements. For more information, see Using Private Endpoints for Azure Web App. This feature isn't supported with App Service Slots.
Enable Private Link to an App Service (Web App or Function App) in Azure Front Door Premium
In this section, you map the Private Link service to a private endpoint within Azure Front Door's private network.
In your Azure Front Door Premium profile, go to Settings and select Origin groups.
Choose the origin group that should contain the App Service (Web App or Function App) origin you want to enable Private Link for.
Select + Add an origin to add a new origin or select an existing one from the list. Use the following table to configure the settings for the origin:
Setting Value Name Enter a name to identify this origin. Origin Type App services Host name Select the host from the dropdown that you want as an origin. Origin host header Customize the host header of the origin or leave it as default. HTTP port 80 (default) HTTPS port 443 (default) Priority Assign different priorities to origins for primary, secondary, and backup purposes. Weight 1000 (default). Use weights to distribute traffic among different origins. Region Select the region that matches or is closest to your origin. Target sub resource Choose site as the subresource type for the selected resource. Request message Enter a custom message to display while approving the Private Endpoint. 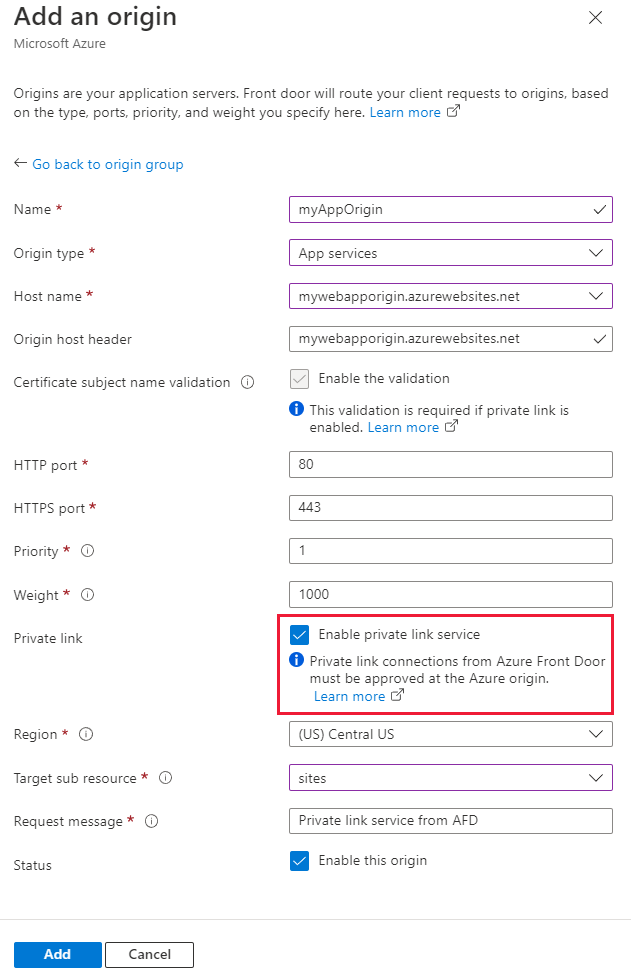
Select Add to save your configuration, then select Update to save the origin group settings.
Use the az afd origin create command to create a new Azure Front Door origin. The private-link-location value must be from the available regions and the private-link-sub-resource-type value is sites.
az afd origin create --enabled-state Enabled \
                     --resource-group 'myResourceGroup' \
                     --origin-group-name 'og1' \
                     --origin-name 'myapporigin' \
                     --profile-name 'contosoAFD' \
                     --host-name 'example.contoso.com' \
                     --origin-host-header 'example.contoso.com' \
                     --http-port 80 \
                     --https-port 443 \
                     --priority 1 \
                     --weight 500 \
                     --enable-private-link true \
                     --private-link-location 'EastUS' \
                     --private-link-request-message 'AFD app service origin Private Link request.' \
                     --private-link-resource /'subscriptions/aaaa0a0a-bb1b-cc2c-dd3d-eeeeee4e4e4e/resourceGroups/myResourceGroup/providers/Microsoft.Web/sites/webapp1/appServices' \
                     --private-link-sub-resource-type sites
Approve Azure Front Door Premium private endpoint connection from App Service
Navigate to the App Service you configured with Private Link in the previous section. Under Settings, select Networking.
In the Networking section, select Configure your private endpoint connections.
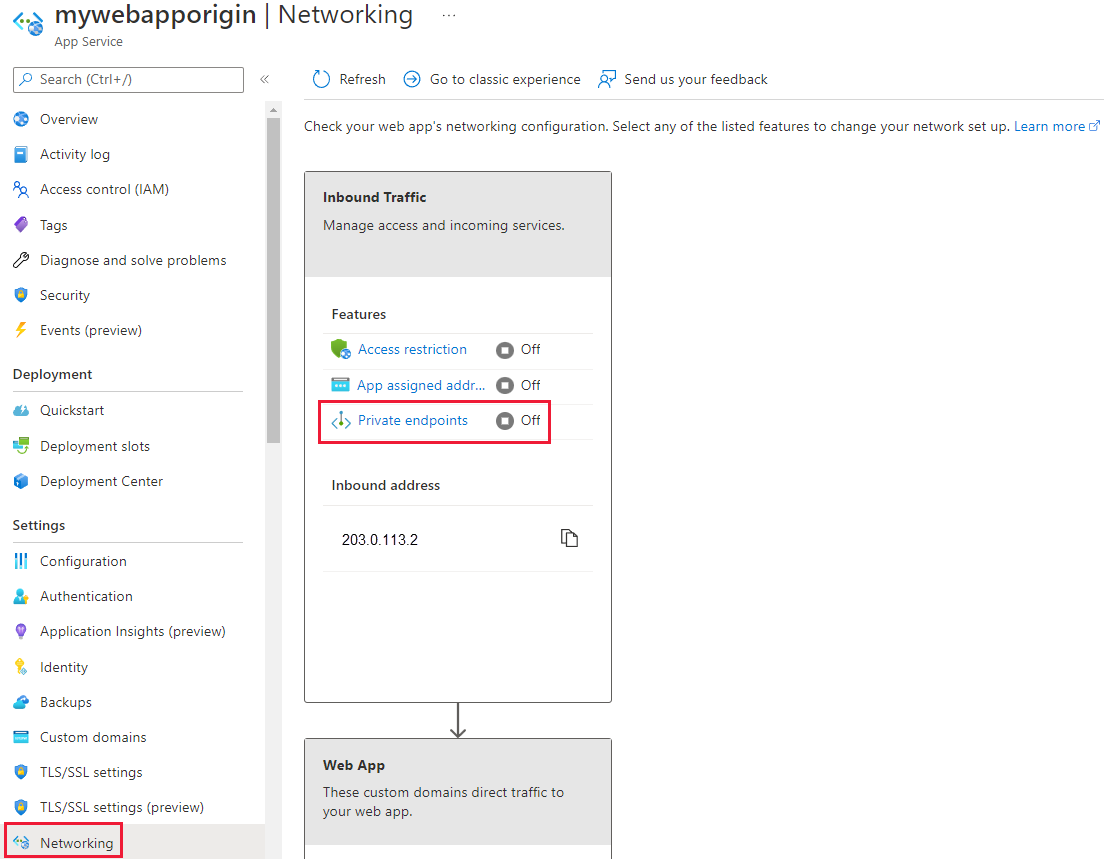
Find the pending private endpoint request from Azure Front Door Premium and select Approve.
Use the az network private-endpoint-connection list command to list the private endpoint connections for your web app. Note the
Resource IDof the private endpoint connection on the first line of the output.az network private-endpoint-connection list --name 'webapp1' --resource-group 'myResourceGroup' --type 'Microsoft.Web/sites'Use the az network private-endpoint-connection approve command to approve the private endpoint connection.
az network private-endpoint-connection approve --id '/subscriptions/aaaa0a0a-bb1b-cc2c-dd3d-eeeeee4e4e4e/resourceGroups/myResourceGroup/providers/Microsoft.Web/sites/webapp1/privateEndpointConnections/aaaa0a0a-bb1b-cc2c-dd3d-eeeeee4e4e4e'
It can take a few minutes for the connection to fully establish after approval. Once established, you can access your web app or function app through Azure Front Door Premium. Direct access to the app from the public internet is disabled once private endpoint is enabled.
Common mistakes to avoid
The following mistake is common when configuring an origin with Azure Private Link enabled:
- Adding the origin with Azure Private Link enabled to an existing origin group that contains public origins. Azure Front Door doesn't allow mixing public and private origins in the same origin group.