Note
Access to this page requires authorization. You can try signing in or changing directories.
Access to this page requires authorization. You can try changing directories.
This article explains how to configure customer-controlled maintenance windows for Azure Firewall. It provides step-by-step guidance for scheduling maintenance using the Azure portal or PowerShell.
Azure Firewall is a managed, cloud-based network security service designed to protect Azure Virtual Network and Azure Virtual WAN resources. Regular upgrades are essential to ensure the service remains effective against emerging cyber threats, complies with regulatory requirements, and incorporates the latest features, security enhancements, and performance improvements.
Upgrades are typically scheduled during off-business hours to minimize disruptions to critical business operations and reduce application downtime. While many modern applications can handle transient network interruptions through autoreconnections, legacy applications such as SAP and Azure Virtual Desktop (AVD) might require persistent connections. These applications are more sensitive to connection drops, which can lead to disruptions during upgrade processes and affect business continuity. To address this, Azure Firewall now supports configurable daily maintenance windows, allowing you to align upgrade schedules with your operational needs.
For more information on limitations and frequently asked questions about customer-controlled maintenance, see the Azure Firewall FAQ.
Maintenance configuration
You can configure customer-controlled maintenance in the Azure portal using two methods:
- From the Azure Firewall resource: This method allows you to configure maintenance directly for a specific Azure Firewall.
- From the maintenance configurations page: This method enables you to create a maintenance configuration that can be applied to multiple Azure Firewalls, offering greater flexibility and efficiency.
Configure maintenance from the Azure Firewall resource
Follow these steps to create a maintenance configuration directly from the Azure Firewall resource:
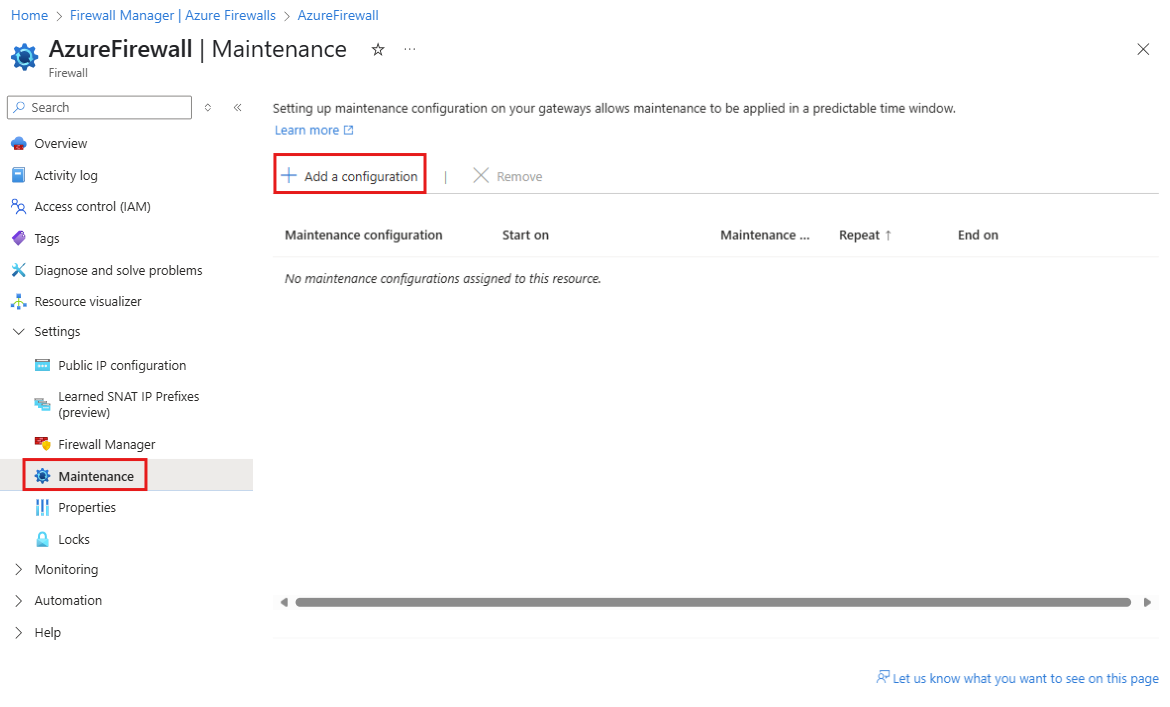
In the Azure portal, navigate to the Firewall resource for which you want to create a maintenance configuration.
On the Azure Firewall page, navigate to Settings and select Maintenance.
Select + Add a configuration to open the Configure maintenance control page.
In the configuration panel, choose an existing configuration from the drop-down menu or create a new configuration.
Enter a descriptive name for the maintenance configuration and select Edit schedule. Define a maintenance schedule of atleast 5 hours recurring daily and select Save.
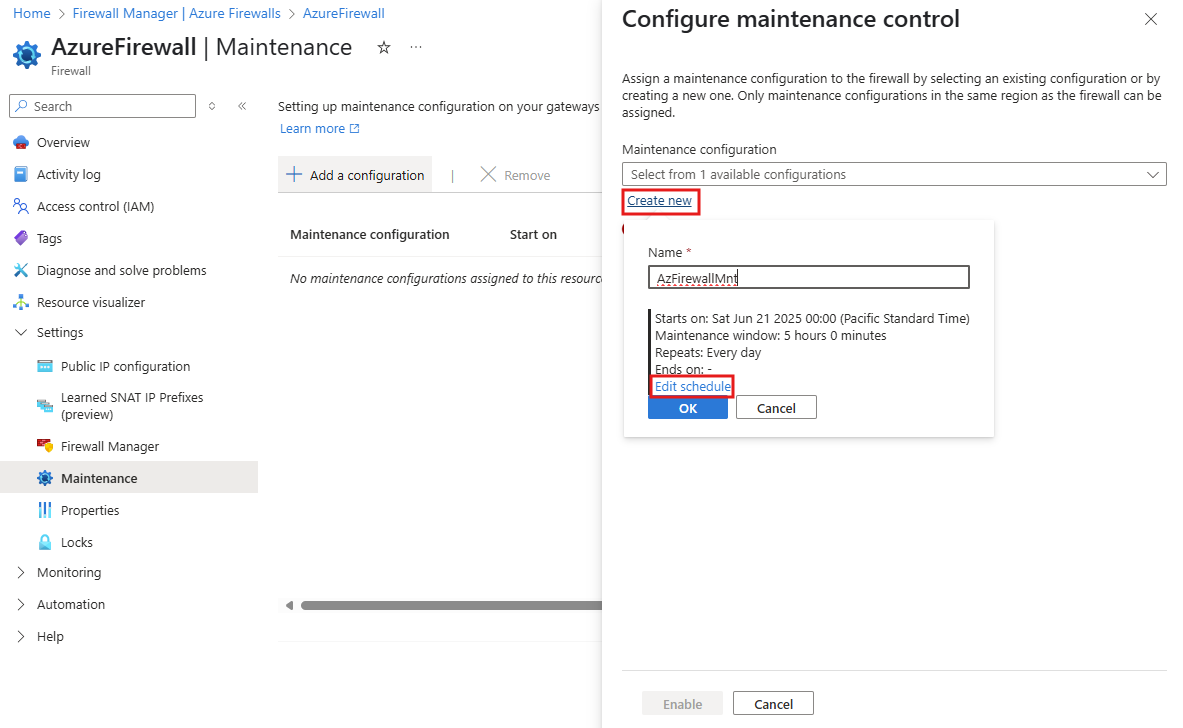
Select Enable to apply the maintenance configuration on the Azure Firewall resource.
Complete the configuration as required to align with your operational needs.
Set up in Maintenance Configurations
Follow these steps to create a maintenance configuration in the Azure portal using the Maintenance Configurations page:
In the Azure portal, search for Maintenance Configurations.
On the Maintenance Configurations page, select + Create to open the Create a maintenance configuration page.
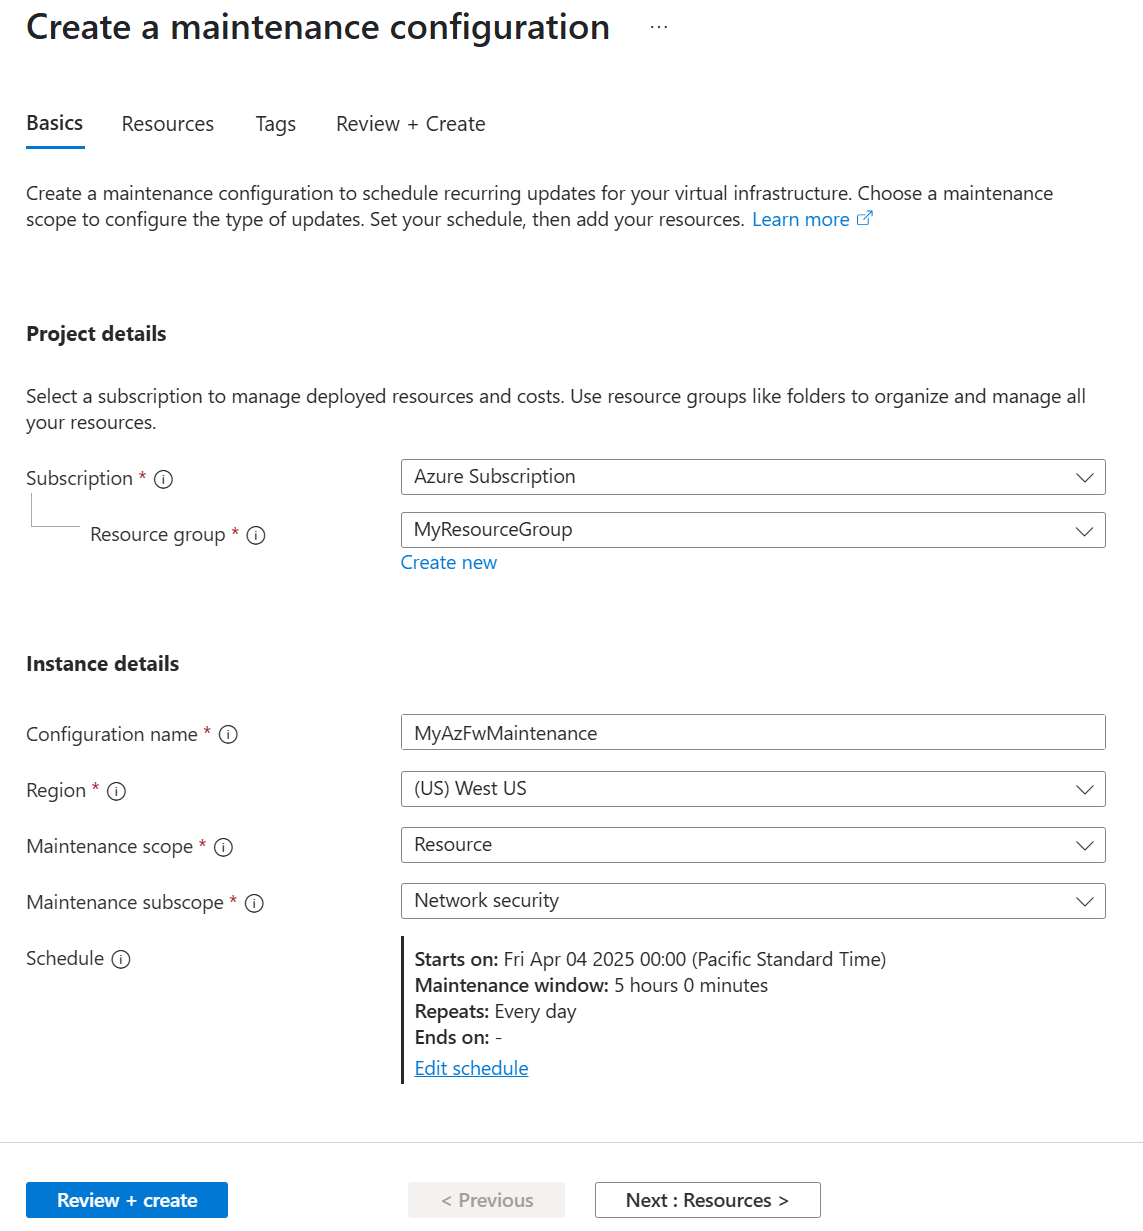
On the Basics tab, provide the following details:
- Subscription: Select your subscription.
- Resource Group: Choose the resource group where your resources are located.
- Configuration name: Enter a descriptive name for the maintenance configuration.
- Region: Select the same region as your firewall resources.
- Maintenance scope: Choose Resource from the dropdown.
- Maintenance subscope: Select Network Security from the dropdown.
Select Add a schedule to define the maintenance schedule.
Note
The maintenance window must be at least 5 hours in duration.
After specifying the schedule, select Save.
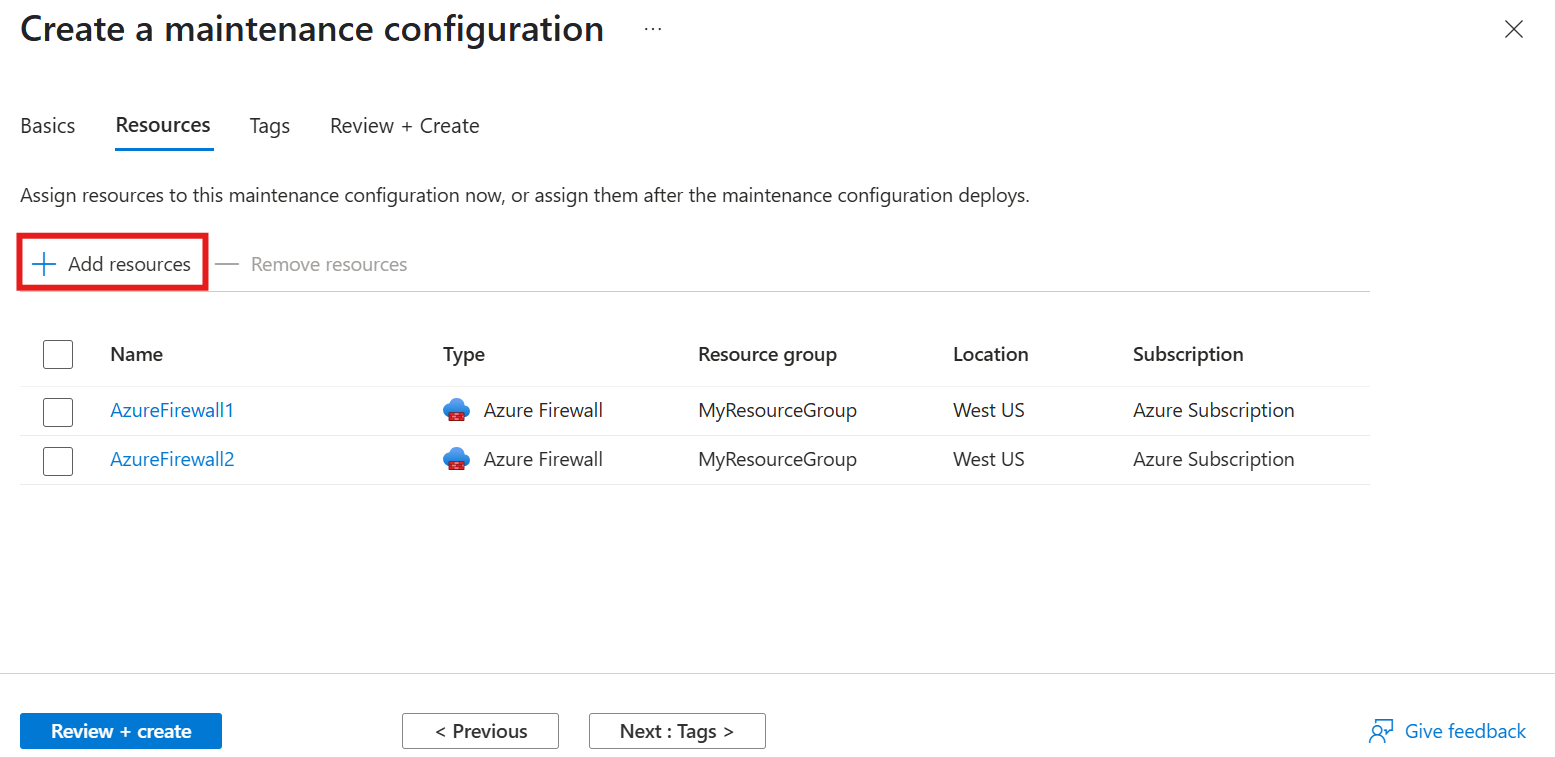
Proceed to the Resources tab. Select + Add resources to associate resources with the maintenance configuration. You can add resources during the creation process or later. For this example, you're adding resources during the configuration creation.
On the Select resources page, verify that your resources are listed. If not, ensure the correct region and maintenance scope are selected. Choose the resources to include in the maintenance configuration, then select Save.
Select Review + Create to validate the configuration. Once validation is successful, select Create to finalize the setup.
View associated resources
Follow these steps to view the resources linked to a maintenance configuration:
- Navigate to the Maintenance Configurations page in the Azure portal.
- Select the maintenance configuration you want to inspect.
- In the left-hand menu, navigate to Settings and select Resources. This opens the Resources page, where you can see all resources associated with the selected maintenance configuration.
Add resources
To add resources to an existing maintenance configuration, follow these steps:
- Navigate to the Maintenance Configurations page in the Azure portal.
- Select the maintenance configuration you want to modify.
- In the left-hand menu, go to Settings and select Resources. This opens the Resources page, where you can view all resources associated with the selected maintenance configuration.
- On the Resources page, select + Add to include a new resource in the maintenance configuration.
Remove resources
To remove resources associated with a maintenance configuration, follow these steps:
- Navigate to the Maintenance Configurations page in the Azure portal.
- Select the maintenance configuration from which you want to remove resources.
- In the left-hand menu, navigate to Settings and select Resources to open the Resources page and view the associated resources.
- On the Resources page, select the resource you want to remove, then select Remove.
- In the confirmation dialog, select Yes to finalize the removal.
Next steps
To explore the latest capabilities in Azure Firewall, see Azure Firewall preview features.