Note
Access to this page requires authorization. You can try signing in or changing directories.
Access to this page requires authorization. You can try changing directories.
Network security perimeter is a framework created to manage public traffic to Azure Platform-as-a-Service (PaaS) resources, and traffic between those PaaS resources. The basic building block is a perimeter, a group of PaaS resources that can communicate freely with each other. The perimeter defines a boundary with implicit trust access between each resource. This perimeter can have sets of inbound and outbound access rules.
This article shows you how to associate a network security perimeter with an Event Grid topic or a domain.
Note
The Network security perimeter configuration is currently available only for topics and domains under the Networking setting.
Prerequisites
The following procedure assumes that you have the following Azure resources:
- An Event Grid topic or a domain
- An Event Hubs namespace with an event hub. The event hub is used as an event handler in the example.
Create a network security perimeter
First, you create a network security perimeter and add the Event Grid domain and the Event Hubs namespace resources to it.
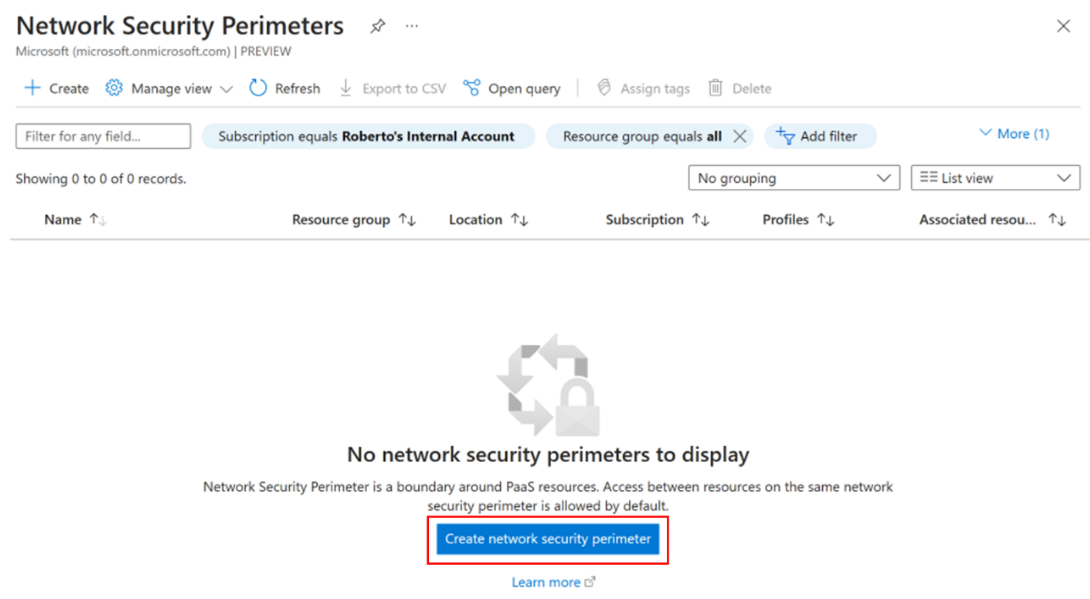
In the Azure portal, search for and navigate to the Network Security Perimeters page, and select Create on the toolbar or Create network security perimeter on the page.
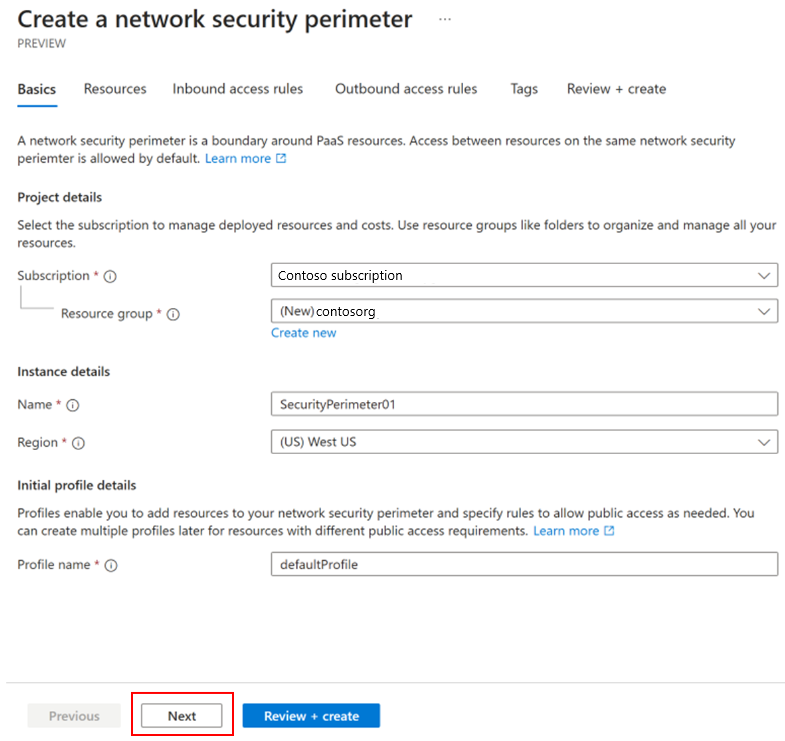
On the Create a network security perimeter wizard, follow these steps:
Select your Azure subscription, resource group, and region in which you want to create the network security perimeter.
Enter a name for the perimeter.
For profile name, enter a name for the default profile.
Select Next at the bottom of the page.
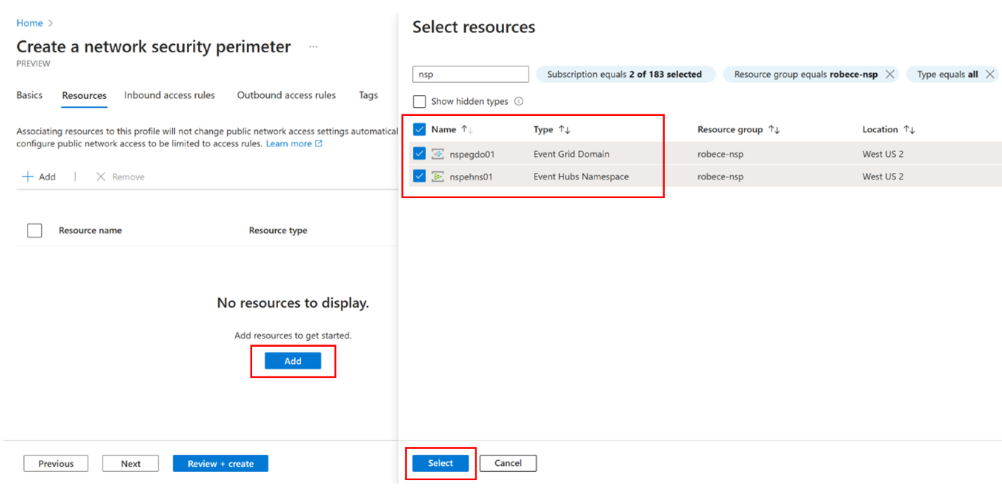
On the Resources page, select Add. Then, on the Select resources page, select resources you want in your perimeter. For example, you can add an Azure Event Grid domain and an Azure Event Hubs namespace that's used as an event handler or destination. Then, select Next.
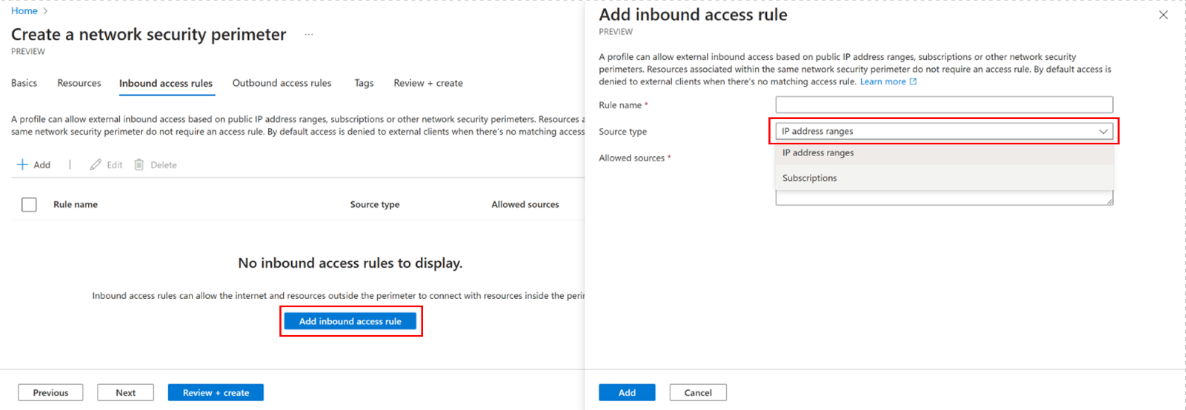
On the Inbound access rules page, select Add inbound access rule.
On the Add inbound access rule page, select the source type. You can use this setting to allow inbound access to specific IP address ranges or subscriptions. When you're done, select Next at the bottom of the page.
On the Outbound access rules page, if you want to allow egress access, select Add outbound access rule.
On the Add outbound access rule page, select the fully qualified domain (FQDN) destination.
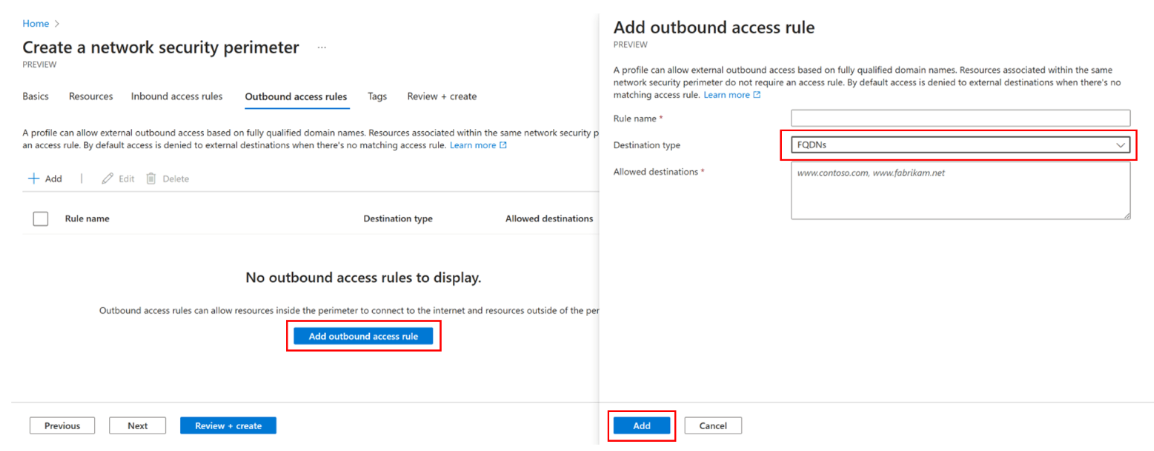
Select Next to navigate to the Tags, and then select Next again to move on to the Review + create page.
On the Review + create page, review the configuration, and select Create to create the security perimeter.
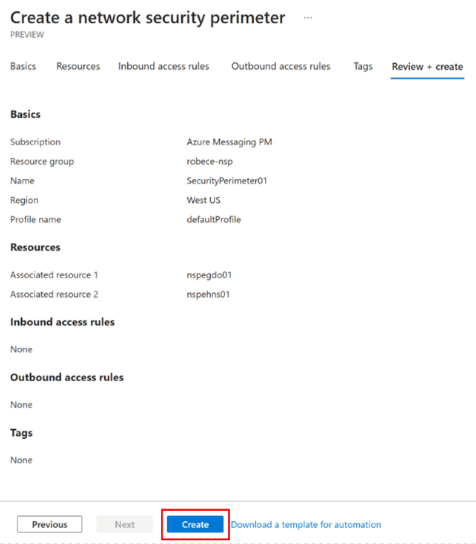
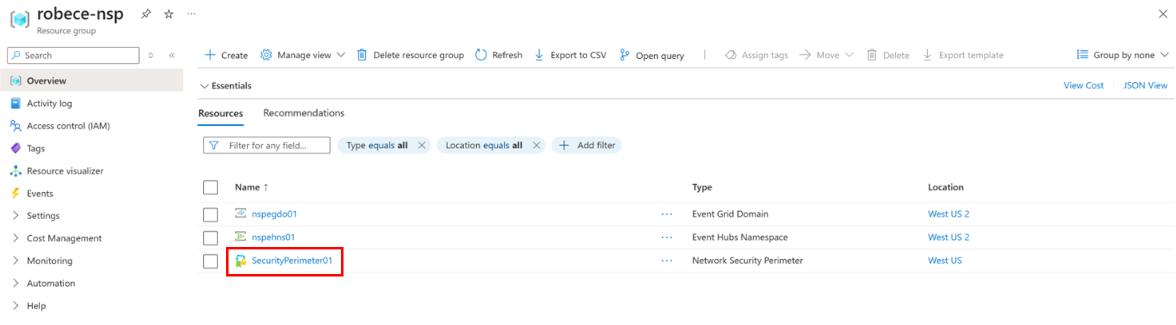
Once the network security perimeter resource is created, you find it in the resource group you specified.


Configure the network security perimeter
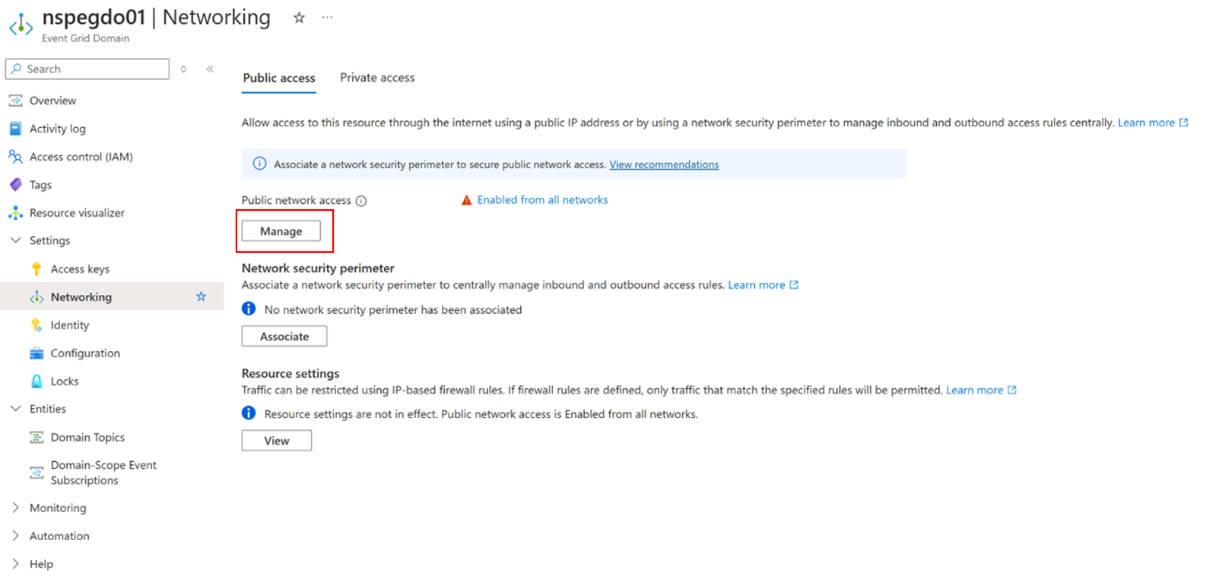
In this step, you associate the network security perimeter you created in the previous step with the Event Grid domain. To configure network security perimeter for a topic or a domain, use the Networking tab on Event Grid Topic or Event Grid Domain page.
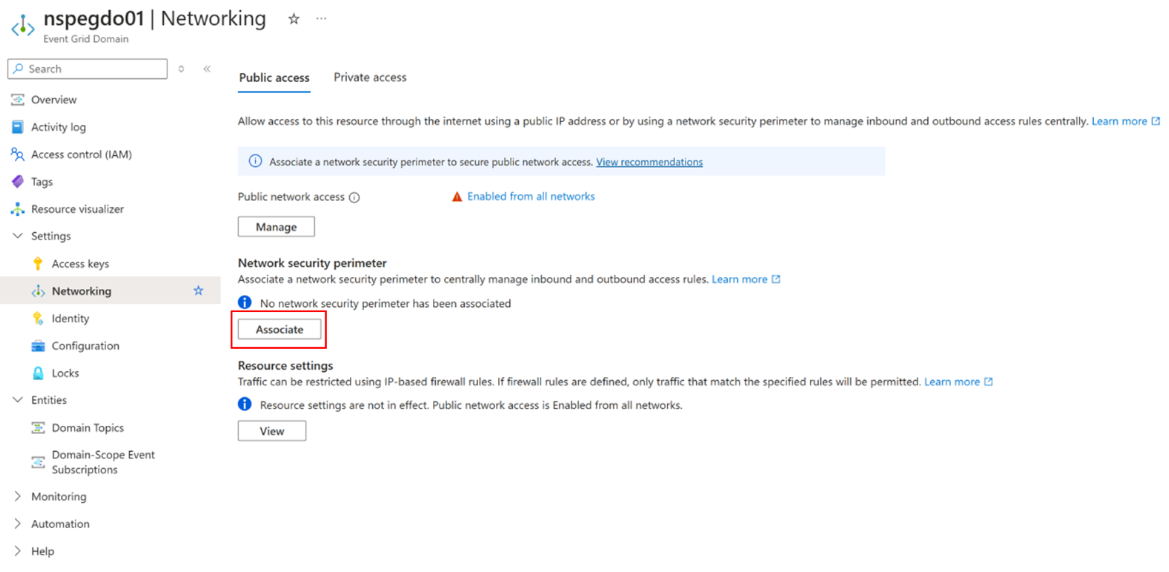
On the Event Grid Topic or Event Grid Domain page, select Networking under Settings on the left navigation menu. The screenshots and steps in this article use an example Azure Event Grid domain. The steps for the topic are identical.
On the Networking page, select Manage.
On the Public network access page, select Secured by perimeter (Most restricted), and then select Save.
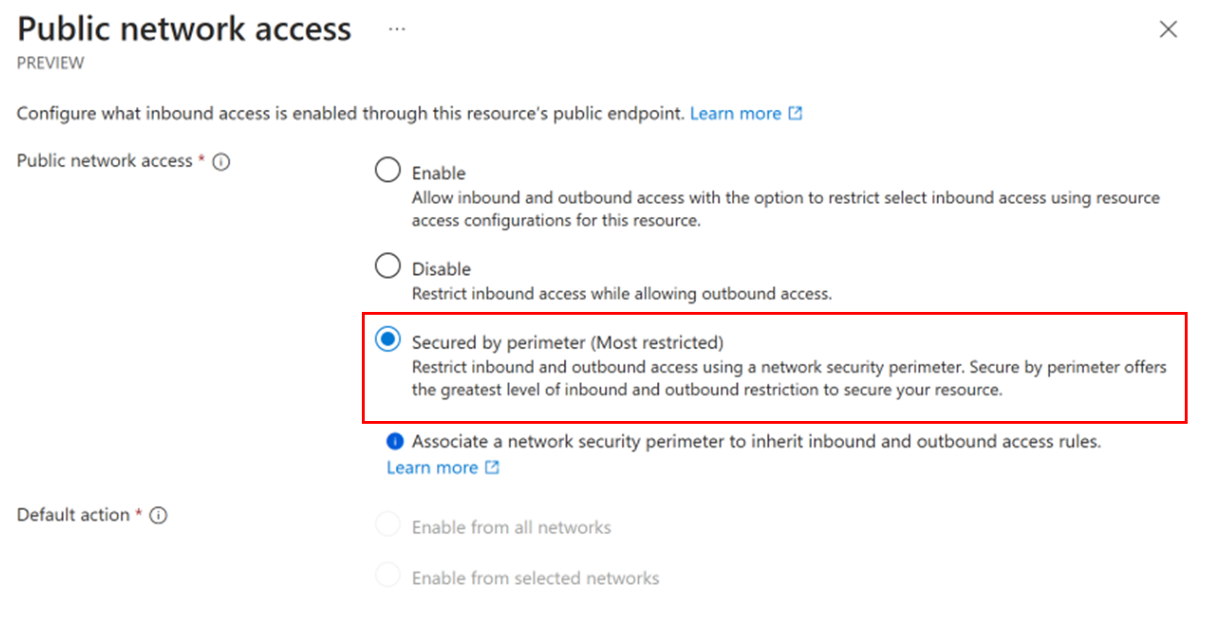
Network security perimeter restricts inbound and outbound access offering the greatest level of inbound and outbound restriction to secure the Azure Event Grid resource.
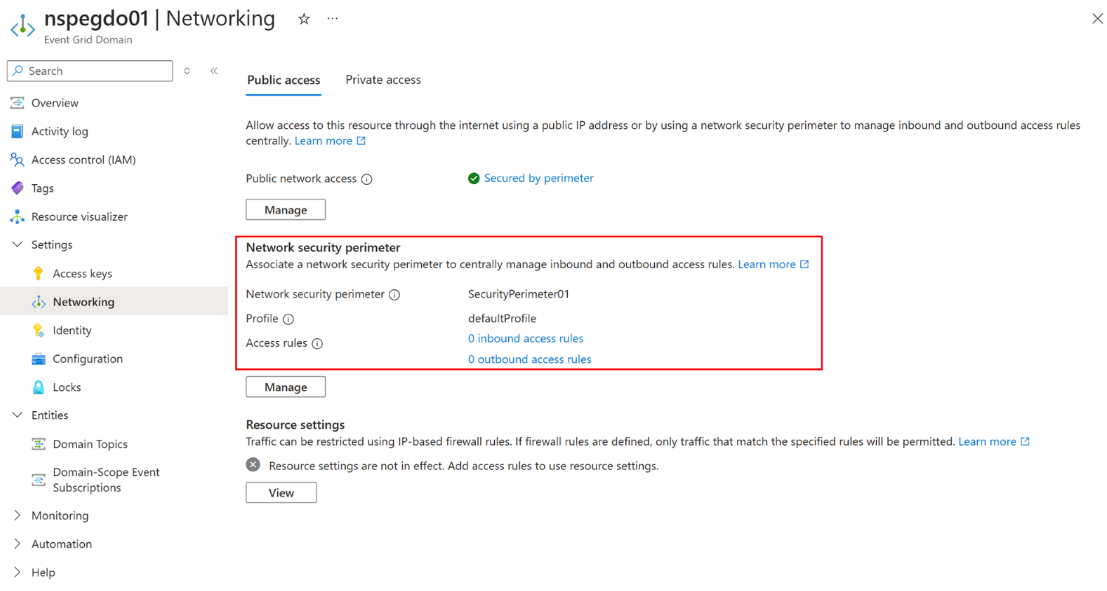
Now, it’s time to associate the network security perimeter with the Azure Event Grid domain or topic in the Networking settings by selecting Associate.
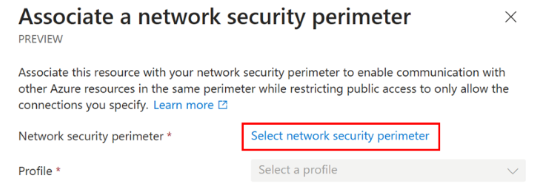
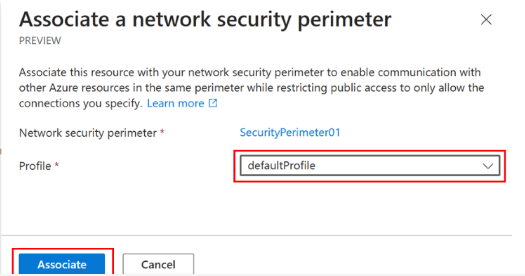
On the Associate a network security perimeter page, choose Select network security perimeter.
Search for the network security perimeter resource, and select the resource.
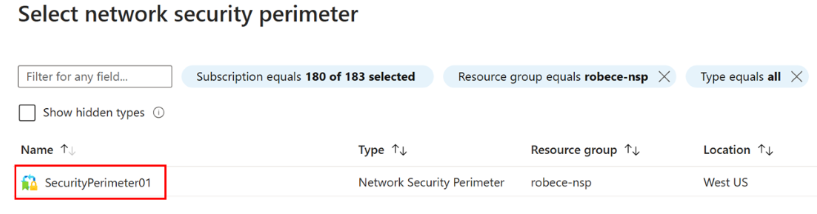
Now, on the Associate a network security perimeter page, select the profile, and then select Associate.
Now you see the network security perimeter associated with your Azure Event Grid domain or topic resource.


Considerations when using network security perimeter
This article discusses a scenario involving Azure Event Grid domains and Azure Event Hubs as destination. In this scenario, you enable managed identity for the Azure Event Grid domain, and then assign identity the Event Hubs Data Sender role on the Event Hubs namespace. For more information, see Event delivery, managed service identity, and private link.