Note
Access to this page requires authorization. You can try signing in or changing directories.
Access to this page requires authorization. You can try changing directories.
Azure DevOps Services | Azure DevOps Server 2022 - Azure DevOps Server 2019
In Azure DevOps, you have the flexibility to customize your project, Agile tools, and the work tracking system by using inherited processes. The customizations apply to all projects that utilize the same process.
An inherited process serves as the foundation for your work tracking system. When you create a new project, you choose a process to define its building blocks. The building blocks include work item types, states, fields, and rules. By customizing an inherited process, you tailor it to your team's specific needs. For more information about what you can customize, see About process customization and inherited processes.
Important
The Inheritance process model is available for projects that are configured to support the model type. If you use an older collection, check the process model compatibility. If your on-premises collection is configured to use the on-premises XML process model, you can only use that process model to customize the work tracking experience. For more information, see Organization-level process customization.
Note
You can review changes made to an inherited process by using the audit log and auditing features. For more information, see Access, export, and filter audit logs.
In this tutorial, you:
- Create an inherited process based on the Agile, Scrum, Basic, or CMMI models
- Change the process type associated with a project
- Create a new project from a defined process
- Copy a process and make customizations
- Enable and disable processes, and set the default process
Prerequisites
For guidance on tailoring Azure Boards to align with your specific business requirements, see Configure and customize Azure Boards.
| Category | Requirements |
|---|---|
| Permissions | - To create, delete, or edit a process: Member of the Project Collection Administrators group or specific collection-level permissions Create process, Delete process, Edit process, or Delete a field from organization set to Allow. For more information, see Customize an inherited process. - To update boards: Team Administrator or a member of the Project Administrators group. |
| Access | - Even if you have Basic or lower access, you can still change a process if someone gives you permission. - To update and change the type of your existing work items: Member of the project. |
| Project process model | - Have the Inheritance process model for the project collection containing the project. - To migrate data to Azure DevOps Services, use the Team Foundation Server Database Import Service. |
| Knowledge | - Familiarity with the customization and process models. |
Create an inherited process
Create an inherited process that you can customize with the following steps. The default system processes are locked, so you can't customize them.
Sign in to your organization (
https://dev.azure.com/<Your_Organization>).Select
 Organization settings.
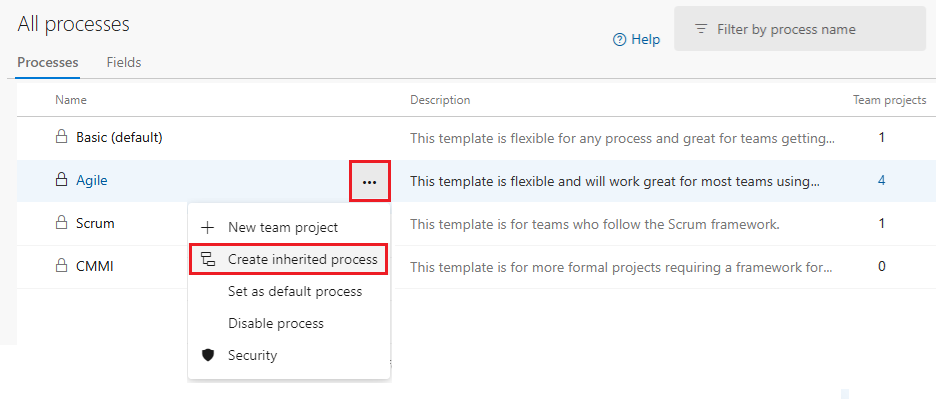
Select Boards > Process. In the Processes list, highlight the process to use and select
 More actions > Create inherited process.
Choose the same system process that was used to create the project that you want to customize. The process types can include Agile, Basic, Scrum, and Capability Maturity Model Integration(CMMI).
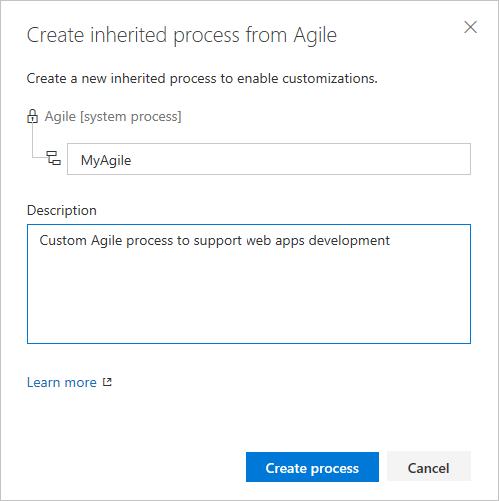
The following example creates an inherited process from the Agile system process:
If you don't have access to these options, ask a member of your Project Collection Administrators group to grant you permissions. To find a member, see Look up a Project Collection Administrator.
Enter a name for your process and an optional description.
Process names must be unique and no more than 128 characters. For other restrictions, see Process customization and inherited processes - Process name restrictions.
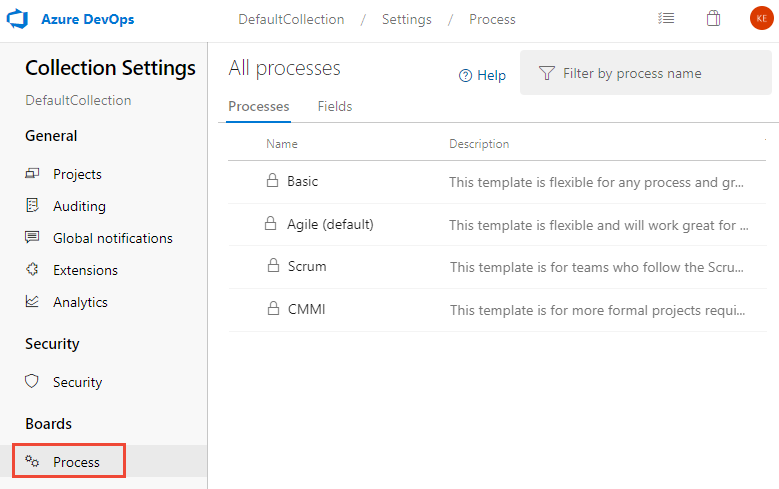
Sign in to your collection.
Select Collection settings or Admin settings.
Select Process.
Important
If you don't have the Create inherited process menu option, then the collection you selected is set to work with the on-premises XML process model. For more information, see Customize your work tracking experience - On-premises XML process model.
Inherited child processes automatically update, based on their parent system processes. Updates to processes are documented in Release Notes for Azure DevOps Server.
After you define the inherited process, you can complete the following tasks:
- Customize a project by using an inherited process
- Create a project that uses the inherited process
- Update a project to use the inherited process
Change a project's process
You can change a project's process from one inherited process to another with the following methods:
- Switch within the same base process by moving a project between processes that share the same base, such as Agile or Scrum.
- Migrate to a different process model by changing the project's process model, for instance, from Agile to Scrum or Basic to Agile.
The example in this section provides detailed steps for the migrate method, which you can apply to several common process change scenarios:
Note
- You can change the process of a project as long as you don't have any undeleted work items of a custom work item type that isn't also defined in the target process.
- If you change a project to a system process or other inherited process that doesn't contain the same custom fields, data is still maintained. However, any custom fields not represented in the current process don't appear on the work item form. You can still access the field data by using a query or the REST APIs. These fields are locked from changes and appear as read-only values.
The following steps demonstrate how to use the migrate method to change a project's process from Agile to Scrum:
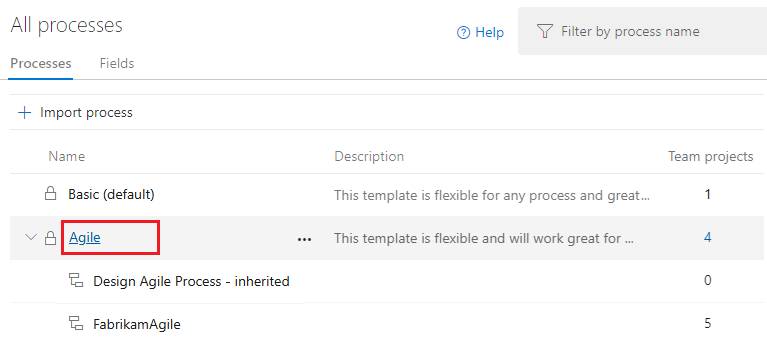
Select Boards > Process. In the Processes list, select your project's process to open the process details. This example selects the Agile process.
In the process details page, select the Projects tab. In the project list, highlight the project to change and select
More actions > Change process.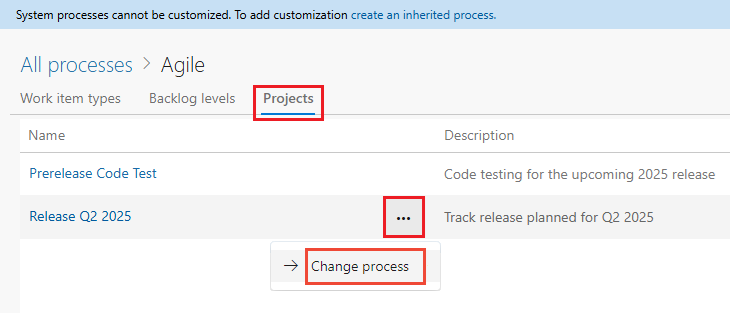
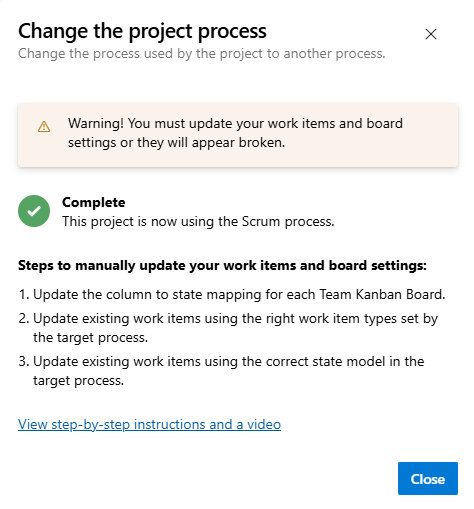
Complete the steps in the wizard. Some project changes, such as migrating from the Agile process to the Scrum process, require manual tasks:
Important
When you switch a project to an inherited process, some Agile tools or work items might become invalid. For example:
- If you designate a field as required, work items that lack the field display an error message. Resolve the identified errors, proceed with further changes, and save the work item.
- If you add or modify workflow states for a work item type visible on your board, update the board column configurations for all teams within the project.
Create a project from a process
Follow these steps to create a project from a process:
Select Boards > Process. In the Processes list, highlight the process to update and select
More actions > New team project.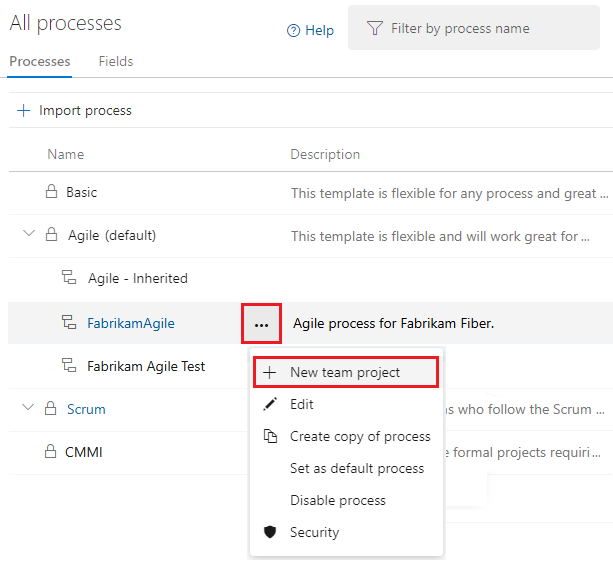
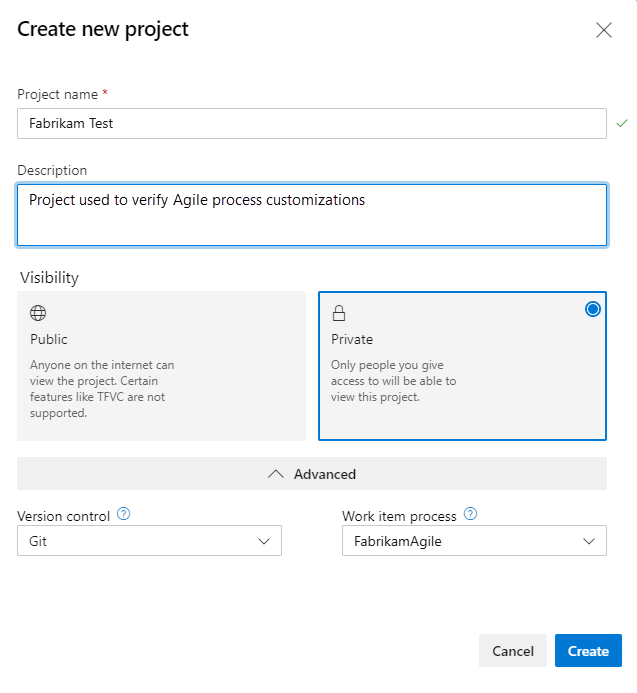
In the Create new project dialog, enter your project information, and then select Create. For more information, see Create a project.
Copy a process
Before you implement customizations across your organization, it's essential to test your planned changes by completing the following steps.
Tip
If you modify a process used by multiple projects, each project immediately reflects the incremental process change. To bundle process changes before rolling them out to all projects, complete the following procedure.
Select Boards > Process. In the Processes list, highlight the process to use and select
More actions > Create copy of process.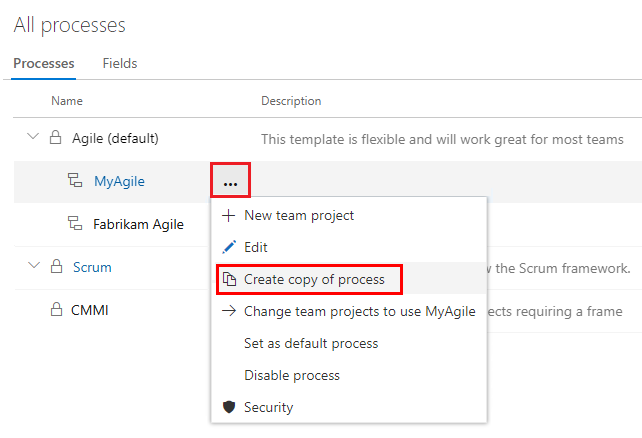
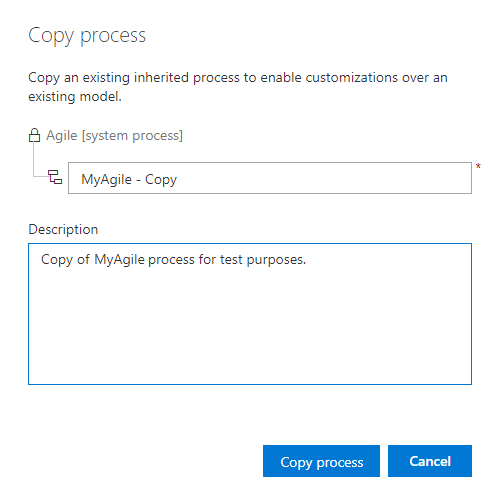
Enter a name and optional description for the copied process and select Copy process.
Make your changes to the copied process. Because no project is currently using the new (copied) process, your changes don't affect any projects.
Verify your changes by creating a test project based on the copied and updated process. If you already created a test project, select Change project to use <Process_Name>. For more information, see Change a project's process in this article.
Roll out your updates by changing the process of the projects that need the new changes. Use the Change project to use <Process_Name> option for each project to update. For more information, see Change a project's process.
Disable or delete the original process.
Enable or disable a process
To prevent the creation of projects from a specific process, you can disable the option. You might enable this option when you want to apply several customizations and don't want the process used until the updates are complete. Or, you might retire use of a specific process in favor of moving projects to a new process.
All system processes and newly created inherited processes are enabled by default. To disable or enable a process, open the ![]() More actions menu for the process and select Disable process or Enable process.
More actions menu for the process and select Disable process or Enable process.
Set a process as the default
You can have an inherited process preselected for other projects you plan to create, by setting the process as the default. This action ensures that any new projects automatically use the inherited process you prefer.
To set a process as the default, open the ![]() More actions menu for the inherited process and select Set as default process. This option isn't available with any of the system processes.
More actions menu for the inherited process and select Set as default process. This option isn't available with any of the system processes.
Project Collection Administrators can add projects from the Projects page.