Note
Access to this page requires authorization. You can try signing in or changing directories.
Access to this page requires authorization. You can try changing directories.
In this article, you'll learn how to use the Azure Developer CLI (azd) to create a GitHub Actions CI/CD pipeline for an azd template. This pipeline enables you to push template updates to a code repository and have your changes automatically provisioned and deployed to your Azure environment.
Note
The azd pipeline config command is in beta. For details, see the feature versioning and release strategy.
Prerequisites
- Install the Azure Developer CLI
- Visual Studio Code (optional, for editing files)
- A GitHub account
- An Azure subscription
Initialize the template
This example uses the Hello-AZD template, but you can follow these steps for any azd template that includes a pipeline definition file (typically found in the .github or .azdo folders).
In an empty directory, initialize the
hello-azdtemplate:azd init -t hello-azdWhen prompted, enter a name for the environment, such as helloazd.
Create a pipeline using GitHub Actions
Follow these steps to create and configure a pipeline:
In a terminal at the root of your template, run:
azd pipeline configWhen prompted to select a provider, choose GitHub.
? Select a provider:  [Use arrows to move, type to filter]
> GitHub
  Azure DevOps
Select your desired Azure subscription and region.
When prompted to configure your remote repository, choose Create a new private GitHub repository. If you have an existing project you'd like to use, you can also choose Select an existing GitHub project.
? How would you like to configure your git remote to GitHub?  [Use arrows to move, type to filter]
  Select an existing GitHub project
> Create a new private GitHub repository
  Enter a remote URL directly
Enter a name for the new repository.
When prompted to commit and push your local changes to start a new GitHub Actions run, enter
y.Review the output in the terminal. The
azd pipeline configcommand displays the GitHub repository name for your project.Note
By default,
azd pipeline configconfigures OpenID Connect (OIDC), also called federated credentials. To use client credentials instead, runazd pipeline config --auth-type client-credentials.OIDC/federated credentials are not supported for Terraform.
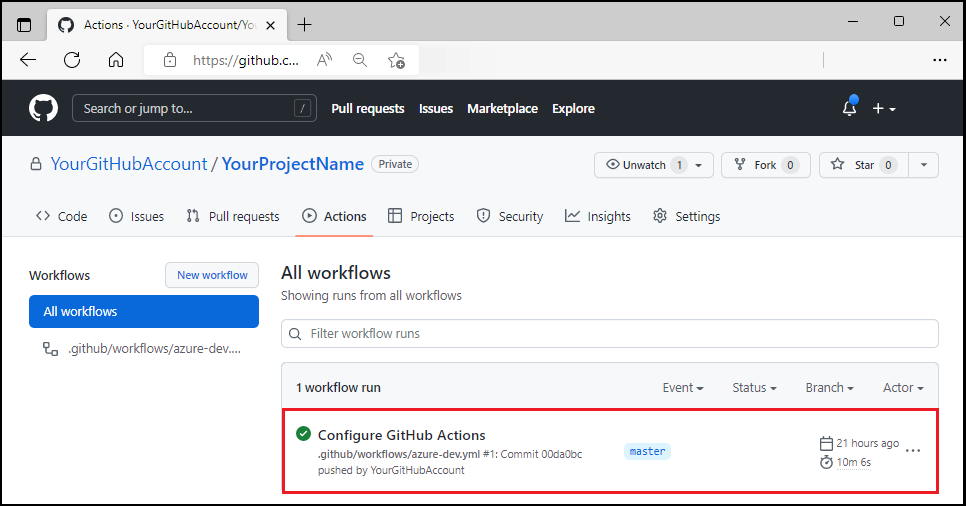
In your browser, open the GitHub repository for your project.
Select Actions to see the workflow running.
Test the pipeline with a code change
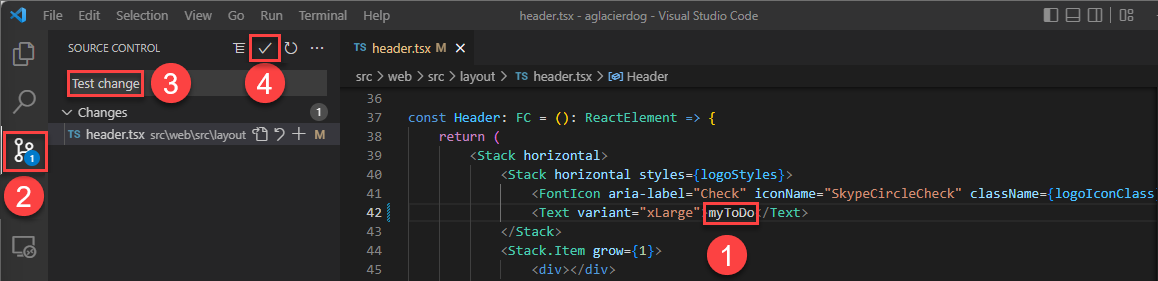
In the project's
/src/components/pagesdirectory, openHome.razor.Locate the
Hello AZD!header text near the top of the file.Change the text to
Hello, pipeline!.Save the file.
Commit and push your change. This action triggers the GitHub Actions pipeline to deploy the update.
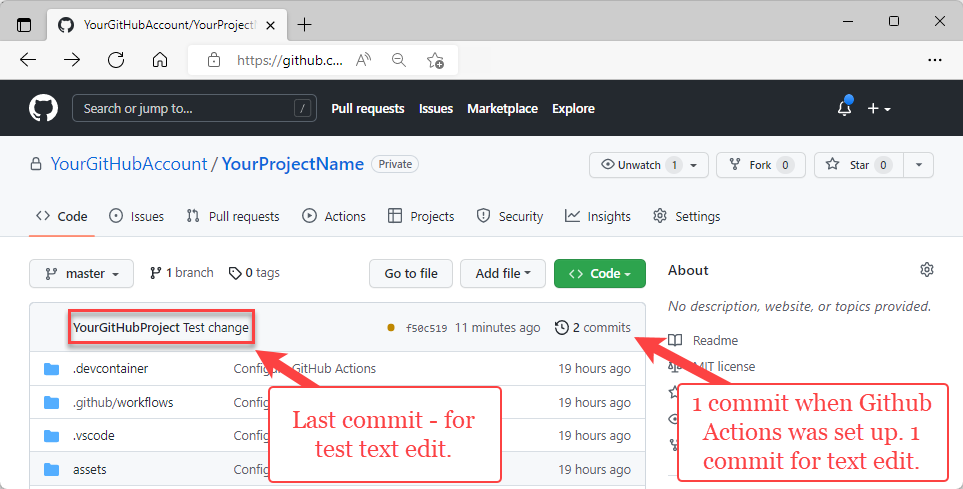
In your browser, open your project's GitHub repository to see:
- Your commit
- The commit from GitHub Actions setup
Select Actions to see the test update reflected in the workflow.

To view the deployed update, visit the web frontend URL provided in the
azdoutput.
Use azd as a GitHub Action
You can install azd as a GitHub Action using the setup-azd action. To use it, add the following to your .github/workflows/azure-dev.yml file:
on: [push]

jobs:
  build:
    runs-on: ubuntu-latest
    steps:
      - name: Install azd
        uses: Azure/setup-azd@v1.0.0
Note
Check the setup-azd releases for the latest version number.
Clean up resources
When you no longer need the Azure resources created in this article, run the following command:
azd down
This command removes all Azure resources associated with your project.