Note
Access to this page requires authorization. You can try signing in or changing directories.
Access to this page requires authorization. You can try changing directories.
Microsoft Dev Box Auto Delete (Preview) helps organizations manage resources and control costs by automatically deleting unused Dev Boxes. This article explains how to enable the feature, configure autodeletion settings, and cancel scheduled deletions in both the Azure portal and developer portal. Use these steps to optimize Dev Box usage in your Azure subscription.
Prerequisites
- Microsoft Dev Box configured with a dev center and at least one project.
Enable the preview feature
While the Dev Box Auto Delete feature is in Preview, you must manually enable it in your Azure subscription. Follow these steps:
Sign in to the Azure portal.
Go to the Azure subscription where you want to enable Dev Box autodeletion.
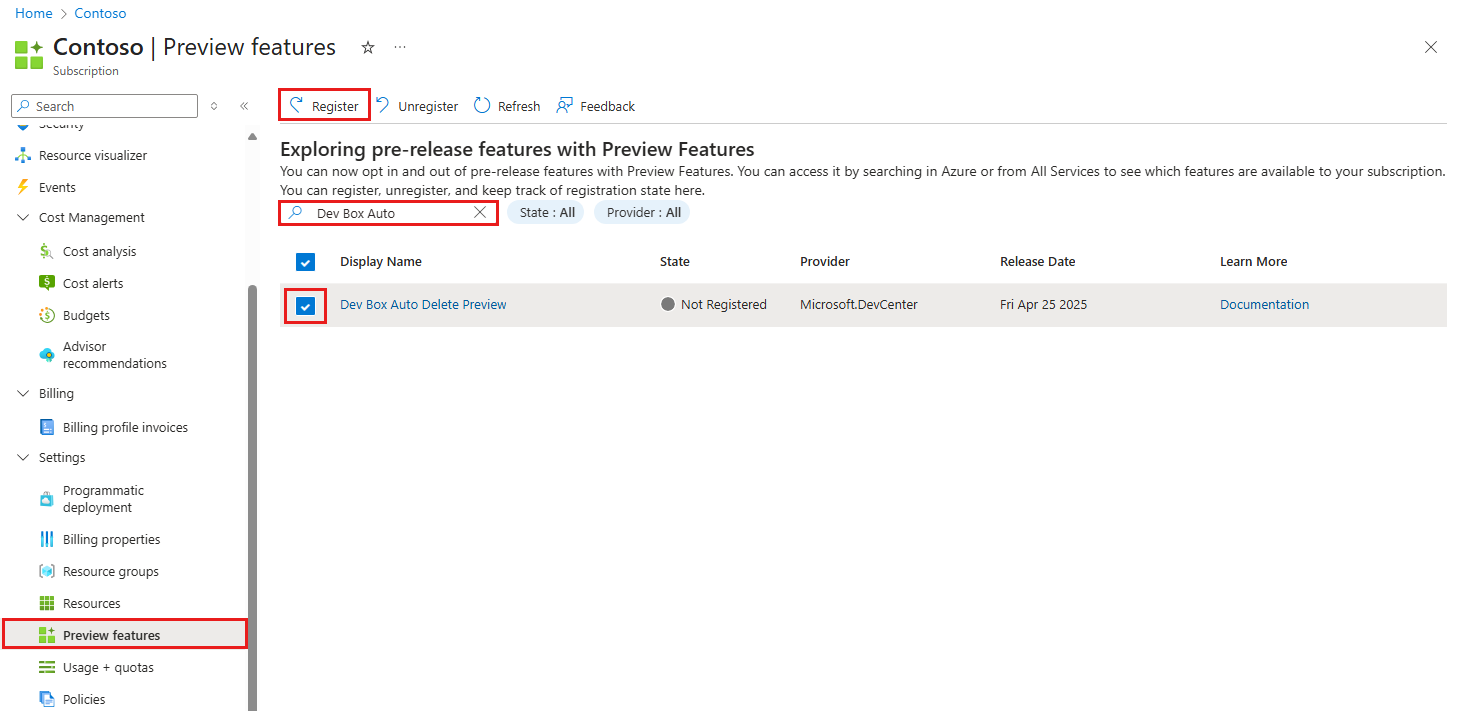
In the left menu, select Preview features.
In the search box, type "Dev Box Auto".
Select Dev Box Auto Delete Preview, and then select Register.
After you register the feature, it will be available for use in your subscription.

Set up autodeletion in a project
To configure autodeletion for unused dev boxes in a project, follow these steps in the Azure portal:
Open an existing Dev Box project, or create a new one in your subscription.
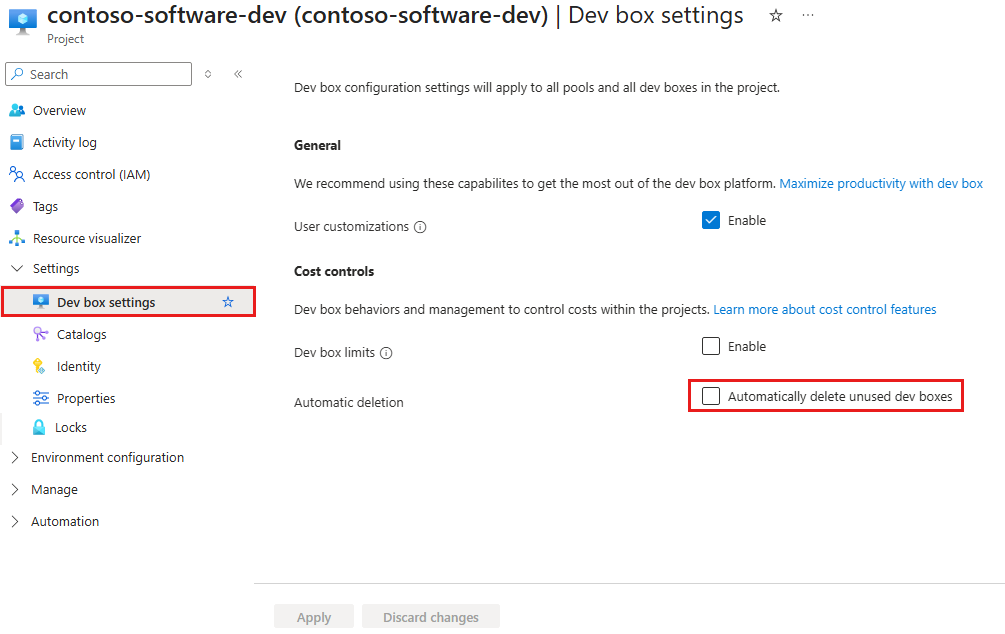
In the left menu, under Settings, select Dev box settings.
On the Dev box settings page, in the Cost controls section, select Automatically delete unused dev boxes.
When automatic deletion is enabled, you can configure the following options:
- Inactivity threshold: Enter the number of inactive days before a Dev Box is scheduled for automatic deletion (for example, 30 days).
- Grace period: Enter the number of days the developer or admin has to respond and keep the Dev Box (for example, 30 days).
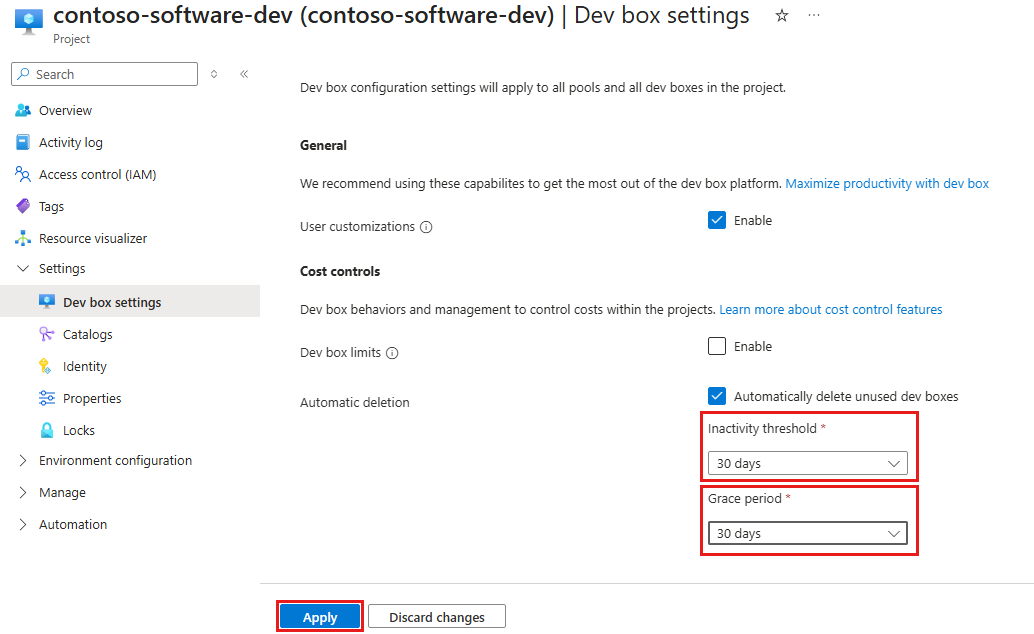
Select Apply.


Cancel scheduled deletions in the Azure portal
To cancel a scheduled deletion in the Azure portal, follow these steps:
Go to the pool that has your Dev Box scheduled for deletion.
Select that pool to view its Dev Boxes. You need Project Admin access to finish this step.
Select the ellipses (...) next to the Dev Box scheduled for deletion.
Select Cancel deletion.
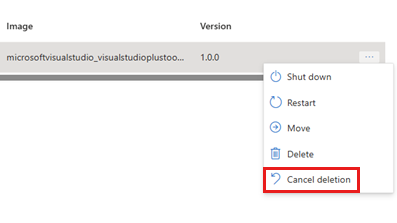

The selected dev box isn't deleted.
Cancel scheduled deletions in the developer portal
After reaching the inactivity threshold, you'll get an email notification warning you that your Dev Box is scheduled for deletion.

If you want to cancel the scheduled deletion and keep your dev box, follow these steps:
Sign in to the developer portal.
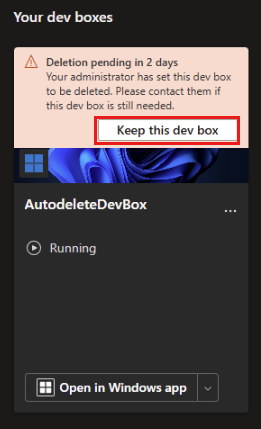
In the developer portal, find the dev box scheduled for deletion.
Select Keep this dev box to cancel the automatic deletion.
The selected dev box isn't deleted.
If you don't see a dev box tile with a pending deletion notice, check with your admin that you still have access to the project containing the dev box.