Note
Access to this page requires authorization. You can try signing in or changing directories.
Access to this page requires authorization. You can try changing directories.
This article describes how to install and configure the Microsoft Defender for Containers sensor on AKS, EKS, and GKE clusters using Helm. You'll learn about prerequisites, enabling Defender for Containers, and step-by-step deployment instructions for different environments.
General prerequisites
Make sure all prerequisite requirements for the Defender for Containers sensor are met, as described in the Defender sensor network requirements.
Step 1: Enable Defender for Containers
If your Defender for Containers plan isn't already enabled, follow these steps:
In the Azure portal, go to Microsoft Defender for Cloud, and select the subscription for the clusters where you want to install the Helm chart. In EKS and GKE, select the environment with those clusters (the security connector for the EKS or GKE account with the cluster).
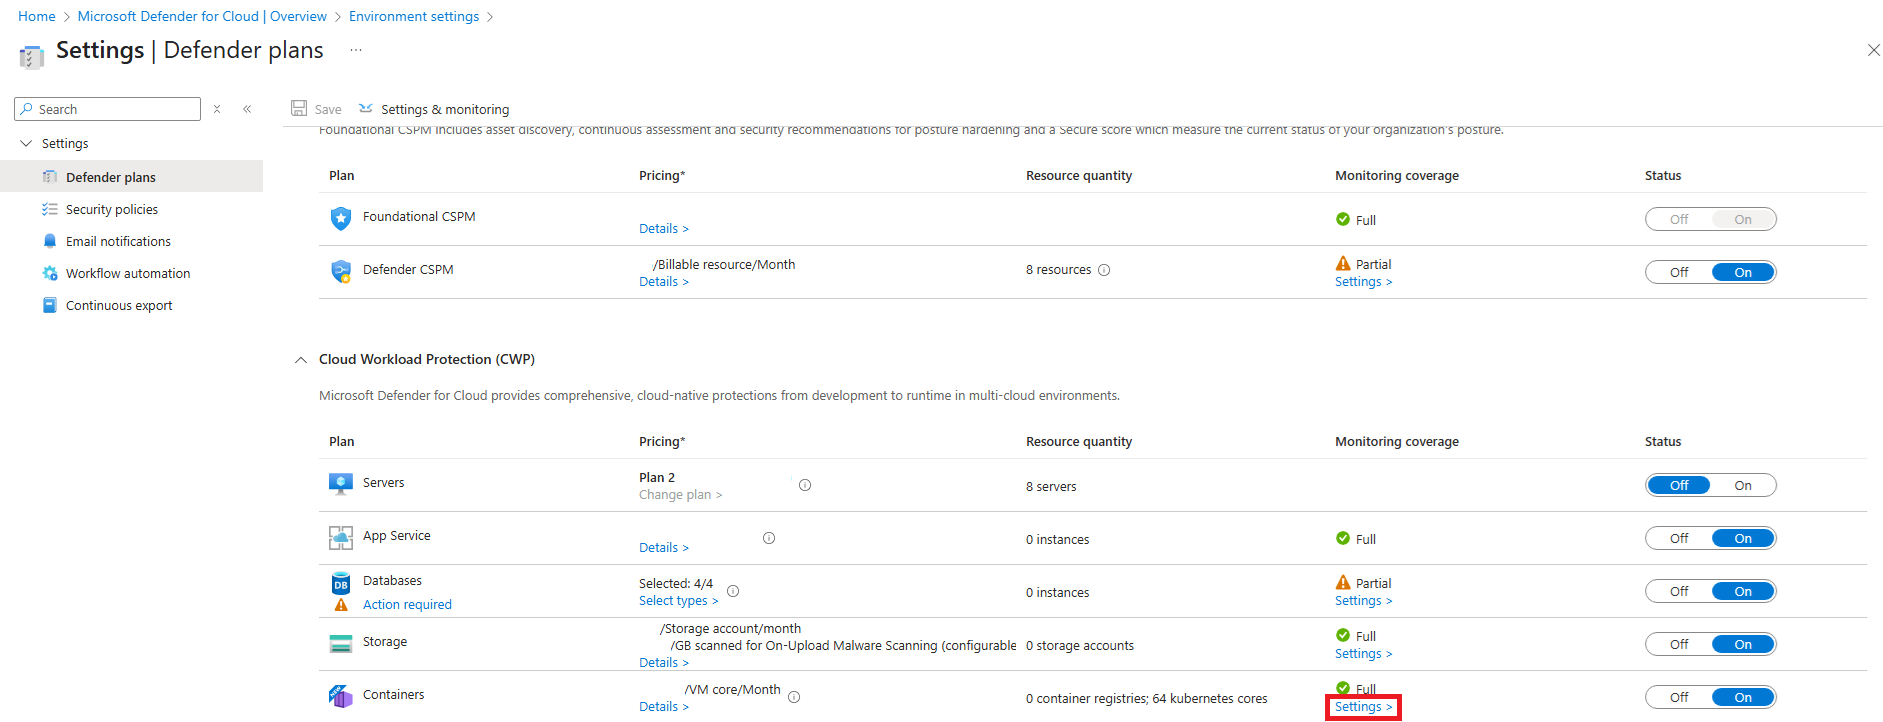
Under Cloud Workload Protection Platform (CWPP), find the Containers plan and set the toggle to On.
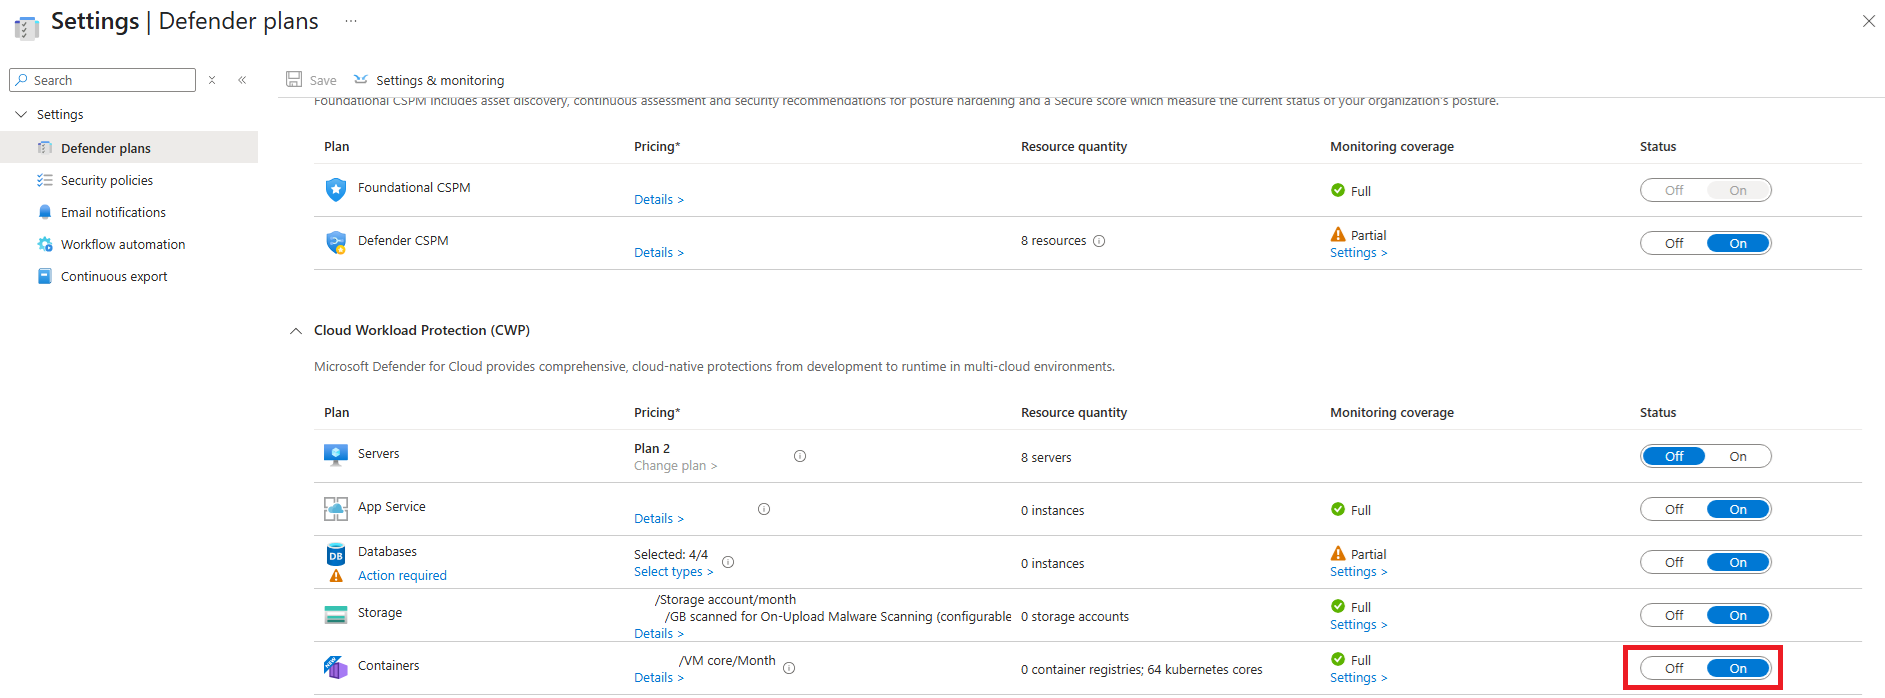
Next to the Containers plan, select Settings.
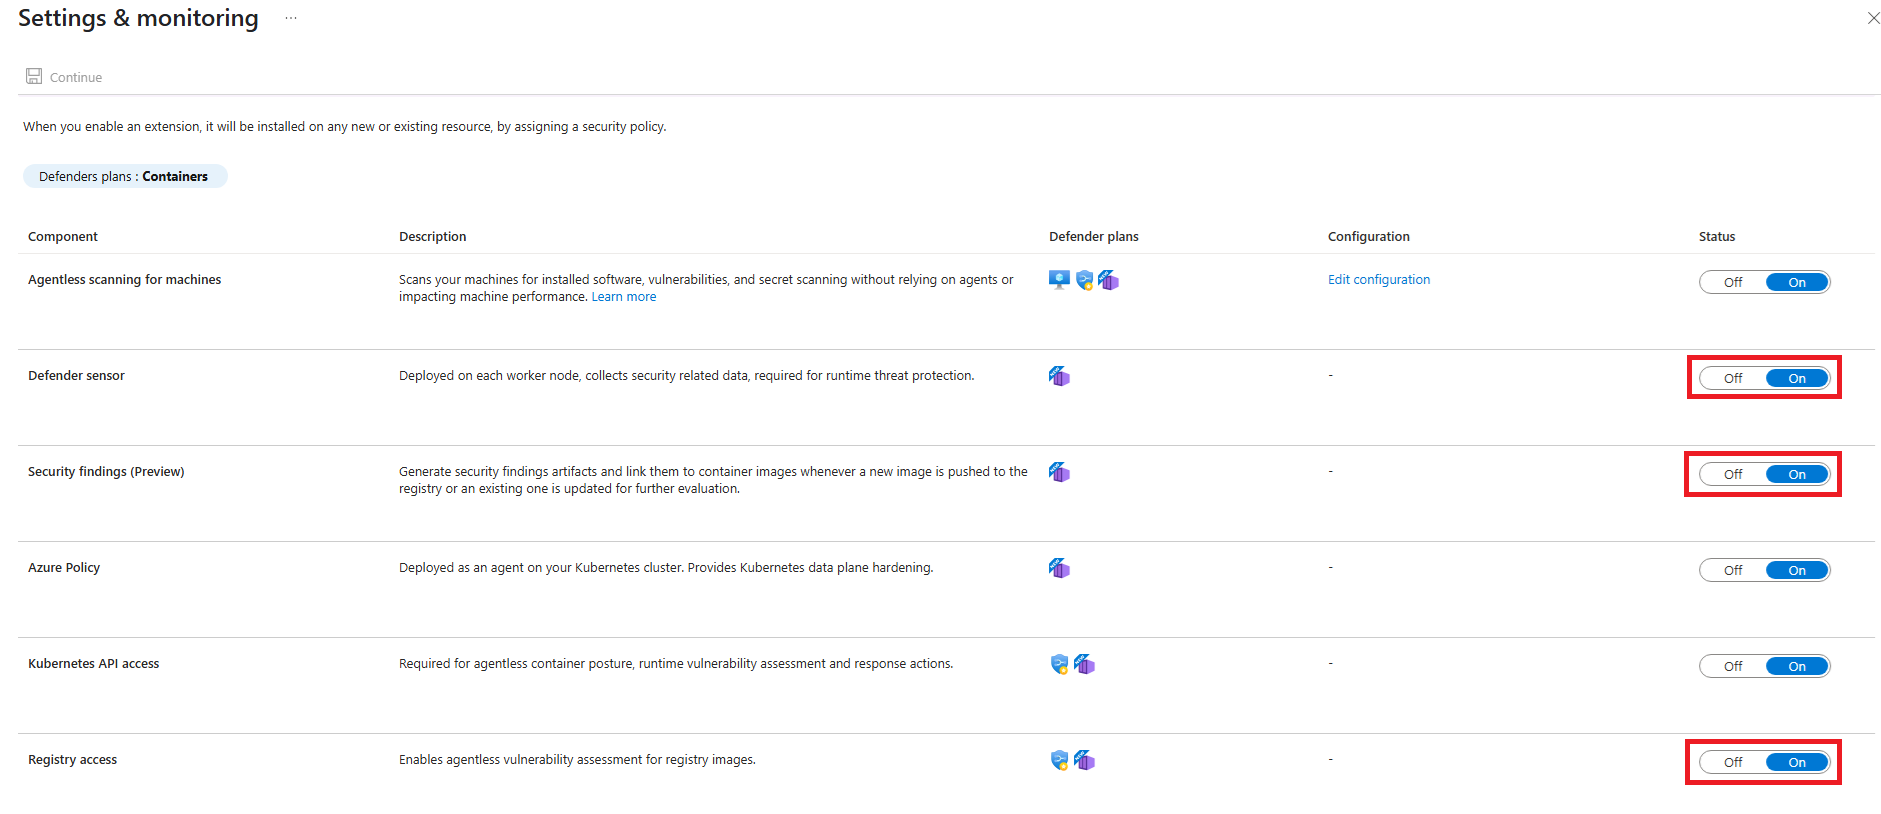
In the Settings & monitoring pane, ensure the following toggles are set to On:
- Defender sensor
- Security findings
- Registry access


Now you're ready to set up the Defender for Containers sensor with Helm.
Step 2: Install the sensors Helm chart
Installation prerequisites
Helm >= 3.8 (OCI support is GA)
Resource group owner role for the target cluster (AKS) or security connector (EKS or GKE)
Azure resource ID for the target cluster
Note
Use the following command to generate a list of your AKS clusters Azure resource IDs given a
<SUBSCRIPTION_ID>and<RESOURCE_GROUP>:az aks list \ --subscription <SUBSCRIPTION_ID> \ --resource-group <RESOURCE_GROUP> \ --query "[].id" \ -o tsv
AKS
Before you install the sensor, remove any conflicting policies. These policy assignments cause the GA version of the sensor to be deployed on your cluster. You can find the list of policy definitions for your subscription at Policy - Microsoft Azure. The ID for the conflicting policy is 64def556-fbad-4622-930e-72d1d5589bf5.
Run the following script to remove them using Azure CLI:
delete_conflicting_policies.sh
Run the script with the command:
delete_conflicting_policies.sh <CLUSTER_AZURE_RESOURCE_ID>
Note
This script removes resource group and subscription level policies for setting up the GA version of Defender for Containers, which can affect clusters other than the one you're configuring.
The following script installs the Defender for Containers sensor (and removes any existing deployment, if one exists):
install_defender_sensor_aks.sh
Run the script with the command:
install_defender_sensor_aks.sh <CLUSTER_AZURE_RESOURCE_ID> <RELEASE_TRAIN> <VERSION>
In the following command, replace the placeholder text <CLUSTER_AZURE_RESOURCE_ID>, <RELEASE_TRAIN>, and <VERSION> with your own values. Use 'public' for the public preview releases (0.9.x). For <VERSION>, use 'latest' or a specific semantic version.
Note
This script sets a new kubeconfig context, and might create a Log Analytics workspace in your Azure account.
EKS/GKE
The following script installs the Defender for Containers sensor (and removes any existing deployment, if one exists):
Set your kubeconfig context to the target cluster, and run the script with the command:
install_defender_sensor_mc.sh <SECURITY_CONNECTOR_AZURE_RESOURCE_ID> <RELEASE_TRAIN> <VERSION> <DISTRIBUTION> [<ARC_CLUSTER_RESOURCE_ID>]
In the following command, replace the placeholder text <SECURITY_CONNECTOR_AZURE_RESOURCE_ID>, <RELEASE_TRAIN>, <VERSION>, <DISTRIBUTION>, and <ARC_CLUSTER_RESOURCE_ID> with your own values. Please note that ARC_CLUSTER_RESOURCE_ID is an optional parameter and only should be used for existing clusters who use the Defender for Containers arc extension and want to provision the sensor via Helm or use arc cluster and want to provision the sensor via Helm.
For <SECURITY_CONNECTOR_AZURE_RESOURCE_ID>:
Set up a security connector for your AWS or GCP account
Note
To install the Helm chart on an EKS or GKE cluster, make sure the cluster account is connected to Microsoft Defender for Cloud. See Connect your AWS account or Connect your GCP project.
Get its Azure resource ID
Note
To install the Helm chart on an EKS or GKE cluster, you need the security connector resource ID for the account your cluster belongs to. Run the az resource show CLI command to get this value.
For example:
az resource show \
 --name <connector-name> \
 --resource-group <resource-group-name> \
 --resource-type "Microsoft.Security/securityConnectors" \
 --subscription <subscription-id> \
 --query id -o tsv
In this example, replace the placeholder text
<connector-name>,<resource-group-name>, and<subscription-id>with your values.
Use 'public' for the public preview releases (0.9.x). For <VERSION>, use 'latest' or a specific semantic version. For <DISTRIBUTION>, use eks or gke.
Note
This script might create a Log Analytics workspace in your Azure account.
Run the following command to check that the installation succeeded:
helm list --namespace mdc
The STATUS field should read deployed.
Security rules for gated deployment
You can define security rules to control what is allowed to be deployed into your Kubernetes clusters. These rules enable you to block or audit container images based on security criteria, such as images with too many vulnerabilities.
Accessing security rules
- Navigate to the Microsoft Defender for Cloud (MDC) Dashboard.
- In the left navigation pane, select Environment settings.
- Click on the Security rules tile.
Configuring vulnerability assessment rules
- Within the Security rules page, navigate to Vulnerability assessment under the Gated deployment section.
- Create or edit your security rules as needed.
Important
For Helm installations:
- Subscription Support Warning: When creating rules, your selected subscription may be marked as "not supported for Gated deployment." This occurs because you installed the Defender for Containers components using Helm rather than through the dashboard's automatic installation.
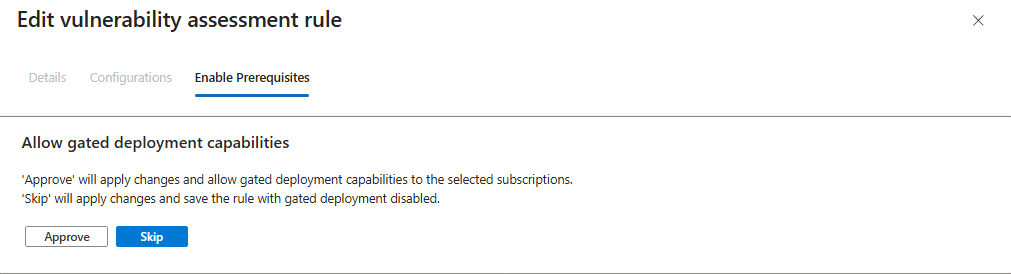
- Skip Auto-Installation: If prompted to enable gating in the third tab of the security rule edit window, make sure to press Skip. This option enables auto-installation, which conflicts with your existing Helm deployment.
Existing recommendation to provision sensor
Note
If you use Helm to set up the sensor, ignore the existing recommendations.
For AKS:
Azure Kubernetes Service clusters should have Defender profile enabled - Microsoft Azure

For multicloud:
Azure Arc-enabled Kubernetes clusters should have the Defender extension installed - Microsoft Azure

Upgrade an existing Helm-based deployment
Run the following command to update an existing Helm-based deployment:
helm upgrade microsoft-defender-for-containers-sensor \
oci://mcr.microsoft.com/azuredefender/microsoft-defender-for-containers-sensor \
--devel \
--reuse-values