Note
Access to this page requires authorization. You can try signing in or changing directories.
Access to this page requires authorization. You can try changing directories.
In this article, you learn how to create, view, and delete Playwright workspaces using the Azure portal.
Important
Playwright Workspaces is currently in preview. For legal terms that apply to Azure features that are in beta, in preview, or otherwise not yet released into general availability, see the Supplemental Terms of Use for Microsoft Azure Previews.
Prerequisites
- An Azure account with an active subscription. Create an account for free.
Create a workspace
To connect with cloud browsers, you first need to create a Playwright workspace.
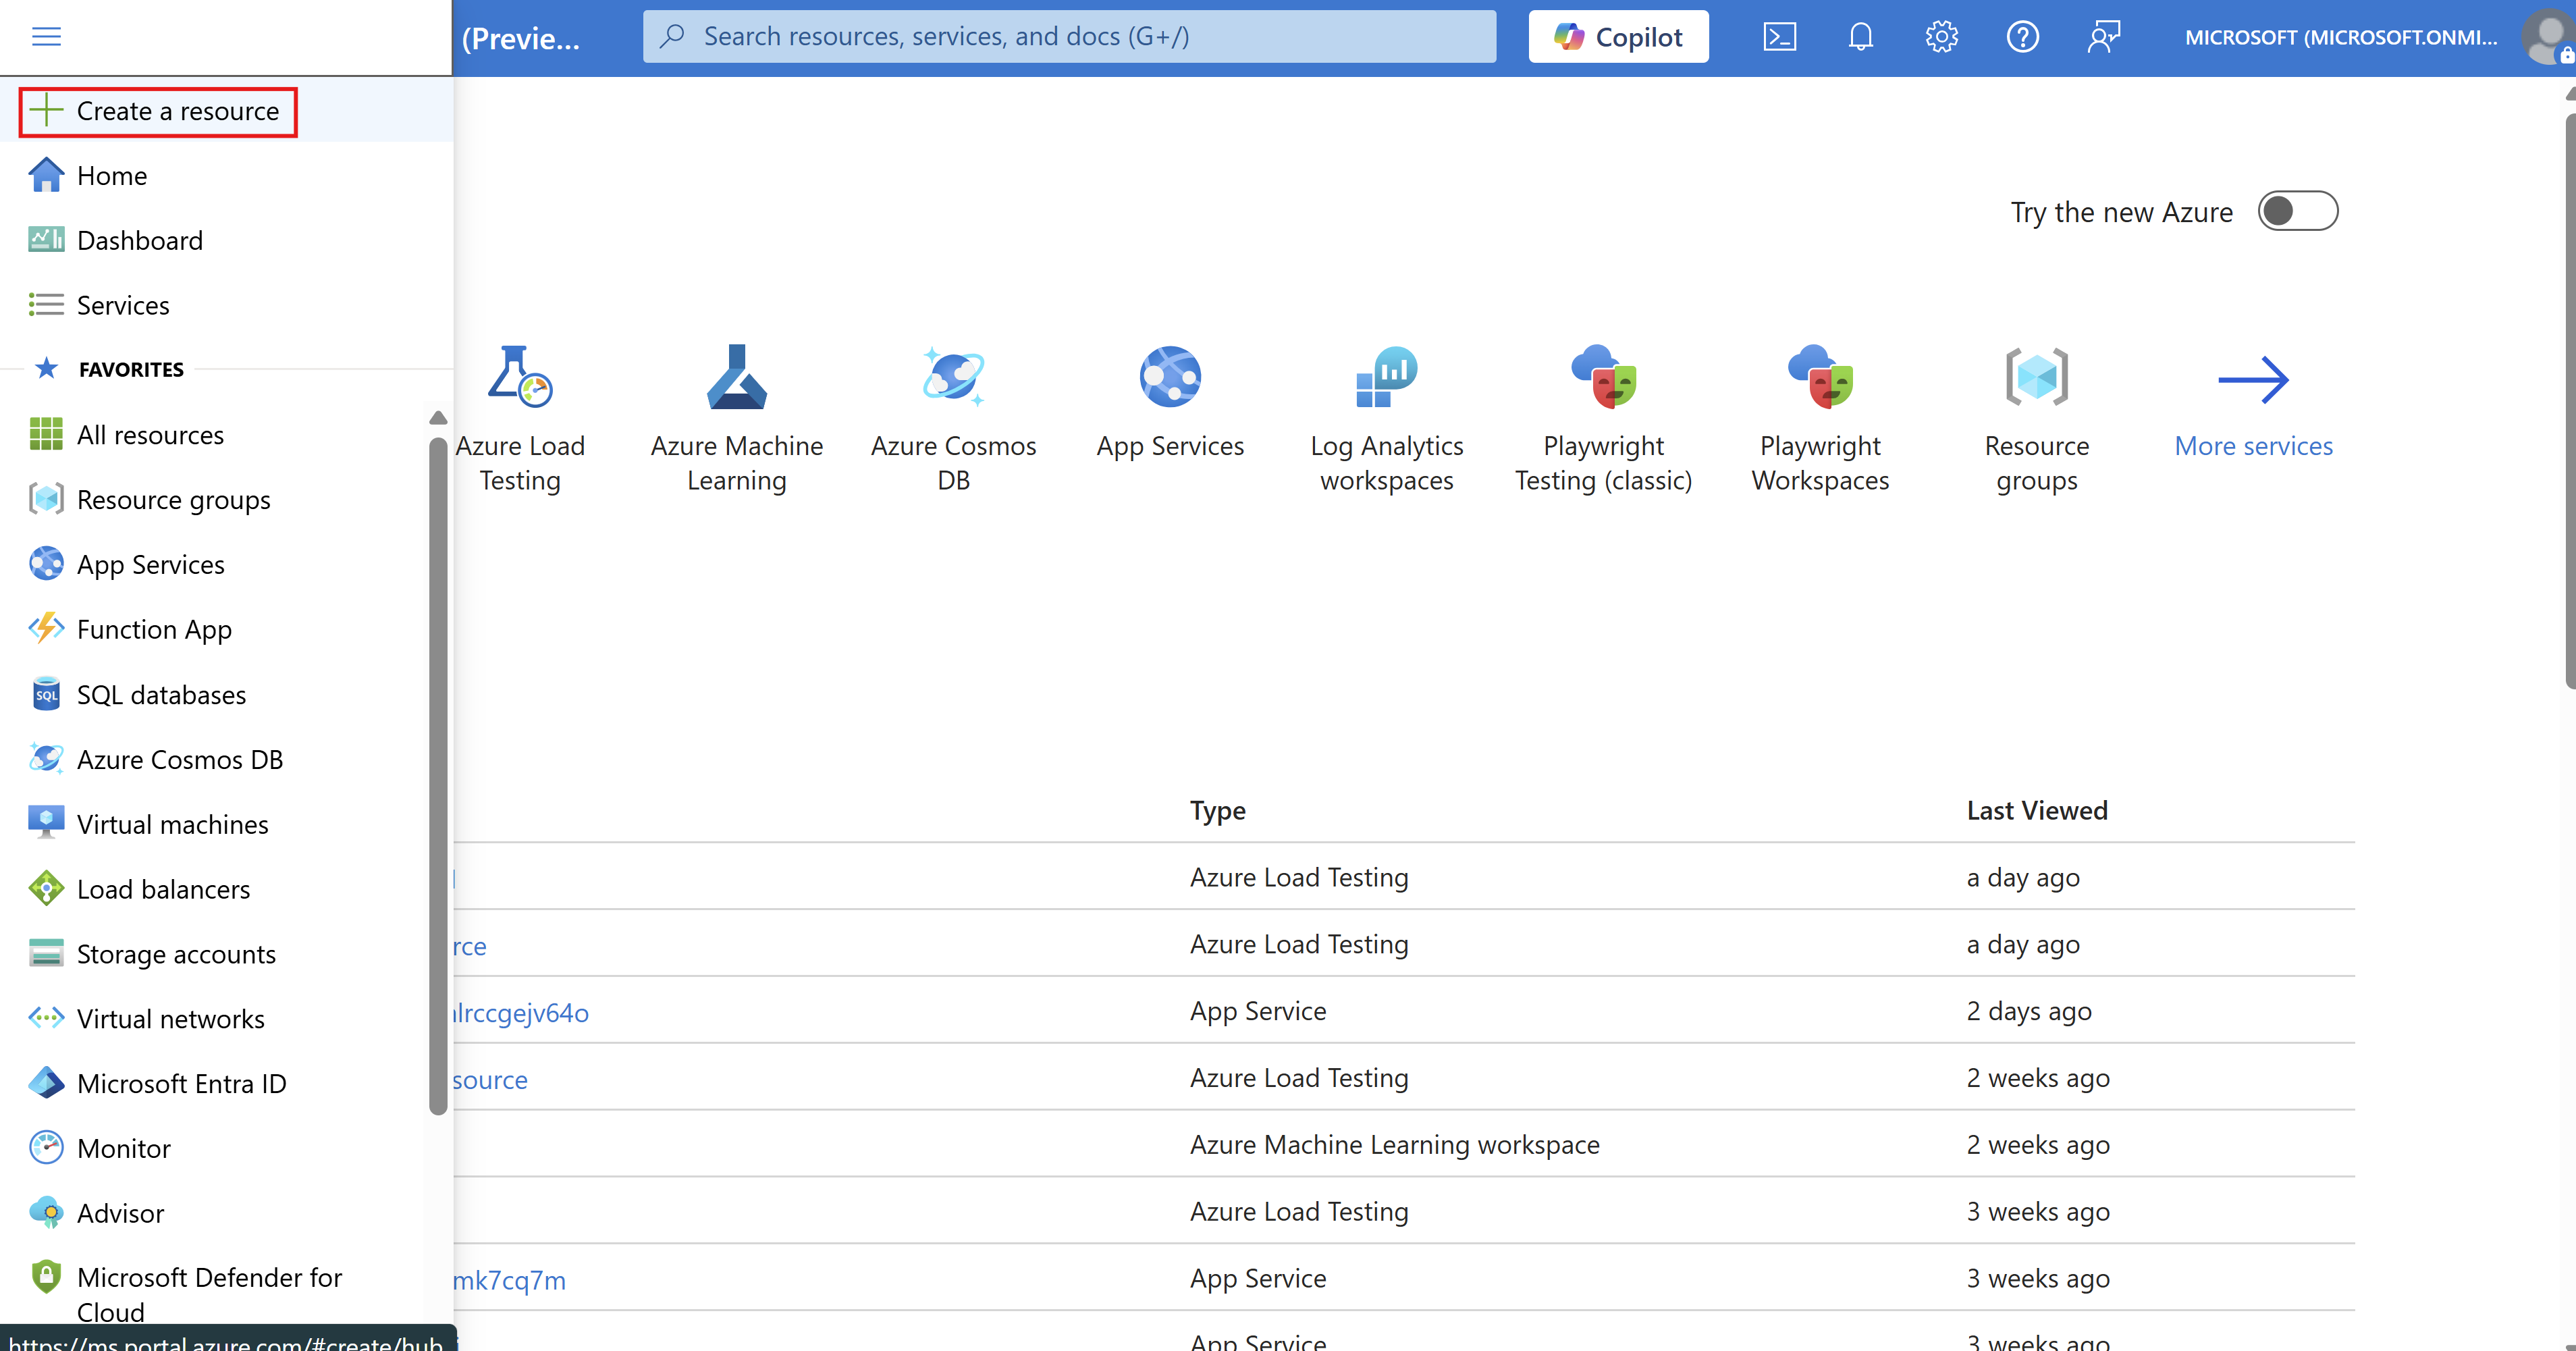
Sign in to the Azure portal.
Select the menu button in the upper-left corner of the portal, and then select Create a resource a resource.
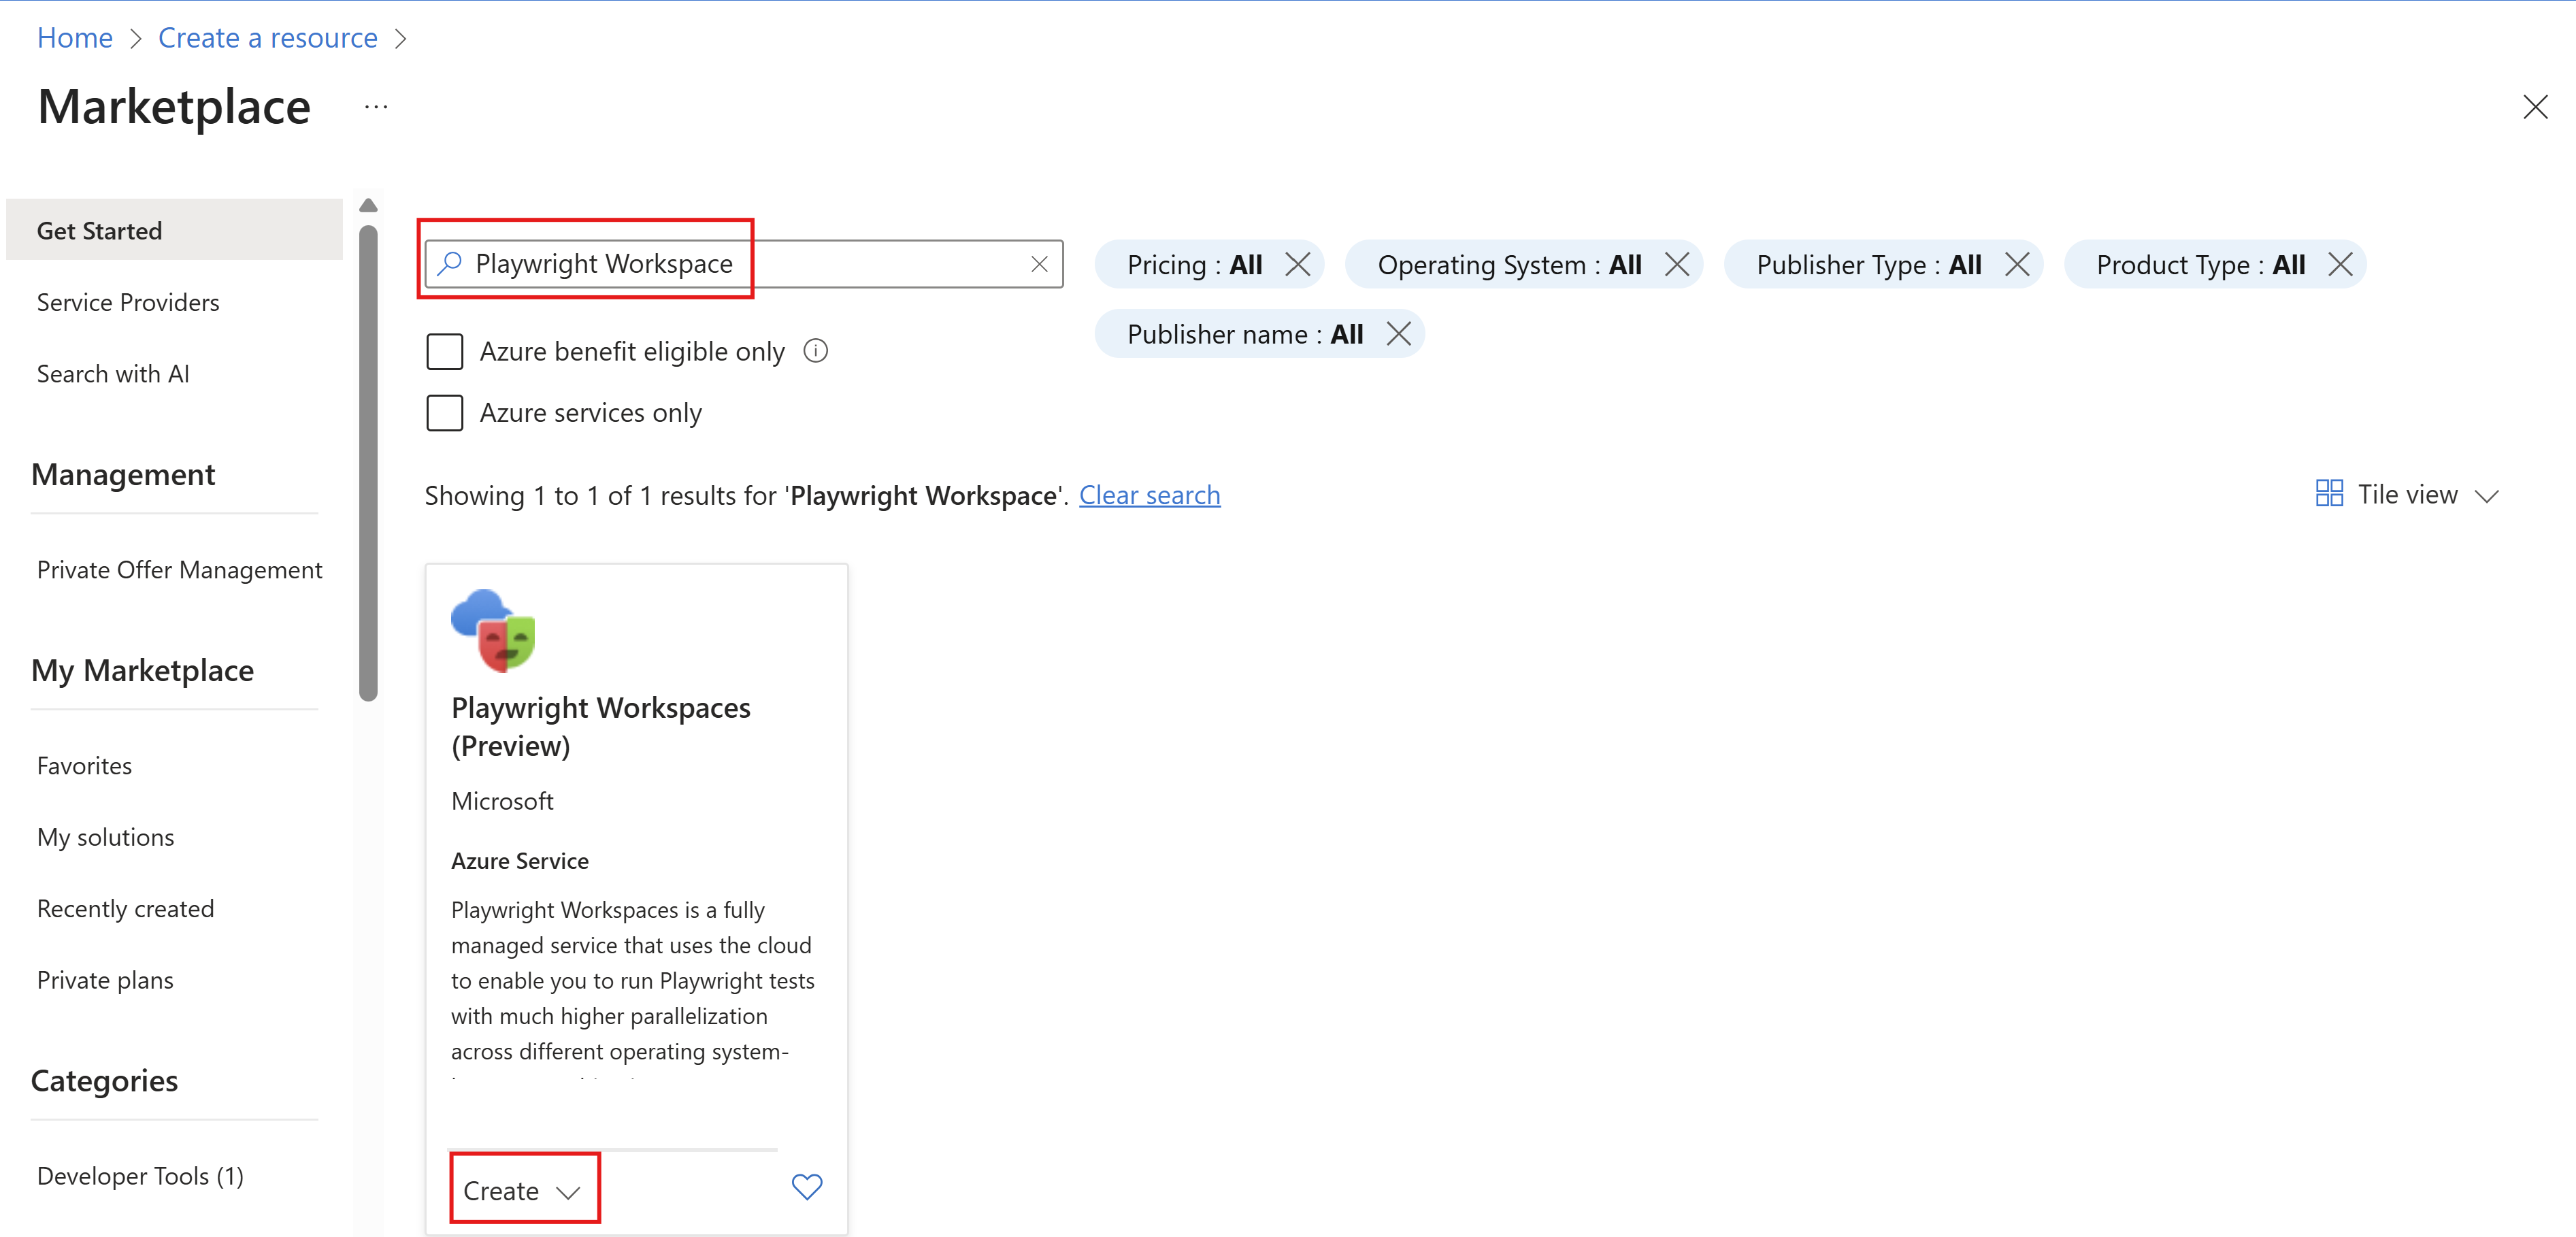
Enter Playwright Workspaces in the search box.
Select the Playwright Workspaces card, and then select Create.
Provide the following information to configure a new Playwright workspace:
Field Description Subscription Select the Azure subscription that you want to use for this Playwright workspace. Resource group Select an existing resource group. Or select Create new, and then enter a unique name for the new resource group. Name Enter a unique name to identify your workspace.
The name can only consist of alphanumerical characters, and have a length between 3 and 64 characters.Location Select a geographic location to host your workspace. Note
Optionally, you can configure more details on the Tags tab. Tags are name/value pairs that enable you to categorize resources and view consolidated billing by applying the same tag to multiple resources and resource groups.
After you're finished configuring the resource, select Review + Create.
Review all the configuration settings and select Create to start the deployment of the Playwright workspace.
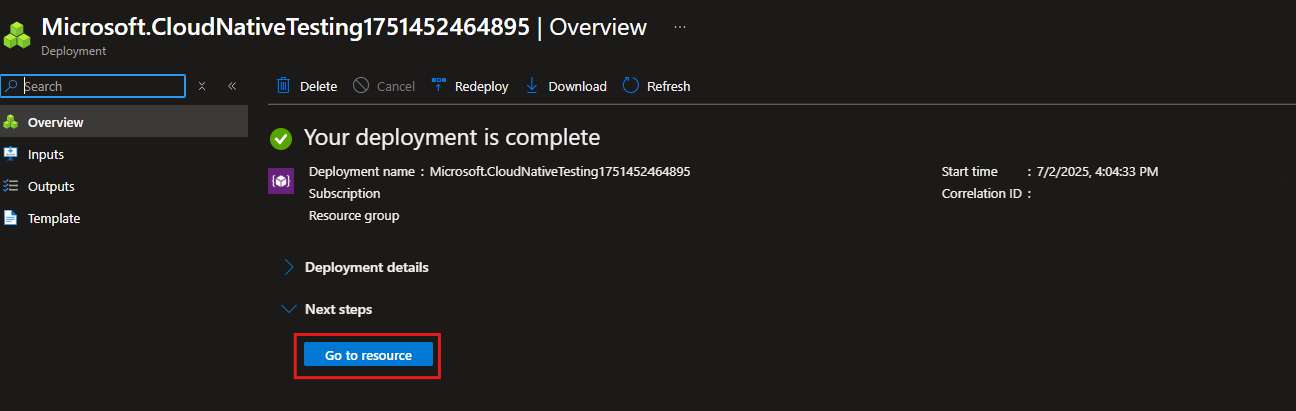
When the process has finished, a deployment success message appears.
To view the new workspace, select Go to resource.


Display a list of workspaces
To get the list of Playwright workspaces that you have access to:
Sign in to the Azure portal.
In the top search field, enter Playwright Workspaces.
Select Playwright Workspaces from the Services section to view all your workspaces.

Look through the list of workspaces found. You can filter based on subscription, resource groups, and locations.
Select a workspace to display its details.

Delete a workspace
To delete a Playwright workspace:
Sign in to the Azure portal.
Navigate to your Playwright workspace.
Select Delete to delete the workspace.
Warning
Deleting a workspace is an irreversible action. The workspace and the activity log can't be recovered.
Related content
Get started with running Playwright tests at scale
Learn more about the Playwright Workspaces resource limits