Note
Access to this page requires authorization. You can try signing in or changing directories.
Access to this page requires authorization. You can try changing directories.
In this tutorial, you'll learn how to expose an ASP.NET Core app's functionality through OpenAPI, add it as a tool to Azure AI Foundry Agent Service, and interact with your app using natural language in the agents playground.
If your web application already has useful features, like shopping, hotel booking, or data management, it's easy to make those capabilities available to an AI agent in Azure AI Foundry Agent Service. By simply adding an OpenAPI schema to your app, you enable the agent to understand and use your app's capabilities when it responds to users' prompts. This means anything your app can do, your AI agent can do too, with minimal effort beyond creating an OpenAPI endpoint for your app. In this tutorial, you start with a simple to-do list app. By the end, you'll be able to create, update, and manage tasks with an agent through conversational AI.
- Add OpenAPI functionality to your web app.
- Make sure OpenAPI schema compatible with Azure AI Foundry Agent Service.
- Register your app as an OpenAPI tool in Azure AI Foundry Agent Service.
- Test your agent in the the agents playground.
Prerequisites
This tutorial assumes you're working with the sample used in Tutorial: Deploy an ASP.NET Core and Azure SQL Database app to Azure App Service.
At a minimum, open the sample application in GitHub Codespaces and deploy the app by running azd up.
Add OpenAPI functionality to your web app
Tip
You can make all the following changes by telling GitHub Copilot in Agent mode:
I'd like to add OpenAPI functionality to all the methods in Controllers/TodosController.cs, but I don't want to change the existing functionality with MVC. Please also generate the server URL and operation ID in the schema.
In the codespace terminal, add the NuGet Swashbuckle packages to your project:
dotnet add package Swashbuckle.AspNetCore --version 6.5.0
dotnet add package Swashbuckle.AspNetCore.Annotations --version 6.5.0
In Controllers/TodosController.cs, add the following API methods. To make them compatible with the Azure AI Foundry Agent Service, you must specify the
OperationIdproperty in theSwaggerOperationattribute (see How to use Azure AI Foundry Agent Service with OpenAPI Specified Tools: Prerequisites).// GET: api/TodosApi [HttpGet] [SwaggerOperation(Summary = "Gets all Todo items", OperationId = "GetTodos")] [ProducesResponseType(typeof(IEnumerable<Todo>), 200)] public async Task<ActionResult<IEnumerable<Todo>> GetTodos() { return await _context.Todo.ToListAsync(); } // GET: api/todos/5 [HttpGet("api/todos/{id}")] [SwaggerOperation(Summary = "Gets a Todo item by ID", OperationId = "GetTodoById")] [ProducesResponseType(typeof(Todo), 200)] [ProducesResponseType(404)] public async Task<ActionResult<Todo>> GetTodo(int id) { var todo = await _context.Todo.FindAsync(id); if (todo == null) { return NotFound(); } return todo; } // POST: api/todos [HttpPost("api/todos")] [ProducesResponseType(StatusCodes.Status201Created)] [ProducesResponseType(StatusCodes.Status400BadRequest)] [SwaggerOperation(Summary = "Creates a new todo item.", Description = "Creates a new todo item and returns it.", OperationId = "CreateTodo")] public async Task<IActionResult> CreateTodo([FromBody] Todo todo) { if (!ModelState.IsValid) { return BadRequest(ModelState); } _context.Add(todo); await _context.SaveChangesAsync(); return CreatedAtAction(nameof(GetTodo), new { id = todo.ID }, todo); } // PUT: api/todos/{id} [HttpPut("api/todos/{id}")] [ProducesResponseType(StatusCodes.Status204NoContent)] [ProducesResponseType(StatusCodes.Status400BadRequest)] [ProducesResponseType(StatusCodes.Status404NotFound)] [SwaggerOperation(Summary = "Updates a todo item.", Description = "Updates an existing todo item by ID.", OperationId = "UpdateTodo")] public async Task<IActionResult> UpdateTodo(int id, [FromBody] Todo todo) { // Use the id from the URL fragment only, ignore mismatching check if (!TodoExists(id)) { return NotFound(); } todo.ID = id; _context.Entry(todo).State = EntityState.Modified; await _context.SaveChangesAsync(); return NoContent(); } // DELETE: api/todos/{id} [HttpDelete("api/todos/{id}")] [ProducesResponseType(StatusCodes.Status204NoContent)] [ProducesResponseType(StatusCodes.Status404NotFound)] [SwaggerOperation(Summary = "Deletes a todo item.", Description = "Deletes a todo item by ID.", OperationId = "DeleteTodo")] public async Task<IActionResult> DeleteTodo(int id) { var todo = await _context.Todo.FindAsync(id); if (todo == null) { return NotFound(); } _context.Todo.Remove(todo); await _context.SaveChangesAsync(); return NoContent(); }At the top of Controllers/TodosController.cs, add the following usings:
using Microsoft.AspNetCore.Http;
using Swashbuckle.AspNetCore.Annotations;
This code is duplicating the functionality of the existing controller, which is unnecessary, but you'll keep it for simplicity. A best practice would be to move the app logic to a service class, then call the service methods both from the MVC actions and from the API methods.
In Program.cs, register the Swagger generator service. This enables OpenAPI documentation for your API, which lets Azure AI Foundry Agent Service understand your APIs. Be sure to specify the server URL. Azure AI Foundry Agent Service needs a schema that contains the server URL.
builder.Services.AddSwaggerGen(c =>
{
    c.EnableAnnotations();
    var websiteHostname = Environment.GetEnvironmentVariable("WEBSITE_HOSTNAME");
    if (!string.IsNullOrEmpty(websiteHostname))
    {
        c.AddServer(new Microsoft.OpenApi.Models.OpenApiServer { Url = $"https://{websiteHostname}" });
    }
});
In Program.cs, enable the Swagger middleware. This middleware serves the generated OpenAPI documentation at runtime, making it accessible via a browser.
app.UseSwagger();
app.UseSwaggerUI();
In the codespace terminal, run the application with
dotnet run.Select Open in Browser.
Navigate to the Swagger UI by adding
/swagger/index.htmlto the URL.Confirm that the API operations work by trying them out in the Swagger UI.
Back in the codespace terminal, deploy your changes by committing your changes (GitHub Actions method) or run
azd up(Azure Developer CLI method).Once your changes are deployed, navigate to
https://<your-app's-url>/swagger/v1/swagger.jsonand copy the schema for later.
Create an agent in Azure AI Foundry
Create an agent in the Azure AI Foundry portal by following the steps at: Quickstart: Create a new agent.
Select the new agent and add an action with the OpenAPI 3.0 specified tool by following the steps at How to use the OpenAPI spec tool.
In the Define schema page, paste the schema that you copied earlier. Review and save the action.
Test the agent
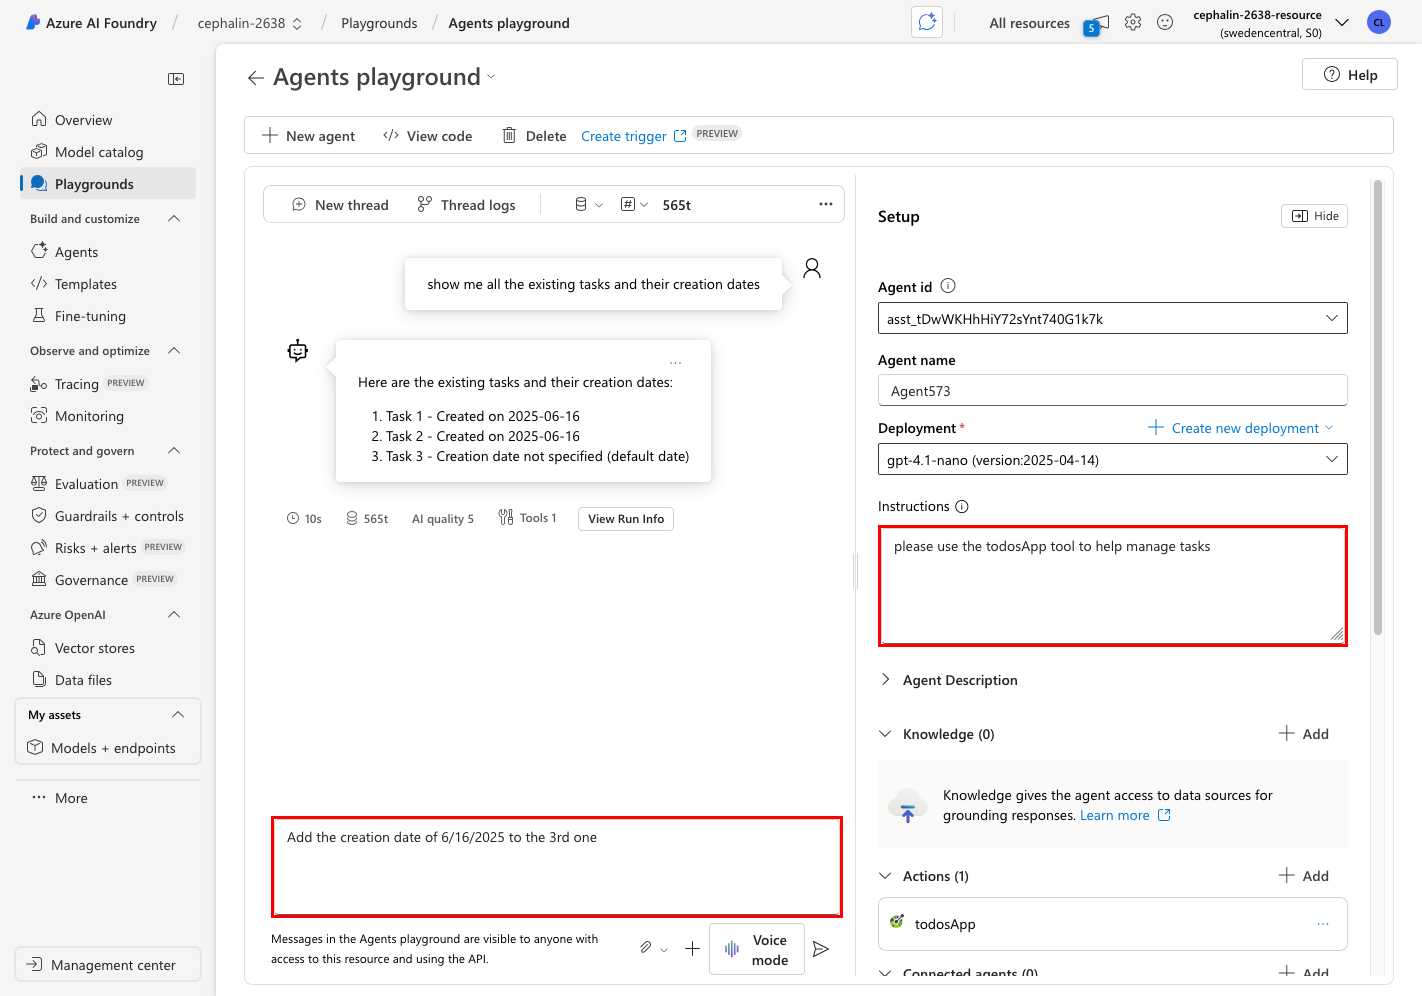
If the agents playground isn't already opened in the foundry portal, select the agent and select Try in playground.
In Instructions, give some simple instructions, like "Please use the todosApp tool to help manage tasks."
Chat with the agent with the following prompt suggestions:
- Show me all the tasks.
- Create a task called "Come up with three lettuce jokes."
- Change that to "Come up with three knock-knock jokes."
Security best practices
When exposing APIs via OpenAPI in Azure App Service, follow these security best practices:
- Authentication and Authorization: Protect your OpenAPI endpoints in App Service behind Azure API Management with Microsoft Entra ID and ensure only authorized users or agents can access the tools.
- Validate input data: The sample code checks
ModelState.IsValidin theCreateTodomethod, which ensures that the incoming data matches the model's validation attributes. For more information, see Model validation in ASP.NET Core. - Use HTTPS: The sample relies on Azure App Service, which enforces HTTPS by default and provides free TLS/SSL certificates to encrypt data in transit.
- Limit CORS: Restrict Cross-Origin Resource Sharing (CORS) to trusted domains only. For more information, see Enable CORS.
- Apply rate limiting: Use API Management or custom middleware to prevent abuse and denial-of-service attacks.
- Hide sensitive endpoints: Avoid exposing internal or admin APIs in your OpenAPI schema.
- Review OpenAPI schema: Ensure your OpenAPI schema doesn't leak sensitive information (such as internal URLs, secrets, or implementation details).
- Keep dependencies updated: Regularly update NuGet packages and monitor for security advisories.
- Monitor and log activity: Enable logging and monitor access to detect suspicious activity.
- Use managed identities: When calling other Azure services, use managed identities instead of hardcoded credentials.
For more information, see Secure your App Service app and Best practices for REST API security.
Next step
You've now enabled your App Service app to be used as a tool by Azure AI Foundry Agent Service and interact with your app's APIs through natural language in the agents playground. From here, you can continue add features to your agent in the Foundry portal, integrate it into your own applications using the Azure AI Foundry SDK or REST API, or deploy it as part of a larger solution. Agents created in Azure AI Foundry can be run in the cloud, integrated into chatbots, or embedded in web and mobile apps.
To take the next step and learn how to run your agent directly within Azure App Service, see the following tutorial: