Note
Access to this page requires authorization. You can try signing in or changing directories.
Access to this page requires authorization. You can try changing directories.
Introduction
In SharePoint 2013, a new feature has been introduced by Microsoft called JSLink. This new property is really helpful in scenarios where there is a requirement for custom rendering of a field in SharePoint views and forms.
This new property loads off the burden of generating XSLT views and allows only the knowledge of simple javascript and HTML to render custom UI for a field in list views and forms.
Requirement/ Scenario
We have a SharePoint list with a column “Request Status” and for the end user, there is a requirement to display the “Request Status” with some KPI indicators in SharePoint Views. The requirement is to transform SharePoint OOTB ListView (Fig-1) into a view which displays status with some indicators (Fig-2)

Fig-1: SharePoint OOTB ListView
[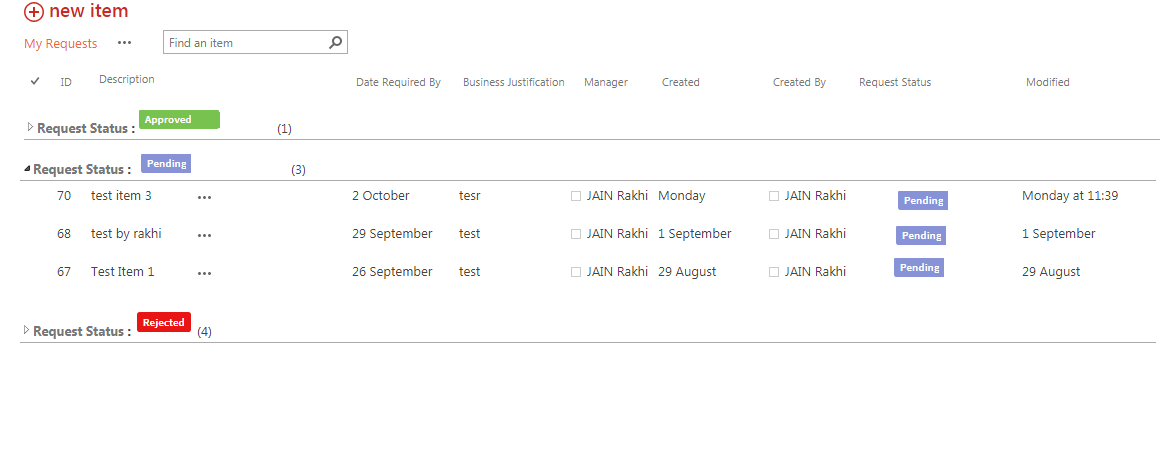
Fig-2: SharePoint OOTB ListView
](resources/662818.2.png)
Implementation Steps
(function () {

    var columnCtx = {};
    columnCtx.Templates = {};
    columnCtx.Templates.Fields = {
        "Request_x0020_Status": //This is field name to be displayed as indicator in view; Enter internal name of column
        {
            "View": DisplayApprovalStatus //Enter the function name
        }
    };

   SPClientTemplates.TemplateManager.RegisterTemplateOverrides(columnCtx);
})();

// images to be displayed in the view as indicators
var lm= "<img src='/sites/<siteUrl>/<LibraryName>/linem.png'/>";
var approved= "<img  src='/sites/<siteUrl>/<LibraryName>/approved.png'/>";
var rejected="<img src='/sites/<siteUrl>/<LibraryName>/rejected.png'/>";

function DisplayApprovalStatus(ctx) {
    var columnValue = ctx.CurrentItem.Request_x0020_Status;  // get the value of the Status Column field of the current item

    var statusIndicator = "";
   if (columnValue == "Awaiting Manager's Approval")
        statusIndicator = lm;

    else if (columnValue == "Rejected")
        statusIndicator = rejected;

    else if (columnValue == "Approved for processing")
        statusIndicator = approved;
    else
        statusIndicator = columnValue;

    return statusIndicator;
}
2. Upload status.js file in “Style Library” library on your site.
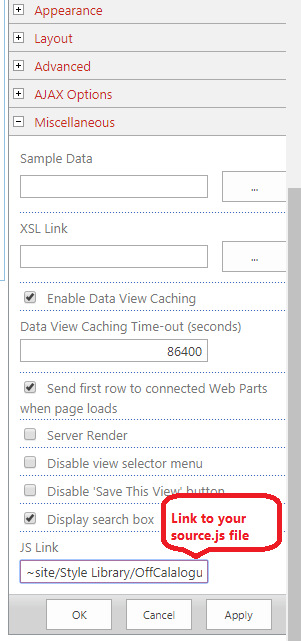
3. Set the JSLink property on a list view web part.
a. Go to list view and select “Edit Properties”.
b. In the “Miscellaneous” section of web part property, configure JSLink property as shown below:
Fig-3 JSLink in Edit WebPart Properties
Conclusion
With just a simple JavaScript file we have changed how the list view is rendering data and provided altogether an interactive UI experience for end users. We can make further advanced transformations in list view and forms in SharePoint 2013/ SharePoint Online be making use of JS Link property.
References
To understand further how the advanced branding customizations can be made using JS Link property, please refer to the below link:
https://dev.office.com/patterns-and-practices-detail/1851