Note
Access to this page requires authorization. You can try signing in or changing directories.
Access to this page requires authorization. You can try changing directories.
Now, in this wiki article, we will add the Workflow Manager 1.0 Certificate into SharePoint trust. After this step, we will avoid almost all the errors related to certificates.
This is step 2 in the process. In step 1, we exported the certificate from Workflow Manager server and in this step, we will import that certificate into SharePoint and build a trust.
Before Begin
- Please make sure you log in on the server where Workflow Manager is installed with Install Account.
Export the Workflow Certificate.
- Login on the server with Install account( krossfarm\kfinst)
- Open Internet Information Services (IIS) by typing Inetmgr in the search window
- In Internet Manager, expand Sites (on left-hand side), click on Workflow Management Site and on the right-hand side under Actions click Bindings
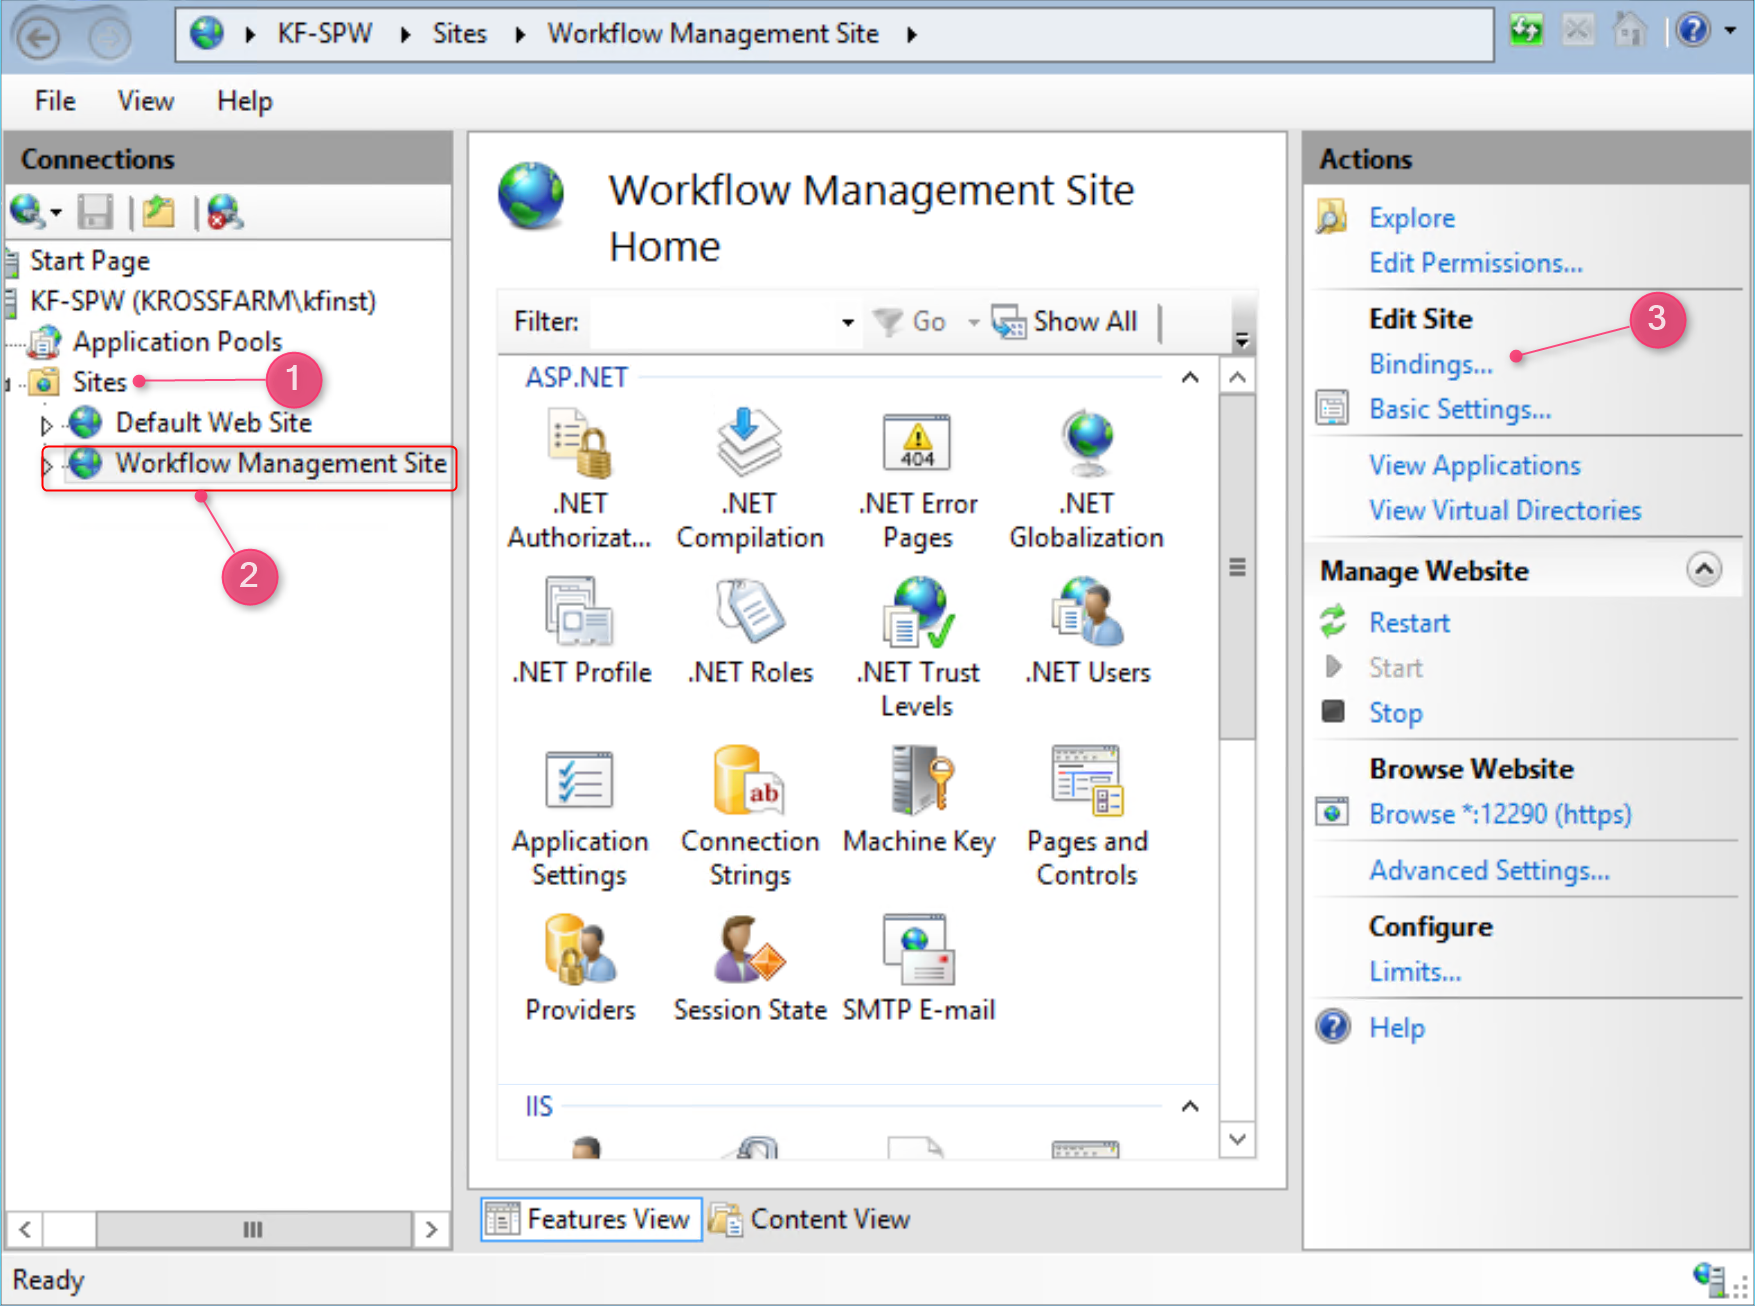
- On this page, select https and click Edit http://krossfarm.com/wp-content/uploads/2016/05/2016-05-29_01h31_35-1024x594.png
- On this page under SSL Certificate, click View certificateshttp://krossfarm.com/wp-content/uploads/2016/05/2016-05-29_01h31_58-1024x598.png
- Click on Details tab http://krossfarm.com/wp-content/uploads/2016/05/2016-05-29_01h32_17-829x1024.png
- Click Copy to Filehttp://krossfarm.com/wp-content/uploads/2016/05/2016-05-29_01h32_36-817x1024.png
- On Welcome to the Certificate Export Wizard click Nexthttp://krossfarm.com/wp-content/uploads/2016/05/2016-05-29_01h32_57-1024x976.png
- On Export Private Key select No, do not export the private key and click Nexthttp://krossfarm.com/wp-content/uploads/2016/05/2016-05-29_01h33_11-1024x982.png
- On Export File Format select DER encoded binary X.509 (.CER) and click Nexthttp://krossfarm.com/wp-content/uploads/2016/05/2016-05-29_01h33_27-1024x982.png
- On File to export select the path where the certificate will be saved and click Nexthttp://krossfarm.com/wp-content/uploads/2016/05/2016-05-29_01h33_56-1024x986.png
- On Completing the Certificate Export Wizard, click Finishhttp://krossfarm.com/wp-content/uploads/2016/05/2016-05-29_01h34_08-1024x977.png
- You will get a message "The export was successful" and click OK
http://krossfarm.com/wp-content/uploads/2016/05/2016-05-29_01h34_20.png
Move the File
Now move the certificate to the SharePoint Server.
Import Certificate into SharePoint.
- Now login on the SharePoint Server with Farm Admin account
- Open the Central Admin Site
- Click on Security and click Manage trust on the right-hand sidehttp://krossfarm.com/wp-content/uploads/2016/05/2016-05-29_01h38_33-1024x270.png
- On the Trust page click Newhttp://krossfarm.com/wp-content/uploads/2016/05/2016-05-29_01h40_35-1024x153.png
- On Establish Trust Relationship enter the following information:
- Name of the certificate
- Path of certificate (where you saved the certificate)
- Click OKhttp://krossfarm.com/wp-content/uploads/2016/05/2016-05-29_01h41_34-1024x940.png
- You will see your certificate added.http://krossfarm.com/wp-content/uploads/2016/05/2016-05-29_01h41_50-1024x88.png
That's it, we successfully built the trust. Now move to the next step and register the Workflow Proxy.
Back to Main
- Please go back and follow the next section where we will register Workflow Proxy with SharePoint. SharePoint 2016: Step By Step Installation of Workflow Manager