Note
Access to this page requires authorization. You can try signing in or changing directories.
Access to this page requires authorization. You can try changing directories.
This guide shows you how to enable forwarding on a users mailbox:
http://collaborationpro.com/wp-content/uploads/2015/02/Forwarding1-300x204.png
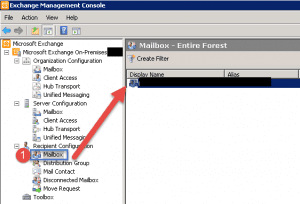
- Open up the Exchange Management Console.
- Expand Recipient Configuration.
- Click Mailbox.
- On the right hand side double click the mailbox you want to modify.
http://collaborationpro.com/wp-content/uploads/2015/02/Forwarding2-300x222.png
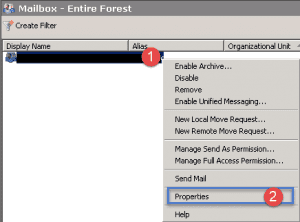
- Step 1 -> Right click on the user account.
- Step 2 -> Click on Properties.
http://collaborationpro.com/wp-content/uploads/2015/02/Forwarding3-248x300.png
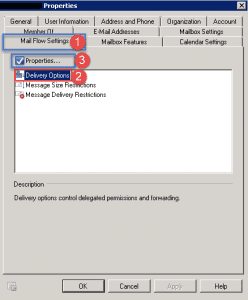
- Step 1 -> Click on the Mail Flow Settings Tab.
- Step 2 -> Click on Delivery Options.
- Step 3 -> Click on Properties.
http://collaborationpro.com/wp-content/uploads/2015/02/Forwarding4-292x300.png
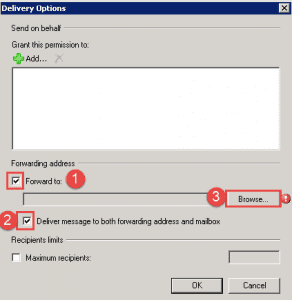
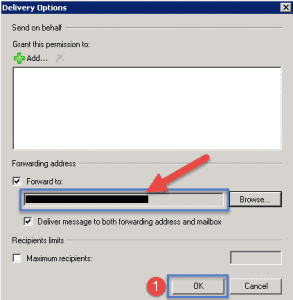
- Step 1 -> Click on the checkbox to enable forwarding.
- Step 2 (optional) -> you can select the option to deliver mail to both mailboxes.
- Step 3 -> Click the Browse button.
http://collaborationpro.com/wp-content/uploads/2015/02/Forwarding5-300x275.png
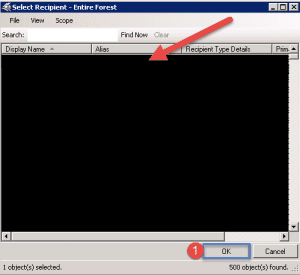
- Select the user or group from the list and then click on OK.
http://collaborationpro.com/wp-content/uploads/2015/02/Forwarding6-293x300.png
- The address will now show in the text box as shown above.
- Click OK.
- Back at the main mailbox settings window click Apply and then OK.