Note
Access to this page requires authorization. You can try signing in or changing directories.
Access to this page requires authorization. You can try changing directories.
This simple guide shows you how to create a Send Connector in Exchange 2013.
In the ECP click on Mail Flow -> send connectors.
http://edwardvbs.files.wordpress.com/2014/08/exsetup26.png?w=300
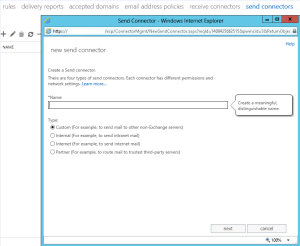
- Click on the + to add a new Send Connector.
- Type in a descriptive name and then select the Type.
- Click Next.
http://edwardvbs.files.wordpress.com/2014/08/exsetup27.png?w=300
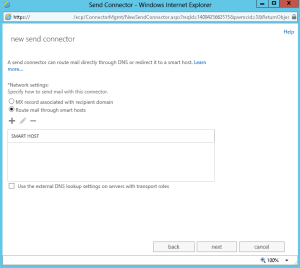
- Select your Network settings, if you routing mail through a smarthost then click the + button.
http://edwardvbs.files.wordpress.com/2014/08/exsetup28.png?w=300
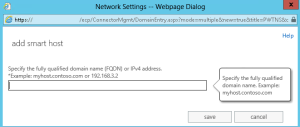
- Type in the smart host info and then click save.
- After that click Next.
http://edwardvbs.files.wordpress.com/2014/08/exsetup29.png?w=300
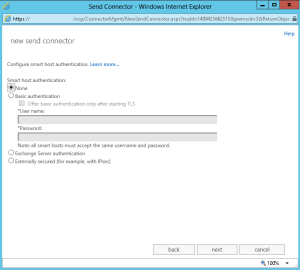
- Specify the authentication as per your ISP and click Next.
http://edwardvbs.files.wordpress.com/2014/08/exsetup30.png?w=300
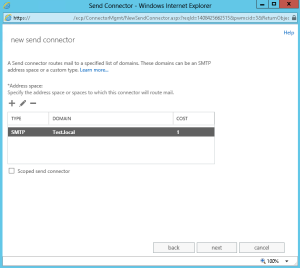
- Click on the + button to setup the Address Space.
http://edwardvbs.files.wordpress.com/2014/08/exsetup31.png?w=300
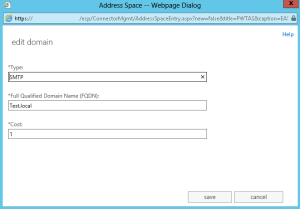
- Enter your FQDN and your Type.
- Click Save.
- Click Next.
http://edwardvbs.files.wordpress.com/2014/08/exsetup32.png?w=300
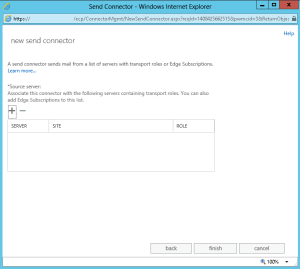
- Click on the + button to add in a Source server. When the window comes up select your exchange server, click the Add -> button and then click ok.
- Click finish and you have now have a send connector setup.