Note
Access to this page requires authorization. You can try signing in or changing directories.
Access to this page requires authorization. You can try changing directories.
Deploying SCOM into the AlwaysOn Availability Group
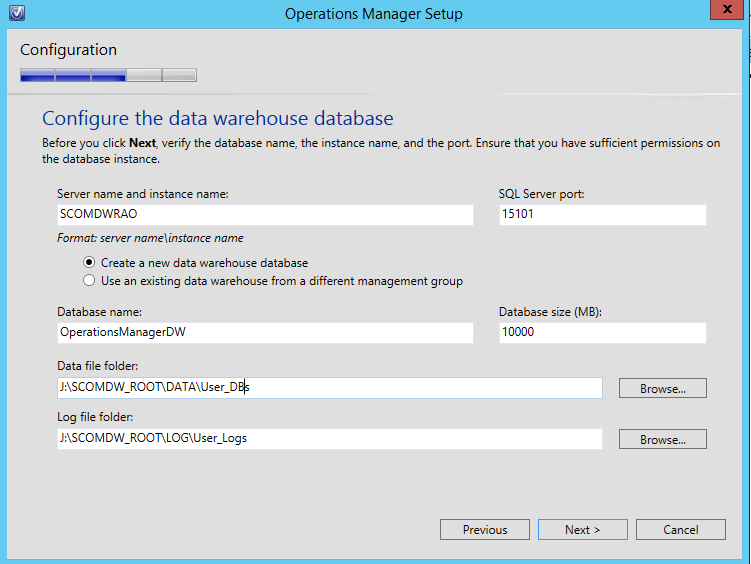
When it comes to installing a System Center product database into the AlwaysOn Availability Group, we need to point the setup to the AlwaysOn listener (SCOMAO in my case) and not the clustered SQL Server instance name. The same process applies to all SC product installations.
Assuming your SCOM installation completes without a hiccup or an issue, you’ve now got SCOM installed and configured to use the AlwaysOn Listener name which means it’s setup to use AlwaysOn however SQL itself isn’t quite ready so we need to dive back into SQL to make the SCOM and SCOM Data Warehouse databases highly available.
Adding the SCOM Databases to the Availability Group
With SCOM now installed, we’re using our AlwaysOn Listener to connect to the SQL Server however the SCOM database isn’t being replicated throughout the AlwaysOn configuration currently.
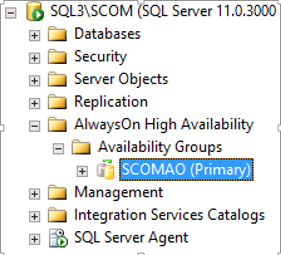
Connect to your SQL Server which is currently the Primary for the Availability Group. You can verify the primary or secondary status from the AlwaysOn High Availability folder in the SQL Server Management Studio.
Once connected and verified that you are connected to the Primary, we need to make changes to the SCOM database.
Expand the Databases folder and access the Properties for the OperationsManager database.
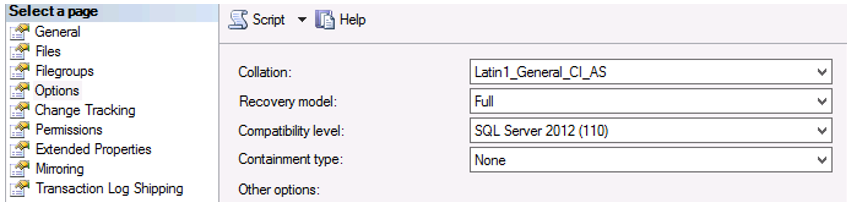
From the Recovery Model drop-down menu, change the option from Simple to Full as required by AlwaysOn.
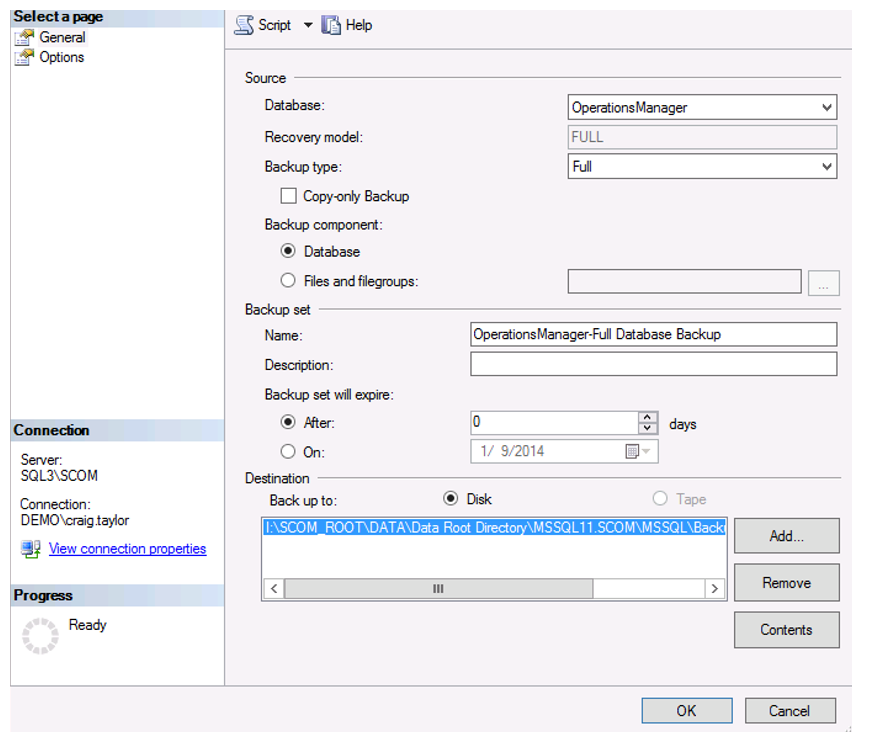
With the Recovery Model now set, we need to take a full backup of the database before processing with the AlwaysOn wizards.
With the database now ready, return to the AlwaysOn High Availability folder and right-click the SCOMAO Availability Group name and select the Add Database option from the menu.
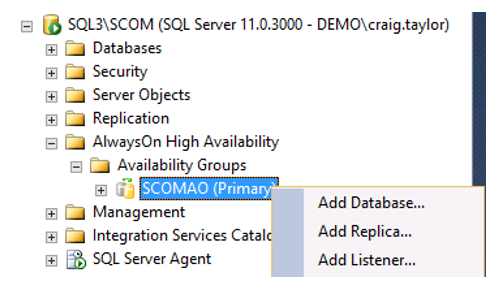
This will open the Add Database to Availability Group wizard.
On the Select Databases pane, you will see the sql_guide databases already a part of the availability group and the OperationsManager database should report the status of Meets prerequisites.
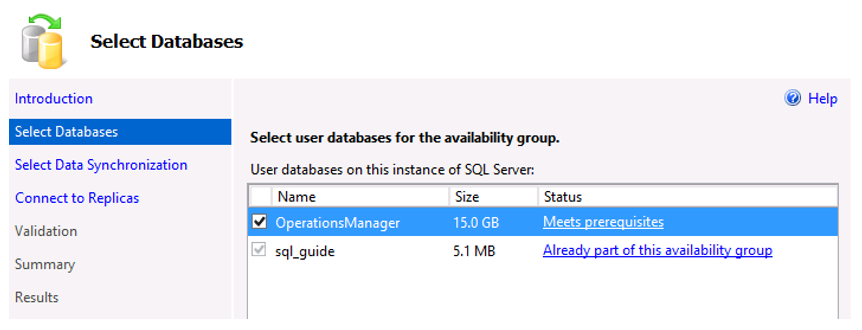
Select the check box for the OperationsManager database and hit Next.
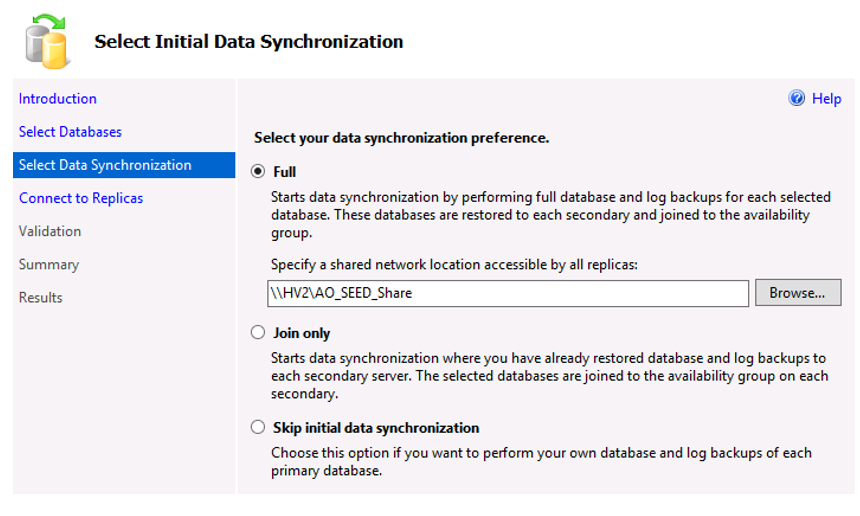
On the Select Data Synchronization pane, leave the default option of Full as is and use the same shared file share which we created earlier in the guide for the initial data transfer.
On the Connect to Replicas pane, you don’t need to specify any replicas this time as the connections are already configured in the Availability Group but you do need to connect to the instance.
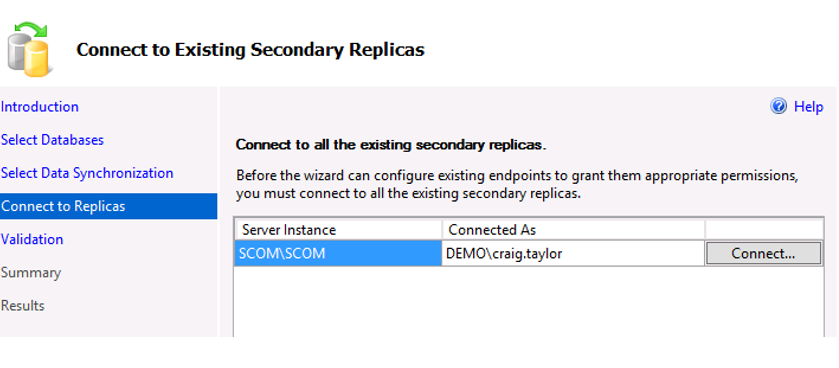
Click the Connect button and use Windows Authentication to connect to the remote SQL Server instance.
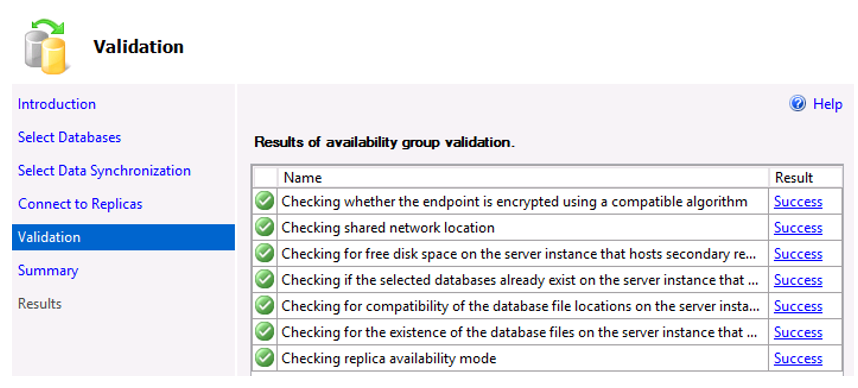
On the Validation pane, you should hopefully get green for all of the pre-flight checks.
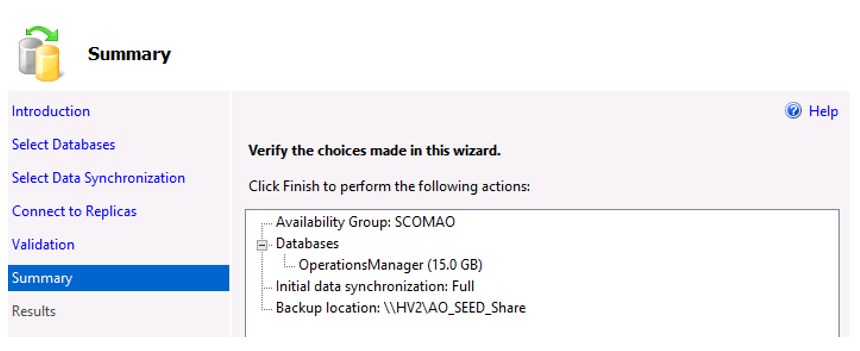
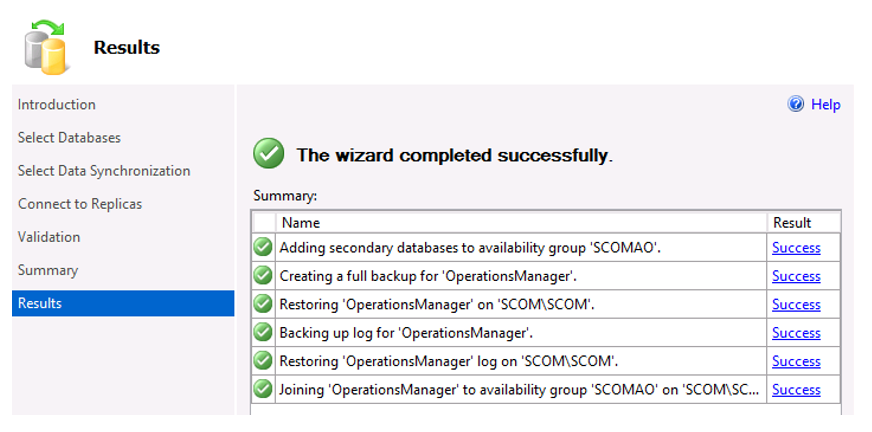
On the final pane before synchronization begins, the Summary will confirm all of your selections from the wizard. Select Finish and let the replication begin.
All going well, you should get a confirmation that the wizard completed successfully.
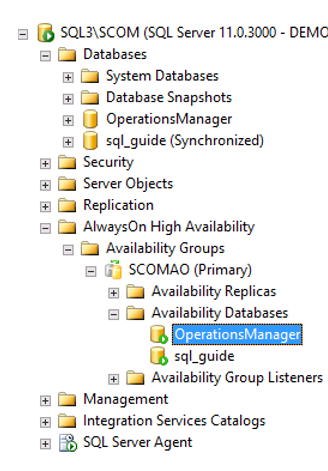
Viewing the list of Availability Databases back in the SQL Server Management Studio folder view should now show the OperationsManager database as per the screen below.