Note
Access to this page requires authorization. You can try signing in or changing directories.
Access to this page requires authorization. You can try changing directories.
Intro
Ok, ladies and gents, I just couldn't take it any longer! The out of the box navigation for blogs is less than ideal and although I will be soon investigating different content query web parts to accomplish the same thing, I went ahead a build a new one. Essentially, I wanted a grouping of blog articles in some sort of tree view as a web part. Simple right? The answer to this is actually yes. What I will plan to do here is simply write a quick code base and deploy to my site. At that point, I can just add my web part and ta-da, workie workie.
Implementation
- Create a CAML query based on the "Posts" list that just orders the posts by publish date. This will look something like:
using (SPWeb spWeb = SPContext.Current.Web) { string DocumentLib = "Posts"; string sUrl = spWeb.Url; string PostDate = string.Empty; SPList list = spWeb.Lists[DocumentLib];// here DocumentLib is name of the name of documentlibrary we are passing SPQuery docQuery = new SPQuery(); docQuery.ViewFields = @"<FieldRef Name=""LinkTitle""/>"; docQuery.ViewFields += @"<FieldRef Name=""PublishedDate""/>"; string CamlQ = @"<OrderBy> <FieldRef Name=""PublishedDate"" Ascending=""False"" /> </OrderBy>"; docQuery.Query = CamlQ; |
- Loop through these posts creating a string representation of XML that looks something like:
sBlogs = @"<?xml version=""1.0"" encoding=""utf-8"" ?>"; sBlogs += @"<BlogPosts>"; SPListItemCollection docList = list.GetItems(docQuery); foreach (SPListItem item in docList) { DateTime PublishedDate = DateTime.Parse(item["PublishedDate"].ToString()); if (PostDate != PublishedDate.ToString("MMMM yyyy")) { //Make sure not first time through loop if (PostDate != string.Empty) { sBlogs += @"</PostMonth>"; } PostDate = PublishedDate.ToString("MMMM yyyy"); sBlogs += @"<PostMonth name=""" + PostDate + @""">"; } sBlogs += @"<PostName name=""" + item["LinkTitle"].ToString() + @""" url=""" + sUrl + @"/Lists/Posts/Post.aspx?ID=" + item.ID.ToString() + @"""/>"; } sBlogs += @"</PostMonth>"; sBlogs += @"</BlogPosts>"; } return sBlogs; } |
- Create an XML Data Source and attach your bindings accordingly
XmlDataSource xBlogPosts = new XmlDataSource(); xBlogPosts.EnableCaching = false; XmlDocument xXMLDoc = new XmlDocument(); TreeNodeBinding tnbTop = new TreeNodeBinding(); TreeNodeBinding tnbMonth = new TreeNodeBinding(); TreeNodeBinding tnbName = new TreeNodeBinding(); string sXMLDoc = string.Empty; try { if (!Page.IsPostBack) { //Create XML sXMLDoc = GetBlogPosts(); //Load XML DataSource xXMLDoc.LoadXml(sXMLDoc); xBlogPosts.Data = xXMLDoc.InnerXml; |
- You will then set your XPath to narrow down your tree
xBlogPosts.XPath = "BlogPosts/PostMonth"; |
- Create a Treeview and set the XML Datasource be the binding
//Create TreeNode Bindings tnbTop.DataMember = "BlogPosts"; tnbTop.Text = "Blog Posts"; tnbMonth.DataMember = "PostMonth"; tnbMonth.TextField = "name"; tnbName.DataMember = "PostName"; tnbName.TextField = "name"; tnbName.NavigateUrlField = "url"; //Associate TreeView Bindings tv.DataBindings.Add(tnbTop); tv.DataBindings.Add(tnbMonth); tv.DataBindings.Add(tnbName); //Bind tv.DataBind(); tv.CollapseAll(); |
- Add the tree view through the RenderChildren method as explained in an earlier post here.
this.Controls.Add(tv); |
- Make sure you dispose your objects that you explicitly instantiate
xBlogPosts.Dispose(); xBlogPosts = null; xXMLDoc = null; tnbTop = null; tnbMonth = null; tnbName = null; tv.Dispose(); tv = null; |
- Build and deploy your finished webpart
- Add the webpart to the page(s) in question
Finishing touches
For full sample of the code, simply email me or send comment. I have uploaded the cs file, however, anonymous access is not yet enabled. I was tired of writing the code in the blog all the time, so figured I would try a different approach this time.
The end product looks something like:
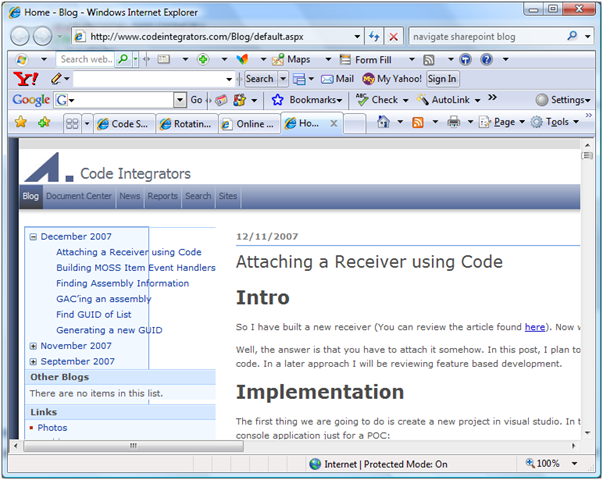
Pretty cool huh?