Note
Access to this page requires authorization. You can try signing in or changing directories.
Access to this page requires authorization. You can try changing directories.
App centric management simplifies the process of allowing apps for your users and groups. App centric management migration involves preserving the users and apps allowed in your app permission policies. You can also add or exclude users during the migration.
We recommend you follow these steps before and after the manual migration to check app centric management migration health.
Pre-migration
- Export app catalog and note allowed apps
- Review permission policies and note allowed or blocked apps
- Identify users permitted for each app through permission policies
Step 1: Export app catalog and note allowed apps
Navigate to Manage Apps page and export the full list of apps in the catalog as a CSV file, including each app’s allowed or blocked app status. The allowed or blocked status determines whether the app is available to everyone or no one, respectively. This status is used in the following steps to filter your users. For more details, see export app catalog as CSV.

Step 2: Review permission policies and note allowed or blocked apps
If you have multiple permission policies, follow these steps to get the permission policies list:
- Go to Teams admin center > Manage apps > Permission policies.
- Open each permission policy and note which apps are allowed or blocked.
Steps to get the permission policies list using PowerShell commands:
Run the PowerShell command:
Get-CsTeamsAppPermissionPolicy.The following result is displayed:


Retrieve allowed apps in each permission policy
You can retrieve allowed apps in each permission policy using PowerShell commands. But not all default apps are displayed in the response. To view the complete list, assign the result to a variable.
For example: $msftApps = Get-CsTeamsAppPermissionPolicy -Identity "Global" | Select-Object -ExpandProperty DefaultCatalogApps $msftApps.id
Filter out blocked apps
After collecting information on all apps permitted within the tenant, identify the users or groups authorized to use each app.
Merge this data with the export from the Manage Apps page.
Note
Any app marked as blocked in Manage Apps will remain blocked, regardless of the policy assignment results.
Step 3: Identify users permitted for each app
You can identify users permitted for each app in the following ways:
Get a list of users assigned to a policy in UI
Go to Teams admin center.
Go to Users > Manage users.
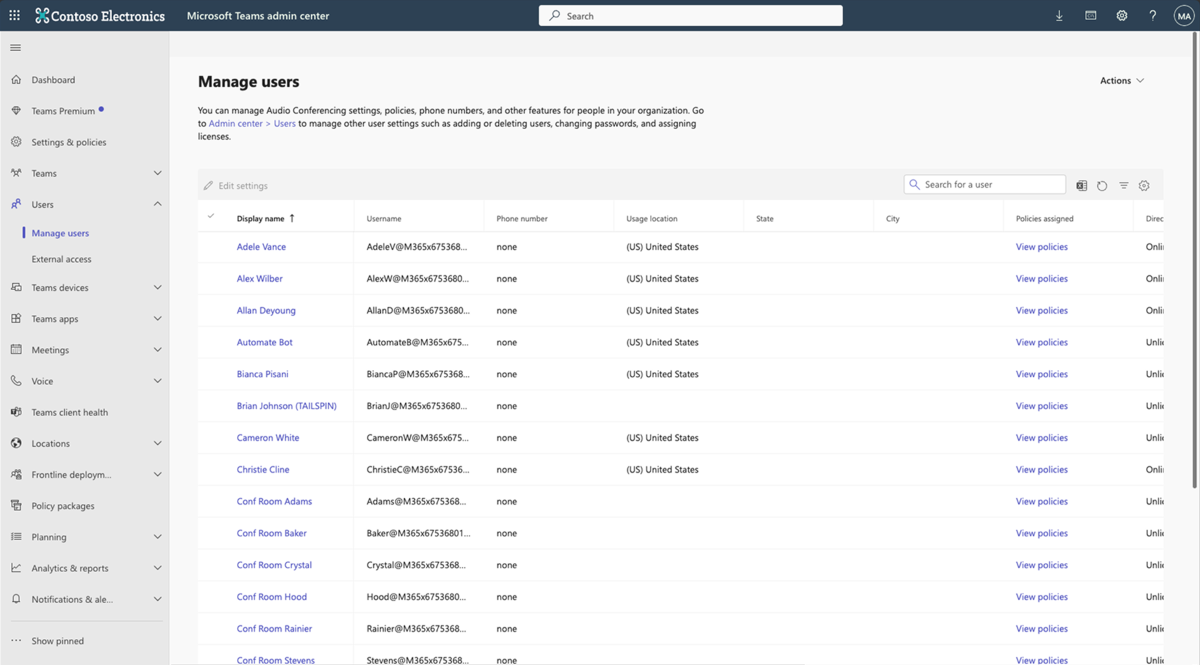
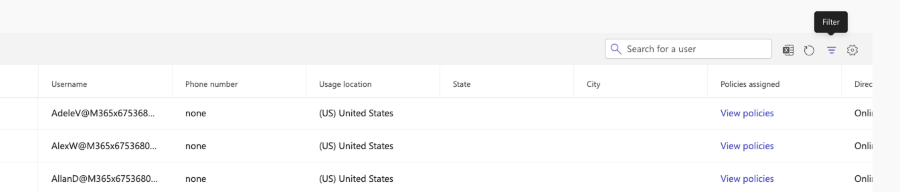
Select the filter located at the top right of the Manage users table.
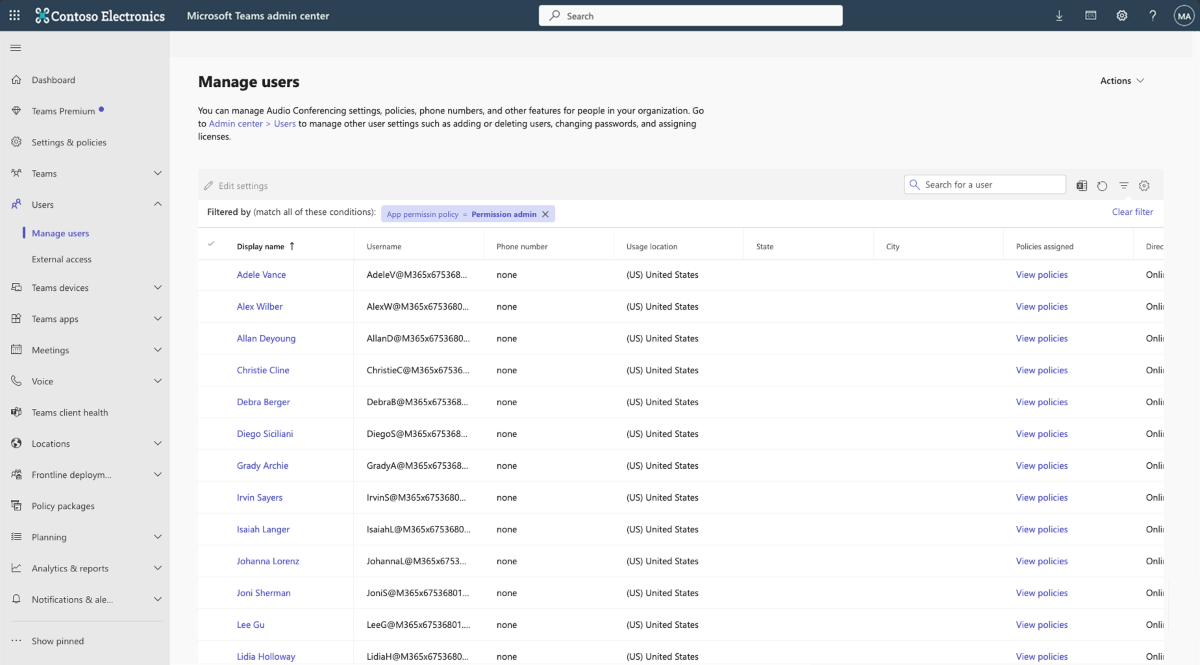
Select the policy name for which you need the user assignments and click Apply.

All the users assigned to the policy filtered are displayed.
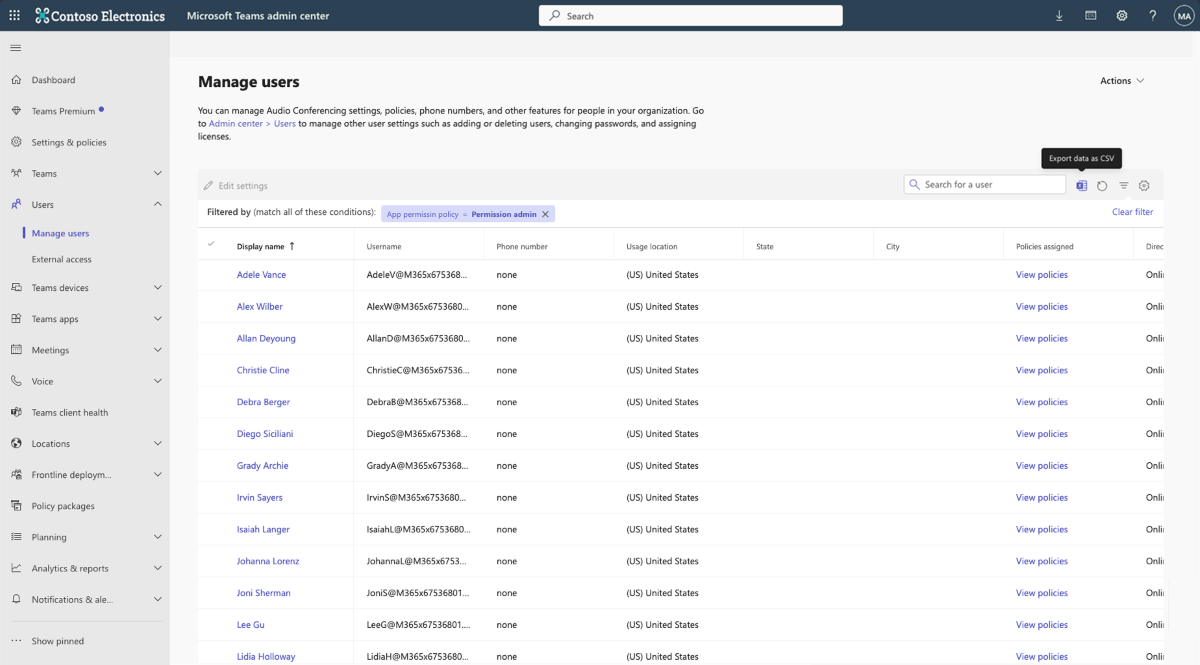
You can also export the users list to CSV.


Identify users allowed for each app in PowerShell
You can also use the following PowerShell command to export user assignments for each custom policy. This script generates an Excel file if the given policy has user assignments; otherwise, a message is shown indicating that no user assignments exist.
PowerShell command output is as follows:

The exported file appears as follows:

To define the base path for exports:
$basePath = "C:\Users\<user name>\Downloads"To ensure the base path exists: if (-not (Test-Path -Path $basePath)) { New-Item -ItemType Directory -Path $basePath | Out-Null }
To retrieve all Teams app permission policies:
$policies = Get-CsTeamsAppPermissionPolicy | Select-Object IdentityTo loop through each policy:
foreach ($policy in $policies) { $policyName = $policy.Identity #Ignore 'Global' policy if ($policyName -eq 'Global') { continue }To remove 'TAG:' prefix if it exists:
if ($policyName -like 'TAG:*') { $policyName = $policyName -replace '^TAG:', '' }To retrieve the users assigned to the current policy:
$users = Get-CsOnlineUser -Filter "TeamsAppPermissionPolicy -eq '$policyName' -and SoftDeletionTimestamp -eq$null" | Select-Object Identity, DisplayName, UserPrincipalName, TeamsAppPermissionPolicy, AccountEnabled, AccountType`To check if the users count is zero:
if ($users.Count -eq 0) { Write-Host "e[31m$policyName does not have any user assignmentse[0m" continue }To export users to a CSV file:
$outputPath = "$basePath\users_$($policyName).csv" $users | Export-Csv -Path $outputPath -NoTypeInformationWrite-Host "e[32mExported users for policy: $policyName to $outputPathe[0m" }
Post migration
After migration customers can validate against the pre-migration posture using the same steps. Follow the instructions defined in this section to gather your previous permission policies and compare them to your app centric management settings. Review your permission policies and note your allowed/blocked apps.
Bulk app management
Create distribution lists and add members: You can use the
New-DistributionGroupandAdd-DistributionGroupMemberPowerShell commands to create distribution lists and add members.For example:
New-DistributionGroup -Name "DTDEAUG_MSTeamsAppPolicy_M365TeamsAdmins" -PrimarySmtpAddress "DTDEAUG_MSTeamsAppPolicy_M365TeamsAdmins@man-es.com"Add-DistributionGroupMember -Identity "DTDEAUG_MSTeamsAppPolicy_M365TeamsAdmins" -Member "user1@man-es.com"Assign all apps to a distribution list: To assign all apps to the distribution list DTDEAUG_MSTeamsAppPolicy_M365TeamsAdmins@man-es.com, you can use the
Update-M365TeamsAppPowerShell command. Here is an example to assign all apps together:$apps = Get-AllM365TeamsApps foreach ($app in $apps) { Update-M365TeamsApp -Id $app.Id -AppAssignmentType UsersAndGroups -Groups "DTDEAUG_MSTeamsAppPolicy_M365TeamsAdmins@man-es.com" }Modify availability of specific apps to everyone: To modify the availability of specific apps to everyone, you can use the
Update-M365TeamsAppPowerShell command with theAppAssignmentTypeparameter set toEveryone.For example:
$appIds = @("appId1", "appId2", "appId3", ...) # List of 53 app IDs foreach ($appId in $appIds) { Update-M365TeamsApp -Id $appId -AppAssignmentType Everyone }Allow Microsoft apps to multiple distribution lists: To allow all Microsoft apps to the distribution lists DTDEAUG_MSTeamsAppPolicy_ITTestMSPVA@man-es.com and DTDEAUG_MSTeamsAppPolicy_M365TeamsAdmins@man-es.com, you can use the
Update-M365TeamsAppcommand.For example:
$msApps = Get-AllM365TeamsApps | Where-Object { $_.Publisher -eq "Microsoft" } foreach ($app in $msApps) { Update-M365TeamsApp -Id $app.Id -AppAssignmentType UsersAndGroups -Groups "DTDEAUG_MSTeamsAppPolicy_ITTestMSPVA@man-es.com","DTDEAUG_MSTeamsAppPolicy_M365TeamsAdmins@man-es.com" }Here's an example of the
list.csvfile:AppId,DistributionList appId1,DTDEAUG_MSTeamsAppPolicy_Group1@man-es.com appId2,DTDEAUG_MSTeamsAppPolicy_Group2@man-es.com appId3,DTDEAUG_MSTeamsAppPolicy_Group3@man-es.com...
The following PowerShell script can be used to read the CSV file and assign the applications to the specified distribution lists:
$csv = Import-Csv -Path "C:\path\to\list.csv" foreach ($row in $csv) { Update-M365TeamsApp -Id $row.AppId -AppAssignmentType UsersAndGroups -Groups $row.DistributionList }
This PowerShell script loops through each row in the CSV file and assign the applications to the corresponding distribution lists.
The following is another example:
Made required changes to Teams Admin Center Configuration Updates.
Applied all available apps to Teams Admin Distribution Group for smooth management.
The following PowerShell command is used:
Import-Csv .\AppList1.csv | %{Update-M365TeamsApp -Id $_.AppId -AppAssignmentType UsersAndGroups -Groups $_.GroupID -OperationType Add}Assigned all Microsoft apps to a designated custom policy group to keep all Microsoft apps organized and managed under a specific policy for targeted user group. The following PowerShell command is used:
Import-Csv .\AppList2.csv | %{Update-M365TeamsApp -Id $_.AppId -AppAssignmentType UsersAndGroups -Groups $_.GroupID -OperationType Add}Mapped specific apps to their respective custom policy groups for making access control more effective. The following PowerShell command is used:
Import-Csv .\AppList3.csv | %{Update-M365TeamsApp -Id $_.AppId -AppAssignmentType UsersAndGroups -Groups $_.GroupID -OperationType Add}Update Global Policy to make selected apps accessible to all users across the organization. The following PowerShell command is used:
gc '.\GlobalApps.txt' | %{Update-M365TeamsApp -Id $_ -AppAssignmentType Everyone}